If you’re like most people, you probably don’t have extra money lying around to spend on a brand new ladder. Learning how to repair a fiberglass ladder may be just what you need. This blog post will walk you through the steps to repair a fiberglass ladder.
Remember that fiberglass ladders can be quite dangerous if not repaired correctly, so follow all the steps exactly as outlined below. If you’re lucky, it’s just the bottom rung that has broken off your ladder. Here are a few tips to help get you started.
Summary: Fiberglass ladders are a great option for many tasks due to their lightweight construction and durability. However, they can still suffer damage over time. If you’re dealing with a broken fiberglass ladder, the good news is that you can often repair it yourself with minimal cost and effort.
Start by using sandpaper to remove any cracked or chipped paint around the damage then, mix resin and hardener according to the instructions on the packaging, apply it to the affected area, allow it to dry and sand down any rough edges.
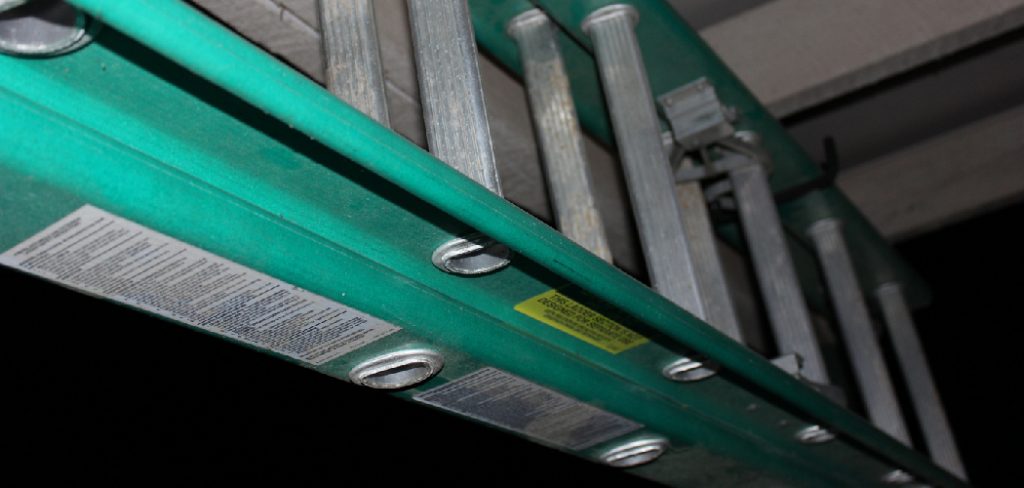
Step by Step Guide: How to Repair a Fiberglass Ladder
Step 1:Assess the Damage:
Before beginning the repair process, evaluate the extent of the damage to the fiberglass ladder. Look for cracks, fractures, or delamination in the fiberglass material. Identifying the severity and location of the damage will help you determine the appropriate repair method and materials required.
Step 2:Gather Necessary Tools and Materials:
To repair a fiberglass ladder, you will need the following tools and materials:
- Fiberglass repair kit (including fiberglass cloth and resin)
- Sandpaper (80, 120, and 220 grit)
- Scissors or utility knife
- Paintbrush or roller
- Clean rags or paper towels
- Acetone or rubbing alcohol
- Protective gloves and eyewear
- Respirator or dust mask
- Drop cloth or tarp
Step 3:Prepare the Work Area:
Set up a well-ventilated work area, ideally outdoors or in a garage with open doors and windows. Lay down a drop cloth or tarp to protect the floor or ground from spills and debris. Put on protective gloves, eyewear, and a respirator or dust mask to protect yourself from harmful fumes and particles.
Step 4:Clean the Damaged Area:
Using acetone or rubbing alcohol and a clean rag or paper towel, thoroughly clean the damaged area to remove any dirt, grease, or debris. This will help ensure proper adhesion of the repair materials. Allow the area to dry completely before proceeding.
Step 5:Sand the Damaged Area:
Starting with 80-grit sandpaper, sand the damaged area to remove any loose or damaged fibers and create a rough surface for the repair materials to adhere to. Gradually work your way up to 120-grit sandpaper for a smoother finish. Be sure to sand at least an inch beyond the damaged area to ensure proper adhesion.
Step 6:Cut the Fiberglass Cloth:
Using scissors or a utility knife, cut the fiberglass cloth included in your repair kit to the appropriate size for the damaged area. You may need to cut multiple layers of cloth, depending on the severity of the damage and the thickness of your ladder’s fiberglass material.
Step 7:Mix the Fiberglass Resin:
Following the manufacturer’s instructions, mix the fiberglass resin included in your repair kit in a clean container. Be sure to mix the correct proportions of resin and hardener to achieve the proper consistency and curing properties.
Step 8: Apply the Resin:
Using a paintbrush or roller, apply a generous layer of the mixed resin to the sanded and cleaned damaged area, ensuring full coverage of the entire area.
Step 9:Apply the Fiberglass Cloth:
Press the cut fiberglass cloth into the resin, ensuring it adheres well and covers the entire damaged area. If multiple layers of cloth are needed, apply additional resin and cloth layers, repeating this process until the desired thickness is achieved.
Step 10:Apply a Final Layer of Resin:
Once all layers of fiberglass cloth have been applied, cover the cloth with a final layer of resin. Use the paintbrush or roller to smooth out any air bubbles or wrinkles in the cloth, ensuring a smooth and even repair.
Step 11:Allow the Repair to Cure:
Let the fiberglass repair cure according to the manufacturer’s instructions. The curing time will vary depending on the type of resin used, as well as environmental factors like temperature and humidity.
Step 12:Sand the Repair:
After the repair has fully cured, sand the area with 120-grit sandpaper, using a sanding block or sponge for an even finish. Gradually work up to 220-grit sandpaper for a smoother surface. Be sure to blend the edges of the repair into the surrounding ladder material for a seamless appearance.
Step 13:Clean the Repair:
Once the repair has been sanded smooth, use a clean rag or paper towel and acetone or rubbing alcohol to clean the area, removing any dust or debris from sanding. Allow the area to dry completely before proceeding.
Step 14:Apply a Protective Coating (Optional):
If desired, apply a protective coating, such as paint or a clear sealer, to the repaired area to enhance its durability and appearance. Follow the manufacturer’s instructions for proper application and drying times.
Step 15:Inspect the Repair:
Examine the repaired area to ensure it is smooth, even, and free of any defects. The repair should be flush with the surrounding ladder material and blend seamlessly with the rest of the ladder.
Step 16:Test the Ladder’s Stability:
Before using the repaired ladder, test its stability by setting it up on a flat, level surface and gently applying pressure to the repaired area. The ladder should feel stable and secure, with no signs of flexing or movement in the repaired area.
Step 17:Perform Regular Inspections and Maintenance:
To prolong the life of your repaired fiberglass ladder and prevent future damage, perform regular inspections and maintenance. Check for any signs of wear, cracks, or other damage, and address any issues promptly to ensure the safety and longevity of your ladder.
By following these steps, you can successfully repair a damaged fiberglass ladder, restoring its structural integrity and safety. The repair process requires patience, attention to detail, and the correct tools and materials, but a well-executed repair will provide a durable and lasting solution. Regular inspections and maintenance will help to prevent future damage and ensure your ladder remains in good condition for years to come.
Some Helpful Tips and Suggestions
Here are some helpful tips on how to repair a fiberglass ladder.
- Fixing a hole or puncture in a fiberglass ladder
- Making a non-skid surface on the top step of a fiberglass ladder
- Replacing broken rung caps
- Replacing missing rivet pins to hold reinforced rails together

- Repairing cracked or broken reinforcement rail sections to your fiberglass ladder
- Fixing a corrosion-prone area on your fiberglass ladder
- Repairing spots that have been worn smooth from the use of a ladder
- Repairing a fiberglass ladder that a forklift has damaged

Sealing a Fiberglass Ladder to Prevent Shedding
Now that you know how to repair a fiberglass ladder, you can follow the steps to get the solutions. But there are still some things that you need to know, like sealing it, to prevent shedding in the future. So the first thing you should do to maintain a fiberglass ladder is to keep it dry.
While rain and water won’t damage the fibers that make up the structural part of the ladder, those same fibers will absorb moisture from things like dew or humidity. Once water gets into the molecular structure of these materials, it can only be removed by evaporation.
This moisture will cause the structural fibers to expand, eventually leading to cracking and breaking your ladder. To prevent this from occurring, you need to seal the ladder against moisture (water and humidity) in any form. Even if your ladder is stored in a shed or garage, humidity can still get to your ladder over time.
There are a few ways you can go about preventing this moisture from occurring:
1. Paint the Ladder:
The easiest way to deal with an existing fiberglass ladder is to paint or prime it. While this may seem like a good idea at first, it might not be the best thing you can do to protect your ladder. However, if you’ve ever painted anything before, the chances are excellent that you know about paint adhesion.
Paint needs something to adhere to, bind correctly, and create a lasting effect. If the paint is applied to a surface that doesn’t have enough texture or grip, it could chip and flake off the first chance it gets. In this case, the paint may not be the best way to seal your ladder because you need water to run off of it as quickly as possible.
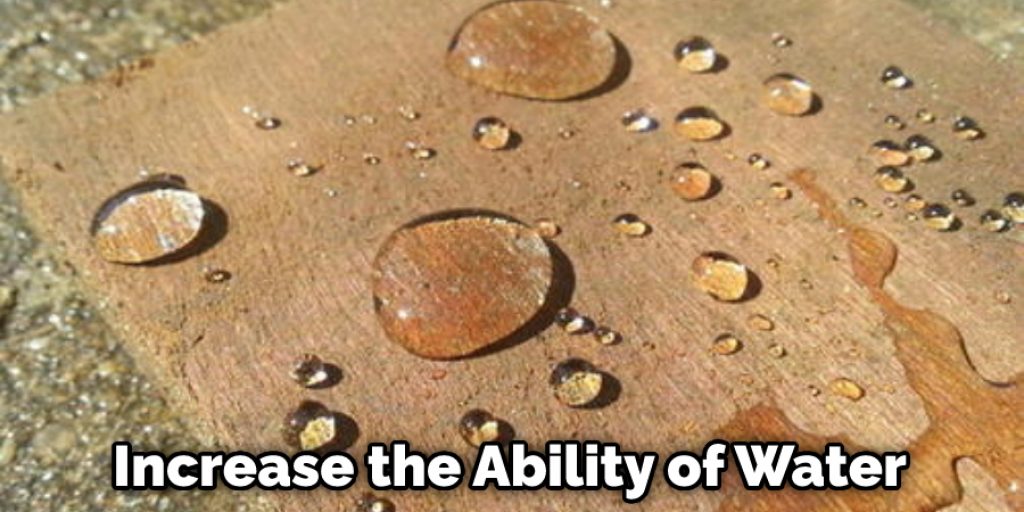
2. Use a Water Repellant:
A water repellant is a substance that can be sprayed on your ladder to seal it and prevent any additional moisture from getting in. While you may think that this sounds like the best idea, it doesn’t necessarily provide anything but an initial barrier.
Water repellants will increase the ability of water to pass through them over time, which means that the protection it provides will be short-lived. To maintain a water-repellant, you’ll have to re-apply it every 1-2 years.
3. Use a Silane Based Water Repellant:
Silane is a very popular chemical compound used in different applications for many different reasons. However, when it comes to some of the most common uses for silane, you can find it as an adhesive in things like fiberglass cloth. Water doesn’t pass through this type of material because it’s made up of very small fibrils that are woven together with a chemical bond.
These materials are considered to be very strong, which is why they’re used in so many different applications. In the case of silane-based water repellants, it’s best to have a professional handle the application. If you choose this option, it will cost you several hundred dollars to have someone come out and do it for you.
4. Silane Water Repellant Kit:
A much cheaper alternative to hiring someone to apply a silane-based water repellant is just to purchase one for yourself. You can find these kits at your local hardware store for much less, but be prepared to pay much more because you’ll have to do all the work yourself.
While it may require elbow grease and dedication, the process is simple and relatively fast. Once applied, you should have a water-resistant ladder that can be used in all kinds of applications without taking any extra steps between uses.
Can a Cracked Fiberglass Ladder Be Repaired
Sections of fiberglass ladders can be repaired if they become cracked. The cracks are usually tiny, but you can have them repaired by a professional fiberglass repair company rather than replace the ladder. Fiberglass is easy to work with and fairly inexpensive, so you can expect your ladder to look as good as new again after it is repaired.

All that usually needs to be replaced are the cracked sections, which will be cut out and replaced with new fiberglass material. Your ladder won’t have any weak spots once it’s fully repaired. Additionally, the crack itself may have made the ladder unsafe to use.
Because professionals will not only replace the broken section but also check the ladder to ensure it is safe for use, you can rest assured that your problems have been solved and you’ve saved yourself the trouble of needing to buy a new ladder.
You Can Check It Out to: Repair Styrofoam
Frequently Asked Questions
Can a Ladder Be Repaired?
each ladder may require a different approach when it comes to repairing or replacing sections. It’s important to have an understanding of the construction and assembly of ladders so that you can determine which parts might need to be replaced or repaired. Additionally, it’s always advisable to consult with a professional if there are any doubts about how your ladder will be handled.
Can Fiberglass Be Repaired?
While it is possible to repair many common residential maintenance mistakes, repairing fiberglass may be more complicated and expensive. If you have damage that includes cracks or tears in the material, hiring a professional restoration contractor might be your best option. Depending on the extent of the damage, this could cost anywhere from $1,000 to $10,000+.
If you are just concerned about small repairs like dents or chips, you can try using different sealants and adhesives available at home improvement stores. These products are often safe for use on fiberglass and can fix minor issues without requiring any structural repairs. However, these fixes may not last long if repeated trauma occurs) so it is important to test them out before applying them extensively.
What Is the Life Expectancy of a Fiberglass Ladder?
it depends on a variety of factors, including the type of ladder, the individual using it, and the particular environment in which it is used. However, based on general estimates, most fiberglass ladders should last between 10 and 20 years with proper care and maintenance.
Do Fiberglass Ladders Deteriorate?
Fiberglass ladders do not generally degrade over time, but they are susceptible to damage from weather conditions such as rain, snow, and wind. Additionally, fiberglass is a non-combustible material so it may be sensitive to fires.
Because of these factors, it is important that you clean your ladder regularly and keep it in good condition by checking for fraying or lose panels. And lastly, use caution when using the ladder indoors since glass can break if hit very hard.
Conclusion
If your fiberglass ladder is damaged, there are a few ways you can repair it. First, find the leak in the joint and place some sealant on it to prevent future leaks. Next, please fill all cracks with epoxy resin filler until they flush again.
Finally, sand down any rough edges or bumps that may have been created during this process so that they don’t snag clothing or scratch furniture when climbing over them.
This should fix most problems associated with fiberglass ladders! We hope this blog post has helped guide you how to repair a fiberglass ladder. If you have any questions or want to know more, then feel free to comment below!
You Can Check It Out to: Repair Wet Brakes on Ford Tractor