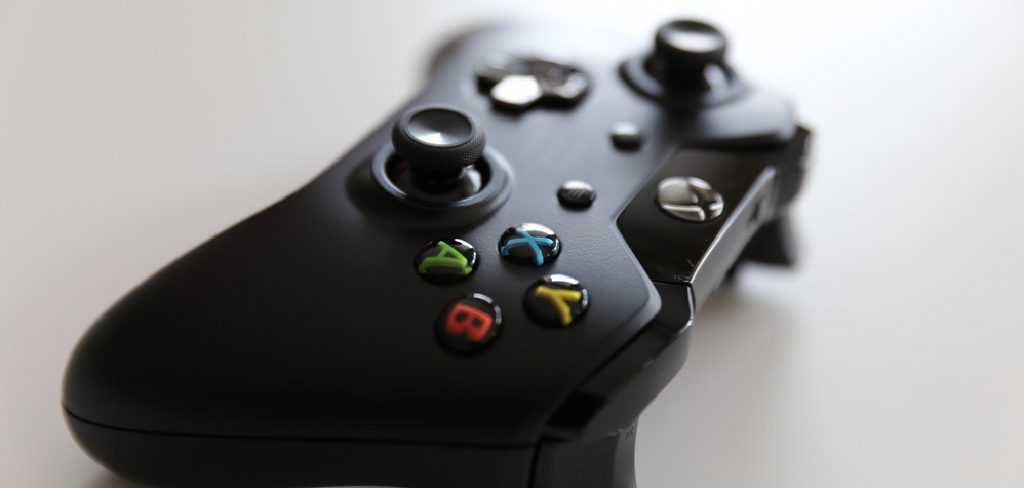
The Xbox One controller is a popular choice for PC gamers. Unfortunately, the right trigger can sometimes malfunction. This guide will show you how to fix right trigger on Xbox one controller.
The right trigger on the Xbox One controller is a common point of failure. If it becomes stuck, it can cause the game to crash or malfunction. Therefore, it’s important to fix the right trigger on Xbox one controller as soon as possible to avoid any potential problems. It’s important to fix the right trigger on Xbox one controller as soon as possible to prevent any potential issues. If the right trigger is stuck, it can cause the game to crash or malfunction.
Summary: This blog post provides step-by-step instructions on how to fix a right trigger issue on an Xbox One controller. It outlines the process of opening up the controller, using tape and rubber to repair the trigger, and then reassembling all of the parts afterwards. With these simple tips, you can get your Xbox One controller back in action in no time!
Things You’ll Need
- A screwdriver
- Needle-nose pliers
- Electrical tape
To fix the right trigger on your Xbox One controller, you’ll need a screwdriver, needle-nose pliers, and electrical tape. The process is relatively simple, but it’s important to be careful. Be sure to unplug the Xbox One controller before beginning any repairs.
How to Fix Right Trigger on Xbox One Controller Step by Step Guide
Step 1: Open Up The Xbox One Controller
The initial start is opening up your controller. How you go about that depends on what type of screwdriver you have available. If you have a mini flathead screwdriver, then simply use that; if not, take apart the screws using an ordinary Phillips head or TORX screwdriver.
Now depending on the model of your Xbox One Controller, you have a couple of choices. Either way, it will require that you open up the controller and then take out all of the screws holding the two halves together.
Step 2: Fix the Right Trigger on Xbox One Controller
To take your controller apart, first remove the spring mechanism connected to the joystick on the left side – this is typically used for the D-Pad. Next, remove the two bumpers, two triggers, and the right trigger itself. There are five parts in total.
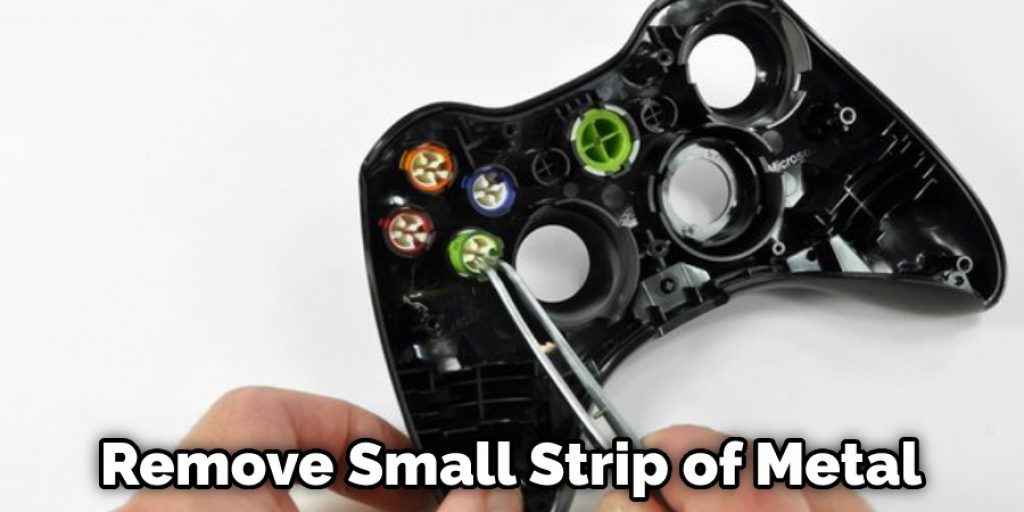
The specifications for this part are very precise, and it will only fit in one specific location. In addition, there is a small strip of metal that comes out of the joystick part itself. If this piece isn’t there or is broken, the joystick will not function properly. To remove this piece, simply pull it out with your fingers.
With this gone, you will now be able to remove the spring mechanism behind the right trigger. It’s the part with two sets of coils on either side. The lower set of springs should be around twice as thick as the upper set.
Look at the coil on the bottom. Now you want to push it up to be even with the top one. This will create space for the joystick mechanism to come out. You may need to use something sharp like a screwdriver for this task but be careful not to damage anything. Once you’ve made this adjustment, pull out the joystick part with the spring mechanism. You’ll need to make sure you don’t lose any of these pieces because they all fit together in one way or another.
Step 3: How To Fix Right Trigger on Xbox One Controller
The right trigger should now be working properly again, but if it isn’t, look at this final step. There’s a small piece of metal that should be right below where the spring mechanism was located, and this is what presses against the spring. Essentially it engages it and releases the trigger itself. So if you move this little piece away from the spring, you can push down on the joystick to remove it and see how far it goes before hitting the other side of the trigger.
Position the little piece on the spring so that it presses against both sides equally. How far it goes off to one side will adjust how much pressure is needed for the joystick to engage.
If you have no idea what I’m talking about, watch the video tutorial, but here’s a quick recap if you don’t want to. The metal piece is the one left of where to spring mechanism was. It should be flush against the trigger itself; if not, move it away from the trigger slightly.
How far away depends on how far down you have to press the joystick, or in other words, how much pressure needs to be applied before it’s activated. By moving this little piece, you change the distance you need to press the joystick down for it to trigger, thus adjusting how much pressure is required to activate it. If that still doesn’t help, then I recommend looking at the video tutorial, which should give a better idea of what needs to be done.
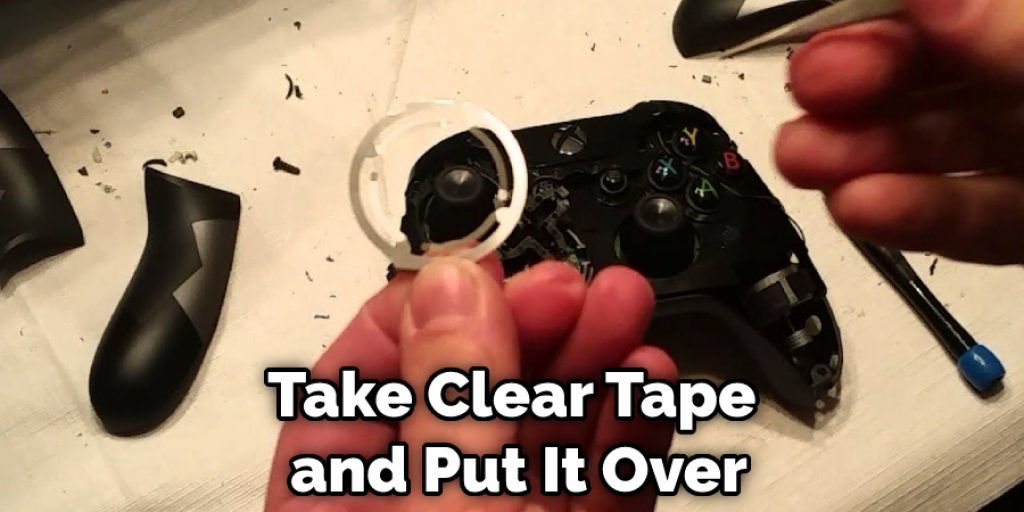
Step 4: Use a Tape and Rubber
When you can finally see the trigger, take clear tape and put it over the top of the rubber. This will help keep it in place and durable when you play games. Make sure that you do not cover up any other buttons with the sticky parts if you use this method because then they won’t work. The main problem with all Xbox One controllers is that the triggers wear out quickly.
This is due to how much you use your controller and because they are not made of a strong enough material.
Step 5: Reassemble the Parts:
Take apart the controller by pulling apart the two halves of it. This will allow you access to take out the circuit board, which houses all the buttons in your Xbox One controller. Keep these parts separate so that if one is put back on wrong or upside down, you can tell without having to go through trial and error again.
The two halves of the controller should come apart with little to no effort.
*If yours does not, pry it open with a flathead screwdriver or something similar.*
The two pieces of the Xbox One controller will easily pull apart.
Just take out all the parts around the circuit board and set them aside for now so you can access it.
Put all the parts back together. Make sure that everything is turned off and that you have a paper or cloth towel to catch any small pieces of metal that may fall out during this process, as they can fly across your room if enough force is used when snapping them in place. Do not apply too much pressure, though, as the plastic can crack if you are too rough.
Now that your Xbox One controller is finally apart, it’s time to get to work fixing that trigger of yours! Most of the steps listed here are for removing triggers, but replacing them isn’t any harder. If you want a new one of these bad boys after repairing it yourself, check out How to buy a new Xbox One controller.
How Do You Take Apart an Xbox One Controller Trigger
The first step is to take the screws out of the back of the controller. There are four screws in total. Once they are removed, you can take the back off of the controller.
The next step is to remove the trigger from the controller. To do this, you will need to pry it open using a thin object such as a screwdriver or a knife. Be careful not to damage the plastic or other components.
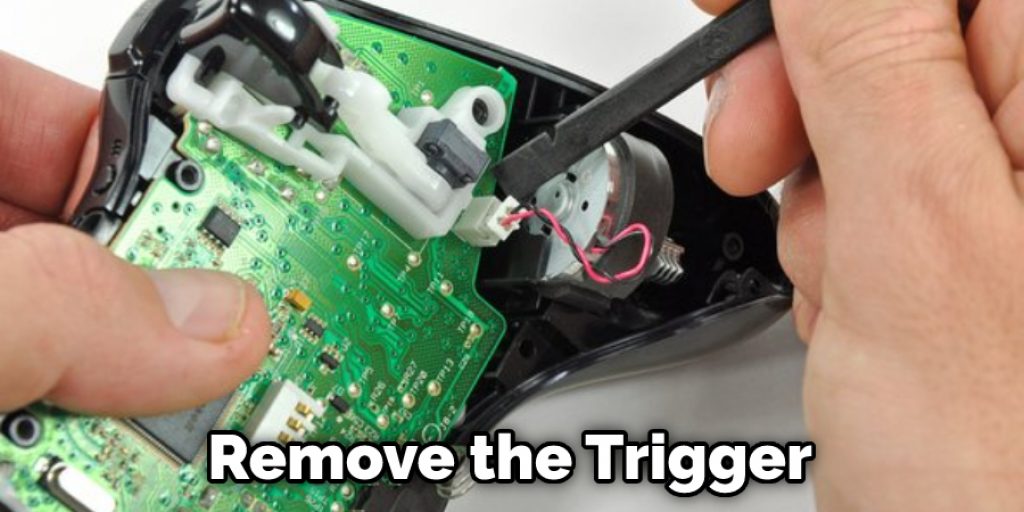
Once the trigger is open, you can see the mechanism that causes it to malfunction. There is a small spring that is responsible for returning the trigger to its original position. If this spring becomes damaged or lost, it will cause the trigger to stick.
To fix the problem, you will simply need to place the spring back into its original position. After that, just close the trigger and put it back into the controller. Now you can screw everything back together. Keep reading for more information about how to fix right trigger on Xbox one controller.
How Do I Fix the Trigger Drift on My Xbox One Controller
If your Xbox One controller’s right trigger is drifting, you can try to fix it by doing the following:
- Open the Xbox Accessories app.
- Select your controller, and then select Calibration.
- Move the controller around to complete the calibration process.
Can I Fix the Right Trigger on Xbox One Controller?
Yes, you can fix the right trigger on your Xbox One controller. The most common issue is that the trigger becomes stuck down, preventing you from being able to use it. To fix this, you’ll need to take the controller apart and replace the trigger mechanism. You can find detailed instructions on how to do this online.
You Can Check It Out to: Fix Pink Screen on Hp Laptop
Frequently Asked Questions
What Is the Right Trigger on the Xbox Controller?
One of the most common questions that gamers ask is about finding the right trigger on their Xbox controller. The answer to this question depends on your individual gaming preferences and needs. For example, some people prefer a button-based trigger while others may find stickier or grippier controllers more comfortable.
If you’re not sure which type of controller is best for you, it’s always a good idea to experiment with different types until you find one that suits your playstyle better. Additionally, make sure to clean your controller regularly so that it continues to function at its best.
What Are L1 and R1 on Xbox One?
L1 and R1 are the keyboard and controller buttons on Xbox One. L1 is the leftmost key, while R1 is the rightmost key. These keys serve as shortcuts for commonly used commands, such as switching between games or apps, entering text in a chat window, or selecting an item from a menu.
Can Xbox Controllers Be Repaired?
Yes, Xbox controllers can be repaired. However, before you attempt to do so, it is important to understand the controller’s basic construction and how it works.
Xbox controllers are made up of four main parts – the front control stick, the shoulder buttons, the backpad, and the trigger. These parts are all connected by a series of plastic joints that allow them to move and react as one unit. If you break one of these joints, it can be difficult or even impossible to fix.
In some cases, it may be possible to replace just the joint itself – but this is usually only a temporary solution. If the joint is badly damaged, or if there is extensive damage to other parts of the controller, it may be necessary to replace the entire controller.
Are the Xbox Triggers Analog?
Xbox Triggers are not analog, but rather they use motion-sensing technology to detect the movements of your hands. This way, you can control games and applications with just your fingertips instead of traditional buttons or controllers.
In addition to being more convenient for gameplay sessions, this technology also makes it easier to interact with menus and other onscreen elements. Plus, it is less likely that you will make unintentional mistakes while playing because you won’t have to take your eyes off the screen in order to find a button or manipulate an interface element.
Conclusion paragraph
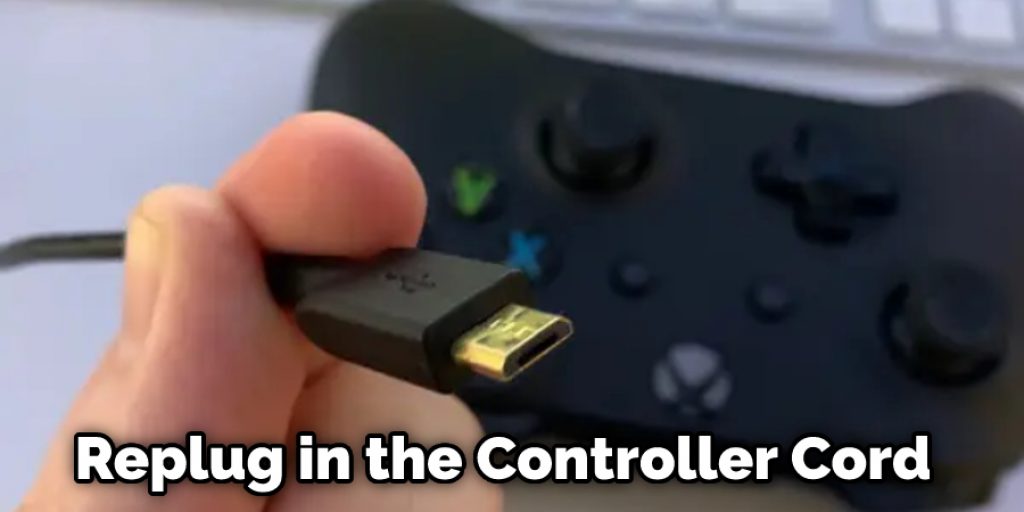
If you’re experiencing the problem of your right trigger not working, there are a few things you can try. One is to unplug and replug in the controller cord. Another option is to check for any bent or broken pieces on the inside where it plugs into the console. You could also turn off vibration when playing games if that’s what has caused it to stop functioning correctly. Have you tried any of these fixes?
Let us know how they work out! We want everyone enjoying their Xbox experience as much as possible – no matter which model they have. Thanks for reading our post about how to fix right trigger on Xbox one controller.
You Can Check It Out to: Fix an Outlet Box that Sticks out Too Far