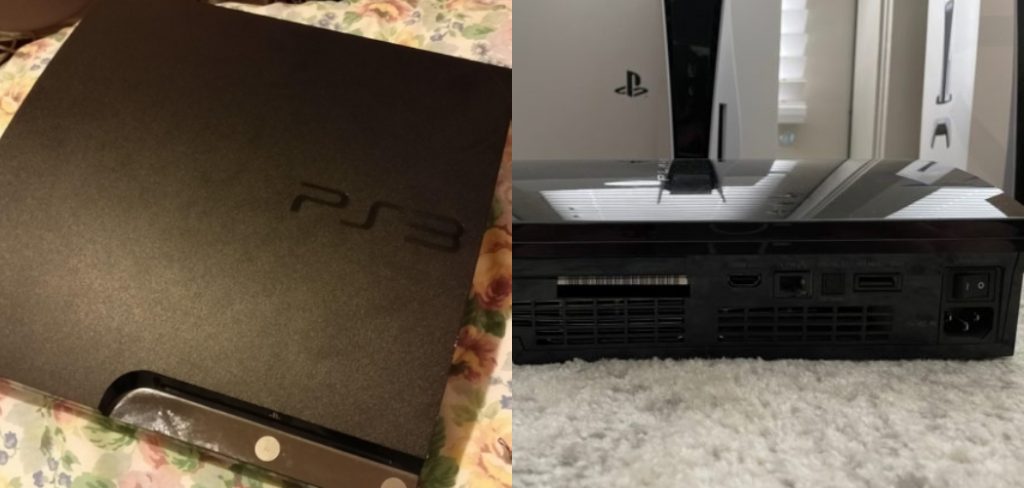
If your PlayStation 3 USB port isn’t working, there are a few things you can do to try to fix it. In this blog post, we will discuss how to fix ps3 usb port. First, make sure that the USB cable is plugged in securely at both ends.
If the problem persists, try using a different USB cable. If that doesn’t work, try disconnecting and reconnecting the power cord for the PS3. If none of these steps fix the problem, you may need to take your PS3 to a technician for further assistance. Read on to know more!
Summary: If you are having problems with your Playstation 3 (PS3) USB port, there are a few steps you can take to diagnose the issue. First, make sure the USB cable is firmly plugged in.
Check for any broken or bent pins that could be preventing a connection. Secondly, check the disk drive and if it is not spinning properly, this may be indicative of a faulty power supply or motherboard. If all else fails, consider restarting your console using safe mode or replacing the USB port altogether.
10 Reasons That Causes Problems in Ps3 USB Port
1. Dust and Debris Build Up
Debris in the USB port can cause it to malfunction. For example, dirt particles in your ps3 controller can eventually lead to the controller’s failure to connect to your console.
2. Damaged USB Cable
Broken, frayed, or crushed cables can damage the USB port and cause connectivity issues with your controller and console. The same goes for a faulty USB cable cord that delivers power to the controller. Without a strong power source, it won’t work correctly.
3. Bending the Pins
If you insert your USB into the pins too forcefully, the pins will become bent and out of shape. This will prevent the controller from working properly.
4. Scratches Around USB Port
Scratches around your console’s USB port can prevent your controllers from connecting to it successfully. In addition, a nicked or damaged USB port may not be able to hold on to the cord snugly.

5. Faulty Power Cable
If your console isn’t turning on, it might be because the power cables are faulty. To avoid damaging your console, use a certified Sony cable that is the right voltage and amperage for your console. Using a poorly made cable could cause charging and connectivity problems and damage your console.
6. Overheating
If your Playstation 3 is overheating, it may have damaged USB ports or a motherboard that prevents it from powering on or connecting to USB cables. Some early PS3 models are known to overheat when placed horizontally or in an area with little airflow. If your PS3 is vertical, it is also more likely to overheat.
7. Corrupted Data
If your system data becomes corrupted, you can experience connectivity issues with your controllers and USB ports. A corrupt system file may cause the USB to be unreadable or unrecognizable by your console when connected. How do I fix a corrupt USB drive?
Fixing Corrupted or Unreadable USB Flash Drive Without Losing Data
Open CMD via the Windows Start Menu. is the drive letter of your USB drive). The scanning process will start and it may take some time to complete depending on the capacity of your USB drive 26 апр.
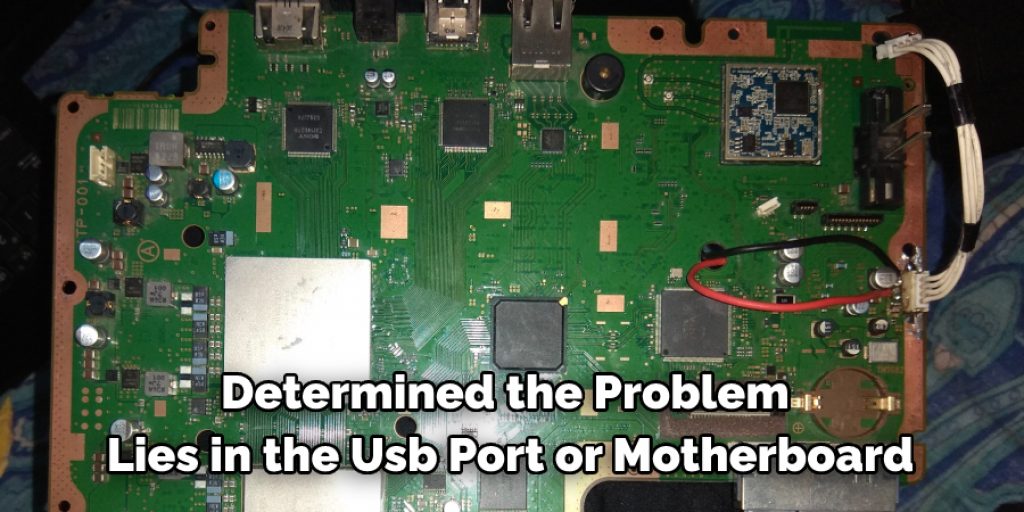
8. Damaged Motherboard
If your PS3 is still under warranty, contact Sony to have it determined if the problem lies in the USB port or motherboard. If it is within warranty, then they will replace your defective unit. To help determine whether it’s a motherboard issue or a faulty USB port, try swapping out the USB cord with the one you use to charge the DualShock. If it starts working again, then the problem is with the USB port.
9. Damaged Power Switch
A faulty power switch can keep your PS3 from turning on or even recognizing that a controller is connected via USB cable. In addition, the power switch may have dirt or debris built up in it, which can prevent it from working correctly or closing all the way.
10. Firmware
The firmware update can resolve any issues you may have with your USB port and help prevent them from occurring again. However, the firmware update might not work if the problem is a hardware issue, such as a damaged or faulty power switch or USB cord.
Step by Step Guide: How to Fix Ps3 USB Port
Step 1: Gather Necessary Tools and Materials
Before you begin, ensure you have the following tools and materials at hand:
- Phillips head screwdriver (Size 0 and Size 1)
- Torx Security screwdriver (Size T8)
- A small container to store screws
- A pair of tweezers
- Replacement USB port(s) for the PS3
- Soldering iron
- Solder wire
- Desoldering braid or pump
- Heat-resistant surface (soldering mat)
- ESD-safe mat or anti-static wrist strap (optional)
Step 2: Disconnect the PS3 from Power Source
For safety reasons, unplug the PS3 from the power source and any other connected devices. It’s essential to ensure the console is entirely disconnected before proceeding with the repair.
Step 3: Remove the Hard Drive
Locate the small plastic panel on the side of the PS3, and slide it off to reveal the hard drive. Using the Phillips head screwdriver, remove the single screw securing the hard drive in place. Carefully slide out the hard drive and set it aside.
Step 4: Remove the Top Cover
Turn the PS3 upside down, and remove the rubber feet and plastic plugs to reveal the screws underneath. Using the Torx Security screwdriver, remove the screws securing the top cover. Turn the PS3 right-side up, and carefully lift the top cover to remove it.
Step 5: Remove the Power Supply
Using the Phillips head screwdriver, remove the screws securing the power supply to the PS3. Gently lift the power supply, and disconnect the two connectors attached to the motherboard. Set the power supply aside.
Step 6: Remove the Blu-ray Drive
Carefully lift the Blu-ray drive and disconnect the ribbon cable and the power connector attached to the motherboard. Set the Blu-ray drive aside.
Step 7: Remove the Motherboard
Using the Phillips head screwdriver, remove all screws securing the metal plate and the motherboard to the console’s bottom case. Carefully lift the metal plate, followed by the motherboard, and set them aside on a heat-resistant surface or ESD-safe mat.
Step 8: Locate the Damaged USB Port
Examine the motherboard and locate the damaged USB port(s). The USB ports are typically located on the front side of the PS3 motherboard.
Step 9: Desolder the Damaged USB Port
Using a soldering iron, carefully heat the solder joints connecting the damaged USB port to the motherboard. Use a desoldering braid or pump to remove the melted solder. Repeat this process until all solder joints are free, and gently remove the damaged USB port using a pair of tweezers.
Step 10: Prepare the Replacement USB Port
Take the replacement USB port and align its pins with the corresponding holes on the motherboard. Ensure that the replacement port is oriented correctly before proceeding.
Step 11: Solder the New USB Port
With the replacement USB port aligned and in place, use a soldering iron and solder wire to create new solder joints connecting the USB port pins to the motherboard. Ensure all pins are securely soldered and that there are no solder bridges between them.
Step 12: Inspect Your Work
After soldering the new USB port, inspect the solder joints to ensure they are secure and free from any solder bridges. If necessary, use a magnifying glass to get a closer look.
Step 13: Reassemble the PS3
Once you’re satisfied with the solder joints, it’s time to reassemble the PS3. Carefully place the motherboard back into the bottom case and secure it with the appropriate screws.
Step 14: Reinstall the Blu-ray Drive
Reconnect the ribbon cable and power connector to the motherboard and gently place the Blu-ray drive back into its original position. Ensure the drive is seated correctly and that no cables are pinched.
Step 15: Reinstall the Power Supply
Reconnect the two connectors from the power supply to the motherboard. Carefully lower the power supply back into its original position and secure it with the appropriate screws.
Step 16: Reattach the Top Cover
Align the top cover with the bottom case and gently press down until it clicks into place. Turn the PS3 upside down and reinstall the Torx Security screws, rubber feet, and plastic plugs.
Step 17: Reinstall the Hard Drive
Slide the hard drive back into its original position within the PS3, ensuring it is correctly aligned. Secure the hard drive with the single screw, and replace the plastic panel.
Step 18: Test the PS3
Reconnect the PS3 to the power source and any other devices. Turn on the console and test the newly installed USB port(s) with a compatible USB device to ensure they are functioning correctly.
Step 19: Monitor the PS3 USB Port
Over the next few days or weeks, regularly check the repaired USB port for any signs of issues or failure. If you notice any problems, consult a professional technician for further assistance.
By following these steps, you can effectively replace a damaged USB port on a PS3 console, ensuring continued functionality for your gaming experience. It’s essential to remember that some repairs may be beyond the scope of a DIY repair, and in those cases, it’s best to consult a professional technician for assistance. Additionally, always practice proper safety precautions when working with electronic devices and soldering equipment.
Some Helpful Tips to Prevent Problems in USB Port
- Turn the system off before you plug anything in
- Try to keep it away from other electronic devices or anything that may interfere with signals
- Do not use while charging; instead, wait until there is a full charge
- Do not force anything in; if it doesn’t fit, it isn’t the right connector
- Make sure you are using the correct connector for that device
- Turn the system off before removing any connected devices
- Don’t leave the system on and connected to a device for more than 90 minutes at a time
- Only use equipment that is compatible with your device’s features
Basic Troubleshooting on Your Ps3 USB Port
Step 1: Check Your USB Cable
First, check to ensure that your cable works and is not faulty. To do this, please try the cable with another USB device. For example, plug the USB cable into your computer and then try to charge that device. If you cannot charge it with your PC, that could be an issue with the port, but it is likely just an issue with your device if it charges.
Step 2: Check Your Device
Second, you’ll want to check your device. Plug it into the USB cable and then attempt to charge it. If your device does not charge, that is likely just an issue with the device itself.
If you have tried both of these steps and still cannot get your USB port working correctly, then you may want to consider getting it checked out at a repair shop or purchasing a new one. This guide is meant to be used to fix your USB port if it has become loose or has an issue.
Step 3: Secure Your USB Port
If you have checked both of these and cannot get your device to work, there is likely something wrong with the USB port itself. First, you will want to secure the port not to become loose. To do this, try pushing down on both sides of the USB port with your thumbs. You want to push fairly hard, and if you cannot, you might need to purchase a new one.
Step 4: Put Your Screwdriver in Place
To do this, remove the back panel on your Ps3. On the left side, you will see a screw in one corner. This is what holds your cover in place, so to properly secure it, you will want to unscrew it using your Phillips-head screwdriver. Make sure that you do not lose the screws, and put them to the side in a safe place.
You Can Check It Out To Fix Charging Connected Device via Usb
Step 5: Secure Your Ports
With your screwdriver in hand, find the circuits on the left side of your Ps3, where you can access each USB port. You will want to secure these ports with two pieces of electrical tape. This will prevent the port from becoming loose.
Step 6: Put Everything Back Together Again
Now that everything is secure, put your back cover on and then twist the screw to lock it. You will need to put four more screws into their respective places to properly secure all of your ports. Once you have done this, your Ps3 should be the same before you opened it. If everything is working correctly, then pat yourself on the back for a well-done job!
You Can Check It Out To Fix Hid Ballast
Frequently Asked Questions
Can a Damaged Usb Port Be Repaired?
If the port is physically damaged, then it may be necessary to replace the entire thing. However, if there are only some missing pieces or corrosion, it might be possible to fix and/or improve the USB connection. This can typically be done by replacing any corroded parts with new ones and applying a lubricant to help reduce friction and prevent future damage. In cases where this does not work, it might also be necessary to replace the entire USB Port adapter board.
Why is the Ps3 Controller Not Charging?
There could be a few reasons why your Ps3 Controller is not charging. The most common reason is that the controller has a low battery. To charge it, you will need to plug it into the PS3 and the wall outlet. Another potential reason is that the controller needs to be reset. To do this, press and hold the power button for about five seconds until the console powers off. Once it powers back on, you will be able to access the setup menu. From here, select “Controller Settings” and then “Reset Controller.”
Can I Use Ps4 Controller on Ps3?
Unfortunately, PS4 controllers are not compatible with older versions of the PlayStation3. If you own a PlayStation3 and want to use your controller on it, you will need to purchase a new one.
Is a Ps3 Controller Bluetooth?
Bluetooth is a wireless technology that allows devices to connect without having to be physically close to each other. This makes it perfect for devices that are used in close proximity, such as controllers for video games and other electronics. In fact, controllers for Ps3 are actually Bluetooth-enabled.
Conclusion
The Ps3 USB port is a valuable component of the gaming console. It allows players to connect peripherals such as controllers, keyboards, and mice. Unfortunately, when it becomes damaged, it can be difficult to repair.
In this blog post, we have discussed the common problems with the Ps3 USB port and how to fix ps3 usb port. We hope that this information will help you resolve any issues you may be experiencing with your gaming console. If you have any questions, please feel free to comment below!
You Can Check It Out To Fix Static Mic Xbox One