Are you experiencing problems with your hid ballast? Do you know how to fix it? This blog post will outline some simple steps you can take to troubleshoot and repair yours hid ballast. We will also provide some helpful tips on how to prevent future problems.
HID ballasts are devices that help control the amount of electricity going to an HID light bulb. They are important in ensuring that the bulbs run at their correct brightness and last as long as possible. However, if they break or malfunction, it can be difficult to know how to fix them. So, if you are having issues with your hid ballast, be sure to read this post on how to fix hid ballast!
Summary:
If you’re having issues with your hid ballast, there are a few things you can do to fix it. First, check if the ballast is securely connected to the power source and that all of the connections are secure. Next, inspect any cables for broken or loose wires.
If necessary, replace any faulty parts with new ones. Additionally, ensure that the bulb is firmly screwed into place in the ballast housing. Finally, make sure that your power supply is sufficient to support the input requirements of your ballast. Following these steps should help get your hid ballast back up and running.
11 Steps on How to Fix Hid Ballast
Step 1: Identify the Issue with the HID Ballast
Before attempting to fix an HID ballast, determine the specific issue that is causing the malfunction. Common issues include flickering lights, lights not turning on, or intermittent functioning. Proper diagnosis will help determine the appropriate course of action.
Step 2: Gather Necessary Tools and Materials
To fix an HID ballast, you will need various tools and materials, such as:
- Multimeter or voltage tester
- Screwdriver (flathead and Phillips)
- Replacement ballast, if needed
- Replacement bulbs, if needed
- Protective gloves and safety glasses
Step 3: Disconnect Power and Remove the HID Ballast
Before working on the HID ballast, ensure that power to the ballast is disconnected. This may involve turning off the breaker, removing a fuse, or disconnecting the battery in a vehicle. Once power is disconnected, remove the HID ballast from its mounting location using a screwdriver.
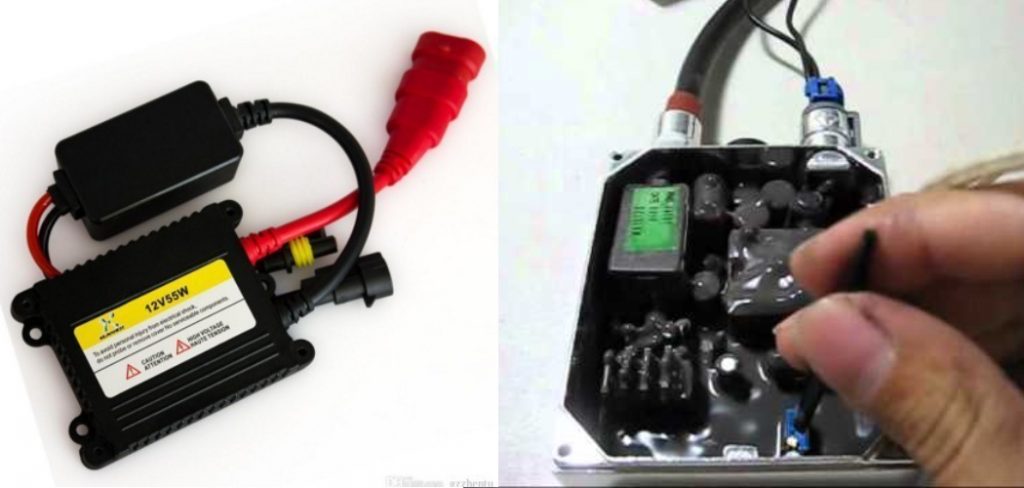
Step 4: Inspect the Ballast for Visible Damage
Inspect the HID ballast for signs of visible damage, such as cracked or bulging capacitors, burnt components, or frayed wires. If any visible damage is found, the ballast may need to be replaced.
Step 5: Test the Ballast
Using a multimeter or voltage tester, test the ballast to determine if it is receiving and outputting the correct voltage. If the ballast is not outputting the correct voltage, it may need to be replaced.
Step 6: Test the Bulbs
If the ballast is functioning correctly, the issue may lie with the HID bulbs. Remove the bulbs from their sockets and test them using a multimeter or voltage tester. If the bulbs are not receiving the correct voltage or have burnt out, they will need to be replaced.
Step 7: Check Wiring and Connections
Inspect the wiring and connections between the ballast and the bulbs for signs of damage, corrosion, or loose connections. Repair or replace any damaged wiring and ensure that all connections are secure.
Step 8: Replace the Ballast if Necessary
If the HID ballast is found to be faulty or damaged, replace it with a new one. Choose a replacement ballast that is compatible with your specific HID system and follow the manufacturer’s instructions for installation.
Step 9: Replace the Bulbs if Necessary
If the HID bulbs are found to be faulty or damaged, replace them with new ones. Choose replacement bulbs that are compatible with your specific HID system and follow the manufacturer’s instructions for installation.
Step 10: Reinstall the HID Ballast and Test the System
Once any necessary repairs or replacements have been made, reinstall the HID ballast in its mounting location and reconnect any wiring or connections. Restore power to the ballast and test the HID system to ensure that it is functioning correctly.
Step 11: Maintain the HID System to Prevent Future Issues
To prevent future issues with your HID ballast, perform regular maintenance, such as:
- Periodically inspecting the ballast, bulbs, wiring, and connections for signs of wear or damage.
- Keeping the ballast and bulbs clean and free of dust or debris.
- Replacing bulbs as needed to maintain optimal performance and prevent stress on the ballast.
By following these steps and using the appropriate tools and techniques, you can effectively fix an HID ballast and restore the proper function of your HID lighting system. Regular maintenance and prompt attention to any issues will help extend the life of your HID system and ensure optimal performance for years to come.
Step 12: Troubleshoot Grounding Issues
In some cases, grounding issues can cause HID ballast problems. If you suspect a grounding issue, inspect the ground connections for the HID system. Ensure that all connections are secure and that the grounding points are free of rust, corrosion, or paint. Clean any problematic grounding points and tighten the connections as needed.
Step 13: Check for Compatibility Issues
Ensure that the HID ballast and bulbs are compatible with your specific vehicle or lighting system. Incompatibility can cause issues such as flickering, intermittent functioning, or premature failure of components. Consult the manufacturer’s guidelines or seek professional advice if you are unsure about compatibility.
Step 14: Inspect the Igniter
The igniter is responsible for providing the initial high voltage required to start the HID bulb. If the igniter is faulty, it can cause issues with the HID system. Inspect the igniter for any visible damage or signs of wear. If necessary, replace the igniter with a compatible one, following the manufacturer’s instructions.
Step 15: Consider Upgrading to a Higher-Quality HID System
If you continue to experience issues with your HID ballast or lighting system, consider upgrading to a higher-quality HID system. Premium HID systems often feature better quality components, more efficient ballasts, and longer-lasting bulbs, which can help to prevent future issues and improve the overall performance of your lighting system.
Step 16: Consult a Professional if Necessary
If you are unable to diagnose or fix the issue with your HID ballast, consult a professional for assistance. A skilled technician can efficiently diagnose and repair HID ballast issues, as well as provide guidance on maintaining and upgrading your HID system.
By following these comprehensive steps and seeking professional help when necessary, you can effectively troubleshoot and repair HID ballast issues and maintain the performance and reliability of your HID lighting system. Regular maintenance, proper component selection, and attention to detail will help prevent future issues and ensure that your HID system remains in optimal condition for years to come.
Troubleshooting Hid Ballast
To troubleshoot your HID ballast, you will need:
- A screwdriver and a multimeter (reading in volts)
- Replacement parts (if needed)
- Ballast tester (if available)
- Time adjustment tool (optional)
- Cleaning supplies such as rubbing alcohol, lint-free rags, and cotton swabs
- Gloves (if cleaning with any cleaner)
Procedure: How to Troubleshoot Hid Ballast
Step 1: Clean Your Ballast
The first thing you should do is clean your ballast, and it’s surrounding area. Remove any dirt or

grime present, including inside the ballast and in the connector wires. Next, use a cotton swab dipped in rubbing alcohol to wipe away dirt and grime from the connections and wires.
If you find large amounts of dirt or grime, you might want to use a soft bristle brush (toothbrush) and some water mixed with dish soap. Be sure to dry all parts completely before proceeding.
Step 2: Check Wires for Any Signs of Corrosion
Next, check the wires for any signs of corrosion (any discoloration such as green or black) or fraying (exposed wire). If you find signs of either, cut back about an inch from the spot where it is visible and discard any remaining wire.
After doing this, strip the end of the new wire (using a knife) to expose bare metal. Then twist together one exposed end with a piece of electrical tape, making sure there are no loose wires.
Step 3: Turn Off the Ballast
Turn off your car and remove the key. Next, place your multimeter in volts (DC) mode with a voltage range of 20V-50V, and set to read direct current (DC). The lowest setting that will register is usually 2 or 3 volts; this is not zero, but you can check zero on the multimeter display by touching it to a grounded metal surface.
Step 4: Turn On your Multimeter
Turn on your car and any accessory lights, such as headlights or interior lights. Make sure all accessories are turned off before proceeding with this step. Next, touch one end of your voltage probe to the battery’s positive terminal and touch the other end of your probe to each wire on the connector. If you get a reading, usually 12 volts, you have a positive voltage running through that connection.
Step 5: Check the Voltage at Each Connection
Next, check the voltage at each connection, including the ballast’s plug, wires connected to the ground, and any other connectors you can test. Remember to check your negative power wire first if you have a positive voltage test.
Next, check your positive power wire (12 volts) for continuity with the ballast’s plug by touching
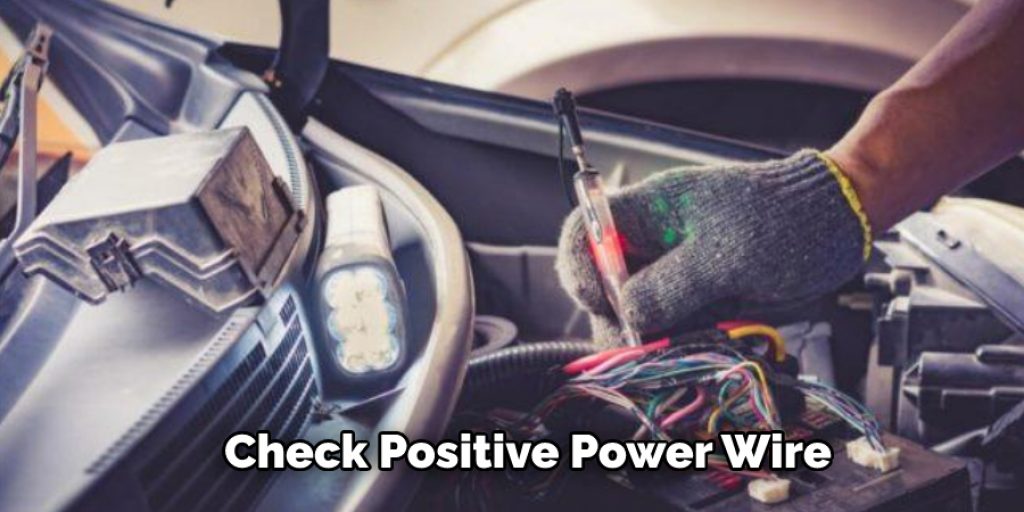
one probe to the positive wire and touching the other probe to each pin in the connector. Again, the multimeter should read a closed circuit because there is no power running through any of the pins.
Step 6: Test for Resistance at Each Connection
Finally, test resistance (ohms) between your positive power wire and each ground connection, including the battery’s negative terminal. If you can get an accurate reading, ohms should be between 500-900 for this step. If you do not have a ballast tester, the only way to test this is by turning on your car and testing voltage at each connection to ensure zero power goes to that connector.
If you determine that the problem lies with a particular ground wire, make sure it is clean and well-attached to the chassis and not frayed or corroded. If you cannot get your multimeter to read the correct voltage, then it might be a good idea to go ahead and replace any wires that appear frayed or corroded.
Safety Measures and Warnings
1. Always turn off your car before testing any connections.
2. Be mindful of the voltage put through the positive wires when testing with your multimeter.
3. If you cannot get a reading, check the voltage on both sides of the fuse box first.
4. Disconnect the battery terminal if necessary.
5. Do not touch anything live or energized unless necessary (such as when testing for voltage).
6. If you feel an unpleasant tingle when touching anything, immediately stop and leave the vehicle alone. The source of electricity should be removed by a professional before beginning your work or driving your car.
7. Do not cut any wires unless necessary.
8. Do not attempt to short circuit anything, as you could risk damaging your car or yourself.
You Can Check It Out To Fix a Chipped Knife Blade
Conclusion
The fixing of hid ballast is actually fairly simple and only requires a few tools. You’ll need a screwdriver, pliers, and wire cutters. The first step is to remove the cover of the light fixture. While you can fix a hid ballast, it is always best to consult with a professional.
We hope this blog post on how to fix hid ballast has been helpful. Ballasts are dangerous if not handled properly and can result in serious injury. If you have any questions about the process or need help fixing your hid ballast, please let us know. We are more than happy to assist you.
You Can Check It Out To Repair a Cracked Headlight