When you tear silicone, there are a few ways to repair it. The most common way is to use a sealant or adhesive. This blog post will show you how to repair torn silicone using a few different methods.

But if there’s a tear in your silicone, whether it’s a seal on your dishwasher or a gasket in your oven you’ll want to know how to fix it. Remember that the best way to repair torn silicone may vary depending on the type of tear and its location. We’ll also give you some tips on preventing future tears. Let’s get started!
Summary: This guide provides an overview of how to repair torn silicone. It involves using items and materials such as a cotton swab, glue/epoxy, super glue, nail polish, rubber cement, Sharpie and household glue.
Silicone sealant or lubricant may also help with certain types of torn silicone. Additionally, wearing a glove liner can protect your hands from coming into contact with the silicone directly. Following these steps should help restore your silicone back to its original form.
19 Effective Ways on How to Repair Torn Silicone
Step 1: Assess the Damage
Begin by examining the torn silicone to determine the extent of the damage. Evaluate the size and location of the tear, as well as any surrounding damage that may require attention.
Step 2: Gather Necessary Supplies
Before starting the repair process, gather the necessary supplies, including:
- Silicone sealant or adhesive (matching the original silicone’s color and type)
- Isopropyl alcohol or silicone cleaner
- Clean cloth or paper towels
- Fine-grit sandpaper (320-400 grit)
- Razor blade or utility knife
- Caulking gun (if using a cartridge of silicone sealant)
- Masking tape
- Gloves
- Toothpick or small brush
Step 3: Clean the Damaged Area
Before repairing the torn silicone, it’s crucial to clean the area thoroughly to ensure proper adhesion of the repair material. Using isopropyl alcohol or a silicone cleaner, clean the surface of the silicone, removing any dirt, oil, or debris. Wipe the area dry with a clean cloth or paper towel and allow it to air dry completely.
Step 4: Remove Loose Silicone
Using a razor blade or utility knife, carefully trim away any loose or damaged silicone surrounding the tear. Be cautious not to damage the underlying material or create a larger tear.
Step 5: Sand the Torn Edges
Lightly sand the edges of the torn silicone using fine-grit sandpaper. This step will help create a better bonding surface for the silicone sealant or adhesive. Wipe away any dust or debris with a clean cloth or paper towel.
Step 6: Mask Off the Repair Area
To create a neat and clean repair, use masking tape to outline the area surrounding the tear. This will help contain the silicone sealant or adhesive during the repair process and prevent it from spreading to unwanted areas.
Step 7: Prepare the Silicone Sealant or Adhesive
Put on gloves to protect your hands and ensure a clean working environment. Following the manufacturer’s instructions, prepare the silicone sealant or adhesive for application. If using a caulking gun, cut the tip of the cartridge at a 45-degree angle and puncture the seal inside the nozzle.
Step 8: Apply the Silicone Sealant or Adhesive
Using the caulking gun, toothpick, or small brush, carefully apply a thin layer of silicone sealant or adhesive to the torn edges of the silicone. Be sure to cover the entire tear, extending slightly beyond the edges to ensure a strong bond.
Step 9: Press the Torn Edges Together
Carefully align the torn edges of the silicone and press them together, ensuring a tight and even bond. Hold the silicone in place for several seconds or use masking tape to secure it while the adhesive cures.
Step 10: Smooth Out the Repair
Using a gloved finger, toothpick, or small brush, smooth out the silicone sealant or adhesive along the tear’s edges. This will help create a seamless repair and ensure the repaired area is watertight.
Step 11: Allow the Silicone to Cure
Following the manufacturer’s instructions, allow the silicone sealant or adhesive to cure completely. This may take several hours or longer, depending on the specific product and environmental conditions. Be patient and avoid disturbing the repaired area during this time.
Step 12: Remove the Masking Tape
Once the silicone has fully cured, carefully remove the masking tape from the surrounding area. Be cautious not to damage the repaired silicone or the underlying material.
Step 13: Inspect the Repair
Examine the repaired area to ensure that the tear has been effectively sealed and the silicone has bonded securely. If any issues are evident, such as gaps or unevenness, you may need to repeat the repair process Step 14: Test the Repair
If the repaired silicone is in a location where it needs to be watertight or airtight, perform a test to ensure the repair is effective. For example, if the torn silicone is part of a seal in an aquarium or around a window, fill the area with water or use a smoke test to confirm that the seal is secure.
Step 15: Clean the Area
After the repair has been completed and tested, clean the surrounding area to remove any residue or debris from the repair process. Use a clean cloth or paper towel and isopropyl alcohol or a silicone cleaner to gently wipe the area.
Step 16: Maintain the Silicone
To prolong the life of the repaired silicone and prevent future damage, regularly inspect and maintain the silicone. Keep it clean and free of debris, and address any signs of wear or damage promptly.
Step 17: Take Preventative Measures
Consider taking steps to prevent future silicone tears, particularly if the damage was caused by external factors such as sharp objects, high heat, or excessive pressure. Implement protective measures, like using guards, shields, or padding, to help avoid similar issues in the future.
Step 18: Monitor the Repair
Keep an eye on the repaired area over time to ensure that the silicone remains in good condition and the tear does not reoccur or worsen. If necessary, repeat the repair process to address any issues that may arise.
Step 19: Consult a Professional if Needed
If you’re unsure about repairing the torn silicone yourself or encounter complications during the repair process, don’t hesitate to consult a professional. They can provide guidance, assess the damage, and recommend the best course of action to ensure a successful repair.
By following these steps, you can effectively repair torn silicone and restore its functionality and appearance. Regular maintenance, preventative measures, and prompt attention to any damage will help prolong the life of the silicone and ensure its continued performance. If you encounter any difficulties or uncertainties during the repair process, seeking professional assistance can help ensure a successful outcome.
Step by Step Process: How to Repair Torn Silicone
Step 1: Prepare the Door Seal
The first step is to clean up the area where the tear is. Use your fingers and start from one of the outside corners of the silicone, gently lifting it away from the door. This will give you a little extra room to work with as you pull out any hair or fiber that had become stuck in between it.
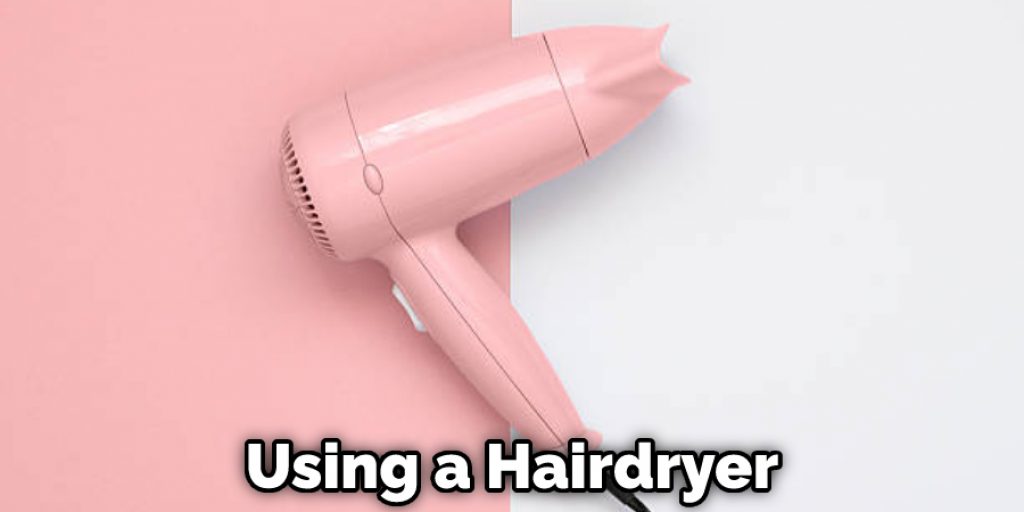
Step 2: Heat the Door Seal
The next step is to warm up the area where you will be working. I usually do this by using a hairdryer on its hottest setting and making sure not to go too close for too long, as that can damage the seal. To get a good idea of how hot it needs to be, touch your hand to the area for a few seconds. It should warm up, but not be uncomfortably hot to touch.
Step 3: Mix the Resin
Once you know the door seal is the perfect temperature, it’s time to mix up your resin. You can use silicone caulk or another adhesive designed specifically for use on doors and windows, but I use this Fortifier Silicone Repair Kit from JB Weld.
It’s not adhesive but rather a resin that fills in the gap and hardens like steel to hold it together. Before mixing, pre-cut yourself a small piece of aluminum foil (maybe about 1 inch by 2 inches). This will be the “mixing stick” you use to mix the powder and liquid.
Step 4: Clean the Area Around the Tear
Use a bit of acetone or nail polish remover on a cotton ball to remove any oils that may be present in the area around the tear. Get it all off, as these oils can affect how well the resin will work later on.
Step 5: Prepare the Tear for Sealing
Take some tube or container sealant, and dispense it into a small container. Apply the sealant to one side of the tear, creating a nice thin layer around the entire perimeter. Then apply another thin coat on top of that first layer, so two coats are covering the area surrounding the tear. Be careful not to get any of this onto your screen! Once you’ve done one side, turn your screen over and do the other.
Step 6: Attach the Door Seal
Pick your door seal up and stick it onto the screen, holding it in place for a few seconds, so it sticks. If you already know which side of the screen will be facing outwards on this particular phone, make sure you put the door seal on that side first.
Step 7: Check the Door Seal
Once your door seal has been stuck on, run a finger over it to ensure there aren’t any air bubbles. Air bubbles can create small pockets between the door seal and phone screen that could get in the way of sealing up the tear.
Other Essential Care Tips and Advice for Your Silicone
1. Do not expose your silicone to sunlight or excessive heat, including a hairdryer or a direct hot lamp.
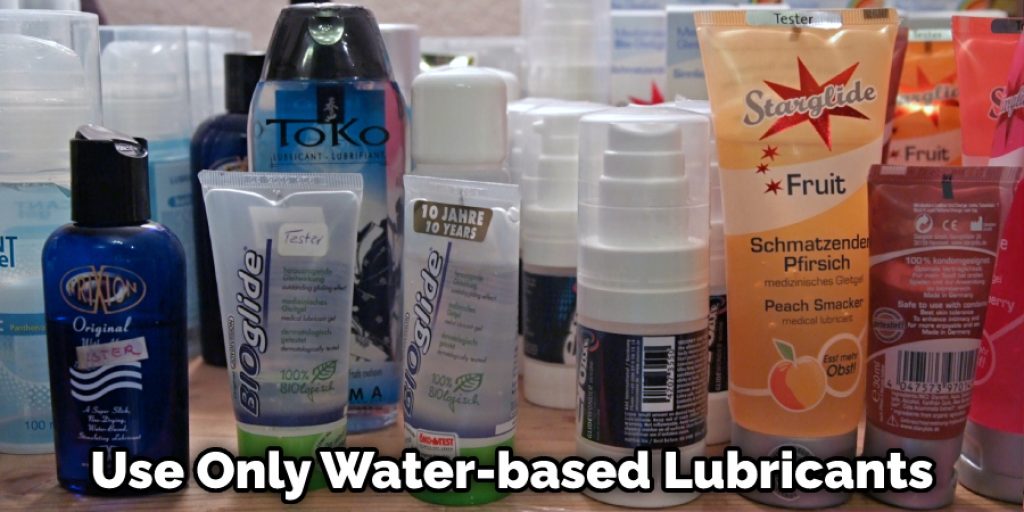
2. Use only water-based lubricants with silicone.
3. Keep your Silicone away from sharp or abrasive objects which could cause damage to the silicone surface and keep it out of direct contact with your clothing and anything containing zippers, such as pockets and purses, because these can snag on the surface, causing pulls.
4. To keep your Silicone fresh between uses, store it in a plastic bag (or wrap it tightly with plastic wrap) to prevent dust and debris from settling on the toy’s surface. Remember that moisture can cause damage, so do not store your silicone in contact with other rubber or jelly toys or materials that may leach into the surface.
5. To sanitize your silicone, wash it with warm water and mild or gentle soap. You may also use a toy cleaner or a specially formulated toy wipe.
6. As silicone is non-porous, it cannot harbor bacteria or other microorganisms, so you do not need to worry about sterilizing your silicone. If you’d like, you can boil your toy for 3 minutes or wash it in the top rack of the dishwasher.
You Can Check It Out to: Repair a Cracked Headlight
Frequently Asked Questions
Can You Fix The Silicone Tear?
Unfortunately, silicone tears are not easily fixed and require special care. When silicone cracks or tears, the gel that is inside the tear can quickly leak out and cause a host of problems. Silicone Tears often become stained with dye from food or drink, which makes them look unsightly and increases your risk of infection. Additionally, if they’re left untreated they may recede further into the socket causing pain and loss of function.
To fix a silicone tear:
1) Clear any debris away from the area where the tear exists – this includes anything that may have gotten stuck in between Jared’s teeth during his dental procedure (like plaque).
What Can You Use To Repair Silicone?
If your silicone appliance is damaged, there are a few things that you can do to repair it. The main thing to remember is not to use harsh chemicals or abrasives, as this could damage the surface of the silicone even further. Instead, try one of these methods:
-Soak in warm water and baking soda for 10 minutes: This will help loosen up any built-up dirt or grease on the silicone surface and make it easier to clean.
-Apply petroleum jelly: Vaseline works well as a lubricant because it’s non-toxic and moisturizes skin at the same time. Apply liberally to a cloth and wipe off with moderate pressure; be sure not to get direct contact with the silicone surface!
-Use boiling water: Boil 1 cup of water until just below boiling point (115 degrees F). Pour distilled vinegar into an empty spray bottle. Hold phone close so vinegar splashes onto all surfaces exposed where Silicone meets Water (the back cover & bottom).
Does Hot Glue Work On Silicone?
it depends on the specific adhesive and the silicone material in question. In general, most adhesives will not work on silicone because the silicone will break down the adhesive molecules and cause it to fail. However, there are a few exceptions to this rule – some adhesives are designed specifically for use on silicone materials, and others are designed to react with the silicone so that it becomes harder (not brittle) after being glued together. If you are in doubt about whether or not an adhesive will work in your particular situation, always test a small amount first to make sure.
Can You Sew Silicone?
Yes, you can sew silicone! Silicone is an inexpensive and durable material that can be used to make a variety of items, including clothes. It is non-toxic and does not corrode, which makes it a popular choice for garments that will be exposed to water or other chemicals.
Silicone also has a soft feel and resists wrinkles well. To start sewing with silicone, you will need the right supplies: high-quality silicone thread (usually made from cotton), needle nose pliers, scissors, ruler/measuring tape/cordless drill with bit holder (optional), light box or lamp for viewing your work in progress (optional).
After you have gathered your supplies, follow these simple steps: identify the area that you want to fabricate; determine which direction the seam should go; mark the outline of the seam on both sides of where you want it; cut out each piece using scissors then measure again against your marked line; join seams by pressing down gently whilst nudging them towards one another until they snap into place; smooth out any bumps or ridges with a credit card or your fingertips.
Conclusion
A sealant can be used to cover the tear and stop any water from getting in, but you must find a silicone-based one. The more silicon on your hands while repairing the damage, the better it will hold up over time. So make sure not to use paint or glue when fixing these leaks!
It might seem like an easy fix with some household supplies around your house, but if you want something durable and long-lasting, call a professional for the leak repairs. We hope this blog post was informative to know how to repair torn silicone. If you have any questions or want to know more, then feel free to comment below!
You Can Check It Out to: Repair a Silicone Mold