If you have a quilt that needs seam repair, don’t worry! It’s a relatively easy fix that you can do yourself. This tutorial will show you how to repair a quilt seam using a ladder stitch. It’s a quick and simple stitch that will help keep your quilt looking its best. So, if your quilt has seen better days, give this tutorial a try!
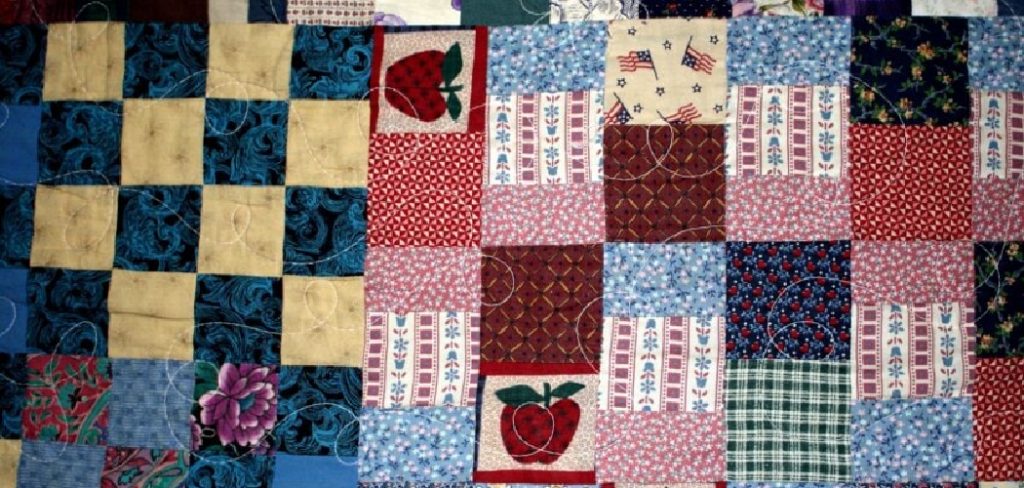
If you don’t repair a quilt seam when it starts to come apart, the fabric will continue to fray, and the quilt will eventually fall apart. By repairing a quilt seam as soon as you notice it’s starting to come undone, you can prevent further damage and keep your quilt looking its best.
Summary: To repair a quilt seam, start by preparing the area and measuring and cutting the fabric. Then replace any broken thread. Fix any loose stitches and close the quilt seam before sewing it back together. Finally, make any final adjustments to ensure a secure repair.
A Stepwise Guide on How to Repair a Quilt Seam
Step 1: Gather Necessary Materials and Tools
To repair a quilt seam, you will need the following materials and tools:
- Seam ripper
- Sewing pins
- Sewing needle
- Thread (matching the original thread color)
- Scissors
- Iron and ironing board
- Quilting ruler or straightedge (optional)
- Thimble (optional)
Step 2: Identify the Damaged Seam
Examine the quilt to determine the location and extent of the damaged seam. Make note of any adjacent seams that may also require repair or reinforcement.
Step 3: Prepare the Quilt for Repair
Lay the quilt out on a flat surface, such as a table or ironing board, with the damaged seam facing up. Smooth out any wrinkles or folds to ensure that the fabric lies flat during the repair process.
Step 4: Remove Damaged Stitches
Using a seam ripper, carefully remove the damaged stitches from the affected seam. Be gentle to avoid accidentally tearing the fabric. Remove approximately 1-2 inches of stitches on either side of the damaged area to provide a secure foundation for the new seam.
Step 5: Align the Fabric Edges
With the damaged stitches removed, align the fabric edges along the original seam line. If necessary, use a quilting ruler or straightedge to ensure that the seam is straight and even.
Step 6: Pin the Fabric in Place
Secure the fabric edges together by placing sewing pins perpendicular to the seam line, spaced approximately 1-2 inches apart. Be sure to pin the fabric on both sides of the damaged area, extending beyond the area where stitches were removed to ensure a secure seam.
Step 7: Thread the Needle
Select a thread color that closely matches the original thread used in the quilt seam. Cut a length of thread approximately 18-24 inches long, and thread it through the eye of the sewing needle. Double the thread and tie a knot at the end to secure it.
Step 8: Begin Sewing the Seam
Starting at one end of the pinned seam, insert the needle into the fabric from the wrong side, pulling it through until the knot is snug against the fabric. If desired, use a thimble to help push the needle through the fabric.
Step 9: Sew the Seam Using a Ladder Stitch
To sew the seam, use a ladder stitch (also known as an invisible or hidden stitch). Insert the needle into the opposite fabric edge, directly across from the point where the thread emerged, and pull it through. Then, insert the needle back into the first fabric edge, slightly to the side of the initial entry point, and pull it through.
Continue this process, alternating between the fabric edges, and pulling the thread snug after each stitch. The stitches should resemble the rungs of a ladder, connecting the fabric edges together invisibly.
Step 10: Secure the Seam
When you reach the end of the damaged seam, sew several small stitches in the same spot to secure the thread. Then, insert the needle into the fabric near the final stitch and bring it out a short distance away. Trim the thread close to the fabric surface, allowing the thread end to disappear into the seam.
Step 11: Remove the Pins
Carefully remove the sewing pins from the repaired seam.
Step 12: Press the Seam
Using an iron set to the appropriate temperature for the quilt fabric, gently press the repaired seam to create a crisp, flat appearance.
Step 13: Inspect the Repair
Examine the repaired seam to ensure that it is secure and that the stitches are even and unnoticeable. If necessary, make any additional adjustments or reinforce the seam with additional stitching.
Step 14: Repeat for Any Additional Damaged Seams
If there are any other damaged seams on the quilt, repeat the process described above to repair them. Addressing all damaged seams at once will save time and ensure that the quilt is properly restored.
Step 15: Reinforce Vulnerable Seams
Examine the quilt for any seams that may be vulnerable to future damage, such as those near heavy wear areas or that appear to be weak or loosely stitched. If necessary, reinforce these seams with additional stitching to prevent future damage.
Step 16: Protect the Quilt
To help maintain the integrity of the quilt and its seams, store and use the quilt in a manner that minimizes stress on the fabric and seams. When storing the quilt, fold it along different lines each time to prevent creases from forming in the same spots. Avoid placing heavy objects on the quilt or using it in high-traffic areas, as these factors can contribute to seam damage.
Step 17: Regularly Inspect the Quilt
To maintain the quilt’s condition, periodically inspect it for signs of wear or damage. Addressing minor issues promptly can prevent them from escalating into more significant problems that may be more difficult or time-consuming to repair.
Step 18: Share Your Knowledge
If you have successfully repaired a quilt seam, consider sharing your experience and knowledge with others who may be facing similar issues. Participate in online forums or discussion groups dedicated to quilting or sewing, or offer your assistance to friends or family members who may need help with their own quilt repairs. By sharing your expertise, you can help others successfully repair and maintain their treasured quilts.
By following these steps, you can effectively repair a damaged quilt seam and restore the quilt’s appearance and integrity. Regular inspection, maintenance, and proper storage can help ensure that your quilt remains in good condition for years to come. As you gain experience and confidence in your quilt repair skills, you can tackle more complex repairs and share your knowledge with others, contributing to a community of quilters dedicated to preserving and enjoying these cherished textile art pieces.
Frequently Asked Question
How Do You Fix a Ripped Seam on A Quilt?
If the rip is small, a few stitches may be enough to fix it. If the rip is bigger, you will need to patch it.
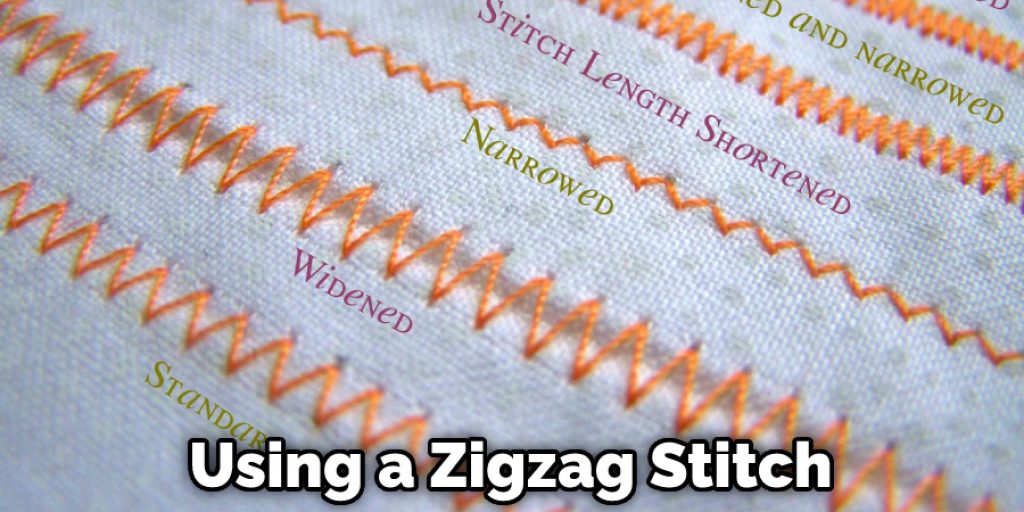
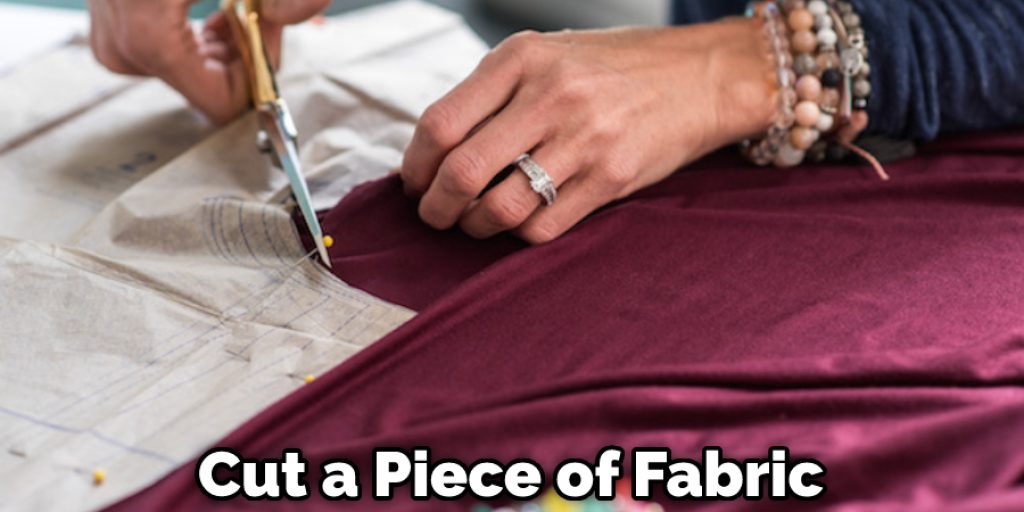
To patch a quilt seam, cut a piece of fabric that is at least twice as wide as the rip and at least six inches longer than the rip. Sew the patch to the quilt using a zigzag stitch.
How to Fix a Small Rip on A Quilt?
If you think you can just sew the rip together, think again. Sewing over it will only create problems later, such as puckers and uneven edges. To fix this, first cut open the quilting seam along both sides of the rip. Ensure that your scissors are clean so that they don’t damage the rest of the quilt.
Next, make a patch by cutting a piece of fabric that is at least twice as wide and how much longer than the rip. Use your seam ripper to open up seams in the patch until you get it to fit right. Pin this patch over the tear and sew it in place using a zigzag stitch across the edge of the patch.
What Could Stitch Be Used to Repair a Seam?
The type of stitch that you will use to repair a seam will depend on how big the rip is. If the rip is small, a few stitches may be enough. If the rip is bigger, you will need to patch it. To patch a quilt seam, you can use a zigzag stitch.
What Is the Best Stitch to Repair a Tear?
The best stitch to use to repair a tear in a quilt is a zigzag stitch. This type of stitch will help to keep the fabric together and prevent it from ripping further.
How Do You Sew a Patch on A Quilt?
If you have a quilt with a tear or hole, you can easily sew on a patch to fix it. Here’s how:
1. Cut a piece of fabric that is slightly larger than the tear or hole.
2. Turn the quilt inside out and place the patch over the tear or hole.
3. Sew around the edge of the patch to secure it in place.
4. Turn the quilt right side out, and your repair will be complete!
You Can Check It Out to: Fix a Rusted Car Roof
Conclusion Paragraph
With these easy steps, you can repair most quilt seams. The only thing left to do is enjoy your newly mended quilt! Remember that if the seam has been ripped or torn so badly that it cannot be repaired with patches, there are many different ways of removing and replacing a section of fabric to make an entirely new patch for this area. Thanks for reading our post about how to repair a quilt seam.
You Can Check It Out To Fix a Popcorn Machine Spinner