Water can cause a lot of damage, especially to concrete. In this blog post, we’ll show you how to fix water damaged concrete and get it looking like new again. Follow these steps, and your concrete will be good as new in no time!
Summary: Water damage to concrete often results from a lack of maintenance and a lack of protection. To repair water-damaged concrete, start by removing the source of the moisture, either by changing the landscape or applying a waterproofing product.
Once you have addressed the water source, assess the extent of the damage and repair what is needed with patching compound or other materials to seal any cracks, holes, or breaks in the surface. If necessary, resurface areas with new concrete mix and trowel it down until even.
What Is a Water Damaged Concrete?
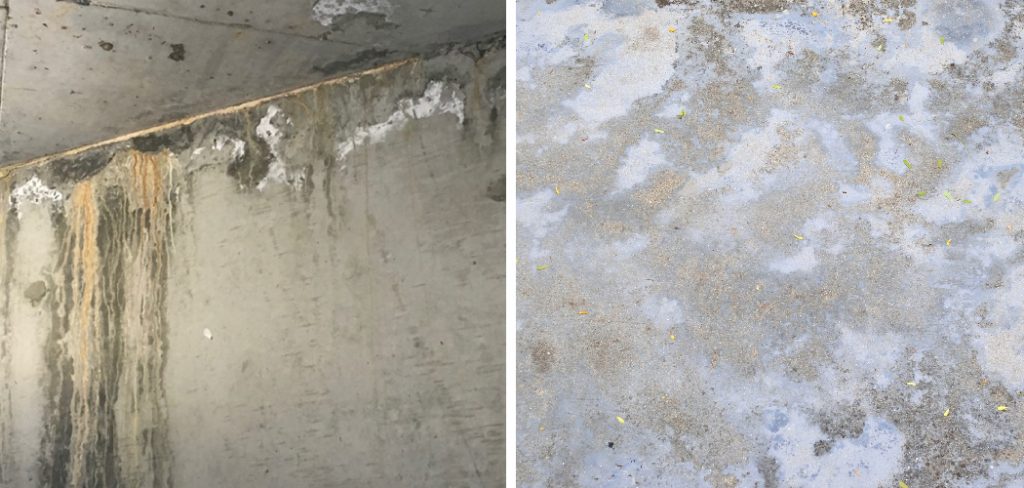
Water damage to concrete can occur for several reasons, including floods, leaks, and heavy rains. When water seeps into the concrete, it can cause the material to weaken and crumble. In some cases, water damage can also lead to the growth of mold and mildew. Therefore, if you have water-damaged concrete on your property, it is important to have it repaired as soon as possible. Otherwise, the damage could continue to spread, causing further issues.
A professional contractor can repair water-damaged concrete. The process typically involves removing and replacing the damaged concrete with new material. However, in some cases, the damage may be able to be repaired without completely replacing the concrete. Contact a professional contractor to discuss your repair options if you have water-damaged concrete on your property.
Why Should You Fix Water Damaged Concrete?
When exposed to water, concrete can become damaged and degrade over time. This is because water causes the concrete to expand and contract, which stresses the material and can cause cracks or even complete collapse. In addition, water can also leach out the nutrients that are essential for concrete strength, leading to a further deterioration of the material.
As a result, it is important to fix water-damaged concrete as soon as possible to prevent further damage and ensure the structure’s longevity. There are several ways to fix water-damaged concrete, depending on the extent of the damage. For minor cracks, sealants can be used to fill in the cracks and prevent further water damage.
For more severe damage, a partial or complete replacement may be necessary. In either case, it is important to consult with a professional to determine the best course of action.
How to Fix Water Damaged Concrete in 6 Easy Steps
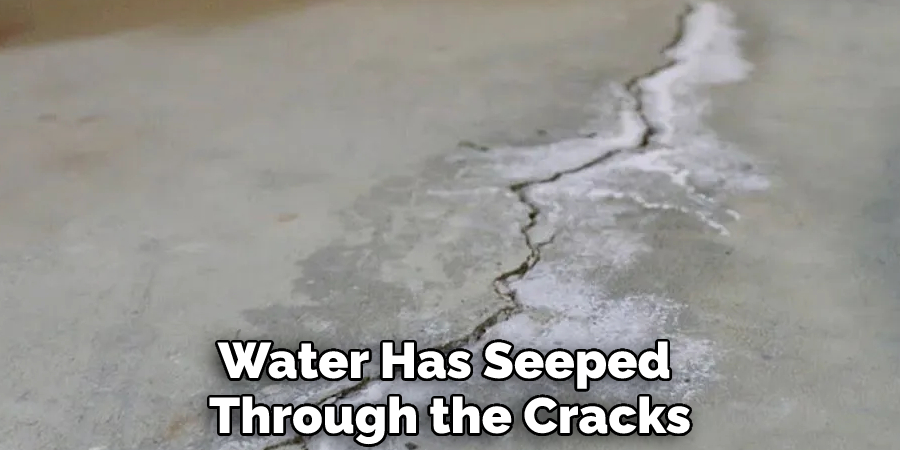
You come home from a long work day only to find that your basement has been flooded. Water has seeped through the cracks in your foundation and has damaged the concrete. What now? The first thing you should do is not panic. While water damage is definitely a cause for concern, it is not the end of the world. With a little bit of time and effort, you can repair water-damaged concrete and get your basement back to its original state.
Step 1: Assess the Damage
The first step in repairing water-damaged concrete is to assess the extent of the damage. The damage should be minimal if the water has only seeped through cracks in the foundation and has not pooled on the floor. However, if the water has pooled on the floor and risen more than a few inches, you will need to take more drastic measures.
In either case, you will need to remove all the wet items from the basement so they can dry out completely. This includes carpeting, clothing, boxes, furniture, and other items the water may have soaked.
Step 2: Dry Out the Area
Once you have removed all of the wet items from your basement, it is time to start drying out the area. If possible, open up all of the windows in your basement to allow for air circulation. If your windows do not open or are too small to provide adequate airflow, you can use fans to help dry out the space.
Place fans around the room’s perimeter and point them inward so that they are blowing air across the floor. It may also be necessary to rent a dehumidifier if there is a lot of humidity in your basement. Run it continuously until the air feels dry and there is no longer any condensation on surfaces such as walls or floors.
Step 3: Repair Cracks in Concrete
Once your basement is completely dry, you can start repairing any cracks that have formed in the concrete foundation. First, clean out any debris from within the cracks using a wire brush or vacuum cleaner with a hose attachment. Next, fill any small cracks (less than ¼ inch wide) with hydraulic cement or epoxy concrete repair sealant.
For larger cracks (more than ¼ inch wide), use hydraulic cement mixed with sand in a 1:3 ratio to fill them up. Once all of the cracks have been filled and allowed to set, apply Masonry waterproofing sealer to any exposed concrete so that future flooding does not occur.
Step 4: Replace Damaged Flooring
If any of the flooring in your basement were damaged by the water, it would need to be replaced. This includes carpeting, wood flooring, tile, and vinyl. If possible, try to salvage any undamaged pieces so that you do not have to replace the entire floor. However, if the damage is too severe, you may need to start from scratch.

Step 5: Clean and Sanitize Everything
Once all of the repairs have been made, and the flooring has been replaced, it is time to clean and sanitize everything in your basement. This includes washing all of the walls, floors, and ceilings with a bleach solution (1 part bleach to 10 parts water). Be sure to wear gloves and a mask to avoid inhaling fumes. You should also throw out any food that was stored in your basement as it may be contaminated.
Step 6: Prevent Future Flooding
To prevent future flooding, it is important to take some preventative measures. First, ensure your gutters and downspouts are clean and in good working condition. This will ensure that water is properly diverted away from your foundation. You should also consider installing a sump pump in your basement so that any water seep can quickly remove.
Finally, check the grading around your home to ensure it slopes away from the foundation. By taking these steps, you can help prevent future flooding and avoid repairing water-damaged concrete again.
That’s it! You’ve now learned how to fix water damaged concrete. Remember to take preventative measures to avoid future flooding and damage.
How to Identify Water Damage in Concrete
Water damage is one of the most common problems faced by homeowners. Not only can it be unsightly, but it can also lead to structural problems if left unaddressed. One of the most common places to find water damage is concrete. Concrete is a porous material, which means that it can absorb water from the surrounding environment. As a result, concrete is especially vulnerable to damage from leaks and flooding. There are several ways to identify water damage in concrete.
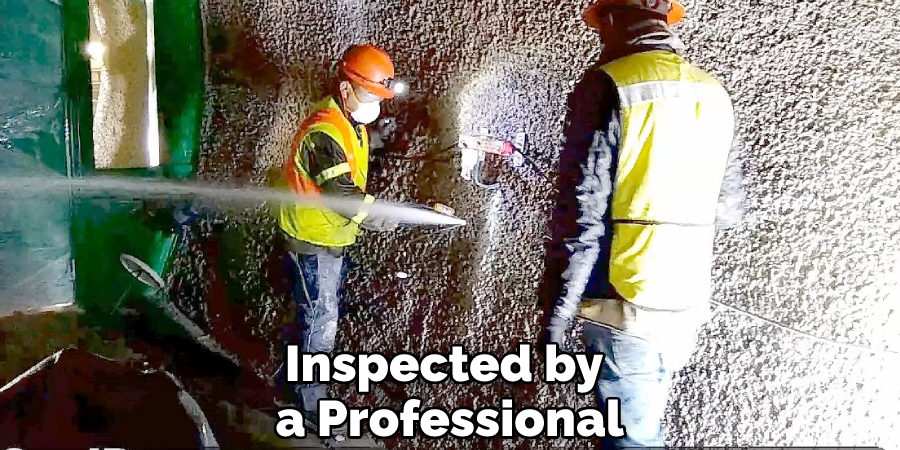
One of the most obvious signs is efflorescence, which appears as a powdery white substance on the surface of the concrete. Another telltale sign is spalling, which occurs when the surface of the concrete begins to flake or peel away. If you suspect that your concrete has been damaged by water, it is important to have it inspected by a professional as soon as possible. By addressing the problem early, you can help to prevent further damage and keep your home in good condition.
What to Do If You Suspect a Leak in Your Home
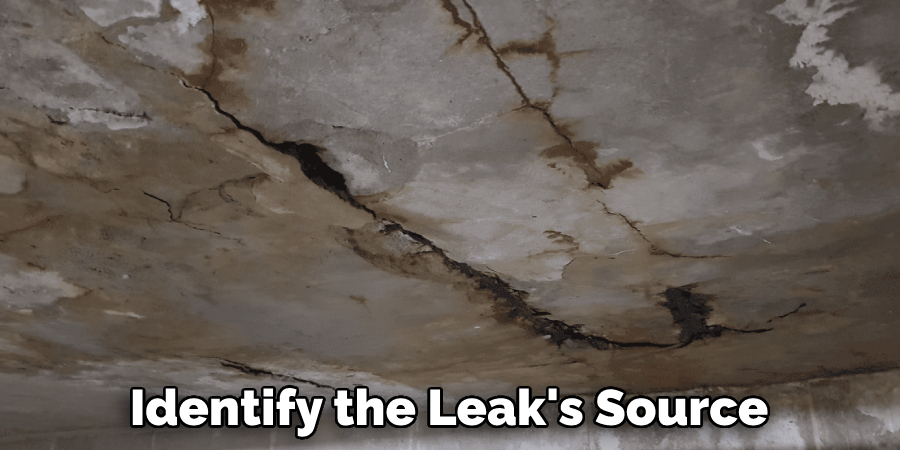
If you think there may be a leak in your home, you first should check all faucets and pipes for signs of water damage or leaks. This includes looking for any water stains on ceilings or walls, as well as any pools of water around baseboards or cabinets. You should also pay attention to any changes in your water bill, as this could indicate that water is seeping out somewhere. Once you have confirmed that there is a leak, the next step is to determine its source.
This can be tricky, but it’s important to identify the source of the leak so that you can get it repaired as soon as possible. If you’re unsure where the leak is coming from, you can always call a professional plumber for help. They will be able to quickly locate the source of the leak and make the necessary repairs. In the meantime, try to avoid using any water in your home until the leak has been fixed. This will help minimize the amount of damage that is caused by the leak.
The Dos and Don’ts of Repairing Water Damaged Concrete
Repairing water-damaged concrete is not a do-it-yourself job. A professional must assess the damage properly and determine the best course of action. However, there are some things you can do to minimize the damage and make the repair process go more smoothly. First, act quickly to remove the water. The longer the water sits, the more damage it will cause.
Second, identify the leak’s source and repair it before proceeding with concrete repairs. Otherwise, you’ll just patch up the damage without addressing the root cause. Finally, when selecting a concrete repair product, be sure to choose one that is specifically designed for use on water-damaged concrete. Following these simple tips can make repairing water-damaged concrete a less daunting task.
Conclusion
Water damage is never fun, but fortunately, it can be fixed with little time and effort. By following these steps—assessing the damage, drying out your basement, and repairing cracks in concrete—you can repair water-damaged concrete easily and effectively so that your basement looks as good as new! Thanks for reading our post about how to fix water damaged concrete.
You Can Chack It Out How to Fix Poorly Finished Concrete