If you’re like most homeowners, you may not know how to fix sheetrock paper. In fact, many people don’t even know what it is. Sheetrock paper is the thin white layer that is applied to the drywall before it is painted. Over time, this layer can start to peel and crack, leading to ugly patches on your walls. Fortunately, fixing this problem is relatively easy. Here’s how to do it.
Summary: Repairing sheetrock paper requires identifying the source of the problem, removing the damaged paper, and applying two layers of joint compound. Allow each layer to dry before sanding until the area is smooth. Finally, prime and paint the area as desired.
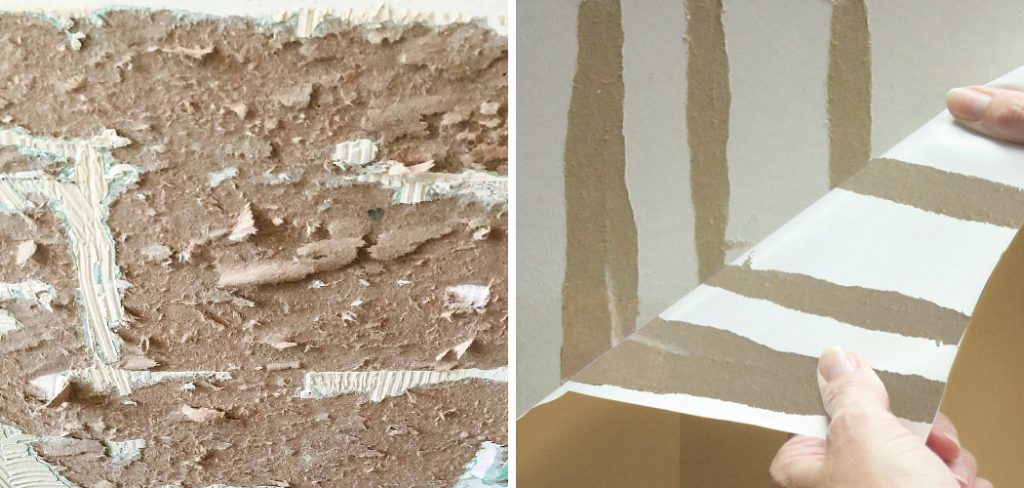
What Is Sheetrock Paper?
Sheetrock paper is a type of wallboard that is used to create smooth, level surfaces on walls and ceilings. It is made from lightweight paper that is coated with a thin layer of plaster. Once the plaster dries, it forms a hard, durable surface that can be painted or wallpaper.
Sheetrock paper is also known as drywall paper or wallboard paper. It is one of the most popular types of wallboard because it is easy to install and provides a high-quality finish.
Why Might You Need to Fix Sheetrock Paper?
Sheetrock is a type of drywall that is made out of gypsum. It is a popular choice for walls and ceilings because it is easy to work with and can be found in various thicknesses. However, Sheetrock can be susceptible to damage, particularly around the edges. One way to help protect Sheetrock from damage is to fix the paper that covers the surface.
This paper reinforces the gypsum and helps to prevent cracking and chipping. In addition, fixing the paper can also help to improve the overall appearance of the wall or ceiling. As a result, it is important to know how to do it to keep your walls and ceilings looking their best.
How to Fix Sheetrock Paper Step by Step Guide
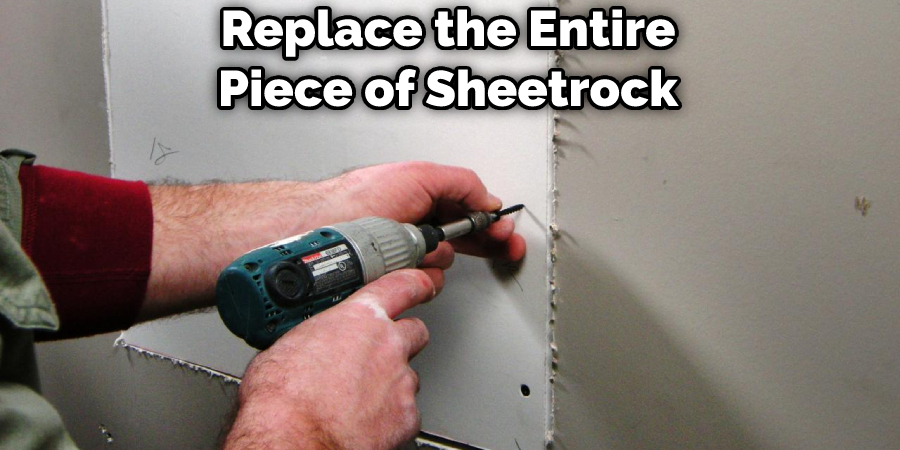
If you have sheetrock paper that is peeling or otherwise damaged, there are a few things you can do to fix it. Depending on the severity of the damage, you may be able to patch it up with some joint compound. For more serious damage, you may need to replace the entire piece of sheetrock.
Here are some tips on how to fix sheetrock paper:
1. Identify the Source of The Problem
The first step is to identify the source of the problem. For example, if the paper is peeling, it could be due to moisture, heat, or another issue. Once you know what is causing the damage, you can take steps to fix the problem and prevent it from happening again in the future.
2. Remove the Damaged Paper
If the damage is not too severe, you may be able to remove the damaged paper and simply replace it. Use a putty knife or other sharp object to remove the damaged section of the paper carefully. Be careful not to damage the surrounding paper or wallboard.
3. Apply a Thin Layer of Joint Compound
Once you have removed the damaged paper, you must apply a thin layer of joint compound to the area. This will help smooth out any irregularities and provide a surface ready for painting or wallpapering.
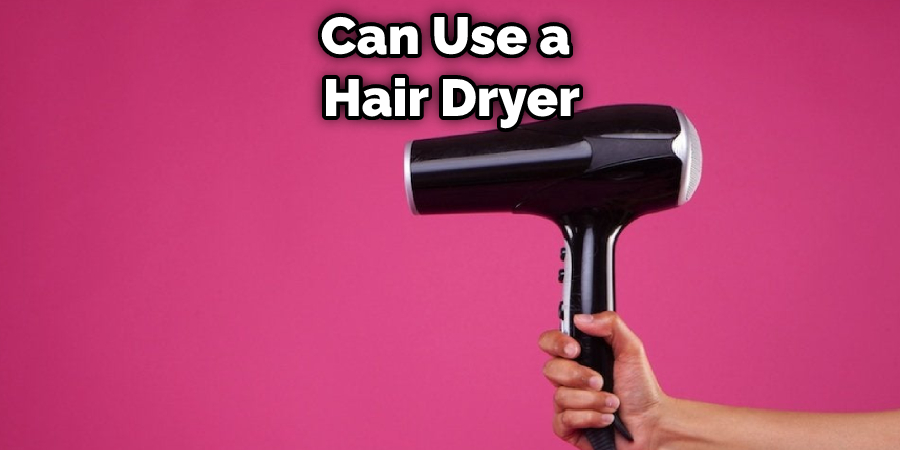
4. Allow the Joint Compound to Dry
After you have applied the joint compound, allow it to dry completely. This may take several hours or even a day, depending on the temperature and humidity of your home. You can make this process fast by using a hair dryer or other heat source to speed up the drying time.
5. Sand the Area until It Is Smooth
Once the joint compound is dry, sand the area until it is smooth. If there are any bumps or irregularities, sand them down until the surface is level. You can use a hand sander or a power sander for this step.
6. Apply The Second Layer of Joint Compound
After the first layer of the joint compound is dry, you will need to apply the second layer. Once again, you will want to use a putty knife to apply the joint compound evenly across the paper. Make sure that you go over any areas that look like they might need more coverage.
7. Allow the Joint Compound to Dry
After you have applied the second layer of joint compound and it has had time to set, you will need to allow it to dry completely. This can take anywhere from a few hours to a day or more, depending on your home’s humidity and temperature levels. Once the joint compound is dry, you can sand it down to create a smooth surface.
8. Sand the Area Again until It Is Smooth
Once the joint compound is dry, you will need to sand the area again until it is smooth. You can use a hand sander or a power sander for this step. Be sure to vacuum up the dust after sanding.
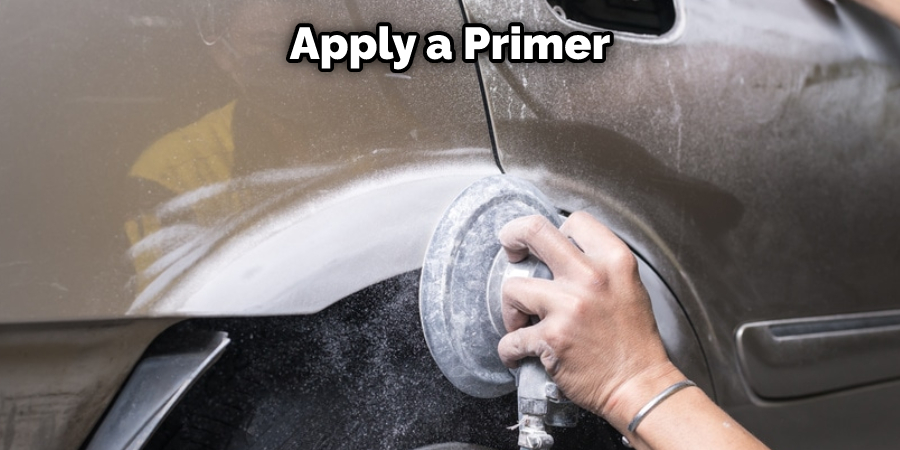
9. Paint the Area with A Primer and Paint of Your Choice
Once the area is smooth, you can now paint over it with a primer and paint of your choice. This will help blend the repair with the rest of the wall and make it less noticeable. Choose a color that closely resembles the surrounding area so that the repair is not too obvious. Apply the primer and paint with a roller for best results.
Now that you know how to fix sheetrock paper, you can keep your walls and ceilings looking their best. By following these simple steps, you can make sure that your home is always in good condition.
You Can Check It Out to Fix Overworked Watercolor Paper
What Are the Consequences of Not Fixing Sheetrock Paper
If you have ever seen a house that has been damaged by water, you know the consequences of not fixing sheetrock paper can be severe. Water can cause the paper to blister and peel, creating an unsightly appearance. In addition, water can cause the sheetrock to swell and distort, making it difficult to repair.
If left unrepaired, water damage can lead to mold growth, which can cause serious health problems. Therefore, it is important to fix any sheetrock paper that has been damaged by water as soon as possible. By taking care of the problem quickly, you can avoid these consequences and keep your home looking its best.
How Much Does It Cost to Fix Sheetrock Paper
Repairing sheetrock paper can be a costly affair. Depending on the hole’s size and the damage’s extent, you may be looking at a bill of several hundred dollars. However, there are some simple steps that you can take to minimize the cost of repairs. First, try to repair the damage as soon as possible. The longer you wait, the more extensive the damage is likely to become.
Second, avoid using excessive force when patching or sanding the area. Using too much pressure can cause the paper to tear, resulting in even more damage. Finally, be sure to use high-quality materials when making repairs. Using cheap filler or low-grade mud will only make the problem worse in the long run.
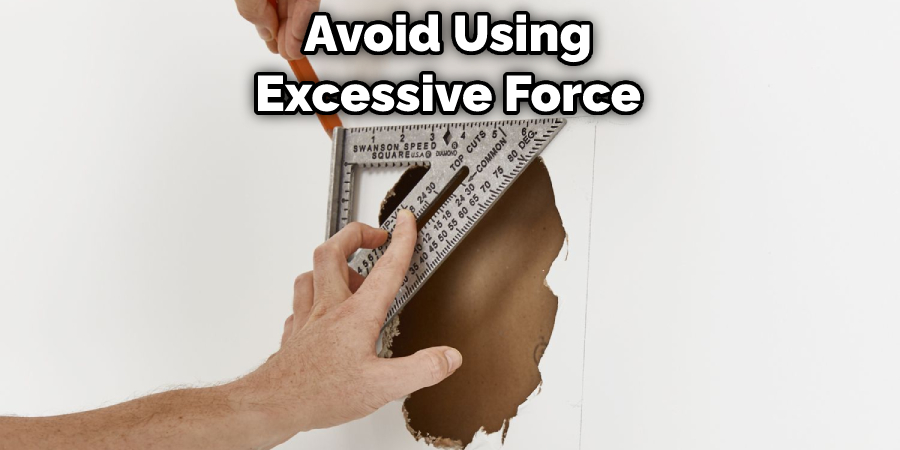
By following these simple tips, you can keep your repair costs down and ensure that your sheetrock paper lasts for years to come.
How Can You Prevent Sheetrock Paper from Happening in The First Place
Sheetrock paper is a real pain to deal with. It’s that flimsy, thin paper that tears easily and leaves your wall looking terrible. But there are ways to prevent sheetrock paper from happening in the first place. The key is to use a higher quality of paint and take extra care when painting around the room’s edges.
When you’re painting, use a thicker brush or roller, and make sure to apply even pressure. Go slowly and smoothly around the edges, not leaving any gaps. And when you’re finished painting, check the edges of the room again to make sure that there are no areas where the paint has been missed. You can avoid sheetrock paper altogether with a little care and attention.
The Benefits of Fixing Sheetrock Paper
There are many benefits to fixing sheetrock paper. First of all, it helps to protect the underlying drywall from damage. Sheetrock paper is stronger than drywall, so it acts as a barrier against dents, scratches, and other types of damage.
Second, fixing sheetrock paper can help to prevent mold and mildew growth. Drywall is particularly susceptible to mold and mildew, but sheetrock paper is much more resistant. Therefore, fixing sheetrock paper can help keep your home healthy and free of harmful mold and mildew spores.
Finally, fixing sheetrock paper can improve the overall appearance of your walls. Cracks, holes, and other imperfections are much less visible when they’re covered by sheetrock paper. This can give your home a neater and more polished look. So if you’re looking for a way to improve the look and feel of your home, fixing sheetrock paper is a great option.
Frequently Asked Questions
Can You Paint Over Torn Drywall Paper?
Type of paint being used, and other factors. That said, if you are using latex or oil-based paint that is designed for wood surfaces (such as trim or doors), then you should be able to achieve satisfactory results by applying two coats of finish. If you are using a waterborne product or epoxy paints specifically designed for walls and ceilings, then three coats may be necessary in order to achieve optimal protection.
What Do You Use to Seal Torn Drywall Paper?
There are a variety of sealants that can be used to fix drywall paper tears. One popular option is mud sealant, which dries quickly and forms an effective bond between the drywall paper and the wall surface. Once dried, this sealant is resistant to moisture, oil, smoke, and other environmental factors.
Another common solution is water-based joint compound (WJC), which comes in a wide variety of colors and finishes that can enhance the appearance of damaged or patched walls. WJC also has high resistance to moisture so it’s ideal for use in areas where flood damage or harsh weather conditions are common. It provides long-term protection against decay as well as mildew growth.
Why is My Drywall Paper Bubbling?
Have you noticed that your drywall paper is bubbling? This could be a sign that your drywall paper is starting to degrade. Drywall paper is designed to protect the wall surface it’s applied to from moisture and dirt. However, over time, the paper can become brittle and start to break down. This causes bubbles in the film because the paper tears easily. When this happens, water can get trapped between the layers of paper, and the film will start to bubble
Should You Wet Drywall Tape?
There are pros and cons to wet or drywall taping, so it is important to do your research before making a decision. Pros of wetting and drying wall tape include that it’s an easy way to fix small problems in the walls quickly and easily. It also eliminates the need for extra tools such as saws, hammers, screws, drill bits, etc., which can be dangerous if not used properly.
Conversely, there are potential dangers associated with using wet/drywall tape including water damage (from leaked tapes or liquid getting through the tape), electrical hazards (due to exposed wires), and structural failure due to excessive weight applied while taping. As always, use caution when working around wiring and live electric components!
Ultimately, whether you choose wet or drywall tape depends on the specific situation at hand. If you’re just trying to patch something up without completely redoing a section of the wall then either option would work fine.
Is It Better to Use Mesh or Paper Drywall Tape?
There’s no right or wrong answer to this question – it really depends on your specific needs and preferences. That being said, here are some general tips that should help you decide which type of tape is best for you:
- Think about the purpose of the tape – Does the tape need to be waterproof? Durable? Is it necessary for a particular application? These are all important questions to ask before making your purchase.
- Consider the price and quality – Of course, price is always a factor, but don’t forget about quality as well. Are the tapes affordable but still high-quality? Or are they overpriced but of poor quality? It’s important to find a balance that works for you.
- Compare different brands and models – Once you’ve decided on a type of tape, it’s time to compare different brands and models. This will help you find the best fit for your needs and budget.
Hopefully, these tips will help you make an informed decision when it comes to choosing the right type of drywall tape!
Conclusion
So, if you have a hole in your drywall, don’t panic. Just follow these simple steps to patch it up and make it look new again. And if you’re ever feeling adventurous and want to try your hand at some DIY repairs, be sure to check out our other blog posts for more tips and tricks. Thanks for reading our post about how to fix sheetrock paper.