In order to get the most out of your watercolor paintings, it’s important to start off with high-quality paper. However, even the best paper can become overworked and lose its vibrancy if not handled properly. This tutorial will show you how to fix overworked watercolor paper and restore its original brightness. So grab your favorite watercolors, and let’s get started.
Summary: Overworked watercolor paper can be easily fixed with the right steps. These include blotting the area, drying it out, applying heat, pressure, a starch solution, PVA glue, masking tape, gesso and paint, applying a decal, dabbing the area and hiding the overworked area. With these tips you can easily restore your paper’s integrity!
What Causes Overworking?
Overworking watercolor paper is usually the result of too much water being applied to the paper or painting in one area for an extended period. This can cause the paper to warp, buckle, or even tear. In extreme cases, the pigments in the paint can start to bleed through the paper, creating a muddy or blurry effect.
Another common cause of overworking is reworking an area of the painting after it has dried. This can happen if you accidentally smudge a wet area of the painting or if you try to add more paint to an area that has already dried. Other causes include using a brush that is too large for the painting or applying too much pressure when painting.
Why Is It Important to Avoid Overworking?
Overworking watercolor paper can ruin your painting and cause you to waste a lot of time and money. In addition to damaging the paper, overworking can also lead to muddy colors and a loss of detail. It’s important to avoid overworking so that you can create beautiful, vibrant paintings that will last a lifetime. If you do find yourself overworking a painting, don’t worry. There are ways to fix it.
Step by Step How to Fix Overworked Watercolor Paper
1. Blotting the Area
The first step is to blot the area with a clean, dry cloth. This will help remove any excess water from the paper. To do this, first wet the cloth with clean water. Then, gently press the cloth onto the overworked area and hold it there for a few seconds. Next, use a dry part of the cloth to blot the area again. Repeat this process until the area is no longer wet.

2. Drying the Area
Drying the area is important so that you can assess the damage and determine what steps need to be taken next. You can use a hair dryer set on the low or cool setting to dry the area. Hold the hair dryer about 12 inches away from the paper and move it around, so the entire area is dry. You can also place the paper on a towel and allow it to air dry. You can hold the area over a fan or open a window if the area is small.
3. Applying Heat
If the area is still wet, you can apply heat to help speed up the drying process. To do this, you can use a heat gun. Hold the heat source about 6-8 inches away from the wet area and move it back and forth until the area is dry. You can also use a hair dryer in a high-heat setting. Again, hold it about 6-8 inches away from the paper and move it around until the area is dry.
4. Applying Pressure
If the area is dry but still warped, you can try applying pressure to help flatten the paper. To do this, you can place a heavy book on top of the sheet of paper. Leave it there for at least an hour so that the paper has time to flatten out. You can also try rolling the paper up tightly and then unrolling it. This can help remove any wrinkles or creases in the paper.
5. Applying a Starch Solution
You can try applying a starch solution if the paper is overworked and buckled. Mix 1 part liquid starch with two parts water to make the solution. Once it’s mixed, apply it to the overworked area with a brush. Allow it to dry for at least an hour. The starch will help to stiffen the paper and make it less likely to warp.

6. Applying PVA Glue
You can try applying PVA glue if the paper is overworked and torn. This type of glue is used for papercraft and is available at most craft stores. To use it, apply a thin layer of glue to the back of the overworked area. Then, place a piece of wax paper or parchment paper over the top and press it down. Allow it to dry for at least an hour. The glue will help to hold the paper together and prevent it from tearing.
7. Applying Masking Tape
If the paper is really buckling, you may need to apply masking tape to the back of the painting to flatten it out. Be sure to use low-tack tape so that it doesn’t damage the paper. To apply the tape, place it on the back of the overworked area. Then, use a roller or your hands to smooth it out. Allow it to sit for at least an hour so that the paper has time to flatten. If the tape is too sticky, you can try dampening it with a wet cloth.
8. Applying Gesso
If the overworked area is still noticeable, you can try applying gesso. Gesso is a type of paint primer that can be found at most art supply stores. It’s white, so it will help to cover up the overworked area. To apply it, first make sure the area is completely dry. Then, using a brush or sponge, apply a thin layer of gesso to the overworked area. Let it dry completely before continuing. If the overworked area is still noticeable, you can repeat this step.
9. Applying Paint
If the overworked area is still noticeable after applying gesso, you can try painting over it. To do this, first, choose a paint color that is similar to the color of your paper. Next, apply a thin layer of paint to the overworked area using a brush or a sponge. Allow the paint to dry completely, and then apply another layer if necessary. Finally, check to see if the overworked area is still visible. If it is, you can try repeating the process until it is no longer noticeable.

10. Applying a Decal
If the overworked area is still noticeable after painting, you can try applying a decal. Decals are small images that can be found at most craft stores. They’re usually made of paper or vinyl and can be applied to the surface of the overworked area. To apply a decal, ensure the area is clean and dry. Next, peel the decal from its backing and place it on the overworked area. Use a soft cloth to rub the decal into place gently. Finally, seal the decal with a clear coat of varnish or lacquer.
11. Dabbing the Area
If the overworked area is still wet, you can try removing some excess watercolors by dabbing them with a clean, dry cloth or paper towel. Gently press the cloth onto the overworked area and lift it away. Repeat this process until you are satisfied with the results. If the overworked area is already dry, you can try rewetting it and then dabbing it as described above. Alternatively, you can use a damp sponge or brush to lightly apply water to the overworked area.
12. Hiding the Overworked Area
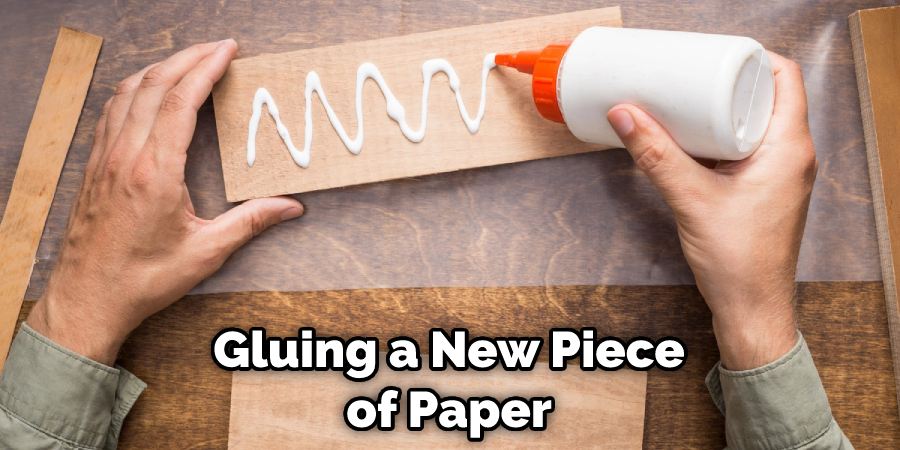
If the overworked area is still noticeable after trying all of these methods, you may need to cover it up simply. One way to do this is to frame the painting using a mat or mount. This will hide the overworked area and give the painting a finished look. Another option is to cut out the overworked area and replace it with another piece of watercolor paper. This can be done by carefully cutting around the overworked area and then gluing a new piece of paper in its place. You can also use this method to create interesting collage effects.
You Can Check It Out to Fix Sheetrock Paper
Tips and Warnings on How to Fix Overworked Watercolor Paper
Tips:
- Be sure to work on a level surface.
- Make sure your paper is stretched tight so it won’t warp while you’re working on it.
- Use a light touch when applying paint to your paper- too much pressure can cause the paper to buckle.
- Avoid using too much water when painting- this will make it difficult for the paint to dry properly and could cause your paper to warp.
- Work in small sections, so the paint doesn’t have a chance to dry before you finish that area.
- Once the paint is dry, you can apply another layer if needed.
Warnings:
- Don’t try to fix every little imperfection- sometimes it’s best to just start over with a new piece of paper.
- Don’t use too much paint or water, as this can cause the paper to warp.
- Be careful not to overwork the paper- too much painting can cause it to become brittle and break.
You Can Check It Out To Fix Wrong Stain Color
Frequently Asked Questions
What is Overworked Watercolor?
Overworked Watercolor is a new and creative way to mix watercolors that can be used in both traditional and contemporary artwork. It involves mixing multiple colors together until the desired shade is reached, then applying this mixture using a brush or palette knife. Overworked Watercolor was made popular by artist Tom Sachs, who has been using it for his paintings ever since its invention.
This method of painting allows for more creativity and latitude when color selection is required, as well as improved control over tone and hue. Additionally, it eliminates the need for extensive dry time between layers which results in faster tracks with lessening frustration on the part of the artist.
Why is My Watercolor Paper Warping?
Watercolor paper is a delicate medium and can be sensitive to different environmental factors, including humidity and temperature. When watercolor paper is wetted, it expands slightly due to the moisture in the paint. This expansion can cause wrinkles in the surface of the paper, which will affect how smoothly you are able to blend your colors. Additionally, if you move or shake your watercolor painting while it’s wet, this motion will also cause further wrinkling.
Can You Overpaint Watercolour?
Yes, you can definitely overpaint watercolor. Overpainting is a technique that can be used to add more color, depth, and intensity to a painting. By adding additional layers of paint, you can create a more impasto-style painting that is full of life and vibrancy. Here are some tips on how to do it:
- Start with a light base – When you start overpainting your watercolor painting, it’s important to start with a light base. This will help to prevent the paint from getting too thick and muddy, which would affect the overall quality of your finished piece.
- Use thin layers – When overpainting watercolors, it’s important to use thin layers so that the paint doesn’t get too sloppy or overwhelming. Too much paint can lead to unwanted distortion and blurring of your details.
- Add more color – Once you have a good foundation in place, you can start adding more color to your work. This can be done by using various hues or by mixing multiple colors together until you achieve the desired effect.
- Experiment – When overpainting watercolours, it’s always best to experiment and play around with different techniques and ideas until you find something that works well for you. The sky is the limit!
Is There a Fixative for Watercolor?
Watercolor is a beautiful medium that lends itself to spontaneity and creativity, but it can be difficult to preserve the original colors of your paintings. One common solution is to use fixatives, which provide a long-lasting seal that prevents water pigment from fading. There are many different types of fixatives available on the market today, so it is important to choose one that will work best for your specific painting style.
Some of the most commonly used fixatives include Shellac (a formaldehyde-free lacquer), Latex Acetate (which contains propylene glycol and acetic acid), or Gum Arabic (a natural gum). All three have their own advantages and disadvantages; however, they all perform similar functions by protecting paintings against moisture damage and helping to preserve color vibrancy over time. It’s also important to experiment with different fixes until you find something that works well for you.
Do You Seal Watercolor Paper?
Watercolor paper is typically not sealed, as the acrylic coating on the paper is designed to resist water and other liquids. If you do need to seal your paper, we recommend using a sealing agent that is specifically designed for watercolor paper.
Conclusion
So there you have it- a few tips on how to fix overworked watercolor paper. If you find yourself in this situation, don’t panic. Follow these steps, and you’ll be able to salvage your painting. If you have any other tips on how to fix overworked watercolor paper, please share them in the comments below. And if you found this post helpful, please share it with your friends.