Is your car plagued with unsightly scratches in the clear coat? Fear not; there are ways to fix them. This blog post will explore a few methods how to fix scratches in clear coat, so your car can look as good as new. We’ll also look at the costs and benefits of each method. So, read on to find out how to restore your car’s shine.
Summary: Clear coat is a great way to protect your car from the elements, but it can also be susceptible to scratches. If you notice scratches on your car’s clear coat, there are several methods you can use to fix them. Here are three options to consider: 1. Use a scratch remover. This type of product removes the scratch and any surrounding paint. 2. Use a primer and then a paint color that matches the clear coat. This will prevent the scratch from showing through the paint. 3. Use a clear coat sealant. This product helps to protect the clear coat from further damage and helps to resist scratches.
What Causes Scratches in Clear Coat?
Scratches in the clear coat can be caused by several things, such as:
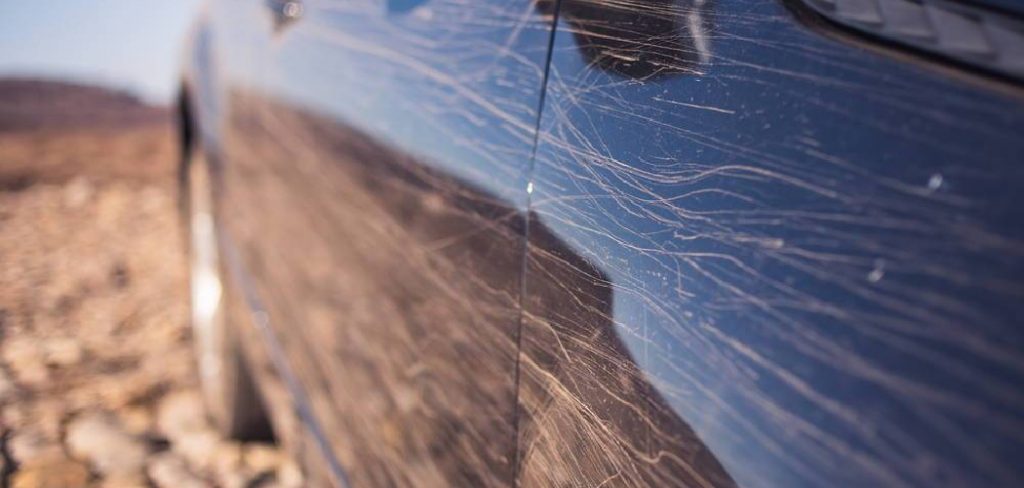
Swirling
Swirling is when small particles of dirt or grit get caught in the clear coat and cause it to swirl. Swirling can also be caused by improper washing or drying techniques.
Abrasions
Abrasions are usually caused by something coming into contact with the clear coat, such as a branch or a rock. However, it can also be caused by incorrect polishing or waxing techniques. Abrasions can be difficult to repair depending on the severity and location of the scratch.
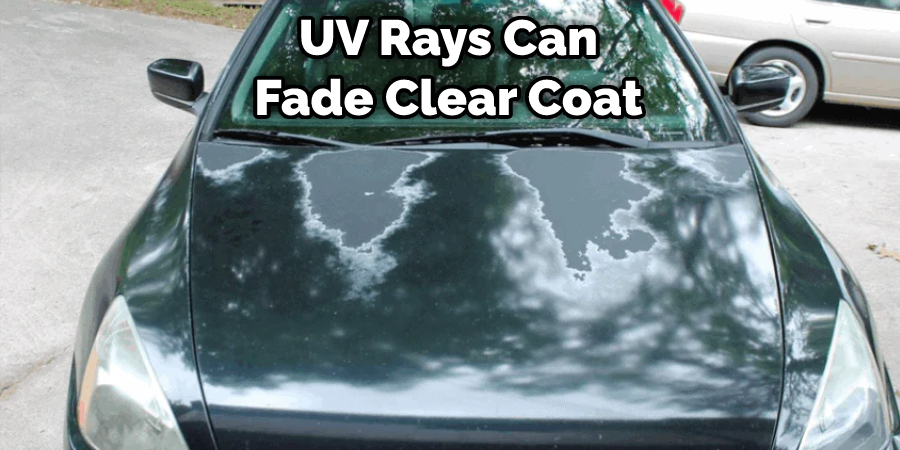
UV Damage
The sun’s UV rays can cause the clear coat to fade, making it more susceptible to scratches. Uv damage is more common in cars that are parked outdoors for long periods. The clear coat can also be damaged by using harsh cleaners or polishes on the paint. This can cause swirl marks to appear, making your car’s paint look dull.
Tree Sap
Parking your car under a tree could result in tree sap falling on the clear coat and causing scratches. Tree sap is notoriously difficult to remove, so it’s best to avoid it if possible.
Bird Droppings
Bird droppings can etch into the clear coat and cause scratches, just like tree sap. It’s best to remove bird droppings as soon as possible, before they have a chance to cause any damage.
Improper Cleaning
If you clean your car with harsh chemicals or abrasive materials, you could be damaging the clear coat. Instead, always use gentle, car-specific cleaners when cleaning your car’s exterior.
15 Simple Steps How to Fix Scratches in Clear Coat
Step 1: Gather Necessary Tools and Materials
Before starting the process of fixing scratches in the clear coat, gather the following tools and materials:
- Mild soap
- Water
- Clean, lint-free microfiber cloths
- Rubbing alcohol or isopropyl alcohol
- Sandpaper (2000-grit and 3000-grit)
- Clear coat touch-up pen or spray
- Automotive rubbing compound
- Automotive polish
- Buffer or buffing pad
- Wax
Step 2: Clean the Affected Area
Wash the scratched area with mild soap and water to remove any dirt, dust, or debris. This will ensure a clean surface for the repair process. After washing, dry the area thoroughly with a clean, lint-free microfiber cloth.
Step 3: Assess the Damage
Inspect the scratch to determine its depth and severity. If the scratch is shallow and only affects the clear coat, it can be repaired using the following steps. However, if the scratch penetrates the paint or the underlying primer, a more extensive repair process may be necessary.
Step 4: Wet Sand the Scratched Area
Soak a piece of 2000-grit sandpaper in water for a few minutes. Gently sand the scratched area using light pressure and even strokes, keeping the sandpaper wet throughout the process. This will help to remove a thin layer of the clear coat, making the scratch less visible. Be cautious not to sand through the clear coat and into the paint, as this can cause further damage.
Step 5: Rinse and Check Progress
Rinse the sanded area with water and dry it with a microfiber cloth. Inspect the scratch to see if it has become less visible. If necessary, repeat the wet sanding process using 3000-grit sandpaper for a smoother finish.
Step 6: Clean with Rubbing Alcohol
After sanding, clean the area with rubbing alcohol or isopropyl alcohol to remove any residue. This will ensure a clean surface for the application of the clear coat touch-up pen or spray.
Step 7: Apply Clear Coat Touch-Up Pen or Spray
Shake the clear coat touch-up pen or spray according to the manufacturer’s instructions. Apply a thin, even layer of clear coat over the sanded area, ensuring that the scratch is completely covered. Allow the clear coat to dry according to the manufacturer’s recommended drying time.
Step 8: Wet Sand the Clear Coat
Once the clear coat has dried, wet sand the area again using 3000-grit sandpaper to remove any excess clear coat and create a smooth, even surface. Rinse the area with water and dry it with a microfiber cloth.
Step 9: Apply Automotive Rubbing Compound
Apply a small amount of automotive rubbing compound to a clean microfiber cloth or buffing pad. Gently rub the compound onto the repaired area using circular motions, applying light pressure. This will help to further smooth the clear coat and blend it with the surrounding area.
Step 10: Buff the Area
Using a buffer or buffing pad, buff the repaired area using circular motions and light pressure. This will help to remove any remaining rubbing compound residue and create a glossy, even finish.
Step 11: Apply Automotive Polish
Apply a small amount of automotive polish to a clean microfiber cloth or buffing pad. Gently rub the polish onto the repaired area using circular motions, applying light pressure. This will help to restore the shine and gloss of the clear coat.
Step 12: Wax the Repaired Area
To protect the repaired area and maintain its shine, apply a thin layer of wax to the surface. Use a clean microfiber cloth or buffing pad to gently rub the wax onto the repaired area using circular motions, applying light pressure. Allow the wax to dry according to the manufacturer’s recommended drying time.
Step 13: Buff the Wax
After the wax has dried, use a clean microfiber cloth or buffing pad to gently buff the wax off the repaired area. This will help to create a protective barrier and enhance the shine of the clear coat.
Step 14: Inspect the Repaired Area
Inspect the repaired area to ensure that the scratch is no longer visible and that the clear coat has been successfully blended with the surrounding area. If necessary, repeat the previous steps to achieve the desired results.
Step 15: Maintain the Repaired Area
To maintain the repaired area and prevent future scratches, follow these tips:
- Wash your vehicle regularly using a gentle, pH-balanced car wash soap.
- Avoid using automatic car washes with abrasive brushes, as these can cause scratches in the clear coat.
- Dry your vehicle using a clean, lint-free microfiber cloth to prevent water spots.
- Apply a high-quality wax or sealant to your vehicle’s paint regularly to protect it from scratches, environmental contaminants, and UV damage.
- Park your vehicle in a garage or shaded area whenever possible to minimize exposure to the elements.
By following these steps and taking proper care of your vehicle’s clear coat, you can effectively repair scratches and maintain a glossy, polished appearance. Remember that if the scratch is deeper than the clear coat or if you are unsure about any part of the repair process, it is always best to consult a professional automotive detailer or body shop for assistance.
How to Prevent Scratches in the Future
1. Keep Your Car Clean:
One of the best ways to prevent scratches is to clean your car. A clean car is less likely to attract debris and dirt that can cause scratches. It’s also easier to spot a piece of dirt or debris on a clean car so you can remove it before it causes any damage.
2. Use a Car Cover:
If you are going to be storing your car for an extended period, or if you live in an area with a lot of trees, using a car cover can help prevent scratches. A car cover will protect your car from debris and dirt that can scratch the paint. If you live in an area with a lot of trees, a car cover can also protect your car from falling branches.
3. Be Careful When Parking:
When you are parking your car, be careful not to scrape it against concrete or other hard surfaces. If you have to park next to another car, make sure you leave enough space so that you don’t accidentally hit the other car and scratch your paint.
4. Use a Car Wax:
Applying a car wax can help to protect your paint from scratches. Car wax will create a barrier between your paint and the environment, which can help to prevent scratches. If you get a scratch, the wax will also help fill in the scratch and make it less visible.
5. Get Your Car Detailed Regularly:
To keep your car looking its best, you should get it detailed regularly. This will remove any dirt or debris that could scratch your paint, and it will also help to protect the paint from the elements.
Tips and Warnings on How to Fix Scratches in Clear Coat:
Tips:
- Washing and waxing your car regularly will help protect the clear coat from damage.
- If you get scratches on your clear coat, clean and dry the area thoroughly before attempting any repair.
- Use a polishing compound designed on clear coats to avoid further damage.
- Always test any repair product in an inconspicuous area before applying it to the scratch itself.
Warnings:
- Avoid using abrasive cleaners or polishes on your car’s clear coat, as they can permanently damage the finish.
- Do not attempt to buff out deep scratches – this will only spread the damage and make it more difficult to repair.
- If the scratch is more than a few inches long, it’s best to leave it to a professional detailer or body shop to fix.
How Much Does It Cost to Fix a Scratch in the Clear Coat?
The cost of fixing a scratch in the clear coat will vary depending on the severity of the damage. If the scratch is shallow, you may be able to remove it with a polishing compound. However, if the scratch is deep, you may need to use a wet sanding technique or automotive touch-up paint. The cost of these repairs can range from $50 to $100.
Frequently Asked Questions
Can You Buff Scratches Out of Clear Coat?
Yes, you can buff scratches out of a clear coat. Start by using a Scotchbrite pad or cloth to remove the scratched area. Be sure to work from the top down so that finer particles are removed first. Then use a heavy-duty polish like Armor All or Meguiar’s Wrenching Oil to finish polishing off the scratch.
Are Clear Coat Scratches Easy to Fix?
Yes, Clear Coat Scratches are typically easy to fix. There are a few things that you can do to help speed up the process:
- use a scratch repair pen – this will help to fill in the scratches and make them less visible
- use a clear coat scratch repair spray – this will help to cover the scratches and make them less visible
- use a clear coat scratch repair kit – this will include all of the necessary supplies to repair Clear Coat Scratches quickly and easily
Should I Worry About Clear Coat Scratches?
Yes, you should worry about clear coat scratches. Clearcoat is a type of protective coating that is applied to the surface of an object such as a car or bike. It’s important to keep in mind that clearcoat scratches are difficult to repair and can eventually lead to corrosion on the metal body of your vehicle or bike. If this happens, it will be very difficult (if not impossible) for you to restore your vehicle or bike back to its original condition.
Does Toothpaste Remove Clear Coat Scratches?
It depends on the type of toothpaste and the severity of the scratches. Some toothpaste may be effective at removing clear coat scratches, while others may not work at all. Ultimately, it is best to try a few different brands and types of toothpaste to see which one is most effective.
Conclusion
So, there you have it. Now that you know how to fix scratches in clear coat, your car can look as good as new! All it takes is a little elbow grease and some patience – and the satisfaction of doing it yourself is well worth the effort. Have you ever repaired scratches in the clear coat before? If so, we’d love to hear about your experience in the comments below.