If you have ever tried to clean your car, the clear coat starts to peel off. In this article, we’re going to show you how to fix sticky clear coat using three easy methods. The clear coat is a protective layer applied to vehicles to keep them looking shiny and new. If it becomes sticky, it can be a challenge to remove without damaging the paint. Follow these tips, and you’ll be on your way to restoring your car’s shine in no time!
Many people mistakenly believe that the clear coat is just another layer of paint. While it is true, they are two different types of protective finishes applied to vehicles. For example, if you have recently washed your car and notice tiny white specs and some stickiness, the top layer has come off, exposing the primer underneath.

Summary: Sticky clear coat is a common problem that can occur on the surface of a car. It’s caused by a buildup of dirt, dust, and other contaminants that can accumulate on the paint over time. To fix sticky clear coat, first wash the car with soap and water to remove any contaminants. Then, polish the surface with an appropriate polishing compound to remove any existing wax or residue. Finally, apply a quality sealant to protect the paint from further damage and give it a lasting shine.
Why Does My Clear Coat Feel Sticky?
If the topcoat of your paint has become sticky, there are several reasons why. First, this can be incredibly frustrating for those who have spent days polishing and waxing their vehicle only to find their hard work was in vain – or worse yet, partially responsible for the problem. Fortunately, all is not lost. There are things you can do to remedy this problem and restore your car’s finish to its former glory.
Let’s take a look at some of the most common causes of a sticky clear coat so that hopefully, you’ll never have this problem!
One major cause of a sticky clear coat is environmental exposure. Environmental exposure can easily cause moisture trapped under your clear coat to condense. When water condenses, it forms droplets. As those droplets evaporate through the clear coat, they pull any dirt particles that may have been stuck to the paint.
This leaves behind little white spots of residue on your paint – otherwise known as Swirls! And what do you do; swirls are caused by polishing and waxing! So if you’re having problems with both, you’ve got some environmental exposure on your hands.
Another common culprit is not allowing your paint to “cure”. By this, I mean your paint needs time to set up. When you apply a coating of wax or polish, the chemicals in the product rely on

both heat and time to cure. As long as they are warm, they will continue working away at your finish.
But once they have cooled, all that work is for nothing (or worse yet – it could cause damage). How much time is required varies depending on what type of protective layer was applied (i.e., wax vs. sealant), but in most cases, 24 hours should do it!
Another cause is contamination in the clear coat. This usually comes in the form of another type of coating applied over or under your current one. If this were to happen, you would see your existing coating flake off – meaning white specks instead of swirls!
There are countless products out there these days with everything from Teflon to waxes intended for use underneath our topcoats, so it’s pretty easy for something like this to occur. But, first, you need to ensure that whatever product you’re using is compatible with any other products or coats you’ve already applied.
Too much polishing/swirling can cause a sticky clear coat. While I’m sure most of us have been
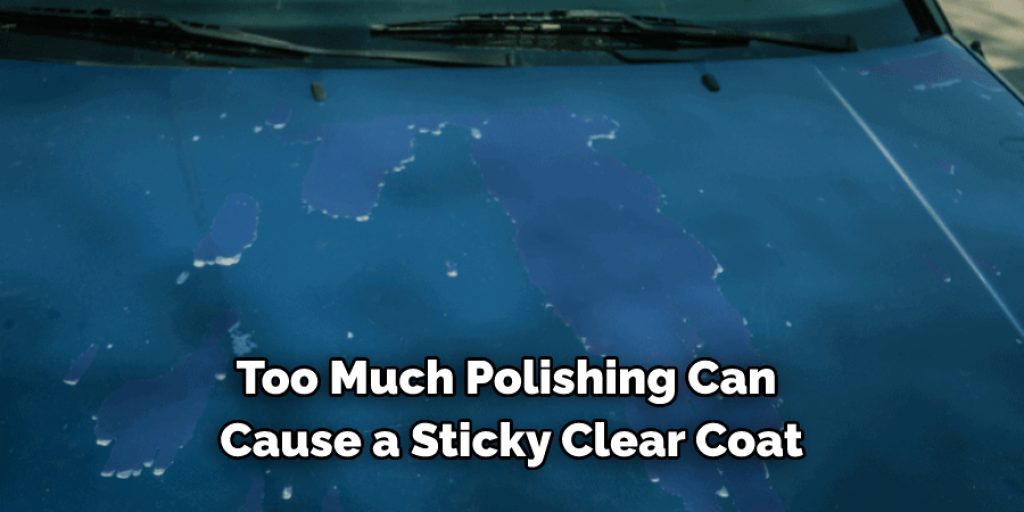
guilty of going a little overboard with our towels now and then, when done, excessively swirled paint is inevitable.
A Step by Step Guide on How to Fix Sticky Clear Coat
Step 1: Assess the Problem
Begin by thoroughly inspecting the surface with the sticky clear coat to determine the extent of the issue. Look for areas where the clear coat has not dried or cured properly, leaving a tacky or gummy texture. Take note of these areas, as they will require attention during the repair process.
Step 2: Gather Necessary Supplies
Before starting the repair process, gather the necessary supplies, including:
- Fine-grit sandpaper (1000-2000 grit)
- Rubbing compound
- Polishing compound
- Microfiber cloths
- Car wash soap
- Water and a bucket
- Clean, lint-free rags
- Automotive masking tape
- Protective gloves and eyewear
- Wax and grease remover
- Clear coat spray or aerosol
Step 3: Clean the Surface
Before addressing the sticky clear coat, ensure that the surface is clean and free of dirt, dust, and debris. Mix car wash soap with water in a bucket and gently wash the surface using a clean, lint-free rag or microfiber cloth. Rinse the surface thoroughly with water and allow it to dry completely.
Step 4: Protect Adjacent Areas
To prevent accidental damage to surrounding surfaces during the repair process, use automotive masking tape to cover any adjacent areas that do not need to be treated. This may include trim, glass, or other painted surfaces.
Step 5: Wet Sand the Sticky Clear Coat
Put on your protective gloves and eyewear before beginning the wet sanding process. Soak the fine-grit sandpaper in water for a few minutes, then gently sand the sticky clear coat using circular motions. Keep the surface wet by occasionally dipping the sandpaper in water or spraying the surface with a water bottle. Be cautious not to sand through the clear coat and damage the underlying paint. Sand the surface until the sticky clear coat is no longer tacky and the surface feels smooth.
Step 6: Clean the Sanded Surface
After wet sanding, rinse the surface with water to remove any sanding residue. Use a clean, lint-free rag or microfiber cloth to dry the surface and remove any remaining water.
Step 7: Apply Rubbing Compound
Apply a small amount of rubbing compound to a clean microfiber cloth or applicator pad. Using circular motions, gently buff the sanded surface until the clear coat begins to regain its original gloss. Be sure to work in small sections, frequently checking your progress to avoid overworking the surface.
Step 8: Apply Polishing Compound
After using the rubbing compound, switch to a polishing compound and a clean microfiber cloth or applicator pad. Buff the surface using the same circular motions as before, working in small sections. The polishing compound will further refine the surface, restoring the clear coat to a high-gloss finish.
Step 9: Clean the Surface Again
Once you have completed the polishing process, clean the surface once more with a mixture of car wash soap and water. Rinse thoroughly with water, and then dry the surface using a clean, lint-free rag or microfiber cloth.
Step 10: Apply Wax and Grease Remover
To prepare the surface for a new layer of clear coat, use a wax and grease remover to eliminate any remaining contaminants. Apply the wax and grease remover to a clean, lint-free rag and gently wipe the surface, following the manufacturer’s instructions for the appropriate dwell time and removal process.
Step 11: Apply a New Layer of Clear Coat
Shake the clear coat spray or aerosol can thoroughly, and then apply a new layer of clear coat to the sanded and prepped surface. Hold the can approximately 10-12 inches away from the surface and use a sweeping motion to apply an even layer of clear coat.
Allow the first coat to dry for the recommended time specified by the manufacturer before applying any additional coats. Multiple light coats are preferable to one heavy coat, as this will help prevent drips and runs.
Step 12: Allow the Clear Coat to Dry and Cure
After applying the final coat of clear coat, allow the surface to dry and cure according to the manufacturer’s instructions. This may take anywhere from a few hours to several days, depending on the specific product and environmental conditions. Be patient and avoid touching the surface during this time to ensure a smooth and durable finish.
Step 13: Wet Sand the New Clear Coat
Once the new clear coat has fully dried and cured, wet sand the surface again using fine-grit sandpaper (1000-2000 grit) to blend the new clear coat with the existing finish. Follow the same process as in Step 5, keeping the surface wet and using gentle, circular motions. Be cautious not to sand through the new clear coat or damage the underlying paint.
Step 14: Buff and Polish the Surface
After wet sanding the new clear coat, buff and polish the surface once more using rubbing compound and polishing compound, as described in Steps 7 and 8. This will help blend the new clear coat with the surrounding area and restore the surface to a high-gloss finish.
Step 15: Clean and Wax the Surface
With the repair complete, clean the surface one final time using car wash soap and water, then rinse and dry it thoroughly. Apply a high-quality car wax to the entire surface to protect the new clear coat and enhance the overall appearance of your vehicle.
Step 16: Inspect the Repair
After completing the entire repair process, inspect the surface to ensure that the sticky clear coat issue has been resolved and that the finish is smooth, glossy, and uniform. If any imperfections remain, you may need to repeat the necessary steps or consult a professional for further assistance.
By following these steps, you can successfully repair a sticky clear coat and restore your vehicle’s finish to its original luster. Proper maintenance, including regular washing, waxing, and prompt attention to any damage, can help prevent future clear coat issues and keep your vehicle looking its best.
You Can Check It Out to Fix Clear Coat Wrinkled
Tips and tricks
- Sometimes, it is hard to tell if your car’s clear coat is sticky or if it’s just dusty. In this case, you can follow the same steps as above but substitute Windex for a cleaning product containing ammonia. The chemical composition of ammonia will help you determine whether dirt particles are the issue or not (if the ammonia bubbles upon contact with your vehicle’s surface, then there are dust particles stuck to it; however, if nothing happens upon applying the cleaning product containing ammonia to your vehicle’s exterior, then you know that its clear coat truly is sticky).
- Be sure NOT to use dishwashing liquid when washing down areas that still feel like they have an oily residue or stickiness on them. You will need a product formulated for car washing to get these areas clean.
- Do not use wax on car parts with any plastic components on them. Waxing can damage these surfaces because it dries out fast, making it harder for water to run off your vehicle’s exterior during or after rainfall.
Frequently Asked Questions
Why Does My Clear Coat Feel Tacky?
Many times, when a clear coat feels tacky, it’s because the paint has become clogged with dirt, dust particles, or other gunk. This build-up can cause a film to form on the surface of your car that makes it difficult for the coating to adhere properly and protect your vehicle from weathering and fading. To deal with this problem, you need to clean your car regularly using a vacuum cleaner designed specifically for cleaning Clear Coats. You should also use a degreaser such as acetone or methylene chloride in order to dissolve any built-up waxes or sealants. Finally, rinse off all of the cleaners before applying new coats of clear coat.
What Do You Do When Spray Paint Stays Tacky?
When paint stays tacky after being sprayed, it is often due to a product called non-staining primer. Primers are essential for ensuring that your paints stay wet and adhere well to the surface they are intended to cover. However, if the primer contains silicone or other types of solvents, it can cause the paint to become sticky.
To fix this problem, you should remove as much of the solvent as possible with a soap scrubbing action before applying new paint. You may also need to clean any hard surfaces that were in contact with the oily primer before painting so that future coats will adhere properly.
Can You Dry Spray Paint With a Hair Dryer?
It depends on the make and model of the hair dryer you are using. However, if you are unsure whether or not it’s safe to use a hair dryer in this manner, we recommend that you avoid doing so. Hairdryers can heat up quickly and cause potentially harmful temperatures inside the clothing or instrument bag that is containing your spray paint.
What Grit Sandpaper Should I Use to Take Off Clear Coat?
The grit of sandpaper that is needed will vary depending on the type of clear coat that needs to be removed. However, generally, grits between 400 and 600 are typically used for removing clear coat.
Do You Fix a Messed Up Clear Coat?
Some people think that it is necessary to fix a messed-up clear coat in order to restore the original appearance. This is not always the case and may actually result in further damage. In most cases, clear coats are designed to be oxidized and faded over time as part of their natural aging process. If you try to clean or repair a Clear Coat without first waiting for it to mature, you could inadvertently cause more harm than good.
Conclusion
The clear coat on your car is there for a reason. It makes your paint job look great, but it also protects the underlying layers of paint from weathering and fading. When the clear coat starts to become sticky, it can be a real pain. Thankfully, there are a few things you can do to fix a sticky clear coat and get your car looking its best again. In this article, we outlined the steps how to fix sticky clear coat.
You Can Check It Out To Fix Wind Noise From Car Door