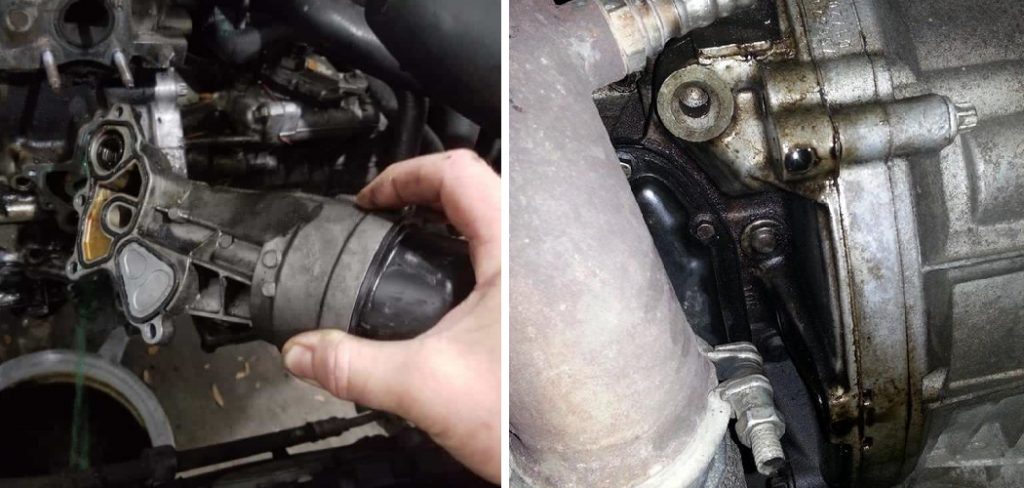
Oil filter housing leaks are a common issue that can occur in any vehicle. This type of leak can be caused by a variety of factors, such as worn gaskets, loose fittings, or damage to the housing itself. If left unaddressed, an oil filter housing leak can lead to serious engine damage and costly repairs.
The main advantage of knowing how to fix an oil filter housing leak is that it can save you time and money. Instead of taking your car to a mechanic and paying for expensive repairs, you can easily fix the issue yourself with just a few tools and some basic knowledge. You can find step-by-step instructions on how to fix oil filter housing leak in this blog article.
Tools You Will Need
- A new oil filter housing gasket
- A replacement oil filter
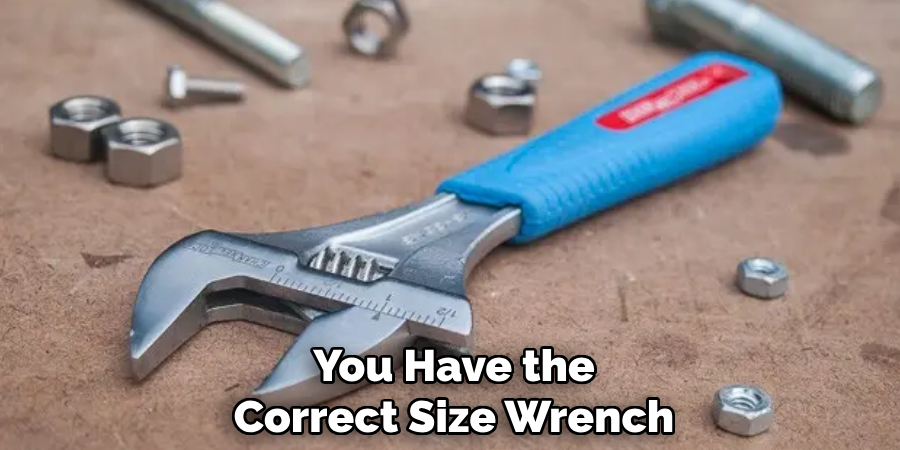
- An adjustable wrench
- A socket set
- Oil filter wrench
- Clean rags
- Chisel or flat head screwdriver
- Pliers (if necessary)
- WD-40 or other penetrating oil
- Teflon tape
Step by Step Processes for How to Fix Oil Filter Housing Leak
Step 1: Inspect the Filter Housing
The first step in fixing an oil filter housing leak is to visually inspect the filter housing for any visible signs of damage or leakage. Look for cracks, dents, or breaks in the housing that may be causing the leak.
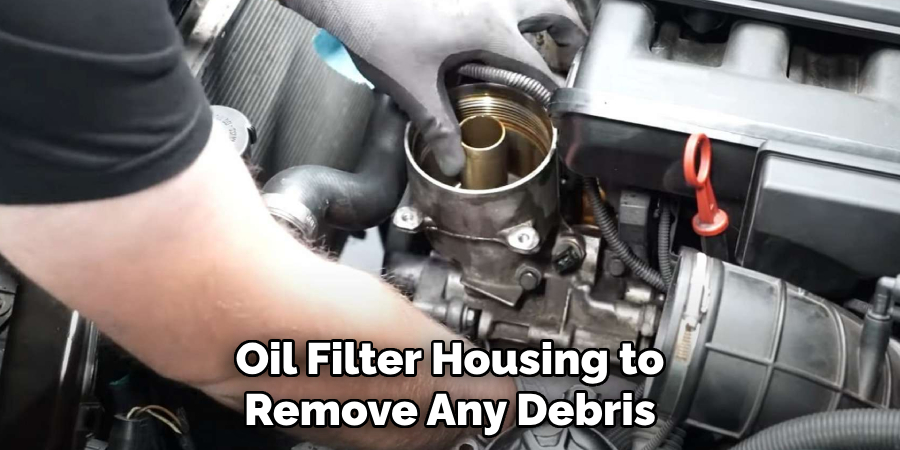
Step 2: Clean the Area
Before attempting to fix the leak, it’s important to clean the area around the oil filter housing to remove any debris, dirt, or oil buildup. This will ensure a better seal when fixing the leak. The gasket is a common culprit for oil filter housing leaks. Inspect the gasket for any tears, cuts, or damage that may be causing the leak. If the gasket is damaged, it will need to be replaced.
Step 3: Tighten the Bolts
If the oil filter housing is loose, this could also cause a leak. Use a wrench to tighten any bolts or screws that may be loose and causing the housing to shift and leak. O-rings are another common cause of leaks in oil filter housings. These small rubber rings can become cracked or damaged over time, causing the housing to leak. Replace any old or worn out o-rings to fix the leak.
Step 4: Add Sealant
If there are any cracks or holes in the oil filter housing, adding a sealant may provide a temporary fix for the leak. Be sure to use a high-quality sealant that is designed for use with oil. If the damage to the filter housing is extensive, it may need to be replaced entirely. This can be a more costly option but will provide a long-term solution for fixing the leak.
Step 5: Check Oil Levels
It’s important to check the oil levels after fixing an oil filter housing leak. If the levels are low, add more oil to ensure proper lubrication for your vehicle. Start the engine and let it run for a few minutes to see if the leak has been successfully fixed. If there is still a leak, you may need to repeat some of the previous steps or consider taking your vehicle to a professional mechanic.
Step 6: Monitor for Leaks
Even if the leak appears to be fixed, it’s important to monitor your oil levels and check for any further leaks in the days following the repair. This will ensure that the issue has been fully resolved. To prevent future oil filter housing leaks, it’s important to perform regular maintenance on your vehicle. This includes regularly checking and changing the oil, as well as inspecting the filter housing for any potential issues.
If you are unable to fix the leak on your own or if you notice a recurring issue, it’s best to seek professional help from a mechanic who can diagnose and repair the problem properly.
Safety Tips for How to Fix Oil Filter Housing Leak
- Wear gloves and safety glasses to protect your hands and eyes from any potential hazards.
- Make sure the engine is cool before attempting to fix a leak in the oil filter housing.
- Park your vehicle on a flat surface and engage the parking brake for added stability.
- Always refer to the owner’s manual or repair guide for specific instructions on how to fix an oil filter housing leak for your particular model and make of car.
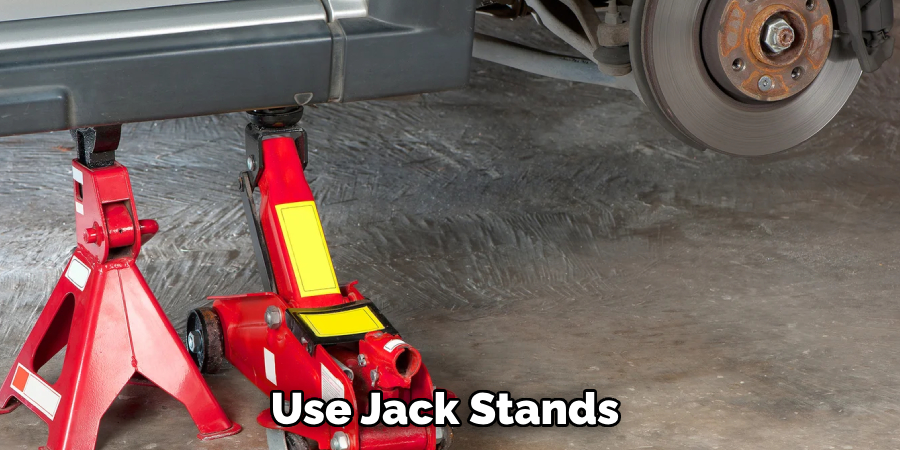
- Use jack stands or a hydraulic lift to elevate the vehicle, if necessary, to inspect and repair the oil filter housing.
- Be cautious when working with hot engine parts. Allow them to cool down before proceeding with repairs.
- Double check that all bolts and screws are tightly secured after fixing the leak.
By following these safety tips, you can ensure a smooth and successful process for fixing an oil filter housing leak. Remember to always prioritize your safety and the safety of those around you when working with any type of vehicle maintenance or repair.
What Causes an Oil Filter Housing Leak?
An oil filter housing leak can be caused by a variety of factors, including wear and tear over time, improper installation, or damage to the housing itself. It is important to identify the root cause of the leaking in order to properly fix it and prevent future leaks. One common cause of an oil filter housing leak is a worn or damaged gasket. The gasket serves as a seal between the oil filter housing and the engine block, and if it becomes worn or damaged, it can lead to leaking.
Another possible cause is a loose or improperly installed oil filter. If the filter is not secured tightly enough, it can result in leakage from the housing. In some cases, corrosion or damage to the oil filter housing itself may be the culprit of a leak. This can happen over time due to exposure to heat and other elements, or it could be caused by an impact or accident.
Are There Any Common Mistakes to Avoid While Fixing an Oil Filter Housing Leak?
The time it takes to fix an oil filter housing leak can vary depending on the severity of the leak and the skills of the person attempting to fix it. In general, it can take anywhere from 30 minutes to a few hours. However, if you are not experienced with car repairs, it may take longer as you familiarize yourself with the process.
One common mistake to avoid while fixing an oil filter housing leak is using improper tools or techniques. It’s important to make sure you have the correct size wrench and that you are applying enough pressure without overtightening.
Another mistake is not properly cleaning the area before installing a new gasket, which can lead to further leaks. Another factor that may impact how long it takes to fix an oil filter housing leak is the type of vehicle you have. Some cars may have easier access to the oil filter housing, making the process quicker and simpler.
Others may require more disassembly, which can add time to the repair. It’s also important to note that if you are not confident in your abilities or do not have the necessary tools, it may be best to take your car to a professional mechanic.
Can You Prevent an Oil Filter Housing Leak From Occurring in the Future?
While an oil filter housing leak may be a common issue for many car owners, the good news is that it can often be prevented from occurring in the future. By following a few simple steps, you can potentially save yourself time, money, and stress down the road. Firstly, make sure to regularly check your vehicle’s oil level and quality.
An inadequate amount of oil or poor quality oil can cause excessive pressure on the filter housing, leading to leaks. It’s also important to change your oil and filter at regular intervals as recommended by your vehicle’s manufacturer.
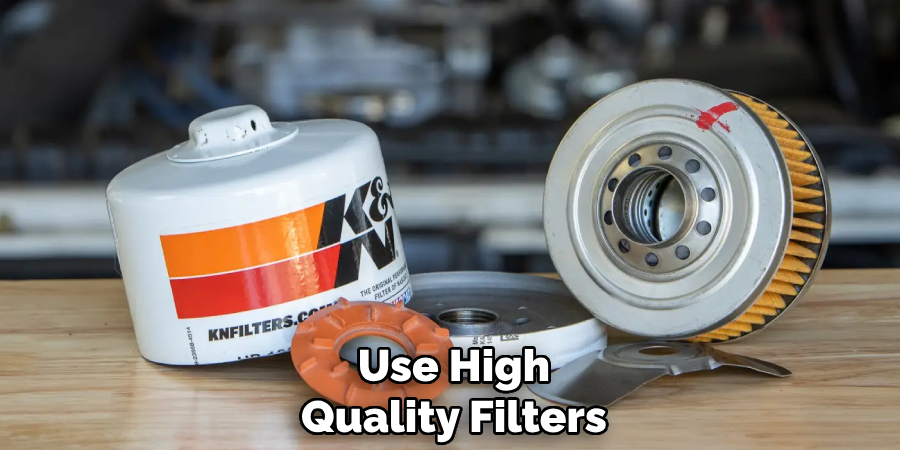
Another way to prevent an oil filter housing leak is to use high-quality filters that are specifically designed for your car’s make and model. These filters may cost a bit more, but they are often more durable and less prone to causing leaks. Additionally, be sure to properly install the filter and housing, as any mistakes during installation can result in leaks.
Maintaining your vehicle’s cooling system is also crucial in preventing an oil filter housing leak. A malfunctioning or contaminated cooling system can cause excessive heat and pressure that may lead to a leak. Regularly check and replace the coolant as needed, and keep an eye on any signs of leaking or overheating.
Conclusion
In conclusion, if you are experiencing an oil filter housing leak, there are several steps you can take to fix the issue. Firstly, identify the location and severity of the leak by inspecting your vehicle for any visible signs of leakage or using a dye kit.
Once you have located the leak, clean the surrounding area thoroughly before attempting any repairs. Then, depending on the type of leak and the condition of your vehicle, you can either replace the entire oil filter housing unit or repair it using a sealant or gasket.
It is important to follow the manufacturer’s instructions and use high-quality products for long-lasting results. I hope reading this post has helped you learn how to fix oil filter housing leak. Make sure the safety precautions are carried out in the order listed.