Mod Podge is a popular glue, sealer, and finish for all sorts of crafts. It’s easy to use but can be tricky to work with. One common problem people have is getting streaks when they apply them. Luckily, fixing those streaks is easy! If you’ve ever used Mod Podge, then you know that it can be streaky.
This post will show you how to fix Mod Podge streaks so your project looks beautiful from start to finish. Follow these simple tips and tricks, and you’ll be able to get a flawless finish every time! However, if you’re not careful, it can also leave behind unsightly streaks. Keep reading for instructions.
Summary: This guide provides a few options for fixing Mod Podge streaks. It outlines methods such as using less Mod Podge, painting in the direction of the wood grain, trying waterbase Mod Podge, gel medium or pouring Mod Podge, using a textured surface and low-maintenance tools, removing excess medium immediately, applying more pressure and using clear acrylic spray. Following these steps should help make sure the project looks pristine.
Five Reasons That Causes Streaky Mod Podge
1. Mod Podge Wasn’t Mixed Well Enough
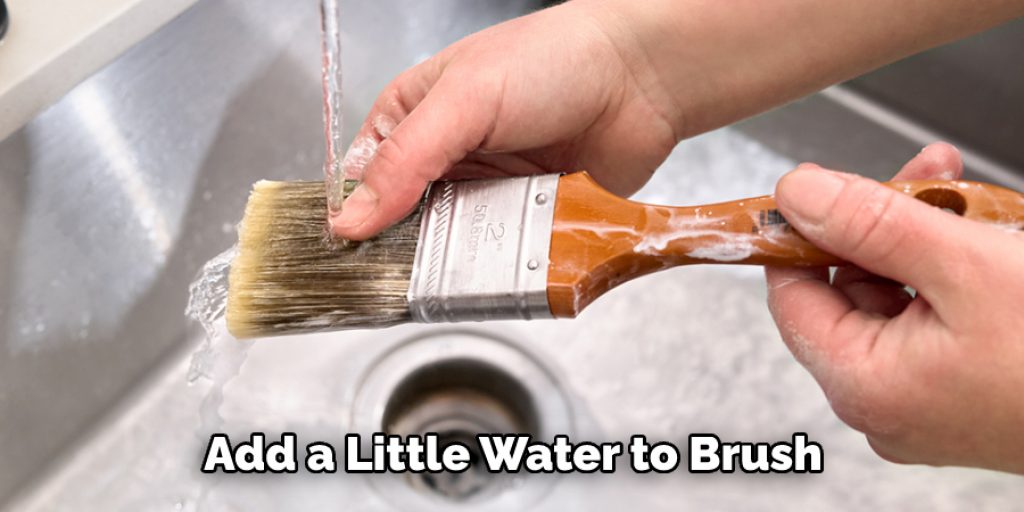
If you didn’t mix your Mod Podge before starting, you need to stir it again. If the mixture is still streaky, add a little water to your brush and try applying another layer of Mod Podge on top of the first.
2. Changed Temperatures
This is the most common reason for Mod Podge streaks. If you live in a hot or humid climate, this is more likely to happen. The Mod Podge formula should remain the same, so you can fix it by adding a little water to your brush to thin out the mixture.
3. The Surface Was too Hot
If you’re using Mod Podge, you shouldn’t let your project dry on a hot surface or in direct sunlight. If you do, the glue might dry too quickly and cause streaks. If your project is drying on a wire rack or other support, you should wait for the glue to dry before using it.
4. Mod Podge Wasn’t Mixed Well Enough
If you didn’t mix your Mod Podge before starting, go back and stir it again. If the mixture is still streaky, add a little water to your brush and try applying another layer of Mod Podge on top of the first.
5. Not Applying a Sealer Coat
Mod Podge is a sealer that you can use to glue things together. You have to put a clear coat over it to protect it. This clear coat should be applied in two thin coats so it can dry completely before you apply the next layer. If you don’t put enough clear coat on, the layers underneath will still show through.
18 Easy Ways on How to Fix Mod Podge Streaks
Step 1: Gather Necessary Tools and Materials
To address Mod Podge streaks, gather the required tools and materials to ensure a smooth workflow. Some essential items include a foam brush or a flat paintbrush with soft bristles, sandpaper (220-grit or higher), a clean, lint-free cloth, and additional Mod Podge.
Step 2: Choose the Right Brush
Selecting the appropriate brush is crucial for preventing and fixing streaks when using Mod Podge. A foam brush or a flat paintbrush with soft bristles is ideal, as they allow for even application and minimize the risk of visible streaks.
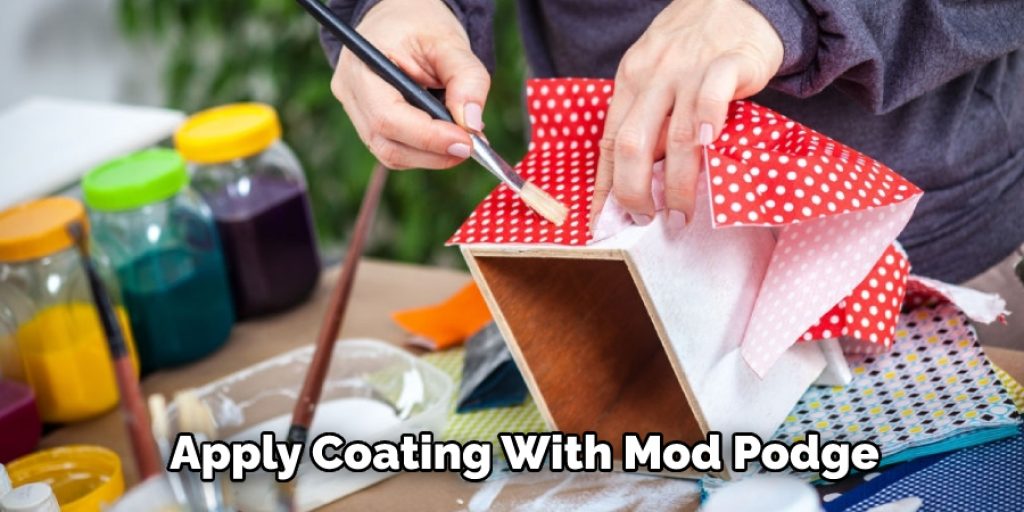
Step 3: Apply Thin, Even Coats
Applying thin, even coats of Mod Podge is key to avoiding streaks. To do this, dip the brush in Mod Podge, then gently tap off any excess product. Apply the Mod Podge to the surface in smooth, even strokes, working in one direction. Allow each coat to dry fully before applying the next one.
Step 4: Let the Mod Podge Dry
Allow the Mod Podge to dry completely between coats. The drying time may vary depending on the climate, humidity, and the thickness of the coats applied. Generally, it takes about 15-20 minutes for a thin coat of Mod Podge to dry, but it is advisable to wait at least an hour before applying another coat to ensure thorough drying.
Step 5: Inspect for Streaks
Once the Mod Podge has dried, inspect the surface for streaks or uneven areas. If streaks are present, proceed to the next steps to fix them.
Step 6: Lightly Sand the Surface
To fix Mod Podge streaks, lightly sand the surface using 220-grit or higher sandpaper. Gently rub the sandpaper over the streaked areas in a circular motion, applying minimal pressure. Be cautious not to sand too aggressively, as this may damage the surface or remove the Mod Podge entirely.
Step 7: Remove Sanding Dust
After sanding the streaked areas, use a clean, lint-free cloth to wipe away any sanding dust from the surface. It is important to remove all dust to ensure a smooth and even finish when applying additional Mod Podge.
Step 8: Apply an Additional Coat of Mod Podge
Using a foam brush or a soft-bristled flat paintbrush, apply a thin, even coat of Mod Podge over the entire surface, focusing on the areas that were sanded. This additional coat will help smooth out any remaining streaks and create a uniform finish.
Step 9: Repeat Sanding and Additional Coats (If Necessary)
If streaks persist after applying an additional coat of Mod Podge, repeat the sanding process and apply more coats as needed. It may take several attempts to completely eliminate all streaks and achieve a smooth, even finish.
Step 10: Seal the Surface (Optional)
Once the streaks have been addressed and the final coat of Mod Podge has dried, you may choose to seal the surface for added protection and durability. Use a clear acrylic sealer or a finishing spray compatible with Mod Podge, following the manufacturer’s instructions for application and drying times.
Step 11: Maintain Proper Care of Mod Podge Projects
To ensure the longevity and appearance of your Mod Podge projects, practice proper care and storage. Avoid exposing the items to extreme temperatures, direct sunlight, or moisture, as these factors can compromise the integrity of the Mod Podge and cause damage to the surface.
Step 12: Learn from Experience
As you gain experience working with Mod Podge, you will become more adept at applying it evenly and avoiding streaks. Experiment with different application techniques and brushes to find the approach that works best for you. Don’t be afraid to make mistakes, as they can provide valuable learning opportunities and help you refine your skills.
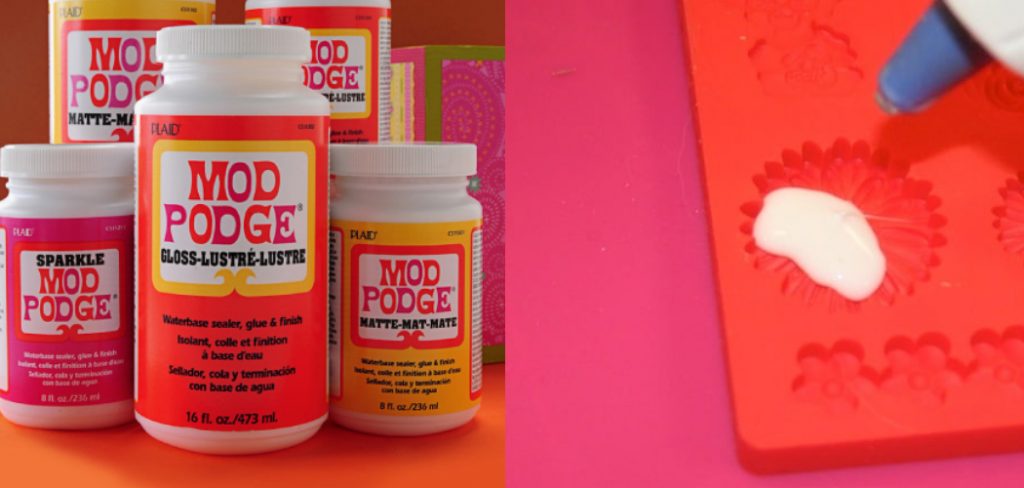
Step 13: Experiment with Mod Podge Formulas
There are various Mod Podge formulas available, each with specific characteristics and purposes. Experimenting with different formulas can help you determine which one works best for your particular project and reduces the likelihood of streaks. Some popular options include Mod Podge Matte, Mod Podge Gloss, and Mod Podge Satin.
Step 14: Work in a Well-lit Environment
Working in a well-lit environment can help you identify streaks and uneven areas more easily while applying Mod Podge. Ensure your workspace has adequate lighting, and if possible, work near a natural light source to better assess the quality of your application.
Step 15: Control Your Environment
The temperature and humidity of your workspace can impact the drying time and consistency of Mod Podge. Aim to work in a room with a stable temperature (ideally around 70°F or 21°C) and a humidity level below 50%. Controlling these factors can help prevent issues such as streaks, uneven drying, and a tacky finish.
Step 16: Keep Your Brushes Clean
Maintaining clean brushes is essential for achieving a streak-free finish when applying Mod Podge. Always clean your brushes thoroughly after each use, removing any residual Mod Podge to prevent dried bits from causing streaks during future applications.
Step 17: Develop a Steady Hand
Developing a steady hand when applying Mod Podge can contribute to a smoother, streak-free finish. Practice your brush strokes and learn to control the pressure you apply while working. Over time, this skill will improve and result in a more consistent application.
Step 18: Share Your Knowledge
As you gain experience and knowledge in working with Mod Podge, share your tips and techniques with others. Helping others learn how to avoid and fix Mod Podge streaks can contribute to the overall success and enjoyment of crafting within the community.
Some Helpful Tips and Suggestions
Here we have given some tips on how to fix mod podge streaks.
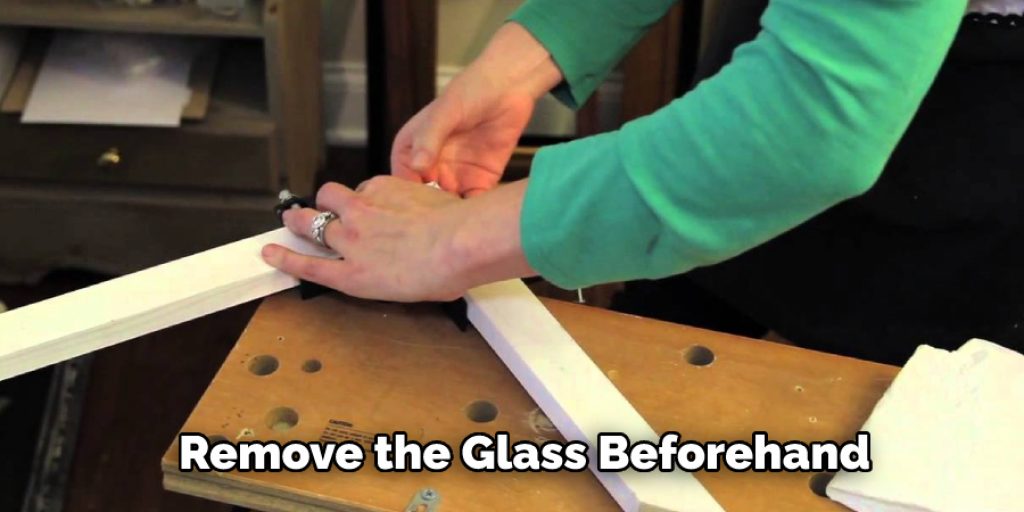
1. If you are using a picture frame with glass, remove the glass beforehand.
2. Apply Mod Podge only to the outside of the frame, not on the front or back of photographs or anything that will be inserted into it.
3. Ensure adequate ventilation wherever you choose to work with this product because it emits some pretty strong fumes.
4. Be sure to work in a well-ventilated area when using any aerosol spray for this reason as well, because the smell can get pretty potent.
5. If ever in doubt about whether or not you should use an epoxy sealant on something (e.g., if you are using an old frame or anything that might not be completely flat), do a small test on the back of the object with some Mod Podge first to see how it turns out. If it still looks good after applying and drying, you can always apply a sealant to the whole thing afterward.
6. If you choose not to use an epoxy sealant, make sure you occasionally clean the inside of your frame while working with it to get rid of any dust that gets in there while you’re working.
7. If possible, avoid placing objects in direct sunlight and on windowsills (especially colored ones since they give off more heat) for extended periods because the combination of these factors and the heat can cause damage to your artwork and photographs.
How Long Does it Take to Cure Mod Podge?
Mod Podge is a sealer and can be used as a topcoat. Unfortunately, it’s also a glue, so it has the potential to crack or peel over time if applied too thickly. If you do not use Mod Podge correctly, you might have a streaky mess. The best way to prevent this is to take the time to do it right.
The first thing you need to know about Mod Podge is how long it takes to cure. It isn’t recommended that the project be handled for at least 24 hours after coating with Mod Podge. But even after this time has passed, there are still several precautions you will want to take before trying to sand, drill, screw, or otherwise handle the project.
So, It will take a minimum of 48 hours for the Mod Podge to cure enough so that you can begin painting or decorating your project. While some people have reportedly used their projects after only 24 hours, Mod Podge recommends allowing a full curing time of at least 48 hours before using the project.
You Can Check It Out To Fix Color Banding in Hair
Frequently Asked Questions
Does Rubbing Alcohol Remove Mod Podge?
Unfortunately, rubbing alcohol does not remove Mod Podge. In fact, it can actually make the surface of the sticker worse because it dissolves the adhesive and causes spills. For best results, use a solvent that is specifically designed to remove stickers such as acetone or denatured alcohol.
Does Mod Podge Come Off With Water?
While Mod Podge does come off with water, it is not recommended to use a cleaner on top of it. This could damage the Mod Podge and cause peeling or even worse, possible staining. It is best to wait until the mod Podge has dried completely before cleaning it with any type of cleaner.
What Is The Best Brush To Use To Apply Mod Podge?
the best brush to use for applying Mod Podge will vary depending on the thickness of the coating you’re applying and the type of surface you’re working on. However, some general tips that might help include using a brush with bristles that are stiff but not stiff enough to cause bristles to break, as this will result in a smoother finish. Additionally, using a damp cloth or sponge between coats can help to eliminate any bubbles or bumps.
Why Is My Mod Podge Streaky?
When you are using Mod Podge, it is important to use a particularly wide brush to apply the sealer. If your brush is not wide enough, the sealer will seep through the paint and leave streaks on your project. To fix this problem, simply buy a wider-than-normal paintbrush or fat quarter ruler (available at most craft stores), and apply Mod Podge as usual.
Conclusion
Mod Podge is a great way to seal and protect your finished wood projects, but it can be tricky to get the streaks out. Always test your Mod Podge mixture on scrap paper before you start coating your project. If you notice any streaks, use a soft cloth to buff them out. Then, be patient and keep working on it until the entire project is covered and streak-free.
And that’s all there is to it! Now you know how to fix Mod Podge streaks no matter what the cause. If you follow these tips, you should be able to remove any unwanted streaks and have a beautiful finish on your project. Have you ever had problems with streaks when using Mod Podge? What tips do you have for avoiding them? Let us know in the comments!
You Can Check It Out To Fix Sticky Clear Coat