Have you ever had your A/C unit flood, causing water to pour out and ruining the coil? If so, don’t worry; you’re not alone. Coil flooding is a common problem with A/C units, but it can be easily fixed.
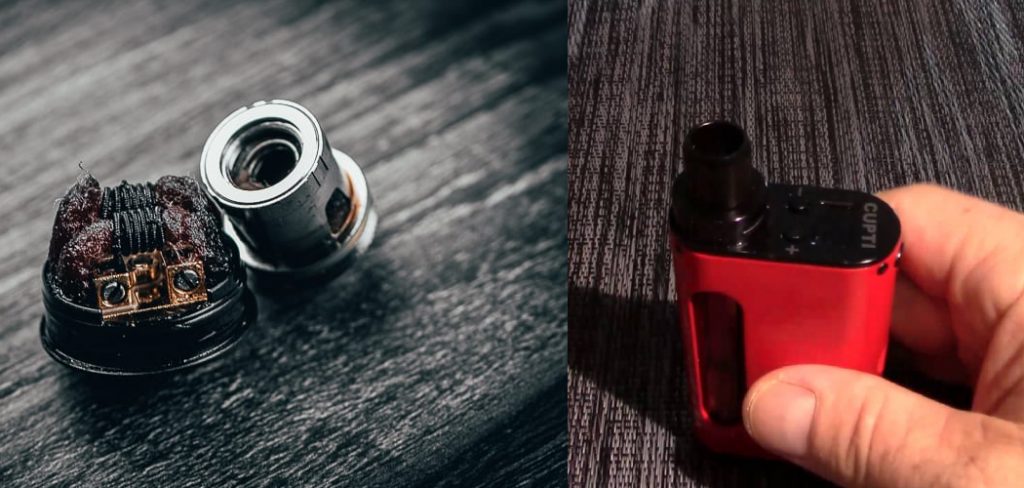
This blog post will show you how to fix flooded coil and get your A/C unit back up and running in no time. Keep reading for instructions on how to do it! Then, we’ll walk you through the steps of disassembling your atomizer, cleaning the coils and wicks, and reassembling everything. Just follow our instructions, and you’ll be vaping again in no time!
Summary: Fixing a flooded coil on an HVAC system requires switching off the power, removing debris and moisture with a vacuum, checking for electrical damage and replacing any damaged parts. Refill any refrigerant lost during draining, and consult an HVAC professional before turning on the power again.
10 Reasons That Causes Flooded Coil
1. Faulty Coil
The first reason is that the coil itself is faulty. If the coil is not working properly, it will not be able to heat the e-liquid, resulting in a flooded coil. There are a few ways to tell if your coil is faulty:
- The coil is burnt out: If you can see it is burnt out, then it is time to replace it.
- The coil is not heating up: Another way to tell if the coil is faulty is if it is not heating up. Again, this could be due to several reasons, but it will not work properly if the coil is not heating up.
- The coil is leaking: If it is leaking, this is another clear sign that it is time to replace it.
2. Wrong Wattage
If you use the wrong wattage for your coil, it can cause flooding. If the wattage is too high, the coil will get too hot and produce too much vapor. This can cause the e-liquid to get pushed up into the mouthpiece. If the wattage is too low, the coil will not get hot enough and will produce little vapor. This can also cause the e-liquid to get pushed up into the mouthpiece. The correct wattage for your coil can be found on the coil itself or in the instructions with your device.
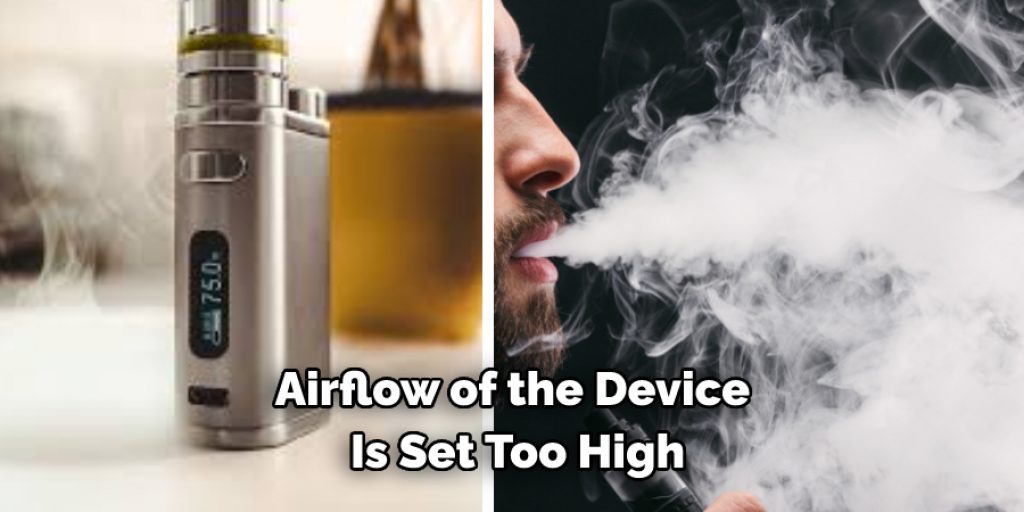
3. Airflow
If the airflow on your device is set too high, this can also cause flooding. The air going through the coil will cool it down and prevent it from getting hot enough to vaporize the e-liquid. This can cause the e-liquid to get pushed up into the mouthpiece. To fix this, you will need to adjust the airflow on your device.
4. Coil Overheating
If your coil is overheating, it can cause the wick to flood. If you’re using a sub-ohm tank or rebuildable atomizer, make sure that your coils are properly wicked. If you’re using a premade coil, replace it with a fresh one. If you’re using a rebuildable atomizer, check that your coils are spaced evenly and that there is enough cotton between the coils. You may also need to increase the airflow on your tank.
5. Improper Wicking
If your coil starts to flood, it might be because the cotton in your wick isn’t absorbing enough juice. To avoid this, make sure to saturate your cotton fully before vaping and check it regularly to ensure that it’s still wet. If it starts to dry out, re-saturate it immediately.
6. Damaged O-rings
If your device has a rebuildable atomizer, the o-rings can become damaged and cause flooding. You will need to replace the o-rings with fresh ones to fix this.
7. Leaking Tank
If your toilet is leaking, first check the gasket and O-ring to see if they’re properly seated and not damaged. If they look okay, try tightening the tank’s screws. If that doesn’t stop the leak, you may need to replace the gasket and O-ring.
8. Condensate Drain
It is important to have a properly functioning condensate drain to ensure that no water is left in the unit that could potentially damage the system. If your coil is leaking, the first thing you should check is the condensate drain to see if it is clogged or blocked. Many times, a simple cleaning of the drain will solve the problem. However, if the drain is completely blocked, you may need to call a professional to clear the blockage.
9. Over-priming
If you prime your coil too much, the e-liquid can overflow and flood the coil. This will cause your atomizer to gurgle, spit, and produce little or no vapor. The over-priming can also damage your atomizer and cause it to leak. Only prime your coil until it is wet and then wait a minute or two before taking a hit. If you don’t prime your coil enough, the e-liquid will not flow properly to the coil and produce little or no vapor. The coil may also burn out quickly if it isn’t well saturated.
10. Using Too Low Power Level
If you are using a low power level on your electronic cigarette, it might not be strong enough to vaporize the e-liquid in the coil. This could result in the e-liquid flooding the device. Make sure to use a power level that is strong enough to vaporize your e-liquid. If you are unsure, start at a lower power level and work your way up until you find the perfect power level for your coil.
You Can Check It Out to Fix Leaking Ac Unit
Step by Step Guide: How to Fix Flooded Coil
Step 1: Identify the Problem
A flooded coil, often referred to as a flooded evaporator, occurs when an excess amount of refrigerant or coolant collects in the evaporator coil. This issue can lead to inefficient cooling, higher energy consumption, and potential damage to the air conditioning or refrigeration system. Some common symptoms of a flooded coil include reduced cooling capacity, frost or ice buildup on the evaporator coil, and increased energy bills. Start by examining your system for these signs to determine if you have a flooded coil.
Step 2: Turn Off the System
Before attempting to fix a flooded coil, ensure the safety of the repair process by turning off the air conditioning or refrigeration system completely. Switch off the power supply at the main breaker or disconnect panel to eliminate the risk of electrocution or damage to the system during the repair process.
Step 3: Access the Evaporator Coil
To fix the flooded coil, you’ll need to access the evaporator coil within the indoor unit of your air conditioning or refrigeration system. Remove the panels or covers as required, following the manufacturer’s instructions for your specific system. Take care not to damage any sensitive components or wiring during this process.
Step 4: Inspect the Coil and Drain Pan
Visually inspect the evaporator coil for signs of flooding, such as excess liquid refrigerant or ice buildup. Also, check the drain pan and drain line for any blockages or debris, which can cause water to back up and contribute to coil flooding. If you discover a blockage, carefully remove it to allow proper drainage.
Step 5: Defrost the Coil
If the flooded coil has caused ice or frost to build up on the evaporator, you’ll need to defrost the coil before proceeding. You can use a hairdryer on a low heat setting or a portable heater to gently melt the ice, taking care not to damage the coil or surrounding components. Alternatively, you can allow the coil to defrost naturally by leaving the system turned off for an extended period, typically 24 hours.
Step 6: Check the Refrigerant Charge
An overcharged refrigeration system can cause the evaporator coil to flood, as excess refrigerant accumulates within the coil. To resolve this issue, use a refrigerant manifold gauge set to check the refrigerant charge in your system. If the refrigerant level is too high, you’ll need to adjust it according to the manufacturer’s specifications. This process should only be performed by a qualified HVAC technician, as handling refrigerants requires specialized training and tools.
Step 7: Inspect and Clean the Air Filter
A dirty or clogged air filter can restrict airflow to the evaporator coil, causing the coil to become too cold and flood with refrigerant. Inspect the air filter for dust, dirt, or debris, and clean or replace it as necessary. Regularly maintaining the air filter can help prevent future coil flooding issues.
Step 8: Check the Expansion Valve
The expansion valve controls the flow of refrigerant into the evaporator coil. A malfunctioning expansion valve can cause an excess amount of refrigerant to enter the coil, leading to flooding. Inspect the expansion valve for signs of wear, damage, or improper operation. If the valve appears to be malfunctioning, you’ll need to replace it with a new one compatible with your system.
Step 9: Examine the Thermostat
A faulty thermostat can also contribute to a flooded coil by causing the system to run continuously or at improper temperatures. Check the thermostat’s settings and ensure it’s functioning correctly. If the thermostat appears to be malfunctioning, you may need to replace it or consult with a professional HVAC technician.
Step 10: Reassemble the System
Once you have addressed the flooded coil and any contributing factors, it’s time to reassemble the air conditioning or refrigeration system. Carefully replace the panels or covers you removed earlier, ensuring that all components are securely in place and that no wires or connections have been disturbed.
Step 11: Restore Power and Test the System
After reassembling the system, restore power by switching on the main breaker or reconnecting the power supply. Turn on the air conditioning or refrigeration system and monitor its performance closely. Check for proper cooling and airflow, and ensure that the evaporator coil remains free of excess refrigerant, ice, or frost. If the system appears to be functioning correctly, continue to monitor it over the next several days to confirm that the flooded coil issue has been resolved.
Step 12: Schedule Regular Maintenance
To prevent future instances of flooded coils and ensure the efficient operation of your air conditioning or refrigeration system, schedule regular maintenance with a qualified HVAC technician. Regular maintenance should include tasks such as checking refrigerant levels, inspecting and cleaning air filters, and examining the overall system for any signs of wear or damage. By staying proactive with maintenance, you can extend the life of your system and avoid costly repairs.
Step 13: Seek Professional Assistance if Needed
If you continue to experience issues with a flooded coil or are unsure how to address the problem, consider seeking the assistance of a professional HVAC technician. A qualified technician can diagnose and repair the issue, ensuring that your air conditioning or refrigeration system operates efficiently and safely. Remember that working with refrigerants and electrical components can be dangerous, and it’s always best to consult a professional if you’re uncertain about any aspect of the repair process.
By following these steps and addressing any underlying issues contributing to the flooded coil, you can effectively fix the problem and maintain the efficient operation of your air conditioning or refrigeration system. Regular maintenance and timely repairs can help prevent future flooding incidents, ensuring the longevity and optimal performance of your system.
You Can Check It Out to Fix a Stiiizy Battery
Some Tips to Prevent Flooded Coil
Here we have given tips on how to fix flooded coil and prevent them in the future.
- Make sure the tank is tightly sealed.
- If you live in a high-humidity area, keep a dehumidifier near your tank.
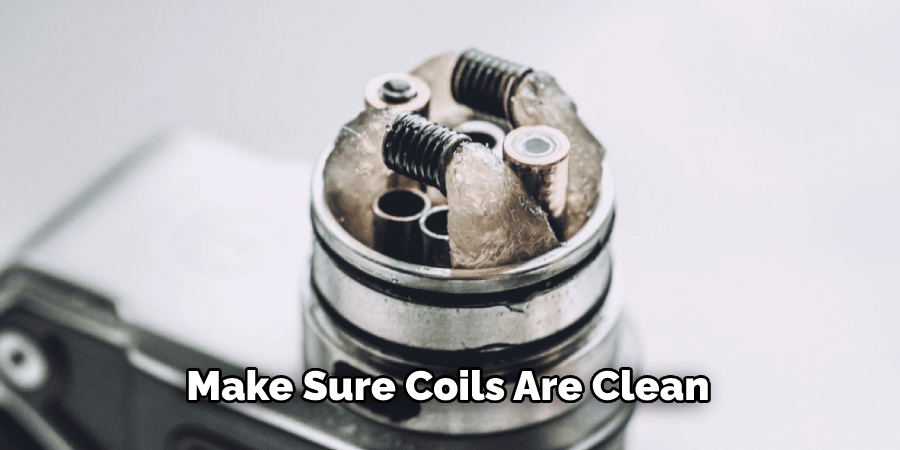
- Make sure the coils are clean and free of debris.

- If you have a pet, keep their food and water dishes away from the tank.
- If your tank is in direct sunlight, try to move it to a shaded area.
- Keep an eye on your water levels and refill when necessary.
- If possible, use a higher-VG e-liquid. This will reduce the chances of your coil flooding.
Frequently Asked Questions
What Does a Flooded Coil Sound Like?
A flooded coil is a type of electronic air conditioner that operates using a refrigerant to cool the room. When water flood into the system, it causes a rapid drop in temperature that can knock out electronics and cause other damage.
Why Does My Vape Coil Keep Flooding?
It’s possible that your vape coil is flooded, which is when the atomizer gets too wet and can’t hold enough vapor. This can lead to a decrease in performance and eventually, a faulty coil. There are a few things you can do to try and prevent your coil from flooding:
- Make sure to clean your atomizer regularly – This includes both the wick and the coil. Washing them with soap and water will help to remove any residues or oils that could be causing flooding.
- Avoid using high- VG e-juices – These juices are typically thicker than nicotine-free juices, which can make it harder for the coil to vaporize. Instead, try using a higher percentage of nicotine or PG e-juices for better performance.
- Change your coil if it begins to flood – If the flooding continues even after following these tips, it may be time to replace your coil. Coils typically last about 50 sessions before they need to be replaced, so it’s worth checking in periodically to see if there’s been an issue.
Why is My Vape Bubbling When I Hit It?
One possibility is that there may be too much juice in the tank, and as a result, it is being forced into the air by the vaporization process. If this is the case, try to empty out the tanks more frequently or switch to an atomizer with a smaller chamber size.
Another potential problem can be with your coil. If it’s not saturated properly with liquid nicotine, gas will begin to form when power is applied because of moisture absorption from melted e-liquid (nicotine). To prevent this from happening, make sure that you install new coils regularly and keep them soaked in oil or propylene glycol prior to use.
Finally, if your device isn’t tightly sealed after each use (particularly if using subohm coils), excess heat can cause pressure builds up within the device that eventually causes leakage and bubbling through Evaporation & Condensation cycles aka “smoke signaling.
Can You Oversaturate a Vape Coil?
Some people believe that you can over-saturate a vape coil and cause it to malfunction or even catch on fire. However, the truth is that there is no definitive answer – it’s up to the individual vaper to decide how much vaping they are willing to risk.
Some people believe that you can over saturate a vape coil by using too high of a voltage or wattage. Doing so can heat up the coil too much and cause it to malfunction. Additionally, over-saturating a coil may also cause it to catch on fire.
Ultimately, it’s up to the individual vaper to decide how much vaping they are willing to risk. If you are unsure about how much voltage or wattage is safe for you, then it might be best to stick with lower voltages and watts. This way, you will reduce your risk of experiencing any negative consequences from vaping too heavily.
Conclusion
If you have a flooded coil, there are a few things you can do to try and fix it before taking it into the shop. We’ve outlined some steps you can take to try and clear the flooded coil yourself. This will help keep your unit running smoothly and efficiently, but it can also prevent further damage that could end up costing you a lot of money.
However, if these solutions don’t work or the flooding is extensive, it’s best to bring your unit in for repair. We hope our tips on how to fix flooded coil have been helpful. Have any questions? Feel free to contact us for more information or assistance. Thanks for reading!
You Can Check It Out To Fix Broken Dental Post