You’re not alone if you’ve ever been frustrated by fertilizer streaks on your driveway or sidewalk. Fertilizer is essential to promoting healthy plant growth. However, fertilizer can cause unsightly streaks on your plants and lawn if not applied correctly. Fortunately, there are ways to fix the problem.
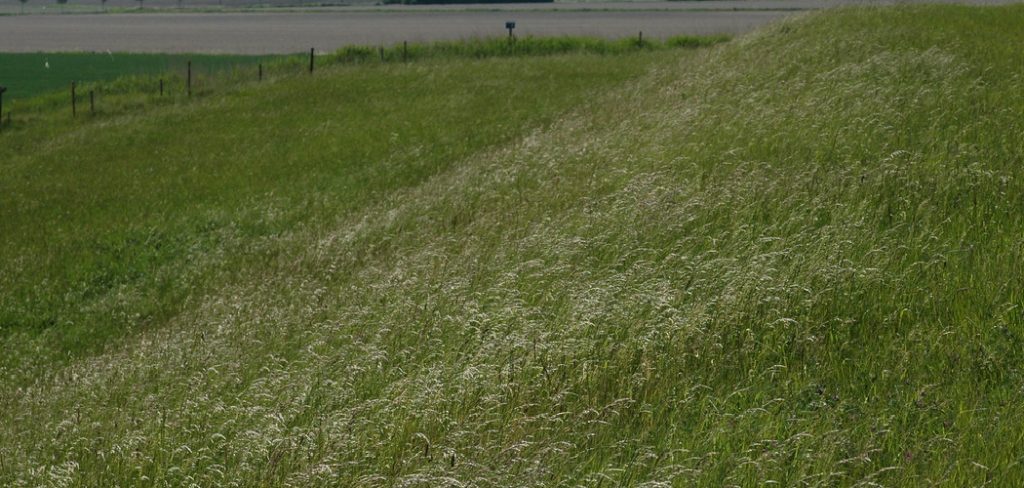
This blog post will discuss some of the most common causes of fertilizer streaks and offer tips for fixing them. We’ll also provide a few tips for preventing fertilizer streaks in the future. So keep reading this blog post till the end to know how to fix fertilizer streaks.
Summary: Most fertilizer streaks can be avoided by following some simple steps. Start with watering the lawn and apply more fertilizer if needed. Wash away some of the granules, reduce watering time and use less fertilizer to avoid streaking. Adjust your spreader settings, clean and dry fertilizer when finished, reduce fertilizer rates or switch to an organic or slow-release fertilizer to further prevent streaks.
10 Reasons That Causes Fertilizer Streaks
1. You did not water the lawn after fertilizing.
2. The lawn was too wet when you applied the fertilizer.
3. You used a poor quality of fertilizer that is mostly filler (not much nitrogen).
4. Your lawn has excessive thatch, which prevents the sprinkler line from reaching the soil where the grassroots can absorb the water and fertilizer.
5. You put too much fertilizer down on your lawn, which caused the excess to flow into the lawn’s waterways and out of reach of plant roots.
6. You had a problem with your spreader that allowed it to overfill or create clumps, causing the excess fertilizer to be applied in certain areas of your lawn.
7. You used a high phosphorus fertilizer, which does not promote root growth for the grass.
8. You used a granular fertilizer that was not dissolved before applying to your lawn.
9. The fertilizer clumps you used were overly wet, resulting in poor distribution through the sprinkler system.
10. The type of grass in your lawn cannot absorb large amounts of nitrogen quickly, which allows it to burn easily when over-fertilized with too much nitrogen in a short time frame.

12 Effective Steps on How to Fix Fertilizer Streaks
Step 1: Identify the Problem
Fertilizer streaks are visible lines or patches of either excessive plant growth or dead grass caused by uneven application of fertilizers. Begin by carefully examining your lawn or garden to identify the presence of fertilizer streaks. Look for areas with darker, taller grass or yellow, burnt patches, which are indicative of over-fertilization or under-fertilization.
Step 2: Assess the Extent of the Damage
After identifying the problem areas, evaluate the severity of the damage. This assessment will help you determine the appropriate course of action to fix the problem. If the damage is mild and localized to small patches, you can address it by manually correcting the affected areas. However, if the damage is widespread, you may need to consider more extensive measures like reseeding or sodding.
Step 3: Water the Affected Areas
If you notice fertilizer streaks shortly after application, immediately water the affected areas to dilute the fertilizer concentration. This will help prevent further damage and promote the absorption of excess nutrients by the surrounding soil. Water the area deeply, using a hose or sprinkler, to ensure the water penetrates deep into the soil and reaches the root zone of the grass.
Step 4: Remove Dead Grass
If the fertilizer streaks have resulted in dead or severely burnt grass, it’s essential to remove the dead plant material. Use a rake to gently remove the dead grass, taking care not to damage the surrounding healthy grass. This will allow sunlight and air to reach the soil, promoting new grass growth and helping the lawn recover.
Step 5: Aerate the Soil
Aerating the soil can help improve the absorption of nutrients, water, and oxygen by the grass roots, facilitating recovery from fertilizer streaks. Use a lawn aerator or rent one from a local garden center. The aerator will create small holes in the soil, breaking up compacted areas and allowing nutrients to penetrate deeper. Focus on the affected areas but also aerate the entire lawn to promote overall health and prevent future problems.
Step 6: Reseed or Sod Damaged Areas
If the damage caused by fertilizer streaks is severe, you may need to reseed or lay new sod in the affected areas. When reseeding, choose a grass seed that is appropriate for your region and matches the existing grass type. Spread the seed evenly over the affected areas, then cover it with a thin layer of soil or compost to promote germination. Water the area regularly, keeping the soil consistently moist until the new grass establishes.
If you choose to use sod, select pieces that match your existing grass and cut them to fit the damaged areas. Prepare the soil by removing any dead grass and loosening the top layer of soil. Lay the sod pieces snugly together, ensuring there are no gaps between them. Water the sod thoroughly after installation and continue to water daily for the first couple of weeks to ensure proper root establishment.
Step 7: Apply a Balanced Fertilizer
After the lawn has recovered from the fertilizer streaks, apply a balanced fertilizer to promote healthy growth. Make sure to choose a slow-release fertilizer with an even ratio of nitrogen, phosphorus, and potassium (such as a 10-10-10 formula). This will provide the lawn with the necessary nutrients without causing additional damage.
Step 8: Use Proper Fertilizer Application Techniques
To prevent future fertilizer streaks, ensure you use the correct application techniques. Use a broadcast or drop spreader to evenly distribute the fertilizer across your lawn. Calibrate your spreader according to the manufacturer’s instructions and the recommended application rate of the fertilizer. Avoid applying fertilizer by hand, as this can lead to uneven distribution and increase the risk of fertilizer streaks.
Step 9: Water After Fertilizing
Once you have applied the fertilizer, water your lawn thoroughly to help the nutrients penetrate the soil and reach the grass roots. Watering also helps to prevent fertilizer from being washed away by rain or wind, reducing the chances of streaking. Make sure to provide enough water to moisten the soil to a depth of 6-8 inches. This will encourage deep root growth and a healthier lawn.
Step 10: Establish a Regular Lawn Care Routine
To maintain a healthy lawn and prevent future fertilizer streaks, establish a regular lawn care routine. This should include mowing, watering, fertilizing, and aerating. Mow your lawn at the recommended height for your grass type and never remove more than one-third of the grass blade at a time. Water your lawn deeply and infrequently, ensuring the soil remains consistently moist but not waterlogged. Apply fertilizer according to the product’s recommendations, and aerate your lawn annually to promote healthy root growth.
Step 11: Monitor Lawn Health
Keep an eye on your lawn’s health, especially after fertilizing, to catch any signs of fertilizer streaks early. If you notice any irregularities in grass color or growth, take prompt action to address the issue. By staying vigilant and responsive to your lawn’s needs, you can prevent fertilizer streaks and maintain a healthy, lush lawn.
Step 12: Seek Professional Advice
If you continue to experience problems with fertilizer streaks or have concerns about your lawn’s health, consider consulting with a lawn care professional. They can assess your lawn, diagnose any issues, and provide guidance on the best course of action. Lawn care professionals can also provide services such as fertilization, aeration, and overseeding to help you maintain a healthy lawn without the risk of fertilizer streaks.
By following these steps and adopting proper lawn care practices, you can effectively fix and prevent fertilizer streaks in your lawn, ensuring a healthy and beautiful outdoor space.
Some Helpful Tips to Prevent Fertilizer Streaks
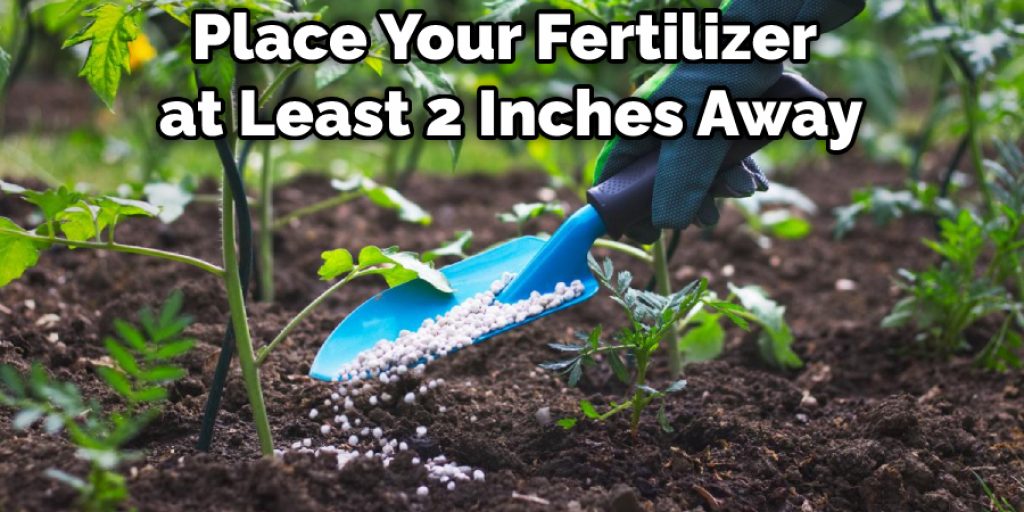
1. Make sure always to place your fertilizer at least 2 inches away from the tree’s trunk and at least 1 inch away from the plant. This will help prevent fertilizer burning on the bark and foliage.
2. Always sprinkle lightly, don’t pour the whole bag all at once! Forever 10 sqft, use a handful (1/4 cup) of fertilizer.
3. Do not fertilize during the day’s heat; this will increase your chances of burning your trees and plants. Fertilizing in the morning is best, especially if you’re using fast-release or water-soluble fertilizers. Don’t forget to water thoroughly after fertilizing!
4. Some fertilizers have a time-release coating that can dissolve when wet, so watering after the application is extra important if you’ve used these types.
5. The best time to fertilize is late spring and early fall. The trees and plants are still actively growing, but the warm temperatures of summer haven’t set in yet.
6. Fertilizer manufacturers will provide information on how much nitrogen should be applied for each type of fertilizer that they sell. This information is usually printed on the side of the package.
7. Be sure to use a combination of slow-release and water-soluble fertilizers. Slow-release types will last longer, but the plants still need a quick shot of nitrogen from time to time. Water-soluble fertilizers can be used for this purpose.
How Do You Fix Over Fertilized Grass
When fertilizing your lawn, you always want to be as accurate as possible. The problem is that many people end up over-fertilizing their grass and with fertilizer streaks. When this happens, your lawn becomes abnormally yellow or green in patches. If you want to learn how to fix fertilizer streaks, keep reading the following article. We will give you detailed instructions on how to get rid of these unsightly streaks.
Some people are under the false impression that when they fertilize their lawn during the early months of spring and summer, they will get a better and greener-looking lawn. Though lawns do indeed need to be fertilized on occasion, you don’t want to overdo it. Your grass can become damaged if you fertilize your lawn too much, which results in the unsightly green patches you see after applying too much fertilizer.
What Are the Signs of Over Fertilizing
If you find that your lawn is getting lighter and lighter after every fertilizer application, then there’s a good chance you’re over-fertilizing. Some signs of over-fertilizing are brown patches in the grass.
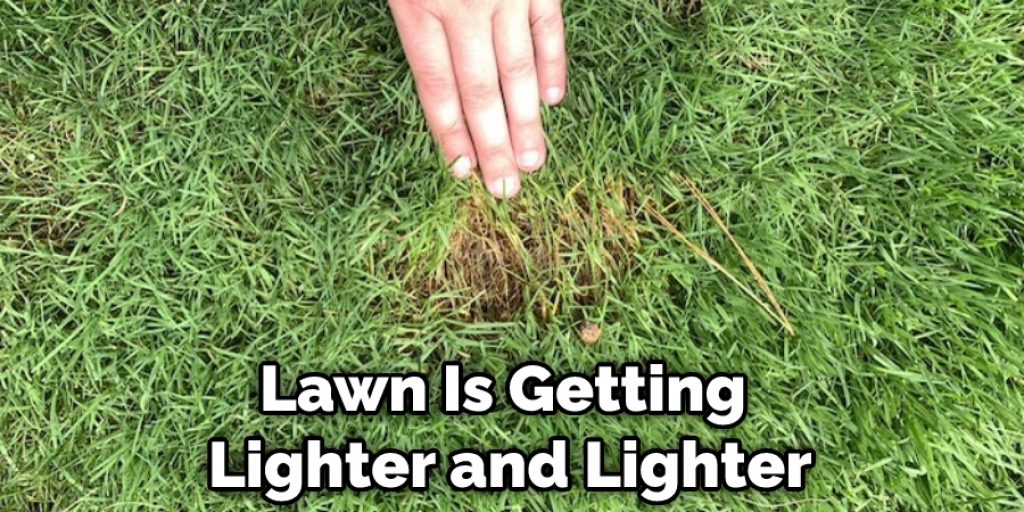
If these brown patches are shaped like circles or ovals, then it’s likely that you are not watering enough between applications of fertilizer. However, if the brown patches are shaped like streaks or spider webs, it’s a sign that you’re over-fertilizing. If this is the case, then you should stop fertilizing your lawn and allow it to recover.
Will Over Fertilized Grass Grow Back
Many times homeowners and landscapers alike will find that newly sodded or seeded grass will show signs of green and yellow or brown streaks. This can be most frustrating because normally all you want is for the new seed to grow, not die. But, if this has happened, don’t fret! There are things you can do to help your lawn recover.
There are many reasons why your new grass, sod, or seed is dying and streaking, so after you read this, it would be wise to research what could have caused the problem. One of the usual suspects is over-fertilizing. While you think this would make a healthy lawn, too much of a good thing will cause damage to your grassroots and growth.
You Can Check It Out to: Fix Soft Resin
Frequently Asked Questions
Should You Water After Fertilizing?
Some people believe that watering can help to wash away the fertilizer, while others say that doing so may damage the plants. Ultimately, you need to experiment a bit and see what works best for your specific situation. However, generally speaking, watering should be done as needed in order to keep the soil moist but not soggy.
What Happens When You Over Fertilize?
Over-fertilizing your plants can have disastrous consequences for their health. When you over-fertilize, you’re supplying them with too much of the wrong type of nutrients and it can lead to nutrient deficiencies and disease. These problems are most pronounced in acidic soils where excess nitrogen results in elevated levels of ammonium. Ammonium is a primary component of nitrogen fertilizer, which is harmful to plants because it causes them to become tender, chlorotic (greenish), and stressed out.
This toxic effect is compounded by the fact that high concentrations of nitrogen damage plant DNA transcription factors, leading to faulty gene expression and plant diseases such as cancer or drought resistance deficiency symptoms.
Can Plants Recover From Fertilizer Burn?
Yes, plants can recover from fertilizer burn, but it will take some time and effort. The first step is to remove all the fertilizer that was burned from the plant. This can be done by raking it up and throwing it away, or by pouring a solution of muriatic acid (available at most hardware stores) onto the burned fertilizer and stirring until all of it has been absorbed. Once the fertilizer has been removed, you can begin to re-apply the nutrients necessary for the plant’s growth.
It may take a few weeks or even months for the plant to rebound to its normal growth rate, but with a little dedication on your part, it should be able to bounce back quickly. Be sure to monitor the plant closely during this time – if there are any signs of deterioration, such as wilting or yellowing leaves, contact a professional immediately.
Will Fertilizer Burn Go Away?
most experts believe that fertilizer will burn away over time. This happens as a result of the application of fertilizers to soil causing it to heat up and release oxygen and nitrogen in an effort to break down the plant matter. While this process is typically desirable, overapplication of fertilizers can cause unwanted vegetation fires or even hold back crop growth. As long as you are conscientious about your use of fertilizer, overall burning should not be a major concern.
Conclusion
To fix fertilizer streaks, it’s important to find out what caused them in the first place. The most common causes of a fertilization streak are over-fertilizing and using too much water, which dilutes the nutrients on your lawn. We’ll be happy to help you diagnose why this is happening so we can provide you with more specific solutions going forward.
Whether you’re looking for quick and easy fixes or more permanent solutions, we have some great tips on how to get rid of fertilizer stains on your lawn. We hope this blog post on how to fix fertilizer streaks has been helpful. If you have any questions or want to know more, then feel free to comment below!
You Can Check It Out to: Fix Lumpy Cheesecake Batter