Are you dealing with condensation buildup in your furnace? This is an all-too-common issue that can be a real headache. But don’t worry – this blog post will help you easily solve the problem!
Condensation leaks in furnaces can be extremely frustrating and, left unchecked, can cause potential damage to your walls or other surrounding areas. If you live in a humid climate or have an old furnace, there is a high chance you will experience condensation leaks at some point. Don’t worry – with the right know-how and preventative steps, they are relatively easy to fix.
In this blog post, we’ll discuss how to fix condensation leak in furnace, what causes it, and how best to repair it! Whether you’re a DIY enthusiast or looking for professional assistance, we have all the information you need to get your furnace back up and running like new. Let’s get started!
What Can Damage a Furnace?
There are a few possible causes of condensation leaks in the furnace. High humidity levels, old furnaces, or improper use of the unit can cause it. If you live in an area with high humidity, your furnace is exposed to more moisture than normal, and condensation buildup can occur as a result.
Additionally, if your furnace is old and hasn’t been serviced in a while, it may be more prone to condensation leaks. This is because the components of older furnaces are less efficient than newer models, meaning they don’t effectively dehumidify your home.
Lastly, improper use of a furnace can cause condensation buildup as well. If your thermostat is not set at the correct temperature or you keep changing the settings too often, this can lead to condensation leaks inside your furnace.
What Will You Need?
Before you start the process, here is a list of items you will need:
- A new furnace filter
- Replacement gaskets or seals
- Pliers
- Screwdriver
- A vacuum cleaner with a hose attachment
Once you have all the necessary items, you can begin the process of fixing your condensation leak in the furnace.
10 Easy Steps on How to Fix Condensation Leak in Furnace
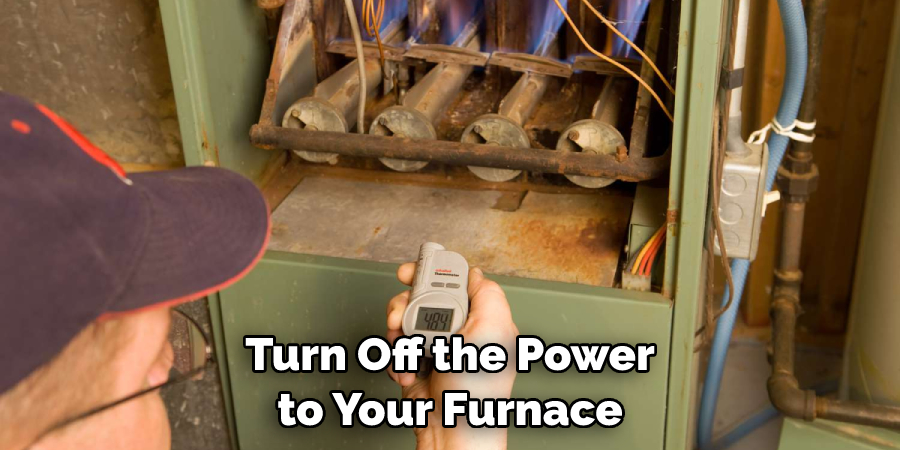
Step 1. Turn Off the Power:
The first step is to turn off the power to your furnace. This will protect you from any accidental electrocution and ensure your safety during the repair process. Try to locate the power switch and make sure it’s in the “Off” position.
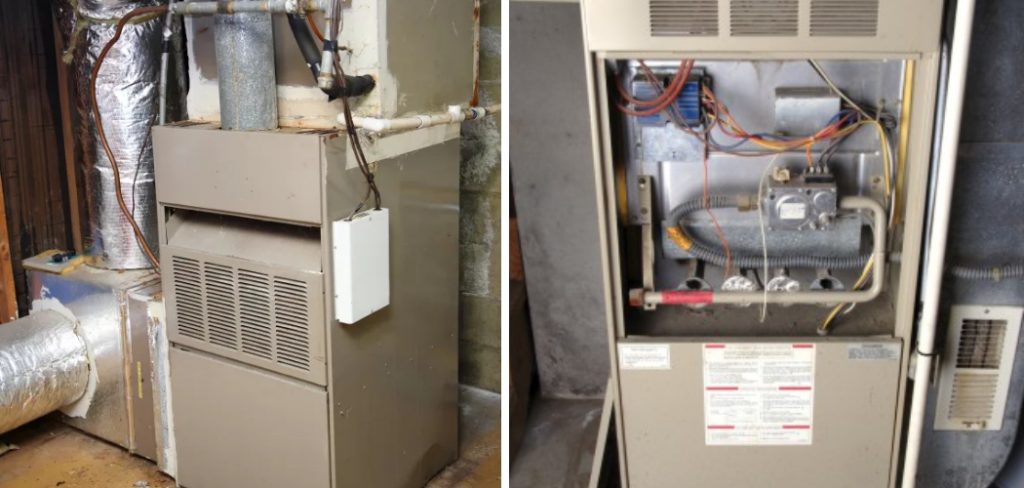
Step 2. Remove the Access Panel:
Once the power is turned off, carefully remove the access panel from the side of your furnace. This will allow you to get a good look at all the components within it. Be careful when removing the panel, as wires and other parts must be handled carefully.
Step 3. Inspect for Leaks:
Look around inside your furnace and inspect for any signs of leaks or water damage. If there are any, quickly identify where they are coming from so you can move on to repairing them. Check your furnace’s seals, gaskets, and other parts to see if they need to be replaced.
Step 4. Clean Out Any Debris:
Use a vacuum cleaner with an attachment hose to clean out any debris or dirt that may be blocking the airflow. This will help reduce condensation and improve the overall efficiency of your furnace. Additionally, it will help reduce the risk of any further water damage.
Step 5. Replace Any Damaged Parts:
If you find any worn out or damaged parts, make sure to replace them immediately. You can purchase new gaskets, seals, and filters from most hardware stores as well as online retailers. Make sure to read the manufacturer’s instructions for installation before performing these repairs yourself.
Step 6. Inspect Your Ductwork:
Inspect your ductwork for any signs of damage or leaks as well – these should be addressed with a professional if possible. If not, consider sealing off any cracks or holes in order to prevent potential leaking in the future. Don’t forget to check the insulation, too – it can be a cause of condensation buildup.
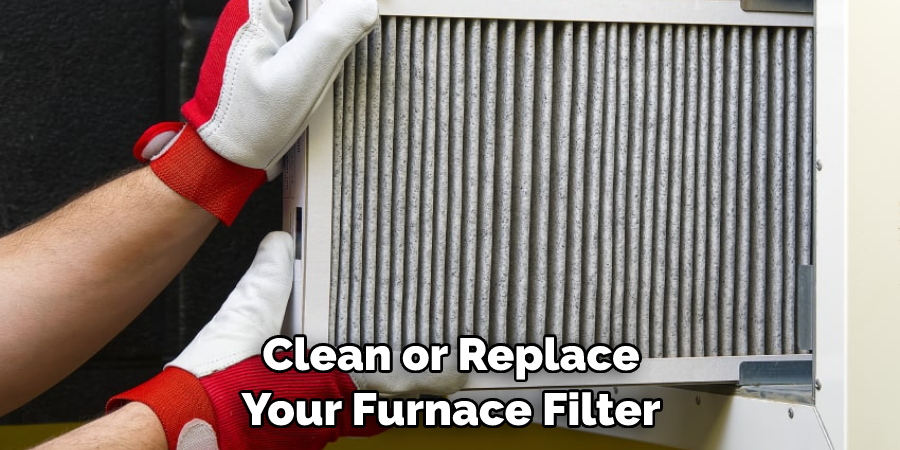
Step 7. Clean and Replace Your Filter:
Clean or replace your furnace filter to ensure that it eliminates dust and debris from the system. This will help reduce the amount of condensation buildup and improve the overall efficiency of your unit. You can use a vacuum cleaner with an attachment hose to blow out the dust and dirt, or replace it with a new filter.
Step 8. Check the Thermostat Settings:
The next step is to check your thermostat settings – make sure they are set correctly for optimal performance. If you find yourself changing them too often, consider investing in a programmable one so you can maintain a consistent temperature without having to adjust it all the time manually.
Step 9. Test Your Furnace:
Once you have completed all these steps, turn the power back on and test your furnace. It should run smoothly and quietly now that you have fixed any leaks and eliminated any potential air blockages. Ensure that the temperature is running at an optimal level and no more condensation is present.
Step 10. Monitor Your Furnace:
Finally, take the time to monitor your furnace regularly to ensure it is running optimally. If you notice any signs of condensation buildup or leaks, act quickly to address them before they cause more serious damage. Remember, taking the time to maintain and repair your furnace properly can save you a lot of money in the long run.
By following these simple steps, you should easily fix the condensation leak in your furnace! Make sure to inspect your system regularly and keep an eye out for any potential problems in order to ensure its peak performance.
5 Additional Tips and Tricks
1. Check the Condensate Line: Make sure the condensate line is not blocked or kinked. If it’s clogged, it can cause water to build up and leak inside the furnace.
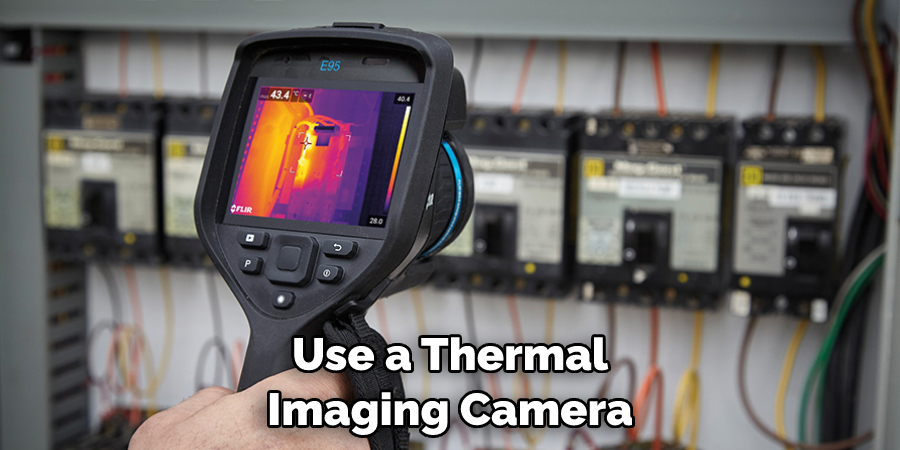
2. Check for Cracks in the Heat Exchanger: If the heat exchanger is cracked, it can also lead to a condensation leak. To check for cracks, you will need to use a thermal imaging camera or a mirror to look underneath the heat exchanger.
3. Replace the Water Pan: If there’s too much moisture in your home, then it’s possible that you may have an old or damaged water pan that needs to be replaced. A professional HVAC technician should do this, as improper installation could lead to additional problems.
4. Replace Any Broken Parts: It’s best to replace them before attempting repairs yourself. This includes the water pan and other components. If you’re not sure how to do this, it’s best to call a professional HVAC technician for assistance.
5. Make Sure Your Furnace is Regularly Maintained and Serviced: Regular maintenance and servicing can help prevent condensation leaks from occurring in the first place. A certified HVAC technician should be able to detect any issues before they become too severe and cause damage to your furnace or home.
Ultimately, following these steps will provide you with a better understanding of how to do it so that you can take the necessary measures to prevent them from happening in the future. Be sure to follow all safety protocols when attempting repairs so that you don
5 Things You Should Avoid
1. Don’t Attempt to Make Repairs if You Don’t Know What You’re Doing: If you don’t have the proper knowledge, tools, or experience when it comes to repairing a furnace, it’s best to contact a professional HVAC technician.
2. Don’t Use Caustic Chemicals: Caustic chemicals can damage the heat exchanger and other furnace components. Instead, opt for milder soaps and cleaning solutions that are specifically designed for use on furnaces.
3. Don’t Forget to Insulate the Condensate Line: Make sure that all exposed parts of the condensate line are properly insulated, as this will help prevent condensation from forming and leaking inside the furnace.

4. Don’t Leave Any Air Leaks: Unsealed air ducts can allow moisture to enter your home and cause condensation to form in the furnace. To prevent this, seal up any exposed air ducts or cracks you may find.
5. Don’t Forget to Check for Other Issues: When diagnosing a condensation leak, it’s important to remember that there could be other underlying problems as well, such as cracked heat exchangers or blocked condensate lines. Be sure to check for these potential issues before attempting repairs yourself.
By following these tips and avoiding common mistakes, you should be able to fix the condensation leak in your furnace with ease.
Conclusion
In conclusion, condensation leaks in furnaces can be a serious problem, but with a little effort and some know-how, you can tackle it yourself. Properly evaluating your furnace can help you identify potential problems that may have been overlooked. If the leak is related to a worn or cracked heat exchanger, then additional professional repairs may be necessary to avoid further damage.
Taking care of the issue as soon as possible is key; ignoring the problem can create greater damage over time and increase repair costs. If you’re uncomfortable doing the work yourself, contact a licensed HVAC technician for assistance—it’s better to be safe than sorry!
Hopefully, the article on how to fix condensation leak in furnace has provided you with the information and guidance you need to get your furnace running efficiently once again. Good luck!