If you have ever been mid-swing and had your zipper come undone Or started to reach for a club only to find that the zipper on your golf bag is broken, then you’re not alone. Unfortunately, zippers can be temperamental, putting a damper on your game. But don’t worry – in this article, we’ll show you how to fix a zipper on a golf bag in just a few easy steps. So next time your zipper starts acting up, you’ll be prepared!
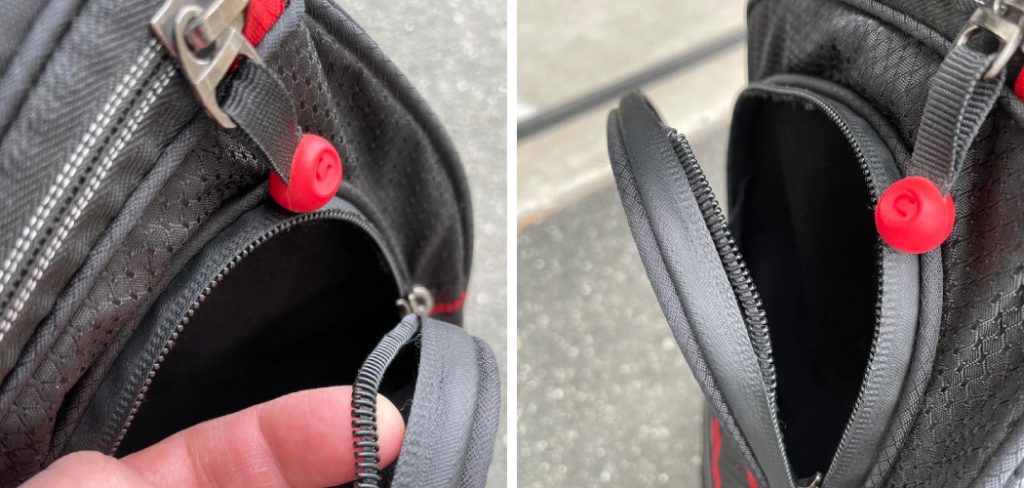
Golf bags are vulnerable to wear and tear, from being thrown around by caddies to being left out in the rain. And one of the most common places for golf bag damage is the zipper. If you’re lucky, a broken zipper on your golf bag might be a stuck zipper that you can fix with a bit of elbow grease. But if the zipper is completely busted, you’ll need to replace it. Either way, we’ll show you how to do it.
Summary: Start by opening the zipper slider as wide as possible. Lift up on the metal piece at the back of the slider, while gently pulling apart the edges of the zipper fabric. Using tweezers or pliers, remove any broken bits of teeth from the zipper fabric and replace any missing pieces. Once this is done, close the zipper slider to secure in place. You can use a lubricant spray or wax pencil to smooth out the zipper’s movement.
A Step by Step Guide on How to Fix a Zipper on a Golf Bag
Step 1: Assess the Zipper Issue
Before attempting any repairs, determine the specific issue with the golf bag’s zipper. Common zipper problems include:
- Misaligned teeth
- Stuck or jammed zipper slider
- Broken or missing zipper teeth
- Damaged or separated zipper slider
- Worn or frayed zipper tape
Understanding the issue at hand will help you choose the most appropriate repair method and ensure a successful fix.
Step 2: Gather Necessary Tools and Materials
To fix a zipper on a golf bag, you may need the following tools and materials:
- Pliers
- Flathead screwdriver
- Needle and thread
- Replacement zipper slider (if necessary)
- Replacement zipper stop (if necessary)
- Replacement zipper teeth (if necessary)
- Lubricant (such as soap, wax, or a specialized zipper lubricant)
- Scissors
- Seam ripper
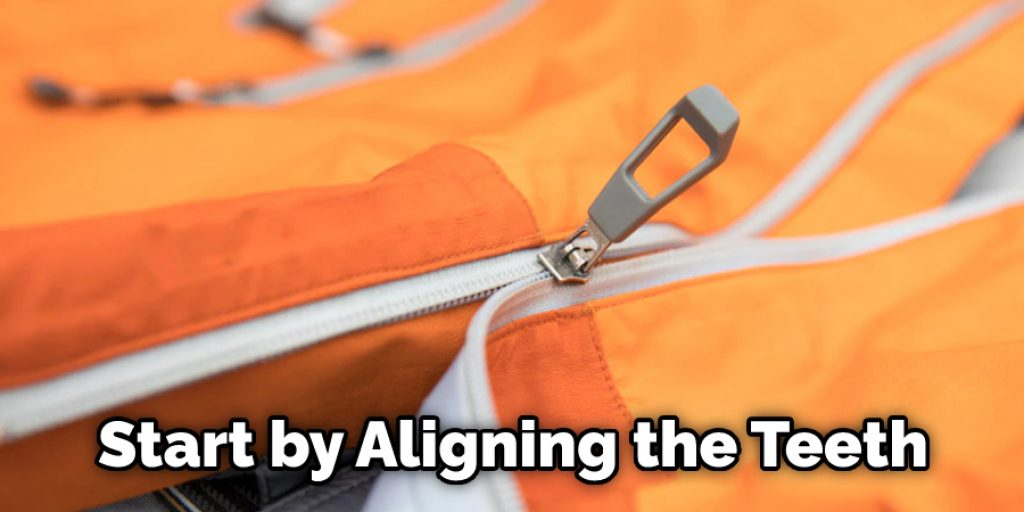
Step 3: Align Misaligned Teeth
If the zipper issue is caused by misaligned teeth, carefully realign them by hand. Ensure that the teeth are straight and properly interlocked. If the teeth are difficult to manipulate, consider using a flathead screwdriver to gently guide them back into position. Once the teeth are aligned, test the zipper slider to see if it moves smoothly along the zipper tape.
Step 4: Lubricate the Zipper
If the zipper slider is stuck or difficult to move, lubricate the zipper teeth to reduce friction. Apply a small amount of soap, wax, or specialized zipper lubricant to the teeth, and then gently move the zipper slider back and forth along the zipper tape to spread the lubricant evenly. If the slider is still stuck after lubricating, it may be necessary to replace it.
Step 5: Repair or Replace Damaged Zipper Teeth
If the zipper teeth are broken or missing, consider repairing them using needle and thread or replacing them with new teeth. To repair a broken tooth, stitch it back into place using strong, durable thread. To replace a missing tooth, carefully remove a tooth from a spare zipper of a similar size and material, and then sew it onto the zipper tape in the appropriate position.
Step 6: Repair or Replace a Damaged Zipper Slider
If the zipper slider is damaged or separated, it may be necessary to repair or replace it. To repair a damaged slider, use pliers to gently reshape or reattach any bent or separated components. If the slider cannot be repaired, replace it with a new slider of the same size and style. To do this, follow these steps:
a. Remove the existing zipper slider by using a seam ripper or scissors to carefully cut the stitching that holds the zipper stop at the end of the zipper tape. Take care not to damage the zipper tape or surrounding fabric.
b. Slide the old zipper slider off the zipper tape.
c. Position the new zipper slider onto the zipper tape, ensuring that it is facing the correct direction and that the teeth are properly aligned.
d. Move the slider along the zipper tape to ensure that it functions smoothly.
e. Sew a new zipper stop onto the end of the zipper tape to prevent the slider from sliding off.
Step 7: Repair a Worn or Frayed Zipper Tape
If the zipper tape is worn or frayed, carefully trim away any loose threads or frayed edges using scissors. Then, reinforce the tape by stitching along the edge with a durable thread. If the damage is severe, it may be necessary to replace the entire zipper.
Step 8: Replace the Entire Zipper (If Necessary)
If the zipper is beyond repair, you may need to replace it entirely. To do this, follow these steps:
a. Use a seam ripper or scissors to carefully remove the stitching that attaches the zipper to the golf bag. Take care not to damage the surrounding fabric.
b. Remove the old zipper from the golf bag.
c. Measure the length and width of the old zipper to ensure that you purchase a replacement zipper of the correct size and style.
d. Position the new zipper onto the golf bag, aligning it with the original stitching holes.
e. Sew the new zipper onto the golf bag using a durable thread and a sewing machine or by hand-stitching. Ensure that the stitches are even and secure.
Step 9: Test the Repaired Zipper
After completing the repair or replacement process, test the zipper to ensure that it functions smoothly and securely. Move the zipper slider along the entire length of the zipper tape several times to verify that the teeth are properly aligned and that the slider moves without difficulty. Also, check that the zipper stop and any repaired or replaced components are securely in place.
Step 10: Maintain the Zipper
To prevent future issues with your golf bag’s zipper, regularly maintain it by keeping the teeth clean and free of dirt, debris, and moisture. Lubricate the zipper periodically to reduce friction and ensure smooth operation. Additionally, inspect the zipper tape, teeth, slider, and stop for signs of wear or damage, and address any concerns promptly to prevent further problems.
By following these steps, you can effectively repair or replace a zipper on a golf bag, ensuring that your equipment remains secure and easily accessible. Always consult the manufacturer’s guidelines for specific recommendations related to your golf bag’s materials and construction. Regular maintenance and prompt repairs can help extend the life of your golf bag’s zipper, preventing issues and ensuring the overall durability of your gear.
Tips and Warnings
Tips:
- If the zipper is completely separated, you will need to reattach it. Start by aligning the teeth and then sewing the two sides together with a needle and thread.
- If the slider is broken, you can replace it with a new one. Then, remove the old slider and attach the new one.
- If the teeth are bent or distorted, try using a pair of pliers to straighten them out gently. You may also be able to use a file to smooth out any rough edges.
- If the zipper is sticking, try spraying it with a lubricant like WD-40. You can also use a toothbrush to scrub away any built-up dirt or debris.
Warnings:
- Do not force the slider if it is stuck. This can damage the teeth and make the zipper harder to use.
- Be careful not to cut yourself when using sharp tools like pliers or a file.
If your golf bag has a broken zipper, don’t despair! There are a few easy ways to fix it so you can get back to playing as soon as possible.
If the zipper is completely separated, you will need to reattach it. Start by aligning the teeth and then sewing the two sides together with a needle and thread. If you don’t know how to sew, you can also use a strong adhesive like super glue or duct tape. If the zipper is only partially separated, you can try to realign the teeth and then zip it up. If this doesn’t work, you will need to reattach it as described above.
What to Do if a Zipper Pull Breaks Off?
If the zipper pull on your golf bag breaks off, don’t panic! There are a few easy ways to fix it to get back to hitting the links.
First, try threading a paperclip or safety pin through the hole where the zipper pull used to be. This will give you something to grip onto to zip and unzip the golf bag easily.
If that doesn’t work, you can also use pliers to squeeze the zipper’s ends together gently. This will make it easier to grab onto with your fingers so you can zip and unzip as needed.
With either of these methods, you should be able to continue using your golf bag without any problems. If the zipper pull breaks off again, repeat the process as needed.
How Do You Fix a Zipper That Won’t Stay Zipped?
If the zipper on your golf bag is not staying zipped, you may be wondering how to fix it. There are a few things you can do to remedy the situation.
One option is to use a key or other small object to help zip up the zipper. Then, put the thing in between the teeth of the zipper and give it a little tug. This may help get the zipper moving and keep it shut.
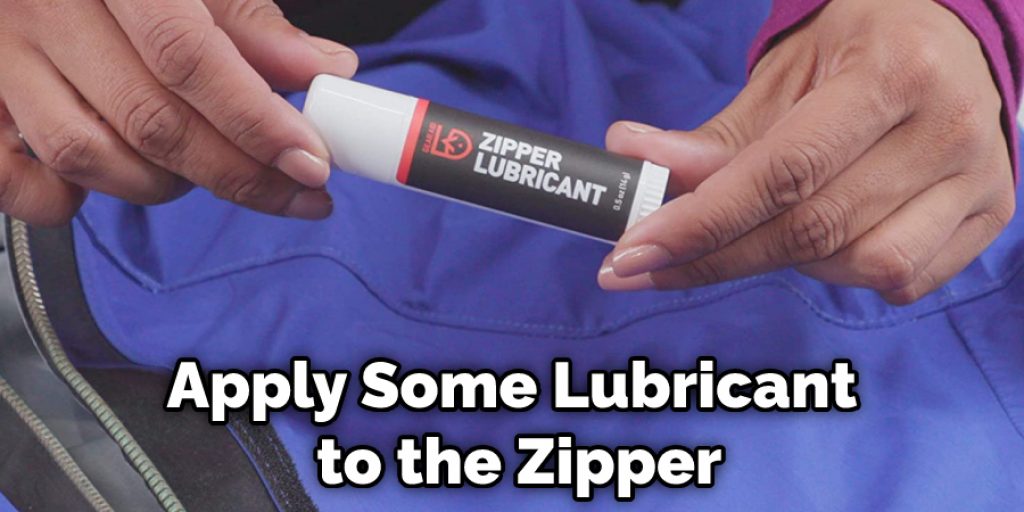
Another option is to apply some lubricant to the zipper. This can help make it move more smoothly and stay closed. You can purchase special zipper lubricants or use a household item like lip balm or cooking spray.
If neither of these solutions works, you may need to take the golf bag to a seamstress or repair shop to have the zipper fixed. Hopefully, one of these tips will help you get your zipper on your golf bag moving again!
Frequently Asked Questions
Can a Broken Zipper Be Fixed?
Sometimes a broken zipper can be fixed by replacing the entire panel. However, this is not always feasible or practical, so in these cases, it may be more cost-effective to fix the zipper without completely replacing it. If you’ve tried everything and your zipper still won’t budge, then you might need to replace the entire garment. In most cases, a broken zipper is just an inconvenience that can easily be fixed; however, if it’s causing significant damage to your clothing or creating safety hazards then you should take action.
Can Golf Bags Be Repaired?
Repairing golf bags is a pretty common task that can be completed by anyone with a bit of know-how and a few tools. The following steps should help you get started:
- Locate the bag’s serial number- This is located on the bottom or back of the bag, near the handle.
- Check for tears or rips- If there are any tears or rips in the fabric, it will need to be repaired before the bag can be used again.
- Repair any tears or rips- If there are any tears or rips in the fabric, they will need to be repaired with a seam sealant and then sewn back together.
- Repackage and label- Once repairs have been made, the bag should be repackaged and labeled with the serial number and repair date.
Can You Replace the Slider on a Zipper?
Unfortunately, it is not possible to replace the slider on a zipper. Zippers are made of several different types of materials that would need to be replaced in order for the slider to function correctly. Additionally, if the slider does break, it can become difficult or impossible to repair due to its specialized design.
What is a Double Strap Golf Bag?
A Double Strap Golf Bag is a type of golf bag that is specifically designed for women. It has two straps that go around the body, instead of just one, to provide more stability and support. This helps to reduce the risk of injury while playing golf.
Conclusion
Now that you know how to fix a zipper on a golf bag, there is no need to worry the next time it breaks. You can easily do this repair yourself and have your golf bag looking good as new in no time!
You May Also Read: How to Fix a Bulging Zipper on a Dress