There’s nothing quite like the feel of a pen in your hand. It’s comforting, like a good book or your favorite old sweater. Pens are also handy tools that can make writing a breeze – unless your pen has a twist mechanism that doesn’t work correctly. In this blog post, we’ll teach you how to fix a twist pen so you can get back to taking notes and writing down your thoughts with ease!
Summary:
Twist pens are a great way to express your creativity, but can sometimes be difficult to fix. However, with a few simple steps, you can ensure your twist pen is in perfect working order. First, check for any blockages like ink residue or dirt by unscrewing the cap and turning the tip left and right.
If there is any debris, use a damp cloth or paper towel to carefully remove it. Next, fill your pen with an appropriate ink refill and reinstall the cap. Finally, press the clip down on the tip to reset the nib and you’re ready to go!
Why Fix a Twist Pen?
There are a few reasons you might want to fix a twist pen. For example, maybe the mechanism is sticking, and it’s hard to twist the pen open and closed. Or maybe the pen keeps spinning in your hand, and you can’t get the ink flowing. Whatever the reason, we’re here to help you fix that pesky twist pen! We’ll go over a few different ways to fix a twist pen, depending on the problem you’re having. We’ll also give you some tips on how to prevent your twist pen from breaking in the first place. Let’s get started!
Required Materials:
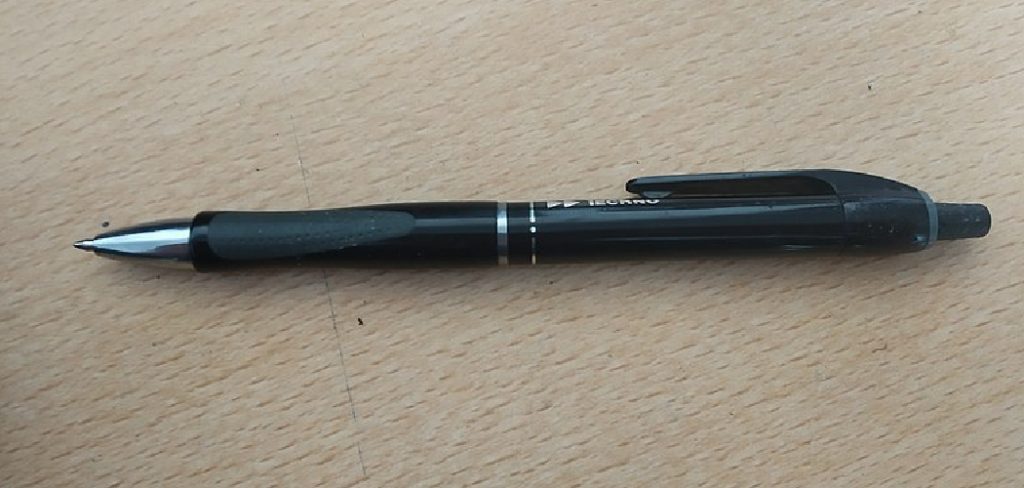
- a twist pen
- a small screwdriver
- scissors
How to Fix a Twist Pen Step by Step Guide
Step 1: Unscrew the Pen Lid
The first step in fixing a twist pen is to unscrew the pen lid so you can access the inside of the pen.

Step 2: Take Apart the Pen
The small metal rod attached to the ink cartridge is what twists when you turn the pen, which in turn causes the cartridge to move and release the ink. The problem usually arises when this small metal rod becomes stuck or snaps off.
If the metal rod is attached to the cartridge, you can try to twist it back into place. However, if it is snapped off, you will need to remove the cartridge and put the rod back in place.
Step 3: Remove Ink Cartridge
If your pen is not working, it might be because the ink is clogged. You can try to fix it by cleaning the ink cartridge with a paper clip or toothpick. To do this, you need to twist the cartridge counterclockwise and be careful not to spill any ink. Once the cartridge is clean, you can put it back in the pen or replace it with a new one.
Step 4: Clean Out the Barrel
Now that the ink cartridge is out, it’s time to clean out the barrel. This can be done with a paper towel or a q-tip. Just make sure to get all of the ink out, so it doesn’t leak in the future.
Step 5: Reinsert the Ink Cartridge
Once you have the pen apart, it’s easy to see how the ink cartridge is inserted. Line it back up and push it firmly into place. Ensure that the cartridge is properly secured before putting the pen back together.
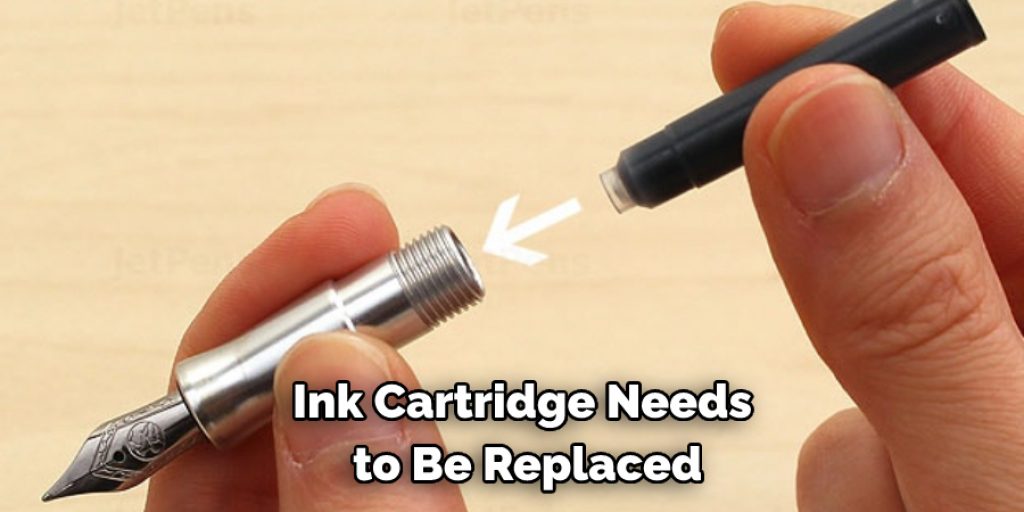
If your twist pen isn’t writing correctly, there’s a good chance the ink cartridge is dislodged or needs to be replaced.
Step 6: Give the Pen a Few Twists to Test It Out
Now that the pen is reattached, it’s time to test it out! Give the pen a few twists and make sure the ink flows smoothly. You may need to tighten the screw a bit more if it doesn’t. If everything seems to be working properly, give the pen a final twist to secure it in place, and you’re done!
Fixing a twist pen is a quick and easy way to get your writing instrument back up. All you need is a screwdriver and a few minutes to spare. Just be sure to follow the steps closely to don’t damage the pen further. And with that, you’re ready to write!
How to Open a Plastic Twist Pen?
If your plastic twist pen is jammed or if the ink has run out, you can often open it up and fix these problems. To do this, you’ll need a small, sharp object like a paper clip or needle.
Step 1: Open It Up
The first thing you’ll want to do is open up the pen. This can be done by twisting the pen barrel and pulling it apart. You may need to use a little bit of force to get it started.
Look for the small hole at the top of the pen. Use your sharp object to poke into this hole and twist. This will loosen the pen’s inside mechanism.
Step 2: Take Out the Ink Cartridge
The ink cartridge is what needs to be replaced when the pen runs out of ink. To take it out, twist the pen in the opposite direction of how it writes. Once the cartridge is out, you can replace it with a new one or refill it with ink.
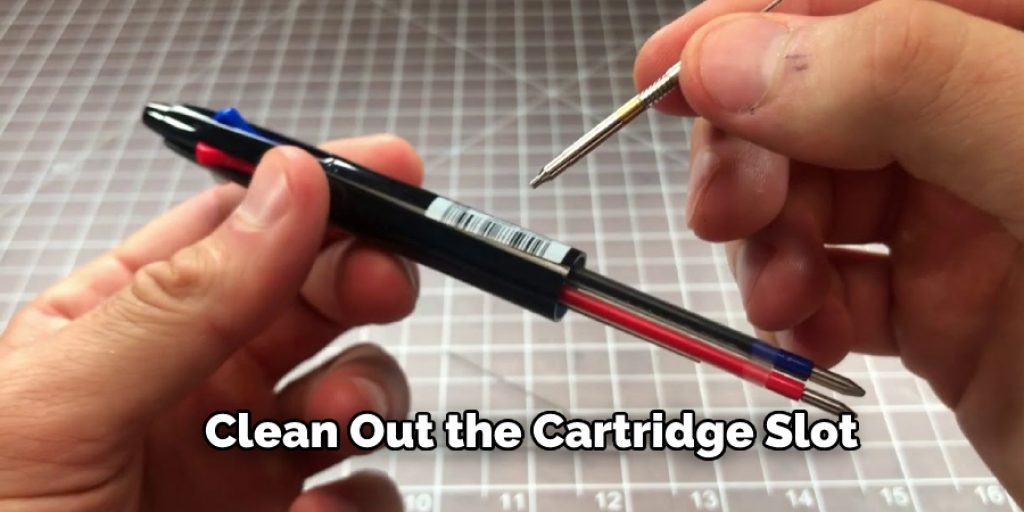
Step 3: Clean the Cartridge Slot
With a small cleaning brush (like the one that comes with some fountain pens), clean out the cartridge slot. This will help keep the ink flowing smoothly.
If your pen is still giving you trouble, it might be time to replace the cartridge. You can find replacement cartridges at most office supply stores.
Step 4: Changing Ink Refill
All twist pens come with an ink refill. This part of the pen holds the ink and is inserted into the pen barrel. If your twist pen isn’t writing correctly, it may be because the ink refill is worn out and needs to be replaced. First, twist the pen cap and remove the old refill to replace the ink refill. Then, insert the new refill into the pen barrel and twist it to secure it.
Step 5: Reassemble Twist Click Ink Pen and Test It
Now that you have fixed the pen, it is time to reassemble it and test it out. Again, follow the steps in reverse order, ensuring that the parts fit together properly. Once it is all put back together, give the pen a few clicks to ensure the ink is flowing correctly. If it is not, you may need to adjust the position of the ink cartridge.
Suppose everything seems to be working correctly; congratulations! You have successfully fixed your twist-click ink pen. Now you can enjoy writing with it once again. Keep reading for more information about how to fix a twist pen.
How Do You Put a Twist Pen Back Together?
If your twist pen is not working, the ink might be dried up. You need to take the pen apart and put some new ink in it to fix this. Here’s how to do that:
- Flip the pen over so that you are looking at the bottom
- Use a small object like a paper clip or a pen to remove the metal clip that is holding the ink cartridge in place
- Remove the ink cartridge from the pen
- Use a small object like a paper clip to remove the ink plug from the ink cartridge
- Put a few drops of ink into the ink cartridge
- Replace the ink plug and replace the screws on the top of the pen
- Replace the metal clip and replace the ink cartridge in the pen
- Twist the top of the pen back on, and your pen should be working again!
How Do You Fix a Pen that Won’t Retract
There are several ways to fix a pen that will not retract. If the pen is new, you may be able to return it to the store. If the pen is old, you can try one of the following methods:
- Use a needle or paper clip to clear any obstructions in the pen’s barrel.
- Soak the pen in warm water for a few minutes.
- Gently twist the pen barrel to loosen any dried ink.
- Use a small screwdriver or other sharp objects to pry off the top of the pen.
- Clean out any obstructions with a needle or paper clip.
- Replace the top of the pen and twist until it is tight.
How Do You Disassemble a Twist Pen?
There are a few simple steps to disassembling a twist pen. You will need a small Phillips-head screwdriver, and it is helpful to have a pair of pliers.
The first step is to remove the clip from the pen gently. Next, you will need to remove two screws on either side of the clip.

Once the screws are removed, you can gently pull the clip off of the pen.
Next, you will need to remove the top of the pen. There are two screws at the top of the pen that holds it in place. Remove these screws and set them aside.
Once the screw is removed, you can gently pull the ink cartridge out of the pen.
Now that the pen is disassembled, you can clean any dirt or ink from the parts. You can also re-grease the threads on the pen to help it twist more easily.
Reassembly is just the reverse of these steps. Again, be sure to replace the screws in the correct order and make sure that they are tight so that the pen does not come apart again. If you want to know more about how to fix a twist pen, keep reading.
You Can Check It Out To Fix Knitting Mistakes Several Rows Down
Frequently Asked Question
Why Did My Pen Stop Clicking?
There are a few potential issues that could be causing your pen to stop clicking. First, if the pen has been dropped, the ink cartridge may have shifted and will need to be re-aligned. If the pen has been unused for a long time, the ink may have dried up and will need to be replaced. Finally, if the pen has been used frequently, the spring inside the pen may have become worn and will need to be replaced.
How Do You Fix a Multicolor Pen?
There are a few ways to fix a multicolor pen. One way is to twist the pen until the ink flows to the correct color. Another way is to remove the ink cartridge and replace it with a new one.
Conclusion
So there you have it! Your very own guide on how to fix a twist pen. We hope you found this tutorial helpful and that your newly repaired pen is writing as smoothly as ever. If not, be sure to give us a shout in the comments below, and we’ll do our best to help out. Happy twisting!
You Can Check It Out To Fix Lumpy Acrylic Paint