If you own a Ryobi power tool, you have one or two of their rechargeable batteries. These batteries are a convenient way to power your tools without having to deal with pesky cords, but what do you do when they stop working? If you have a Ryobi battery that won’t charge, don’t despair.

You can do a few easy things to try to fix the problem. In this blog post, we’ll walk you through the steps on how to fix a ryobi battery that won’t charge. We’ll also explain why your battery might not be charging in the first place. So if you’re experiencing this issue, keep reading for some helpful tips.
Summary: First, check to see if the charger is working properly. If the charger is good, check to see if the battery is receiving enough power from the charger. If the battery is receiving enough power from the charger, check to see if the battery is properly connected to the charger. If the battery is properly connected to the charger, check to see if the battery is properly plugged into the outlet. If the battery is properly plugged into the outlet, check to see if the outlet is properly plugged into the wall. If the outlet is properly plugged into the wall, check to see if the battery is properly charged.
What is Ryobi Battery?
Ryobi is a Japanese company that produces a wide variety of power tools and accessories, including batteries. Ryobi batteries are rechargeable, and they come in different voltages. The most common Ryobi batteries are 18-volt and 24-volt. This type of battery are used in Ryobi power tools such as drills, saws, and impact drivers.
What Are the Purpose of Ryobi Battery?
The purpose of a Ryobi battery is to power the company’s line of cordless tools. These batteries are made with lithium-ion cells, providing a high energy density and long life span. However, like all batteries, they can eventually stop working properly. When this happens, it’s important to know how to troubleshoot and fix the problem.
If you’re having trouble charging your Ryobi battery, you can try a few things. First, ensure the charger is properly plugged in and the outlet is working. Next, check the connection between the charger and the battery. If both things are in working order, the problem may be with the battery itself.
7 Common Reasons That Causes Ryobi Battery to Not Charge:
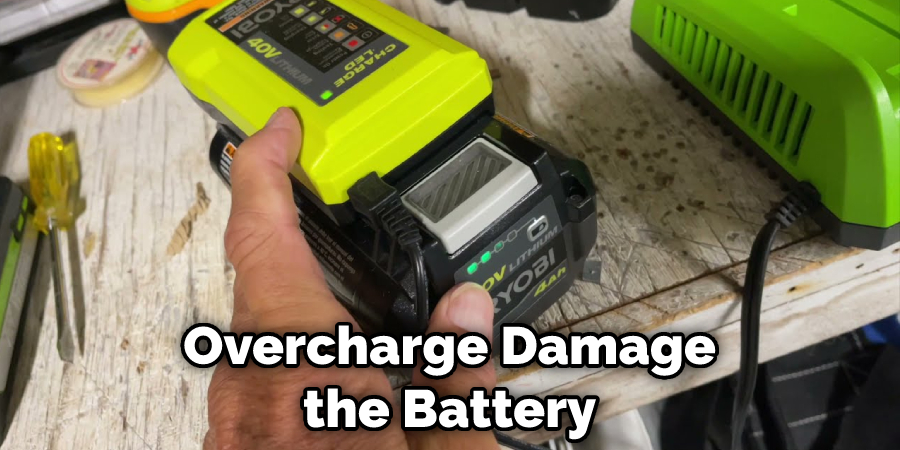
1. The Battery Was Overcharged:
If you left your battery on the charger for too long, it can cause the battery to overcharge. This will damage the battery and prevent it from holding a charge in the future. To avoid this, always remove the battery from the charger as soon as it is fully charged. When removing the battery, hold the button on the charger for a few seconds to ensure that all power is released from the battery.
2. The Battery Is Old and Worn Out:
Just like any other type of battery, Ryobi batteries will eventually reach the end of their lifespan. After years of use, the battery will no longer be able to hold a charge as well as it used to. So if your battery is more than three years old, it’s probably time to replace it.
3. The Battery Was Stored in a Cold Location:
Batteries don’t like extreme temperatures, so if you’ve been storing your Ryobi battery in a cold garage or shed, it could be the reason why it’s not charging. Batteries work best when stored at room temperature, so bring your battery inside and let it warm up to room temperature before trying to charge it.
4. Dead Cells in Battery:
If your battery has dead cells, it will no longer be able to hold a charge. This is usually caused by overcharging the battery or leaving it stored in a cold location for too long. If you think your battery has dead cells, you can try reviving it with a battery reconditioning kit.
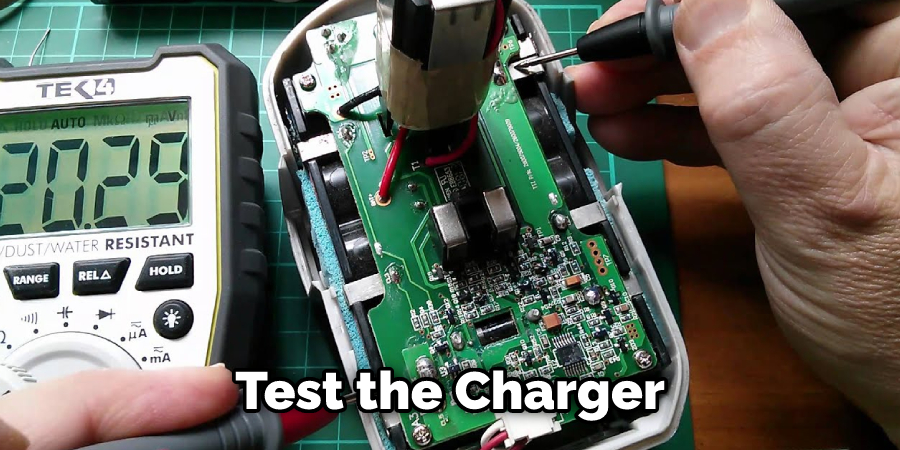
5. The Charger Is Damaged:
If your battery doesn’t charge, the problem could be with the charger. Test the charger with a multimeter to see if it’s putting out the correct voltage. If it is, the problem could be with the charging port on the battery itself. First, clean the charging port with a cotton swab dipped in rubbing alcohol. If that doesn’t work, you may need to replace the charger. If you want to try to repair the charger, you can open it up and look for loose wires or other damage.
6. Internal Circuit Burnt:
If your Ryobi battery doesn’t charge, it could be because the internal circuit is burnt. This is usually caused by overcharging the battery or using a charger that is not compatible with the battery. To fix this, you’ll need to replace the internal circuit. You may also change the battery type to a Li-ion battery, which has a built-in overcharge protection circuit.
7. Broken Internal Cable:
If the internal cables that connect the positive and negative terminals within the battery are damaged or broken, it will prevent the flow of electricity and cause the battery to fail to charge. To fix this issue, the internal cables will need to be replaced. You can do this by opening up the battery case and soldering new cables instead of the old ones.
10 Effective Ways on How to Fix a Ryobi Battery That Won’t Charge
1. Check the Battery:
The first thing you should do if your Ryobi battery won’t charge is to check the battery. Ensure the battery is properly seated in the charger and the connections are clean. If the battery is damaged or defective, it may need replacement. Ensure the battery is not overcharged, as this can damage the battery and cause it to not work properly.
2. Jumpstart the Battery:
If the battery is completely dead, you may need to jumpstart it. First, use a Ryobi battery jumper to jumpstart the battery. This will temporarily get the battery working so that you can charge it. If you think the battery is completely dead, you can also try replacing it.
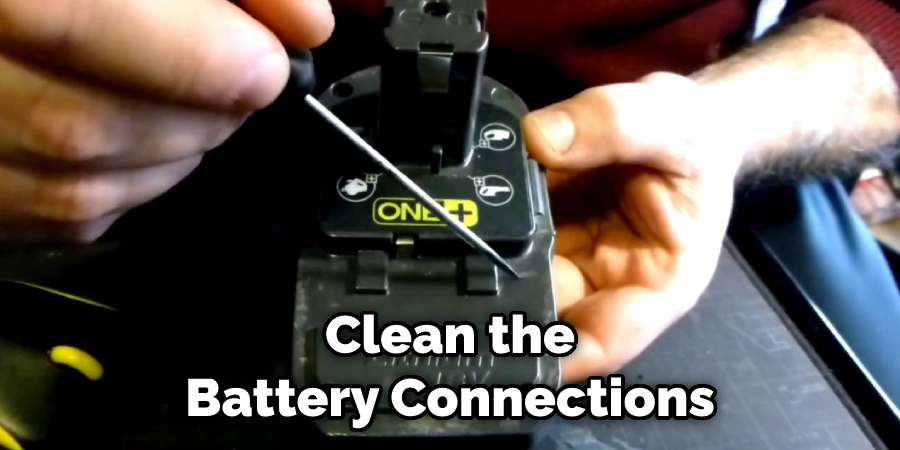
3. Clean the Battery Connections:
If the battery connections are dirty or corroded, they may not be able to make a good connection with the charger. Use a Ryobi battery cleaning brush to clean the connections. You may also need to use a Ryobi battery terminal protector to prevent further corrosion. While you’re at it, check the charger’s connections to ensure they’re clean and free of corrosion.
4. Remove Moisture or Dirt in the Battery:
If your Ryobi battery doesn’t charge, it may be due to moisture or dirt build-up. To clean the terminals, disconnect the battery and use a dry cloth to remove debris. If the terminals are excessively dirty, you can use a mild cleaning solution and a toothbrush to scrub them clean. Make sure the terminals are completely dry before reconnecting the battery.
5. Try a Different Charger:
If your Ryobi battery still doesn’t charge, try using a different charger. Sometimes, the problem is with the charger and not the battery. If you have another Ryobi battery, try charging it with the charger you’re using to see if it charges. If it does, then the problem is most likely with your Ryobi battery, and you’ll need to replace it.
6. Replace the Battery:
If your Ryobi battery still doesn’t charge, it may be time to replace it. First, check the warranty on your battery to see if it’s still covered. If not, you can purchase a new battery from Ryobi or a third-party retailer. Be sure to choose the correct battery for your Ryobi model. With a new battery, your Ryobi power tools should work again.
7. Use a DC Power Supply:
You can try using a DC power supply if you’re having trouble charging your Ryobi battery. This will bypass the charger entirely and allow you to charge the battery directly. Connect the positive and negative leads of the power supply to the corresponding terminals on the battery.
8. Use a Different Outlet:
Using a different outlet can rule out whether or not the outlet is the problem. If the battery still won’t charge, the problem is most likely with the battery or charger, not the outlet. Make sure your outlet is working by plugging in something else, like a lamp. If the outlet is not working, you will need to replace it.
9. Clean the Charger Contacts:
If your charger and battery are both working properly, but the battery still won’t charge, try cleaning the charger contacts. Over time, the contacts can become dirty or corroded, which can prevent the charger from properly connecting to the battery.
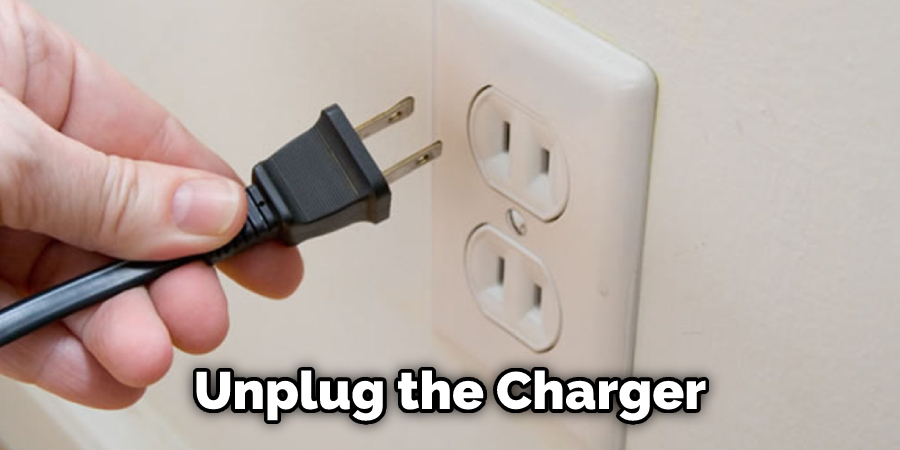
To clean the contacts, first unplug the charger from both the power outlet and the battery. Then use a cotton swab or a soft cloth soaked in rubbing alcohol to wipe away any dirt, dust, or corrosion from the contacts. Once the contacts are clean, plug the charger back in and try charging the battery again.
10. Take it to a Repair Shop:
If you’ve tried all of the above steps and your Ryobi battery still won’t charge, then it’s time to take it to a repair shop. A professional will be able to diagnose and fix the problem, and may even be able to replace the battery if necessary. Make sure the shop you choose is reputable and has experience dealing with Ryobi batteries.
What Does It Mean When Ryobi Battery Flashes Red and Green?
Ryobi batteries have a built-in charging system that indicates when the battery is fully charged, needs to be recharged, or is damaged. The system uses a series of lights to communicate the battery’s status to the user. If the battery is fully charged, the light will be solid green.
If the battery needs to be recharged, the light will flash green. And if the battery is damaged and needs to be replaced, the light will flash red. If your Ryobi battery is flashing red and green, it means that the battery is damaged and needs to be replaced. You can purchase a new Ryobi battery from your local home improvement store or online retailer. But make sure that the new battery is compatible with your Ryobi power tool.
Once you have a new battery, simply insert it into the power tool and start using it. If the light on the new battery is green, then your power tool is working properly. If the light on the new battery is red, then there is something wrong with your power tool and you should take it to a professional for repairs.
Can Ryobi Batteries Be Left on Charger?
It is not recommended to leave your Ryobi battery on the charger for more than 24 hours. Doing so could overcharge the battery, which could shorten its lifespan. If you need to store your Ryobi battery for an extended period of time, it’s best to remove it from the charger and store it in a cool, dry place.

If your Ryobi battery is not holding a charge, there are a few things you can do to try and fix the problem. First, check the charging port for any debris or corrosion. If there is any build-up, clean it off with a cotton swab dipped in rubbing alcohol. Next, check the charging cable and adapter for any damage. If the cable is damaged, you’ll need to replace it. Finally, try charging the battery in a different outlet. If none of these solutions work, you may need to replace the battery.
Frequently Asked Questions
Why Is My Ryobi 18v Battery Flashing Red and Green?
If you’re experiencing flashing red and green lights on your Ryobi 18v battery, it is most likely that the battery needs to be replaced. The flickering may indicate the battery is overcharging or undercharging, which can damage the battery. For long-term protection against fading colors and reduced performance, it’s important to replace your batteries every 2-3 years.
Do Ryobi Batteries Wear Out?
Ryobi batteries typically last for 2-3 years, but it is important to follow the instructions that came with your battery pack. If you’re constantly charging and discharging them, they may not last as long. Additionally, make sure to store your batteries in a cool and dry place so that they perform at their best.
Is It Ok to Leave Ryobi Batteries on the Charger?
It’s always a good idea to unplug your electronics when you’re not using them, but there are some cases where leaving your Ryobi batteries on the charger may be OK.
First of all, make sure that you’re using the right type of charger – a charger that is specifically designed for Ryobi batteries are not going to charge them properly. If you’re using a standard outlet, your batteries should be charged by the time you finish working.
Furthermore, if your battery is completely dead and you’ve just replaced it with a fresh one, leaving it on the charger may actually help it to reach full capacity faster. This is because the new battery will have more energy than the old one, and the charger will help to distribute that energy evenly.
So, in general, it’s ok to leave your Ryobi batteries on the charger if they’re fully charged and if you know that the charger is specifically designed for them. However, be sure to use the correct type of charger and to check on your batteries regularly in order to make sure they’re getting the proper amount of energy.
Can Ryobi Batteries Be Rebuilt?
Ryobi batteries can definitely be rebuilt, but it is a somewhat difficult process. The first step is to make sure that you have all of the correct tools and parts necessary for the job. Next, you will need to disassemble the battery as carefully as possible in order to avoid any damage. After everything has been removed, you will need to clean all of the parts thoroughly using rubbing alcohol or warm water and elbow grease.
Next, you will need to apply a layer of silicone sealant around each joint where metal meets plastic (this includes both Positive and Negative electrodes). Make sure that each piece is completely sealed before putting everything back together by aligning tabs with slots and pressing down firmly until the silicon adhesive sits flush against surfaces.
Finally, wattage should be calculated according to your specific battery model in order to ensure a proper balance between current flow and internal resistance.
If done correctly, your Ryobi battery should now be operable again!
Final Words
As a Ryobi battery owner, it’s important to know how to fix a ryobi battery that won’t charge. This is a problem that can occur for a variety of reasons, but luckily it’s an easy issue to troubleshoot and repair. First, make sure that the battery is properly seated in the charger. If it’s not, that could be why your battery isn’t charging.
If the battery is properly seated in the charger, try cleaning the terminals on both the battery and the charger with a wire brush or sandpaper. If those steps don’t work, it might be time to buy a new battery or charger. Ryobi offers a three-year warranty on their batteries, so you can always replace them if needed. We hope you find this information helpful!
You May Also read: How to Fix a Drill Battery That Won’t Charge