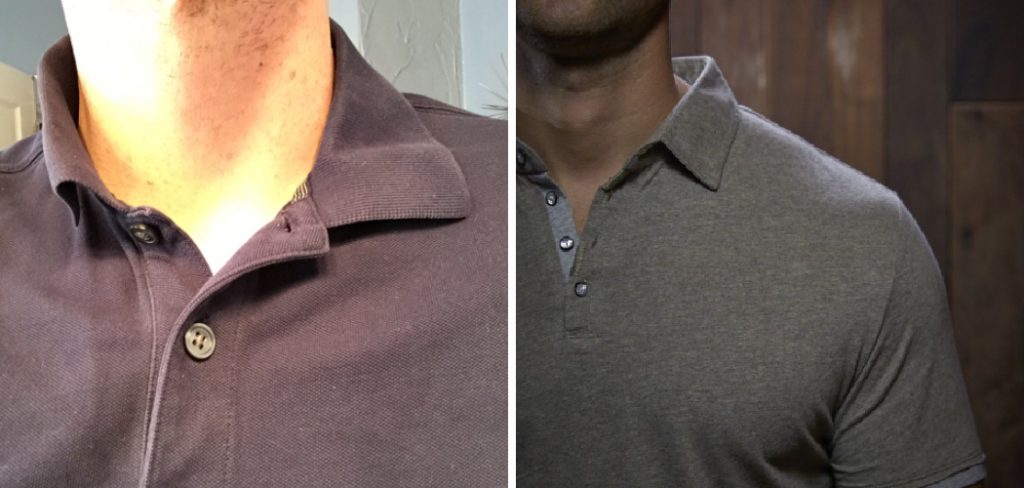
Is your beloved polo shirt starting to show its age? Are the cuffs and collar looking a little worse for wear? Never fear; fixing a polo shirt collar is an easy task – and it will have your shirt looking as good as new in no time! Read on for our step-by-step guide on how to fix a collar on a polo shirt.
Summary: If your collar is coming undone on your polo shirt, there are a few simple steps you can take to fix it. First, make sure the collar is properly threaded through the holes in the shirt. Next, use a needle and thread to stitch the collar back together. Finally, make sure the thread is neat and tight, and re-thread the collar through the holes in the shirt.
Why Should You Fix a Collar on A Polo Shirt?
A collar is an important part of a polo shirt, and there are several reasons why it should be fixed if it becomes damaged. First, a collar can help to improve the fit of the shirt. Without a collar, the shirt may feel loose and uncomfortable.
In addition, a collar can help to protect the neck from sunburn and other skin damage. Without a collar, the neck is exposed to the elements and is more vulnerable to damage.
Finally, a collar can add structure and support to a polo shirt. Without a collar, the shirt may lose its shape and sag. As a result, it is important to fix a broken collar as soon as possible to maintain the integrity of the shirt.
How to Fix a Collar on A Polo Shirt Step by Step Guide
Step 1: Assess the Damage
Begin by thoroughly examining the collar of your polo shirt to determine the extent of the damage. Look for fraying, loose threads, or separated seams. Take note of the problem areas, as you will need to address each issue individually.
Step 2: Gather Necessary Supplies
Before starting the repair process, gather the necessary supplies, including:
- Matching thread
- Sewing needle
- Scissors
- Seam ripper (optional)
- Iron and ironing board
- Pins or fabric clips
- Sewing machine (optional)
Step 3: Remove Loose Threads
Using a pair of sharp scissors, carefully trim away any loose threads from the damaged area. Be cautious not to cut into the fabric itself, as this may cause further damage.
Step 4: Repair Separated Seams
If the collar seam has come undone, use a seam ripper to carefully remove any remaining stitches. Once the seam is free, fold the fabric along the original seam line, ensuring that the edges align correctly. Pin or clip the fabric in place to keep it secure during sewing.
Step 5: Thread the Needle
Select a thread color that matches the fabric of your polo shirt as closely as possible. Cut a length of thread approximately 18-24 inches long and thread it through the eye of the sewing needle. Tie a small knot at the end of the thread to secure it.
Step 6: Hand Sew the Seam (Optional)
If you prefer to hand sew the seam, use a backstitch to create a strong and durable connection. Begin at one end of the seam, and push the needle through the fabric from the wrong side to the right side. Move the needle back one stitch length, then insert it through the fabric again, working from right to left. Continue in this manner until the entire seam is sewn, then knot the thread securely and trim any excess.
Step 7: Machine Sew the Seam (Optional)
If you prefer to use a sewing machine, set it to a straight stitch and adjust the stitch length to match the original seam. Begin at one end of the seam, and carefully sew along the pinned or clipped fabric edge. Backstitch at the beginning and end of the seam to secure the stitching. Trim any excess thread.
Step 8: Press the Seam
Once the seam is sewn, use an iron to press it flat. This will help create a crisp, professional appearance and ensure that the repaired collar lies smoothly against the shirt.
Step 9: Repair Frayed Edges
If the collar is frayed, fold the frayed edge under to create a new, clean edge. Pin or clip the folded fabric in place, ensuring that the new edge aligns with the rest of the collar.
Step 10: Sew the Folded Edge
Using the same thread and needle (or sewing machine) as before, sew along the folded edge to secure it in place. If hand sewing, use a small running stitch, working from right to left. If using a sewing machine, set it to a straight stitch and sew along the folded edge. Backstitch at the beginning and end of the seam to secure the stitching. Trim any excess thread.
Step 11: Press the Folded Edge
Use an iron to press the newly sewn edge, ensuring that it lies flat and smooth against the collar.
Step 12: Reinforce Collar Points
If the collar points are damaged or weakened, reinforce them by sewing a small triangle or bar tack at the tip of each point. Use the same thread and needle (or sewing machine) as before and sew a few small, closely spaced stitches to create a durable reinforcement.
Step 13: Wash and Dry the Polo Shirt
After completing the repairs, wash and dry the polo shirt according to the care instructions on the garment’s label. This will help remove any residual dirt or oils from the repair process and ensure that the collar lies smoothly and evenly.
Step 14: Inspect the Repair
Once the polo shirt is clean and dry, inspect the repaired collar to ensure that it is secure, even, and free of any remaining damage. If any issues are still present, repeat the necessary steps to address them.
Step 15: Maintain the Collar
To prevent future damage and extend the life of your polo shirt, take care when laundering and storing the garment. Follow the care instructions on the label, and avoid exposing the collar to excessive heat or harsh chemicals. When hanging the shirt, use a hanger with a wide, curved shape to support the collar and prevent creasing or distortion.
Step 16: Learn to Fold the Collar Properly
Folding the collar correctly can also help maintain its shape and prevent damage. When folding the shirt, ensure that the collar is lying flat and smooth, with the points aligned evenly. If desired, use a light starch spray to help the collar maintain its shape during storage.
Step 17: Rotate Your Polo Shirts
To minimize wear and tear on your favorite polo shirts, rotate them regularly with other shirts in your wardrobe. This will help distribute the stress of daily wear and extend the life of each garment.
Step 18: Address Damage Early
If you notice any signs of damage or wear on your polo shirt collar in the future, address them as soon as possible. Prompt repairs can help prevent the damage from worsening and save you time and effort in the long run.
By following these steps, you can successfully repair the collar on your polo shirt and keep it looking sharp and well-maintained. With proper care and attention, your polo shirts can remain a stylish and versatile part of your wardrobe for years to come.
Some Other Ways to Fix a Collar on A Polo Shirt
1. Vinegar and Ironing Combination
This is a great way to get rid of wrinkles on your collar. Simply combine one part vinegar with two parts water in a bowl. Dip a clean cloth into the mixture and then wring it out so that it is damp. Next, lay the damp cloth over the wrinkled area of the collar and then place a dry towel over the top. Allow this to sit for at least thirty minutes, and then use the iron on the lowest heat setting. Do not forget to remove the towel before you iron.
Set your iron to the lowest heat setting, and then iron over the towel for a few minutes. The vinegar will help relax the fabric, and the wrinkles should come out.
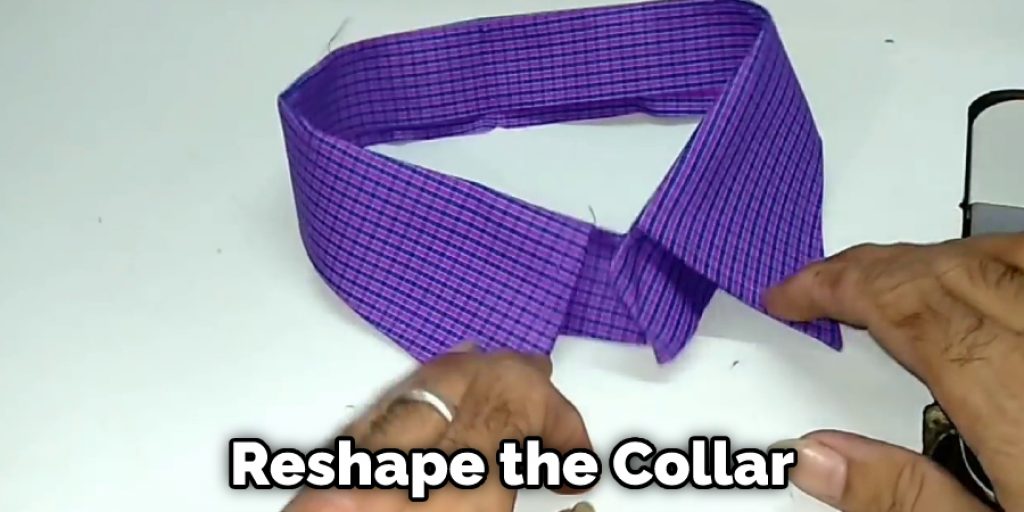
2. Hairdryer and Towel
This is a quick fix for a vinyl or plastic collar that has lost shape. First, wet a towel and drape it over the affected area. Next, turn your hairdryer onto the high heat setting and hold it about six inches from the wet towel. The steam from the towel will help to reshape the collar.
3. Rubber Band Method
If the collar on your polo shirt is too loose, you can tighten it by using a rubber band. Start by wrapping the rubber band around the base of the collar. Make sure that the rubber band is tight, but not so tight that it is uncomfortable. Next, sew the ends of the rubber band together with a needle and thread.
4. Starching the Collar
One way to make sure a collar lies flat is to starch it. This will help the fabric stand up and make it less likely to wrinkle. To starch a collar, simply mix a small amount of starch with water and apply it to the collar with a brush. Allow the collar to dry completely before wearing the shirt.
5. Using Interfacing
Interfacing is a great way to add structure and support to a polo shirt collar. Simply cut a piece of interfacing to the same size and shape as the collar, and then attach it to the wrong side of the fabric using a sewing machine or iron.
You Can Check It Out To Fix Collars on Dress Shirts
How Do You Fix a Messed up Collar on A Polo Shirt?
It happens to everyone at some point. For example, you’re getting ready for a big meeting or a hot date, and you reach for your favorite polo shirt only to discover that the collar is all messed up. But don’t despair! There is a way to fix it.
First, lay the shirt flat on a surface and smooth out the collar. Then, using a handheld steamer or an iron with steam capabilities, hold the steamer about six inches away from the shirt and run it over the collar.
The heat will help to remove any wrinkles. Once the collar is smooth, use a lint roller or tape to remove any lint or hair that may be clinging to the fabric. Next, lightly mist the entire shirt with water. This will help to remove any static cling that may be present. Once the shirt is lightly damp, use a hand steamer or iron to smooth out any remaining wrinkles. Hang the shirt on a padded hanger to dry and then store it in a cool, dry place.
Finally, give the shirt a quick once-over with an iron to ensure that everything is lying flat. And that’s it! With just a few simple steps, your shirt looks as good as new. Keep reading for more information about how to fix a collar on a polo shirt.
Frequently Asked Question
Do Hangers Stretch Collars?
The answer to this question is yes, and hangers can stretch the collars on polo shirts. In order to prevent this from happening, it is best to use special hangers for polo shirts that have a built-in chin cup. These hangers help to keep the collar in its original shape.
Should Polo Shirts Be Hung or Folded?
There is some debate over how to store polo shirts – should they be hung or folded? The consensus seems to be that folding is the better option, as it will help keep the shirt in good condition. To fold a polo shirt, start by laying it out flat on a surface. Then, fold the bottom up to meet the halfway point of the shirt.
Next, fold each side in so that they meet in the middle. Finally, fold the top down to meet the bottom of the shirt. This should leave you with a neatly folded polo shirt that can be stored away until needed.
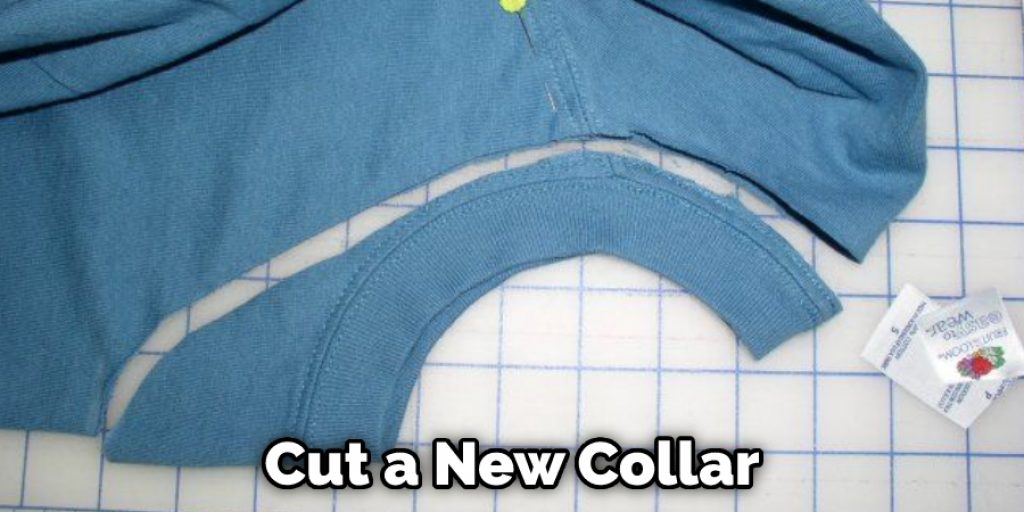
Can You Replace a Polo Shirt Collar?
If the collar on your polo shirt is damaged or fraying, you can replace it yourself. Start by turning the shirt inside out and removing the old collar. Next, cut a new collar from a piece of fabric, making sure to match the size and shape of the old one. Next, attach the new collar to the shirt with pins and sew it in place. Finally, turn the shirt right-side out and enjoy your new collar!
Conclusion
So, now that you know how to fix a collar on a polo shirt, there’s no need to feel self-conscious the next time your shirt starts to look a little too rumpled. With just a few simple steps, you can have your shirt looking like new again in no time at all.
So the next time you’re getting ready for an important meeting or event and notice your collar dropping, don’t panic! Just follow our easy guide, and you’ll be good to go.
You May Also Read: How to Fix Broken Hoop Earrings