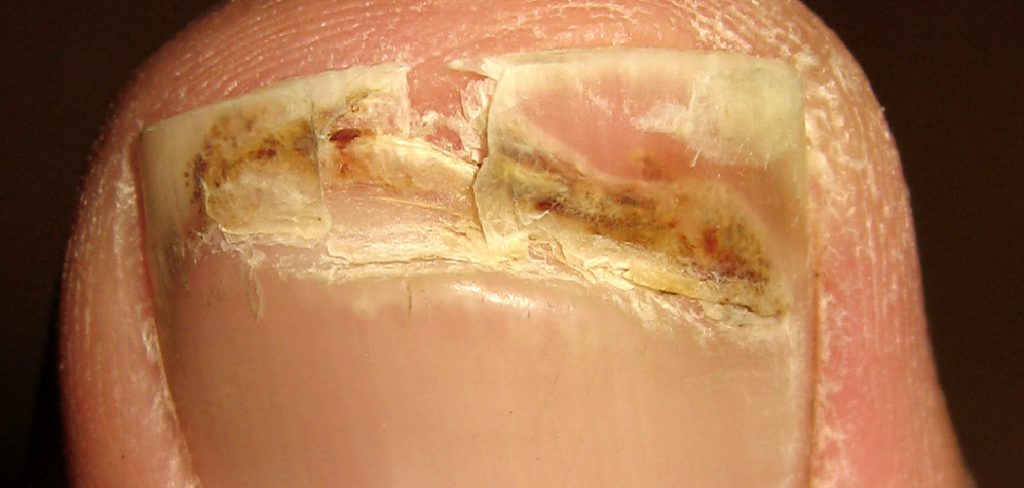
It’s not unusual to have a broken toenail. It can happen quite easily, especially if you’re active or wear too tight shoes. A broken toenail can be painful and may cause your toe to become swollen. But there is no need to worry. There are several ways to fix a broken toenail, but using acrylic may be the easiest and most effective way.
In this blog post, we will show you how to fix a broken toenail with acrylic and provide some tips on preventing it from happening again. So, whether you are a professional nail technician or want to know how to take care of your nails, read on for our tips on fixing a broken toenail with acrylic.
Summary: If you’ve ever broken a toenail, you know how painful and frustrating it can be. Fortunately, there is a way to fix it using acrylic. First, start by gently removing the broken piece of the toenail with tweezers or scissors. Next, use an acrylic kit that has been designed specifically for toenail repair. Apply the liquid acrylic to the broken area and wait for it to set. Once set, finish off by filing and shaping your nails into their original form.
Five Common Reasons That Causes a Cracked Toenail
1. Walking Barefoot:
Walking barefoot on hard surfaces can be dangerous for your toenails. Your toenails can become brittle and crack, or you could get an infection.
2. Inadequate Foot Hygiene:
It is important to keep your feet clean and dry to prevent infection. Bacteria and fungi can cause problems if your feet are moist, so it is important to dry them well.
3. Poorly Fitting Shoes:
It’s important to wear shoes that fit well. If they’re too tight, it can cause problems like foot fungus or toenails that grow in abnormal ways.
4. Injury:
If you have a cracked toenail, it might be because you hurt your toe somehow. This could be from stubbing it or dropping something on it. When this happens, it’s hard for the toenail to grow the right way.
5. Aging:
Age can affect a person’s feet just as well as the rest of their body. This is because as you age, your skin becomes less flexible and less durable. It is due to this reason that an aged person is more likely to get a cracked or ingrown toenail. Additionally, the fatty tissues in your feet can start to break down, which can lead to pain and other problems.
15 Easy Steps on How to Fix a Broken Toenail With Acrylic
Step 1: Gather Necessary Supplies
To fix a broken toenail with acrylic, you will need the following supplies:
- Nail file
- Nail buffer
- Nail clippers
- Acrylic nail primer
- Acrylic nail powder
- Acrylic nail liquid (monomer)
- Acrylic nail brush
- Nail glue
- Nail dehydrator (optional)
- Small piece of aluminum foil or plastic wrap (optional)
- Cuticle pusher
- Cuticle oil
- Clean towel or paper towel
- Cotton swabs or cotton balls
- Rubbing alcohol
Step 2: Clean and Prepare Your Toenail
Before starting the repair process, ensure your toenail is clean and free from any nail polish or debris. Soak your foot in warm, soapy water for a few minutes to soften the nail and surrounding skin. Use a clean towel or paper towel to dry your foot and toenail thoroughly.
Step 3: Trim and File the Broken Toenail
Use nail clippers to trim any jagged or uneven edges on the broken toenail. Then, use a nail file to smooth and shape the edge of the toenail. Be gentle during this step to avoid causing further damage or pain.
Step 4: Push Back the Cuticles
Using a cuticle pusher, gently push back the cuticles on your toenail to create a clean and even surface for the acrylic application. Be careful not to push too hard or damage the cuticle, as this can cause pain and increase the risk of infection.
Step 5: Apply Cuticle Oil
Apply a small amount of cuticle oil to the cuticles and surrounding skin to moisturize and protect them during the acrylic application process. Use a cotton swab or cotton ball to remove any excess oil from the surface of the toenail, as this can interfere with the acrylic’s ability to adhere.
Step 6: Dehydrate the Toenail
To further ensure proper adhesion of the acrylic, apply a nail dehydrator to the surface of the toenail. If you do not have a nail dehydrator, you can use rubbing alcohol as an alternative. Allow the dehydrator or alcohol to dry completely before proceeding to the next step.
Step 7: Apply Acrylic Nail Primer
Apply a thin layer of acrylic nail primer to the surface of the toenail, avoiding contact with the surrounding skin. The primer will help the acrylic bond more securely to the toenail, ensuring a durable and long-lasting repair.
Step 8: Prepare the Acrylic Mixture
Pour a small amount of acrylic nail liquid (monomer) into a clean container. Dip your acrylic nail brush into the monomer, and then into the acrylic nail powder. The powder should stick to the brush, creating a small bead of acrylic mixture. Tap off any excess powder to ensure the bead is not too large or difficult to control.
Step 9: Apply the Acrylic Mixture to the Toenail
Carefully apply the bead of acrylic mixture to the broken area of the toenail, using the brush to shape and smooth the acrylic as needed. If necessary, use a small piece of aluminum foil or plastic wrap to create a mold or support for the acrylic while it dries. This can help to maintain the desired shape and prevent the acrylic from sagging or drooping.
Step 10: Allow the Acrylic to Dry
Allow the acrylic to dry completely, which may take anywhere from a few minutes to an hour, depending on the specific product used. During this time, avoid touching or disturbing the toenail, as this can cause the acrylic to shift or become damaged.
Step 11: File and Buff the Acrylic
Once the acrylic has dried, use a nail file to gently shape and smooth the surface of the repaired toenail. Be cautious during this step, as applying too much pressure or filing aggressively can damage the acrylic or the underlying toenail. Follow up with a nail buffer to create a smooth, even finish.
Step 12: Clean the Toenail
After filing and buffing, use a cotton swab or cotton ball dampened with rubbing alcohol to clean any dust or debris from the surface of the toenail. This will help to remove any residual filing dust and ensure a clean surface for the application of nail polish, if desired.
Step 13: Apply Nail Polish (Optional)
If you wish to conceal the repair or match the appearance of your other toenails, apply your preferred nail polish color to the repaired toenail. Allow the polish to dry completely before wearing socks or shoes.
Step 14: Maintain Proper Foot and Nail Care
To prevent further damage to your toenails and promote overall foot health, practice good foot hygiene and nail care habits. Keep your feet clean and dry, wear properly fitting footwear, and trim your toenails regularly to prevent them from becoming too long or ingrown.
Step 15: Monitor the Repair
Keep an eye on the repaired toenail as it grows out, checking for any signs of lifting, peeling, or discomfort. If you notice any issues with the acrylic repair, consult a professional nail technician or podiatrist for further guidance and care.
By following these steps, you can effectively fix a broken toenail with acrylic, restoring its appearance and functionality. This method can be a quick, cost-effective solution for minor toenail breaks, allowing you to maintain your foot health and appearance without the need for professional intervention. Just remember to practice good foot and nail care habits, and monitor the repair to ensure it remains secure and comfortable as your toenail grows.
Tips to Prevent Cracked Toenail
Some helpful tips on how to fix a broken toenail with acrylic.
- Keep your feet clean, dry and cool
- Exfoliate dead skin with a pumice stone or foot file regularly
- Cut nails straight across; don’t round the edges
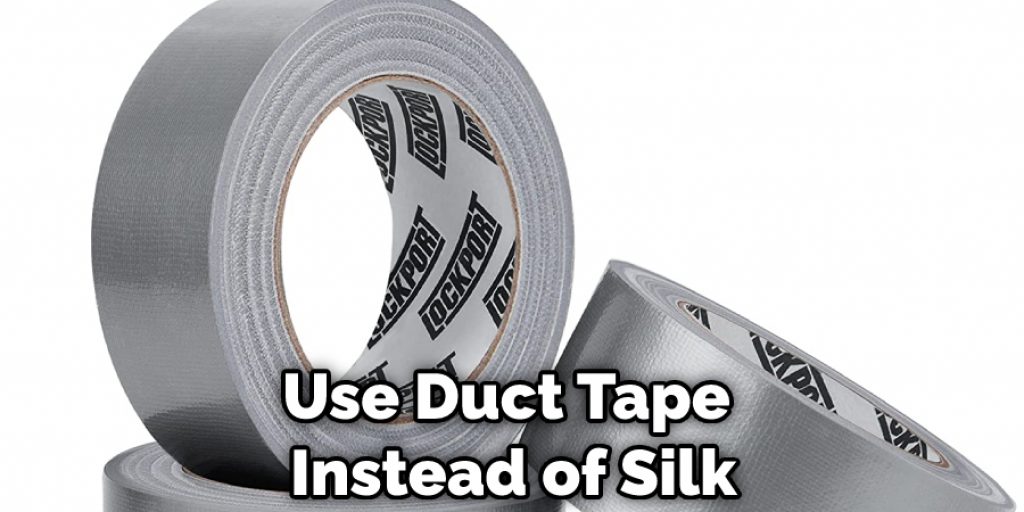
- Apply adhesive silk to the underside of your nail before applying polish to prevent chipping
- To get rid of bumps on nails; use an emery board
- Wear shoes that don’t cramp your toenails (flip flops, sandals, etc.)
- Apply nail glue on the underside of your nails to prevent chipping and cracking
- Don’t push or cut peeling nails back further than the healthy skin
How Does Long Will Acrylics Need to Stay on a Broken Nail
After you finish applying the acrylic fill material, it will take three days for the nails to harden completely. They are not meant to stay on forever, though. The main goal is for them to protect the broken nail until it grows out.
Since everyone’s body functioning is different, no one can say exactly how long that will take. Normally it’s between two and three weeks. If you have a job that requires you to move around a lot or do strenuous work, we recommend waiting at least ten days before coming back for removal and a new set.
Can a Cracked Toenail Heal Itself
Some people can grow portions of their nails back, but most often, it is just small pieces that can be seen at the base of the nail. The larger part of the nail will need some outside help to grow back.
When the nail is broken, it will often separate itself from the surrounding skin, allowing dirt or bacteria to get beneath the nail and cause an infection. This can lead to an unsightly appearance for the broken nail and in some cases, pain when walking because there isn’t much support at all for this area.
You Can Check It Out to: Fix Ice Cream Scoop
Frequently Asked Questions
Can You Put Acrylic on Damaged Toenails?
While many people feel that it is safe, there may still be risks associated with this type of treatment. If you decide to go ahead and use acrylic on your damaged nails, be sure to get a second opinion from a qualified health professional before doing so. Additionally, always wear protection such as gloves when painting your nails in order to avoid any potential injury
What Do You Do When Your Toenail is Half Off?
If you have a toenail that is half off, removal may be necessary in order to prevent further injury. The first step is to gently wash and dry your toenail area. Next, use a non-surgical shoe removal method like Caster Sock Removal or Toe Separator (available at most pharmacies). If the nail cannot be removed with these methods, then it will require surgical intervention.
Surgical removal of a partially detached toenail may involve cutting the broken edge off so that it can grow back together properly and prevent infection from setting in. Additionally, care must be taken not to injure the surrounding tissues below the cuticle which could lead to additional foot problems down the road. Finally, regular soaking of the wound using antibiotic ointment will help speed up healing time and minimize any discomfort experienced during this process.
Does Nail Glue Fix Broken Nail?
The good news is that most nail glues can be used to fix broken nails. However, it is important to use the correct type of glue for the job. Here are four types of nail glues and their corresponding uses:
- Acetone nail glue – This type of glue is typically used to fix small nails that have been broken or chipped. It works by dissolving the surface of the nail and then bonding it back together.
- Superglue – This type of glue is best suited for fixing larger nails that have been broken or chipped. It works by sticking the broken pieces together and then reinforcing them with plastic cement.
- Nail polish – This type of glue can be used to fix small nails that have been broken or chipped, but it is less effective than acetone nail glue or superglue. It works by coating the broken pieces with a layer of polish, which then dries hard and becomes resistant to further damage.
- Gel nails – This type of glue can be used to fix both small and large nails that have been broken or chipped, but it is more difficult to use than acetone, superglue, or nail polish because it requires a UV light source in order to work properly.
Should I Go to the Hospital if My Nail Ripped Off?
If you have a nail that has ripped off, there is no need to go to the hospital. If the nail was attached by just a small piece of skin, then it can be safely removed at home using some Q-tips and hydrogen peroxide. Be sure not to eat or drink anything while your nails are being treated, as this could make them worse. Once you’ve gotten rid of the debris and any infection that might have developed, apply Neosporin to the wound and cover it with a bandage. Keep your fingers pushed up against each other so they don’t get too cold or dry. Repeat these steps twice daily until your wounds heal completely.
Conclusion
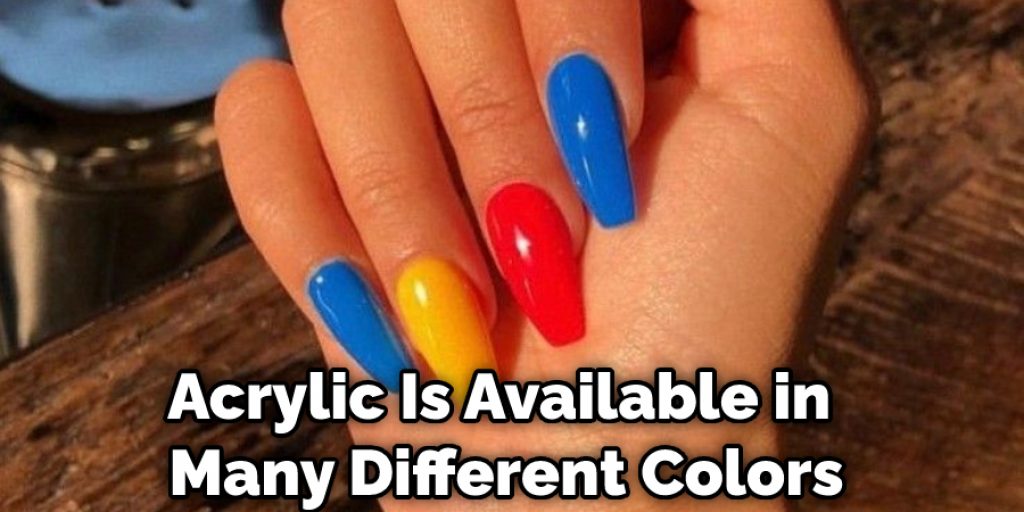
This blog post has given you a brief overview of how to fix a broken toenail with acrylic. Acrylic is available in many different colors and textures, so there are plenty of options for fixing your nails without going out and buying new ones!
We hope this article was helpful to you if you were looking for ideas on how to repair your broken or chipped fingernails. If not, we suggest checking our other posts that cover various topics that may be what you’re looking for. We always welcome questions, suggestions or feedback about our blog.
You Can Check It Out to: Fix Broken Hoop Earrings