Auto body repair tape is one of the most versatile tools in a mechanic’s toolbox. It can be used to fix many problems, both big and small. This article will show you how to use auto body repair tape to fix common car problems. So stay safe and keep your car running smoothly with auto body repair tape!
Cars are complex machines with many different parts and components that work together to make the car run properly. It is difficult for one person to know everything about how a car works, but everyone can learn to use auto body repair tape!
Summary: Auto Body Repair Tape is an effective way to repair dents and other damage on a car’s body. To use the tape, first determine what needs to be repaired and clean the area. Then cut the tape into pieces and apply them to the damaged areas. Once everything is painted over, carefully remove the tape and finish up with any additional touches needed.
A Step by Step Guide on How to Use Auto Body Repair Tape
Step 1: Gather Necessary Tools and Materials
Before starting the auto body repair process, gather the required tools and materials to ensure a smooth workflow. Some essential items include auto body repair tape, a plastic scraper, clean cloth or rag, rubbing alcohol, scissors or a utility knife, and sandpaper (optional).
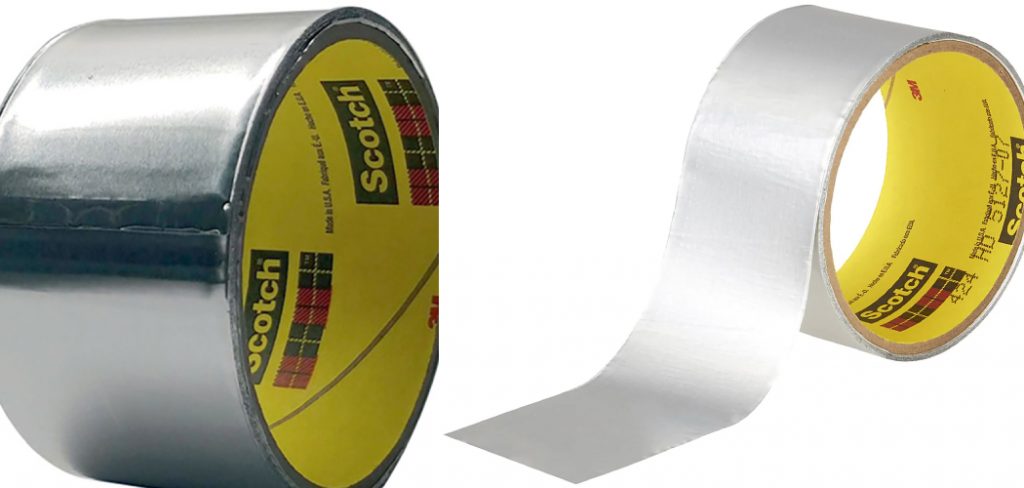
Step 2: Choose the Appropriate Repair Tape
Select the right auto body repair tape for your specific needs. There are several types available, including aluminum tape for metal surfaces, fiberglass tape for reinforced repairs, and clear or colored tapes for matching the vehicle’s paint. Ensure the tape is suitable for outdoor use and is UV-resistant to avoid premature deterioration.
Step 3: Prepare the Damaged Area
Clean the damaged area thoroughly to ensure proper adhesion of the repair tape. Use a clean cloth or rag and rubbing alcohol to remove any dirt, grease, or debris from the surface. If the damaged area has sharp edges or uneven surfaces, use sandpaper to smooth the area and create a uniform surface for the tape to adhere to. Be sure to remove any dust or particles created during the sanding process.
Step 4: Cut the Repair Tape to Size
Measure the damaged area and cut a piece of repair tape that is slightly larger than the area to be covered. This will ensure that the tape covers the entire damaged area and provides a secure bond. Use scissors or a utility knife to cut the tape, being careful not to damage the adhesive side.
Step 5: Apply the Repair Tape
Peel off the backing from the repair tape to expose the adhesive side. Carefully position the tape over the damaged area, ensuring it is properly aligned and covers the entire area. Press the tape firmly onto the surface, starting from the center and working your way out to the edges. This will help remove any air bubbles and create a strong bond between the tape and the vehicle’s surface.
Step 6: Smooth Out the Tape
Use a plastic scraper or the edge of a credit card to smooth out the repair tape, ensuring there are no air bubbles or wrinkles. Apply firm pressure as you work your way from the center of the tape to the edges. This will ensure maximum adhesion and a seamless repair.
Step 7: Trim Excess Tape
If there is any excess tape extending beyond the damaged area, carefully trim it using a utility knife or scissors. Be cautious not to cut into the vehicle’s paint or scratch the surrounding surface.
Step 8: Allow Time for Adhesion
Allow the repair tape to adhere to the surface for the recommended time specified by the manufacturer. This can vary depending on the type of tape and environmental conditions, so be sure to consult the product’s instructions for proper curing time.
Step 9: Inspect the Repair
Once the tape has had time to adhere, inspect the repair to ensure it is secure and covers the entire damaged area. Check for any air bubbles or loose edges, and smooth them out if necessary. If the tape has not adhered properly, carefully remove it and repeat steps 4 through 8, ensuring that the surface is clean and properly prepared.
Step 10: Maintain the Repair
To prolong the life of the repair, keep the taped area clean and free from dirt and debris. Regularly inspect the tape for signs of wear, peeling, or damage, and replace it as needed to maintain a secure and effective repair.
Step 11: Consider a Permanent Repair (Optional)
While auto body repair tape can provide a temporary fix for minor damage, it may not be a permanent solution. If the damage is more extensive or the tape repair is not sufficient, consider consulting a professional auto body repair shop for a more permanent solution.
Precautions
- Before you repair any damage, be sure that the vehicle is in a safe working environment if your car is in a garage or other enclosed area, clear space for adequate ventilation, and opens all doors and windows. Next, engage the parking brake and remove the key from the ignition.
- Always wear protective equipment while working with your vehicle. You will need safety glasses and work gloves to protect yourself from sharp edges and flying debris.
- If you do not have a heat source, preheat the damaged area on the vehicle with a hairdryer for about 2 minutes on high before attempting to remove any paint or finish. This makes it easier to peel off the residue but can also cause discoloration of the metal underneath.
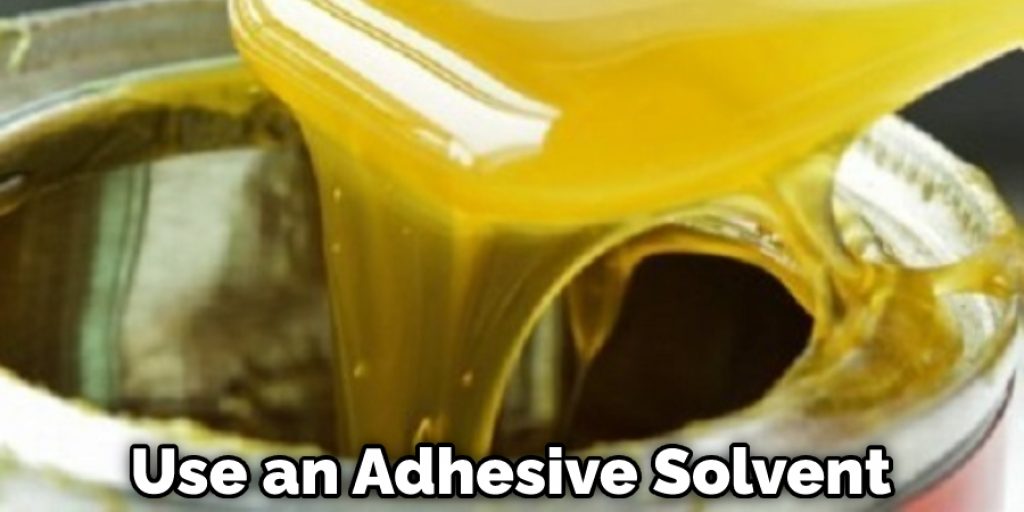
- Be sure to use an adhesive solvent to remove the old paint, finish, or tape residue.
How Do I Get Tape Residue Off My Car
Body tape is generally used to prevent paint damage to the lining of your bumper when hitting another car, but if not removed, it can cause some problems. Even though adhesive on the tape will usually come off with a bit of rubbing alcohol or sandpaper, this may result in an uneven edge and a noticeable look of damage to your vehicle.
If you have sandpaper, try using that first; however, if it’s still causing trouble, use an automotive masking solvent instead of sandpapering down the edge of the bumper. This way, you can get out any jagged edges without worrying about scratching up your paint job.
If you plan to use body tape for future accidents or damages, it can be worth the investment to buy aluminum foil tape instead. When removed, aluminum foil tape will not leave behind any adhesive and is much easier to deal with in the long run. When it comes to dealing with walls, particularly if you are going to be painting them or staining them, we recommend using a product such as Plaster of Paris.
This is a powder that will immediately set and harden when mixed with water. It can be used to fill in holes quickly, making it an excellent choice for anyone who wants to avoid the long-term damage that would otherwise occur. You can apply plaster of paris and then simply sand it smooth.
You Can Check It Out to: Fix a Rusted Car Roof
Frequently Asked Questions
Can You Cover The Rust With Tape?
the best way to cover rust depends on the type of rust and the amount of coverage that is desired. However, some tips include using a Rustoleum primer if available and spraying a liberal coating of paint over the affected area. You can also use sandpaper or steel wool to remove any remaining rust before applying your chosen sealant.
Will Duct Tape Hold Up On A Car?
duct tape typically does a good job of holding up on a car. It’s made from strong adhesive tape that can withstand high temperatures and heavy pressure. Additionally, the medical-grade adhesive is Non-Swelling and will not cause any damage to surfaces or paintwork. In fact, if you need to temporarily fix something on your car, duct tape is an affordable and easy solution!
Is It Worth Fixing The Rust On A Car?
it’s important to weigh the pros and cons before making a decision. On the one hand, rust can be a major inconvenience and can seriously damage a car. On the other hand, rust can also be easily repaired – and in some cases, even replaced – if it’s caught in time.
So what’s the verdict? It really depends on your individual situation. If you’re worried that rust might damage your car, it may be worth considering fixing it. However, if you’re confident that you can repair it yourself or replace it relatively cheaply, you may want to go that route. Either way, it’s important to weigh the risks and rewards carefully before making a decision.
Can Gorilla Tape Be Used On Cars?
Yes, Gorilla Tape can be used on cars. It is a very strong and durable adhesive that is perfect for use in emergency situations. This tape can adhere to most surfaces and has a high bond strength. Additionally, it is resistant to aging, water damage, UV rays, and chemicals.
Conclusion
Auto body repair tape is a great way to keep your car looking new, but it can also prevent rust and corrosion. You must use the correct type of auto body repair tape for your specific needs; this article on how to use auto body repair tape will help guide you in purchasing the appropriate product. We hope that this information has helped make an informed decision about which product to buy!