Steel cables are one of the essential pieces of safety equipment in any industrial setting. They are used to secure loads and keep workers safe from potential falls. However, a frayed cable can quickly lead to failure, so it’s crucial to address any damage as soon as possible.
If a cable becomes damaged, it can be dangerous for everyone in the area. This blog post will show you how to repair a frayed steel cable. We’ll also show you an easier way to improve a steel cable using duct tape and scissors. Keep reading for more information!
Summary: If you are experiencing a shutter grille problem with reduced power levels, you can take some simple steps to fix it. Begin by unplugging the device, then carefully inspect any visible components, such as cables and other wires. Inspect the settings menus looking for any changes that may be affecting it. Finally, check the power level settings to ensure they are set correctly and that no problems exist in the system.
9 Easy Ways on How to Repair a Frayed Steel Cable
Step 1: Assess the Damage
Before attempting to repair a frayed steel cable, inspect the cable to determine the extent of the fraying and damage. Assess whether the fraying is localized or spread along the cable, and consider the severity of the fraying in relation to the cable’s overall strength and functionality. If the fraying is severe or the cable’s integrity is compromised, it may be necessary to replace the cable entirely.
Step 2: Gather Necessary Tools and Supplies
To repair a frayed steel cable, you will need the following tools and supplies:
- Protective gloves and safety glasses
- Wire rope cutters or bolt cutters
- Wire rope thimble
- Wire rope clips or clamps (also known as cable clamps or U-bolts)
- Socket wrench or adjustable wrench
- Cable lubricant (optional)
Step 3: Cut Away Damaged Sections
Wearing protective gloves and safety glasses, use wire rope cutters or bolt cutters to remove any severely damaged or frayed sections of the cable. Cut as close to the frayed area as possible, ensuring that you leave enough undamaged cable for the repair.
Step 4: Install a Wire Rope Thimble
A wire rope thimble is a metal fitting used to protect the cable from abrasion and maintain its shape when forming a loop or eye. To install a wire rope thimble, follow these steps:
- Bend the cable into a loop, ensuring that the cut end is positioned alongside the undamaged portion of the cable.
- Insert the wire rope thimble into the loop, positioning it between the cut end and the undamaged portion of the cable.
- Adjust the size of the loop to fit snugly around the wire rope thimble, ensuring that the cable maintains its shape and alignment.
Step 5: Secure the Cable with Wire Rope Clips or Clamps
Wire rope clips or clamps are used to secure the cut end of the cable to the undamaged portion, creating a strong and reliable connection. To secure the cable with wire rope clips or clamps, follow these steps:
- Position the first wire rope clip or clamp near the base of the loop, ensuring that the U-bolt is placed over the cut end of the cable and the saddle is placed over the undamaged portion.
- Insert the nuts onto the U-bolt and tighten them evenly using a socket wrench or adjustable wrench, ensuring that the clip or clamp is securely fastened to the cable.
- Position additional wire rope clips or clamps along the cable, spacing them evenly and ensuring that they are all securely fastened.
- Ensure that the cable is properly secured and aligned, with no visible gaps or irregularities in the connection.
Step 6: Inspect the Repair
Inspect the repaired cable to ensure that the wire rope thimble, wire rope clips, or clamps are all securely in place and properly aligned. Check for any signs of damage or wear on the cable and its fittings, and address any issues as needed.
Step 7: Lubricate the Cable (Optional)
If desired, apply a cable lubricant to the repaired cable to help protect it from corrosion, reduce friction, and extend its lifespan. Follow the manufacturer’s instructions for application and ensure that the lubricant is evenly distributed along the length of the cable.
Step 8: Test the Repaired Cable
After completing the repair, test the cable to ensure that it can safely support the required load and function properly. Perform a load test, if possible, to verify the cable’s strength and reliability. If any issues are identified during testing, repeat the relevant steps to address them as needed.
Step 9: Perform Regular Maintenance and Inspections
To prevent future issues with frayed steel cables, perform regular maintenance and inspections to identify any signs of wear or damage. This includes checking for fraying, corrosion, or other forms of damage, tightening loose fittings, and lubricating the cable as needed. Additionally, avoid overloading or exceeding the cable’s weight capacity, as this can cause damage or failure.
By following these steps and taking the necessary precautions, you can effectively repair a frayed steel cable and maintain its strength and functionality. Regular maintenance and proper care will ensure that your cables remain in good condition for years to come. Remember that professional assistance is always recommended when dealing with complex repairs or issues beyond your skill level, and it’s essential to follow all safety guidelines and manufacturer’s instructions when working with steel cables and fittings.
Some Helpful Tips and Suggestions
Here we have given some tips on how to repair a frayed steel cable.
1. Always use pliers when working with cable
2. Always measure the cable before cutting it to length
3. Keep cable on a slight angle while it is being wound, don’t wind cable in a flat circle
4. Do not pull the end of the steel cables directly against one of the spokes on your wheel
5. If possible, use something to pad and protect any part of the frame that is going to be hit by the steel cables when they are being rewound up
6. Do not cut the steel cable to fit; try and buy a length that is slightly too long so you can start winding it onto the spool with the cable lock and then trim it down later for a perfect fit
7. Try to avoid cutting into any wires inside of your bike’s frame when making an opening for the steel cable
8. Do not cut any cables that are still working; you will need to find a spare length of wire or buy a new one.
Things to Consider When Repairing a Frayed Steel Cable
1. A steel cable with a normal jacket will not have as much movement as one without a jacket.
2. A self-supporting cable only has the outer poly, so it will be more prone to damage, especially if there is wear inside the conduit through which it travels.
3. Any repair technique should eliminate movement in the damaged area and include a clamp to hold the cable in place.
4. Additional protection and/or support should be added to prevent future wear if the cable egresses from a raceway.
5. A bolted connection will provide the most secure repair.
6. All repairs or splices should be made inside a raceway or enclosure. It is never acceptable to expose the cable at the enclosure/raceway entrance. In addition, the outer jacket must not be able to rub against another surface; this can cause damage and water intrusion, which will lead to corrosion and future failure.
What Causes a Damaged Frayed Steel Cable
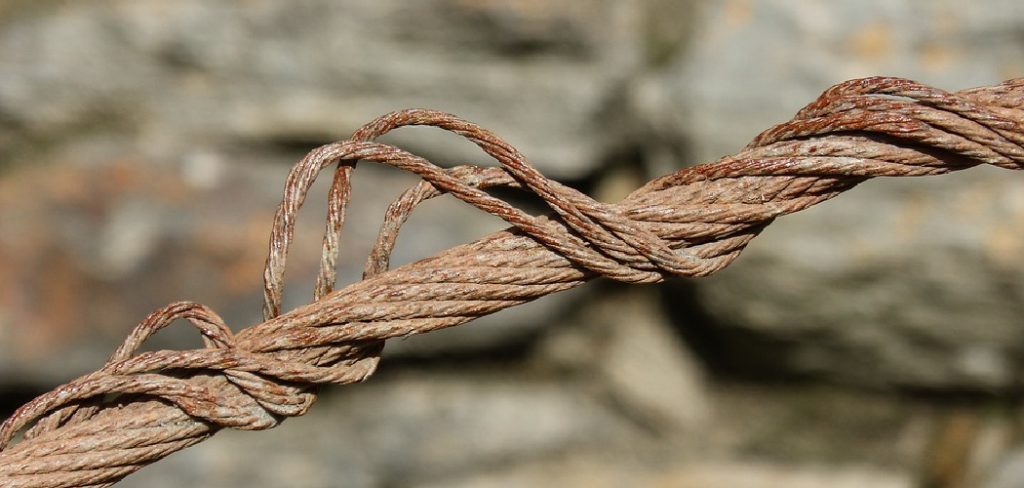
A frayed steel cable is caused by the exterior metal skin and interior supporting wires breaking away from their fillings. These fillings may be a polymer or rubber-like material used to hold it all together, but once exposed, they can cause them to break apart. A frayed steel cable can be caused by general wear and tear, rusting high impacts, or just plain old age.
A thorough check of all affected areas must immediately be done before deciding on a method for repairing the damage. Areas showing wear should be replaced, and polymer fillings must secure the remaining areas for protection.
What are the Signs of a Damaged Frayed Steel Cable
Several signs can show you have damaged steel cables in your vehicle. First, you may hear squeaky or rubbing sounds when turning corners or applying forces to the wheel. Second, you may notice that the steering wheel is not centered or will pull to one side when driving straight.
Third, vibrations may be felt in the wheel itself, especially on turns. If these signs sound familiar, the cables in your steering system may be damaged and need repair. These cables can also break entirely and cause a loss of control and power to the steering system.
What Are the Different Types of Cable Repair
There are several different methods of fixing a frayed steel cable. The cable can be spliced, knotted, or clamped together to reattach it back with the working end. These methods depend on how badly damaged your wire is and what’s available to you at the time.

When fixing cables, try not to solder them if possible, as an excess of solder can weaken the steel and cause it to break in extreme conditions. First, you should determine if your cable is stranded or solid core; if it’s stranded, you will need a method that attaches the two ends without soldering; this may be knotting or clamping. On the other hand, if it’s a solid-core type, you can splice or solder the cable to reattach it.
Frequently Asked Questions
Can Frayed Wires Be Fixed?
Yes, Frayed Wires can be fixed. However, it may take some time and effort on your part to get the results you desire. Start by studying the repair kit that came with your appliance or electronics device.
There are usually instructions included that will help you complete the repairs yourself. If this does not work for you or if you need additional assistance, ask a family member, friend, or professional technician to help fix your frayed wires.
Can You Tape a Frayed Wire?
Yes, you can tape a frayed wire by adding electrical tape to the ends of the wire and then rejoining them. This will help to keep the wire together and prevent it from becoming damaged further.
Is It Safe to Tape a Frayed Wire?
the safety of any activity depends on a variety of factors, including the type of wire, the amount of tape used, and the person performing the tape job. That said, here are a few general tips to keep in mind when it comes to taping wires:
- Always use a professional – When it comes to anything electrical, always use a professional. They know how to handle delicate equipment and will be able to minimize any potential risks.
- Use enough tape – When taping wires, use enough tape to cover both the wire and the joint. Too much tape can cause problems down the line, including separation of the wire from the joint, insulation failure, and more.
- Don’t over-tape – Another common mistake people make when taping wires is over-taping. This can cause stress on the wire and lead to failure. Just enough tape is all that’s needed to keep things secure.
- Check for signs of failure – Once you’ve taped a wire in place, always check for signs of failure. This includes checking for separation or movement of the wire, as well as insulation breakdown or smoke emission. If any of these signs are present, then take corrective action ASAP!
Hopefully, these tips will help you make sure that your wiring job is safe and secure – no matter what type of wire it is!
Can I Use Glue Gun Instead of Solder?
While glue guns are often used to attach objects together, they can also be used to make small repairs on electronics. By using a high-temperature glue gun, you can fix broken or missing parts quickly and easily. Just make sure that the area you’re attaching the part to is heat safe – usually anything over 170 degrees will work.
If you don’t have a high-temperature glue gun available, then an old toothbrush may do the trick. Simply coat it with Gorilla Glue and apply it liberally to your device’s screen surface.
Be sure not to touch the adhesive directly with your fingers – use a non-conductive cloth instead. Allow time for the glue to set before turning off your device and removing the glued section (or pieces). If all goes well, you should be able to repair your screen without having replaced any components!
Conclusion
The best way to repair a frayed steel cable is by using a crimping tool. This should be done as soon as possible before it becomes too damaged and cannot be repaired. This article has provided you with the basic steps on how to repair a frayed steel cable.
There are many different types of cables, and you must know what kind of cable you’re repairing before proceeding. If you have any questions or need further help, please get in touch with us. Thank you for reading this helpful guide!
You Can Check It Out To Fix a Stripped Gear Shifter