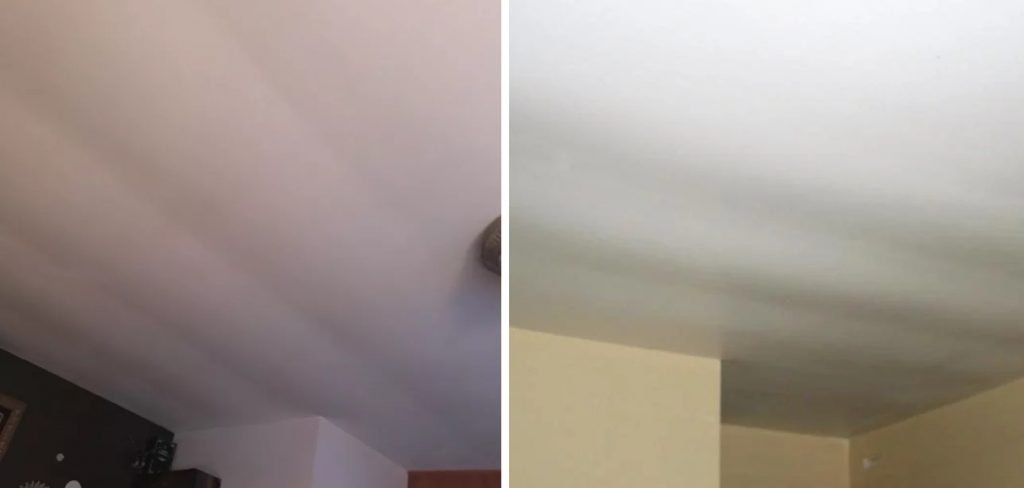
Wavy drywall can be a frustrating and unsightly problem for many homeowners. It occurs when the drywall is not properly installed or the wall behind it is uneven. Wavy drywall can also be caused by moisture, which causes the drywall to expand and contract, resulting in a wavy appearance.
The good news is that fixing wavy drywall is a relatively simple process that can be done by most DIYers. In this article, we will discuss some effective methods for how to fix wavy drywall, including how to identify the cause of the problem, how to properly prepare the surface, and how to install new drywall or use a leveling compound to smooth out the surface. With the right tools and techniques, you can fix wavy drywall and restore the appearance of your walls.
Why Does My Drywall Look Wavy?
Wavy drywall is a common problem that occurs when the drywall compound doesn’t adhere to the wall in an even manner. This can be caused by bad taping techniques, unevenly applied joint compounds, or too much moisture in the walls.
In some cases, wavy drywall can also occur when the framing of the walls isn’t level. If not addressed properly, wavy drywall can ruin the aesthetics of your home and diminish its value. It’s important to take steps to fix this issue as soon as possible.
Fortunately, there are several solutions available for fixing wavy drywall. You can use mesh tape or paper tape combined with a high-quality patching compound to improve adhesion and create a smoother surface. Additionally, you can use screws to secure the walls and make sure they are level before applying joint compound.
By taking the necessary steps to fix wavy drywall, you can improve the look of your home and ensure that it retains its value. With the right tools and materials, this job doesn’t have to be difficult or time-consuming. Follow the advice in this article for an easy way to get your drywall back in shape!
10 Methods How to Fix Wavy Drywall
1. Identify the Cause of the Problem
The first step in fixing wavy drywall is to identify the cause of the problem. Some common causes include improper installation, moisture damage, and structural issues. Once you identify the cause, you can begin to develop a plan for fixing the drywall.
If the cause is moisture damage, you may need to make repairs to your home’s plumbing or HVAC system. If the issue is structural, you may need shoring up of the walls or ceilings before attempting repairs. However, if the issue is improper installation, you can take steps to repair the wavy drywall yourself.

2. Prepare the Surface
Before you can begin fixing wavy drywall, you need to prepare the surface. This involves sanding down any high spots and filling in any low spots with joint compound. You should also remove any loose or damaged drywall tape and apply a new layer of tape to ensure a smooth surface.
To do this, you’ll need a sanding block, drywall joint compound, and drywall tape. Though it may take some extra time, preparing the surface properly will ensure that your finished product looks as good as possible. Make sure to wear a dust mask and safety glasses while sanding.
3. Install New Drywall
If the waves in your drywall are severe, it may be necessary to install new drywall. This involves removing the old drywall and installing new sheets that are properly aligned and fastened to the studs. Once the new drywall is in place, you can apply joint compound and sand the surface to create a smooth finish.
Be sure to wear a mask and protective eyewear when using joint compound and sanding drywall, as these materials can create dust which is unhealthy to inhale. Once the new drywall is installed and sanded, you can prime and paint it to complete your repair job.
4. Use a Leveling Compound
If the waves in your drywall are less severe, you may be able to use a leveling compound to smooth out the surface. A leveling compound is a type of joint compound that is specially formulated to create a level surface. It can be applied over the existing drywall and sanded down to create a smooth finish.
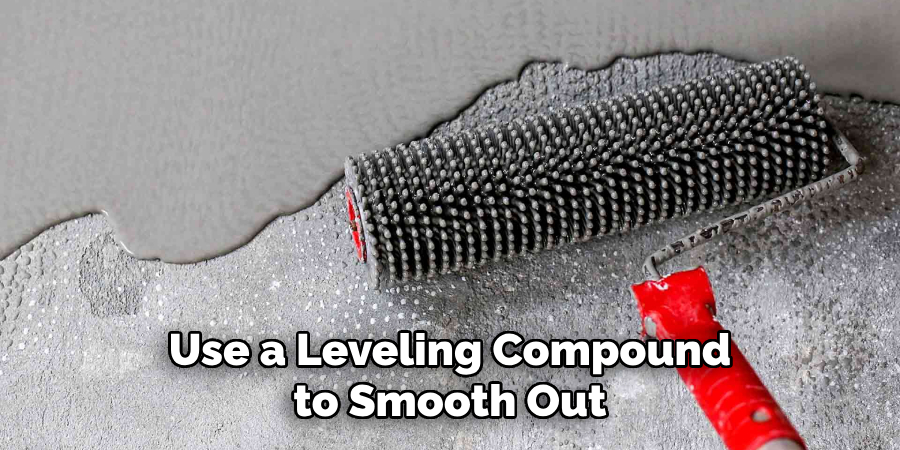
Before applying the leveling compound, make sure to fill in any nail holes or other imperfections with the regular joint compound. Use a taping knife to spread the leveling compound evenly over the area. Once it has dried, sand it down with fine-grit sandpaper and then apply a coat of primer before painting or wallpapering.
5. Apply a Skim Coat
A skim coat is another option for fixing wavy drywall. It involves applying a thin layer of joint compound over the entire surface of the drywall to create a smooth finish. This method is best for minor waves and imperfections in the surface of the drywall.
You will need a wide paint roller to apply the joint compound, a putty knife, and sandpaper. Start by pouring the joint compound into a paint tray and roll it onto the drywall in thin layers with the roller. Use the putty knife to smooth out any uneven spots, and then let the joint compound dry.
6. Use Drywall Shims
If the waves in your drywall are caused by uneven studs, you can use drywall shims to create a level surface. Drywall shims are small pieces of wood or plastic that can be inserted between the drywall and the studs to create a level surface. Be sure to use a level and tap lightly on the shims until they are flush with the surface of the drywall.
Once you’ve inserted all of the shims, you can use a utility knife to cut away any excess material. If you have large gaps between the drywall and the studs, you can use a joint compound to fill them in. Although this method can be time-consuming and labor-intensive, it will ensure that your drywall is level.
7. Reinforce the Drywall
If the waves in your drywall are caused by structural issues, it may be necessary to reinforce the drywall. This can be done by installing additional studs or using metal brackets to provide additional support. This should be left to a professional contractor as it requires some expertise and special tools to do.
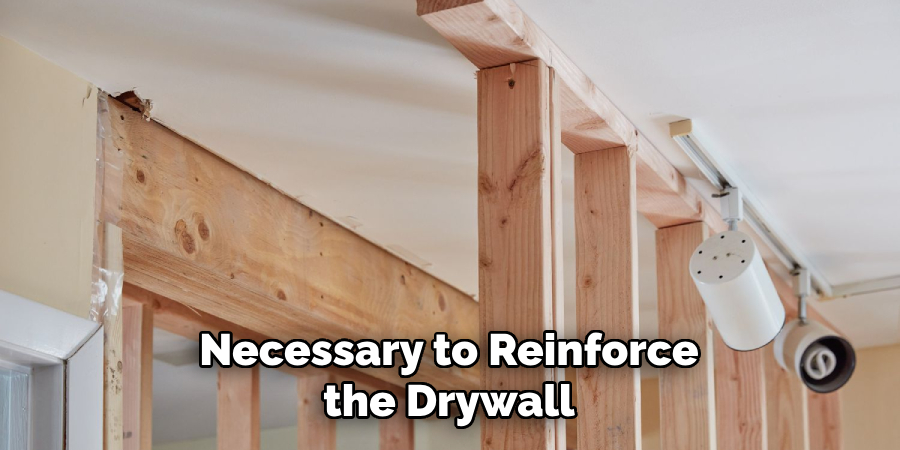
Once the additional support is installed, you can then proceed to patch and finish the wall as you would any other drywall repair. Doing this should help to eliminate any waviness in the wall and ensure that the surface is even and smooth. Although this step is more involved than the others, it can be done by someone with a moderate level of skill and experience.
8. Address Moisture Issues
If the waves in your drywall are caused by moisture, it is important to address the underlying issue before fixing the drywall. This may involve repairing a leaky roof or addressing issues with moisture buildup in your home.
When addressing these issues, make sure to also check for signs of mold or mildew in your home. If you find any mold or mildew, it is important to clean it up thoroughly and address the underlying cause. Once you have fixed any moisture issues, you can begin repairing your drywall.
9. Hire a Professional
If you are not comfortable fixing wavy drywall yourself, or if the waves are severe, it is best to hire a professional. A professional contractor can assess the situation and recommend the best course of action. This may involve patching the drywall and applying a skim coat, or it may require replacing the entire wall.
Whichever solution is chosen, hiring a professional ensures that the job is done right and will last. However, the cost for a professional contractor may be higher than attempting to fix it yourself.
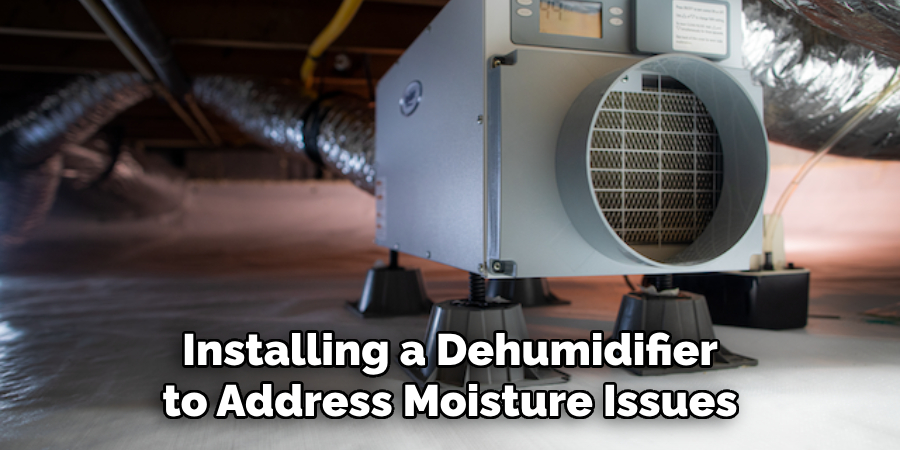
10. Prevent Future Issues
Once you have fixed your wavy drywall, it is important to take steps to prevent future issues. This may involve installing a dehumidifier to address moisture issues, properly sealing your home, or using the correct installation methods for any future drywall projects.
Additionally, regularly checking for signs of wavy drywall and addressing any underlying issues quickly can help to ensure that your walls remain level. Taking the necessary steps to protect your home from potential issues can help you avoid any costly repair projects in the future.
Things to Consider When Fixing Wavy Drywall
1. Assess the Extent of the Waviness.
If it is localized to one area, you may be able to fix it by applying a small amount of joint compound over the wavy area and then sanding it down. If the waviness is more extensive, you may need to remove and replace some drywall panels.
2. Consider Using Self-Leveling Compound.
If you are dealing with minor waviness, consider using a self-leveling drywall compound. This product is designed to fill in and level out any waviness, so it can be a great way to address the issue without having to replace any panels.
3. Determine Whether You Can Fix the Issue Yourself.
If the waviness is minor, there’s no reason why you shouldn’t be able to fix it yourself with some basic tools such as a putty knife and sandpaper. However, if the issue is more extensive or you don’t feel comfortable attempting the repair work by yourself, then consider seeking professional help.
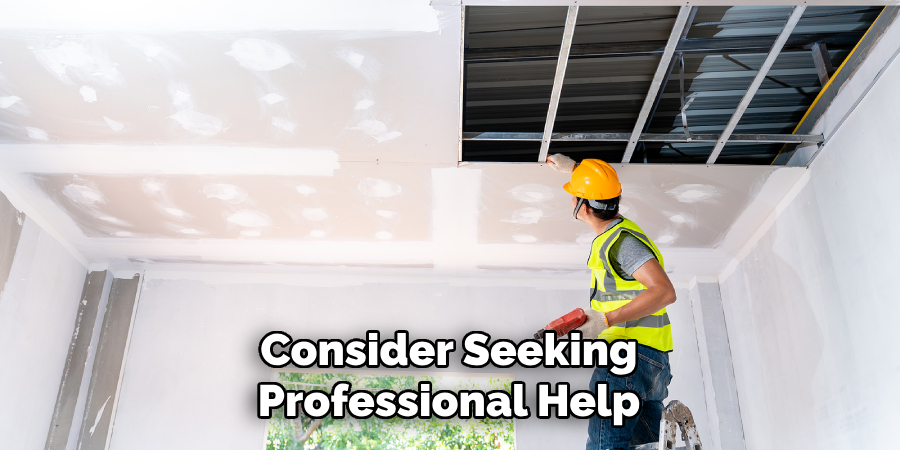
4. Get Professional Help if Necessary.
If your wall has extensive damage that requires major repairs or the replacement of several panels of drywall, then it’s best to seek professional help. A professional can assess the extent of the damage, advise you on the best course of action and make sure that your wall is repaired properly.
Conclusion
Fixing wavy drywall can be a tricky and time-consuming process, but it can give you an opportunity to add value to your home. By taking the time to identify underlying structural issues first and then making sure you match products to the type of surface, you can get a satisfactory end result. Repairing these surfaces is no simple task–there’s a real artistry that goes into properly preparing surfaces for finish coating.
However, in the right hands, the results speak for themselves. A successful repair will not only look great but also maintain its integrity over time. Be sure to follow all instructions on how to fix wavy drywall carefully, and always consult an expert when in doubt. Happy fixing!