Is your vinyl plank flooring separating? It can be a real pain to fix, but it can be done with the right tools and techniques. In this article, we’ll show you how to fix vinyl plank flooring separating using a few simple steps. We’ll also provide some helpful tips to make the process as smooth as possible. So read on for all the info you need!
Vinyl plank flooring is a popular choice for many homeowners because it’s affordable, durable, and easy to install. However, one downside of vinyl plank flooring is that it can separate over time. If your vinyl plank flooring is separating, don’t worry – it can be fixed! Many homeowners have had to deal with this issue, and it’s not as difficult as you might think. It just takes a little bit of patience and the right tools.
Summary: If your vinyl plank flooring is separating, there are a few things you can do to fix it. First, make sure the flooring is secure against the walls and ceilings. Second, use a sealant to keep the flooring together. Finally, use a contractor to repair the flooring.
What Is Vinyl Plank Flooring Separation?
Vinyl plank flooring is designed to resemble hardwood floors. The planks are made of vinyl and have a grooved tongue-and-groove edge that allows them to snap together. This type of flooring is usually installed as a floating floor, meaning that it is not glued or nailed to the subfloor.
This is talking about why wood floors might have spaces between the planks. It says that as the planks expand and contract due to changes in temperature and humidity, the joints can loosen and the planks can pull apart. Also, if you have heavy furniture or appliances, they can cause the planks to separate.
If your vinyl plank flooring starts to separate, you need to act fast. Once the planks are pulled apart, they can get damaged more easily from water or dirt. Also, gaps between the planks can make it easy to trip.
What Causes Vinyl Plank Floors to Separate?
Vinyl plank flooring is a popular choice for many homeowners because it is affordable, durable, and easy to clean. However, vinyl plank floors can start to separate over time, causing gaps and cracks in the surface. This can be caused by a variety of factors, including:
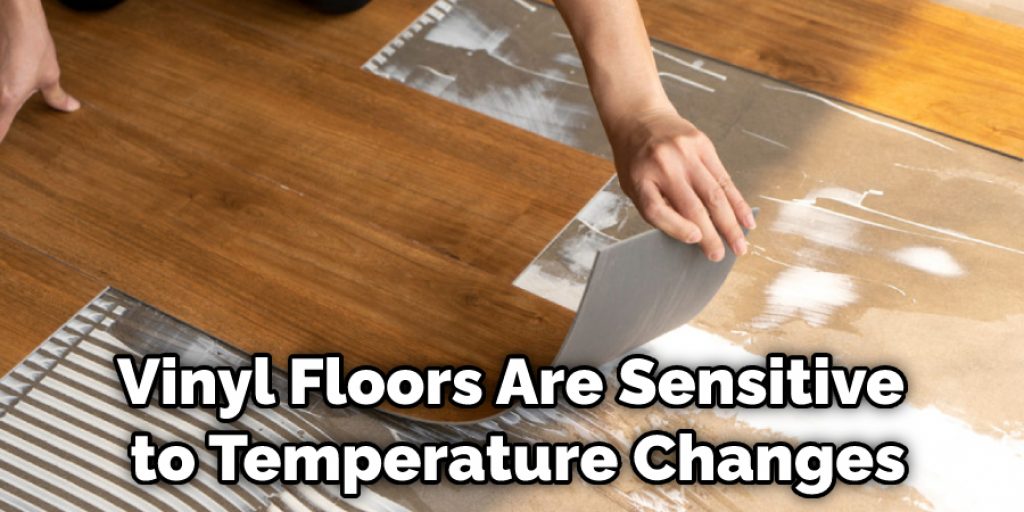
- Temperature changes: Vinyl floors are sensitive to temperature changes and can expand or contract with extreme heat or cold. This can cause the planks to separate from or from the subfloor.
- Humidity: High humidity levels can also cause vinyl plank floors to separate. This is because the planks absorb moisture from the air, making them swell and pull away from each other.
- Improper installation: If vinyl plank floors are not installed correctly, they can start to separate soon after installation. This is usually due to the planks not being locked together correctly or not being appropriately sealed around the edges.
- High-traffic and Moving Heavy Furniture Around: Vinyl plank floors can also start to separate if they are subject to wear and tear. For example, if you move heavy furniture around often or have a lot of foot traffic in your home, the planks can become loose over time.
A Detailed Guide on How to Fix Vinyl Plank Flooring Separating
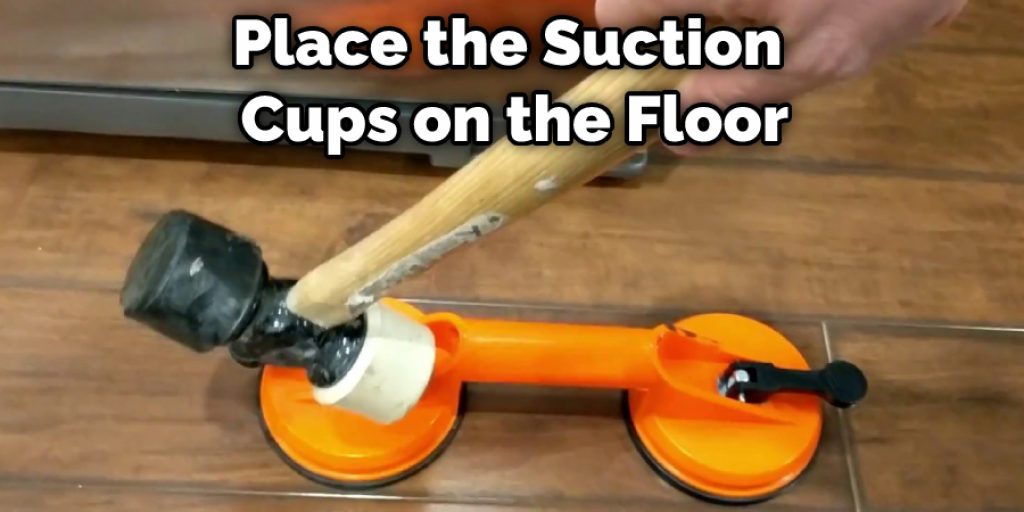
Method 1: Using Suction Cups
Suction cups are small, disc-shaped objects that create a vacuum seal when pressed against a smooth surface. This seal is strong enough to hold onto things like shower caddies, bathroom grab bars, and–most relevantly–vinyl plank flooring. So if your vinyl plank flooring is separating at the seams, you can try using suction cups to reattach it.
What You’ll Need?
- Suction cups (available at hardware stores)
- A utility knife or box cutter
- A putty knife or old credit card
Step 1: Determine Where the Seams Are Pulling Away
Before you can start reattaching your flooring, you need to determine where the seams are pulling away. This will help you know how many suction cups you’ll need and where to place them. Start by lifting the flooring up at one end of the room. Make sure you have a few extra suction cups handy, just in case.
Step 2: Cut the Suction Cups in Half
Once you know where the seams are separating, it’s time to cut the suction cups in half. You can do this with a utility knife or box cutter. It’s essential to make sure that each suction cup is cut evenly to create a good seal.
Step 3: Peel Back the Flooring at the Seam
Once you’ve cut the suction cups in half, it’s time to peel back the flooring at the seam. Be careful not to damage the flooring as you do this. You can use a putty knife or old credit card to help you lift the flooring up.
Step 4: Place the Suction Cups on the Floor
Once you’ve peeled back the flooring, it’s time to place the suction cups on the floor. Make sure that each suction cup is pressed firmly against both flooring pieces. If necessary, use a small amount of water to help them adhere.
Step 5: Let the Suction Cups Dry
After placing all of the suction cups on the floor, let them dry for 24 hours before walking on the flooring or replacing any furniture. This will give them time to create a strong seal.
Method 2: Using Heat
If your vinyl plank flooring is separating at the seams, you can use a hairdryer or heat gun to fix the issue. Heat will soften the adhesive and allow you to press the planks back together.
What You’ll Need?
- Hairdryer
- Heat gun
Step 1: Before You Start
Before you start using heat to fix your vinyl plank flooring, there are a few things you need to do. First, make sure that the area you’re working in is well-ventilated. Second, put on gloves to protect your hands from the heat.
Step 2: Use a Hairdryer
If you’re using a hairdryer to fix your vinyl plank flooring, start by setting the hairdryer to the highest setting. Hold the hairdryer about 6 inches away from the seem and move it back and forth until the adhesive is soft.
Step 3: Use a Heat Gun
If you’re using a heat gun, set it to low heat and hold it about 8 inches away from the seem. Move the heat gun back and forth until the adhesive is soft.
Step 4: Press the Planks Together
Press the vinyl planks together once the adhesive is soft and hold them in place for about 30 seconds. Allow the adhesive to cool, and then repeat steps 2-4 if necessary.
Step 5: Clean Up
Once you’ve fixed your vinyl plank flooring, you need to clean up any adhesive left behind. To do this, wet a rag with warm water and use it to wipe away any excess adhesive.
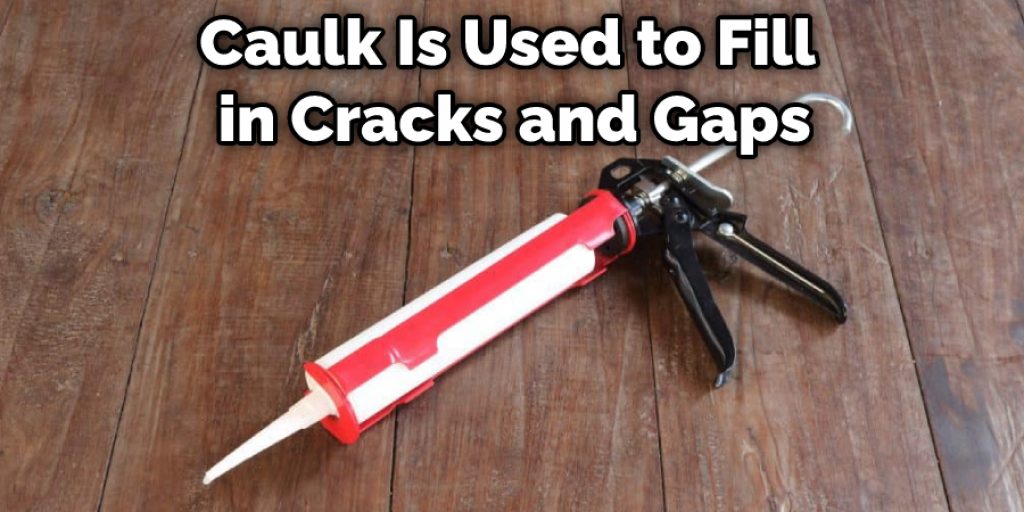
Method 3: Use Caulk
Caulk is a type of sealant used to fill in cracks and gaps. It is made of silicone, latex, or acrylic, and it can be applied to both porous and nonporous surfaces. For example, when the caulk is used on vinyl plank flooring, it can help seal the cracks and gaps that are causing the flooring to separate.
What You’ll Need?
- Caulk gun
- Caulking tube
- Putty knife
- Rag
- Alcohol-based cleaner
Step 1: Prepare the Area
Before applying caulk, you need to prepare the area where the caulk will be applied. This means that you need to clean the surface of the vinyl plank flooring and remove any dirt, debris, or grime. You can do this by using an alcohol-based cleaner and a rag.
Step 2: Cut the Tip of the Caulking Tube
Once the area is prepared, you can cut the tip of the caulking tube. Be sure to cut the tip at a 45-degree angle. This will make it easier to apply the caulk evenly.
Step 3: Apply the Caulk
Now, you can start to apply the caulk. Begin at one end of the crack or gap and slowly move the caulk gun along the surface. Be sure to apply a continuous bead of caulk.
Step 4: Smooth the Caulk
Once you have applied the caulk, you need to smooth it out. You can do this with a putty knife or your finger. Just be sure to smooth it out evenly.
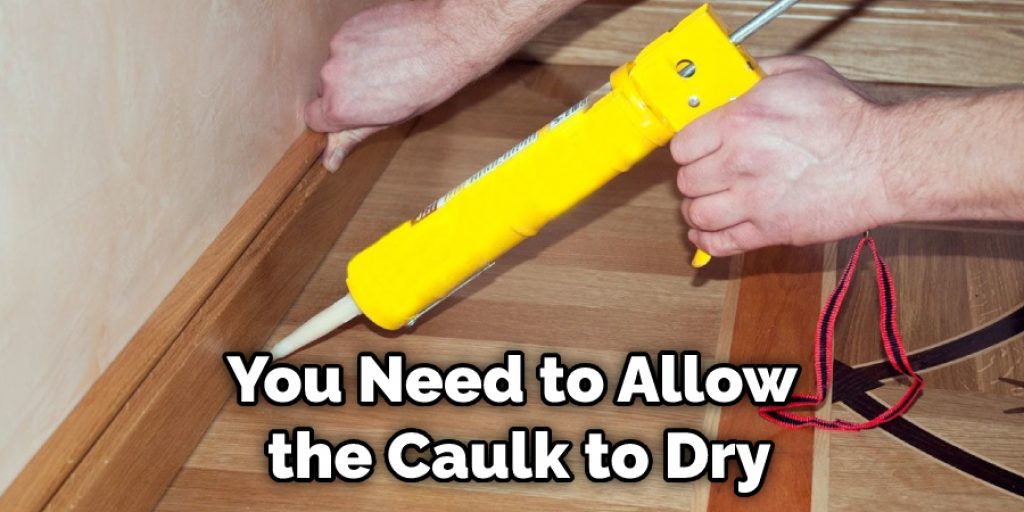
Step 5: Allow the Caulk to Dry
Now, you need to allow the caulk to dry. This usually takes about 24 hours. Once it is dry, you can enjoy your vinyl plank flooring without worrying about it separating.
Method 4: Replace the Damaged Planks
If the problem is just one or two damaged boards, you can replace those without much issue. However, if the damaged area is small, this will be the best and most seamless option.
What You Need?
- Utility knife
- Putty knife
- Hammer
- Chisel
- Replacement planks (make sure to get the same batch and color!)
- Wood glue
- T-molding (optional)
Step 1: Remove the Damaged Plank
Use your utility knife to score along the edge of the plank. Do this a few times so that the blade can get through the adhesive.
Use your putty knife or a flat object to pry up the plank. Start from one end and work your way across until the entire plank is removed. If it’s stubborn, you can use a hammer to tap on the putty knife and help dislodge the plank.
Step 2: Prep the Area for the New Plank
Use a chisel to remove any remaining adhesive from the subfloor. You want to make sure that the area is clean before proceeding so that the new plank will adhere properly.
Step 3: Install the New Plank
Apply wood glue to the subfloor and place the new plank in position. Use a weight or something heavy to hold it down while the glue dries.
Step 4: Connect the New Plank to the Old Ones
Once the adhesive has dried, you can connect the new plank to the old ones by sliding it into place. You may need to use a mallet or hammer to tap it into place. Make sure that it’s flush with the other planks before proceeding.
If you have a T-molding, you can install it now to hide any seams between planks. Otherwise, your floor should be good as new!
You Can Check It Out to Fix Air Pockets Under Laminate Flooring
How Do You Prevent Vinyl Plank Floor Separation?
Preventing vinyl plank floor separation is key to maintaining the beauty and integrity of your floors. There are a few simple things you can do to help keep your floors looking like new:
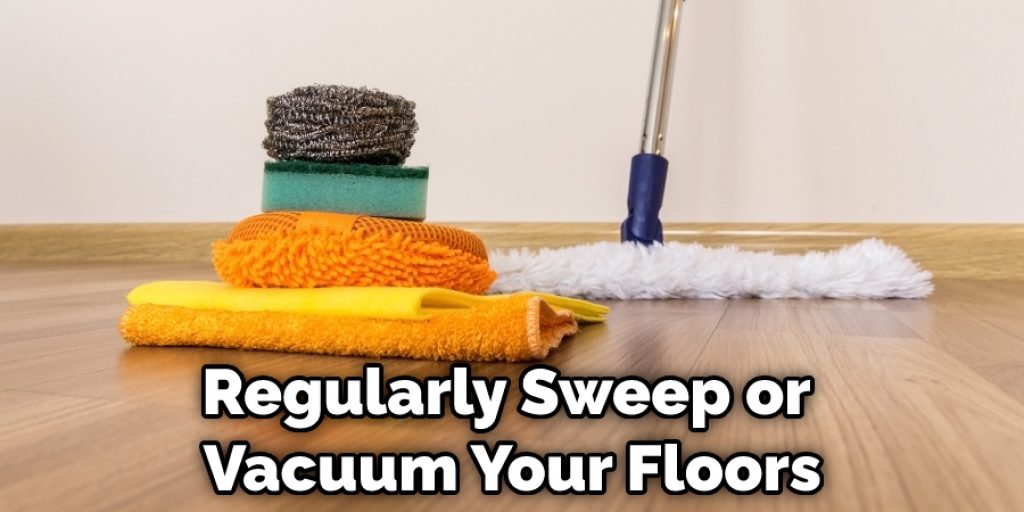
- Regularly sweep or vacuum your floors to remove dirt and debris.
- Wipe up spills immediately.
- Place mats at entries to help reduce tracking in dirt and mud.
- Avoid using harsh cleaners or scrubbing pads on your floors. Instead, stick to gentle, pH-neutral cleaners explicitly designed for vinyl floors.
- Never wax or polish your vinyl floors, as this can cause them to become sticky and attract dirt.
By following these simple tips, you can help keep your vinyl plank floors looking like new for years to come.
Frequently Asked Questions
Why is My Vinyl Plank Flooring Separating?
Vinyl plank flooring is a relatively new type of flooring that has been gaining popularity in recent years. This type of flooring is made from plastic sheets that are joined together to create an overlay on the ground. Vinyl plank floors can be installed either as solid vinyl sheets or as panels that can be lifted and moved around, which makes them popular for use in high-traffic areas such as kitchens and bathrooms.
One common issue with vinyl plank floors is a separation between the planks. This occurs when moisture seeps into the seams between the planks and causes them to swell up, creating cracks in the surface of the wood. If this happens, it’s important to deal with it quickly because prolonged separation may lead to wooden rot. In most cases, simply cleaning and re-sealing the seams will resolve the issue but if this doesn’t work then you will need to replace your entire vinyl plank floor.
Should Vinyl Plank Flooring Be Glued Down?
The best way to attach vinyl plank flooring may vary depending on the type of flooring, the condition of the flooring, and your particular installation situation. That being said, some tips that may be useful include applying a sealant or liquid adhesive to the seams of the plank before installing it, and using a level to ensure that the plank is installed straight and perpendicular to the floor joists.
Is There a Sealant for Vinyl Flooring?
There are a number of sealants that can be used to protect vinyl flooring, but most experts recommend using a patented and water-resistant sealant called Xtreme Seal. This product is specifically designed for use on vinyl floors and was created in collaboration with the Vinyl Flooring Manufacturers Association (VFMA).
Xtreme Seal has been shown to resist staining, fading, and water damage while also providing long-term protection against wear and tear. It is also easy to apply by simply brushing it onto the surface of your vinyl flooring. Once it’s dry, you should test the application area for leaks before applying any other treatments or furniture.
If you choose not to use Xtreme Seal, then another option would be polyurethane coatings such as Super Shield or Tuffcoat. These products offer good moisture resistance but may require extra applications over time due to their gradual nature.
Can Vinyl Planks Be Sealed?
Yes, vinyl plank flooring can be sealed using a variety of sealants. However, it is important to choose the right sealant for your flooring and installation. Vinyl plank flooring is susceptible to moisture, so a water-resistant sealant is a good choice. Some other factors to consider when choosing a sealant for vinyl plank flooring include:
-The type of adhesive used
-The temperature at which the sealant will be applied
-The type of vinyl plank flooring is sealed
-The number of coats of sealant required
Is Polyurethane Safe for Vinyl Plank Flooring?
There is mixed evidence on the safety of polyurethane based vinyl plank flooring when it comes to allergies. Some studies have found that it can exacerbate existing allergies, while other studies haven’t shown any adverse effects. Ultimately, if you are concerned about your allergy status, it is best to consult with a certified health professional before making any decisions.
Conclusion
Vinyl plank flooring is a popular choice for homeowners because it’s affordable and durable. However, if your vinyl plank flooring starts to separate, there are ways to fix the problem. In this article, we have shown you how to fix vinyl plank flooring separation. Thanks for reading!
You May Also Read: How to Fix Gap Between Door Casing and Floor