LED light bulbs are becoming more and more popular in homes across the globe. They last longer, use less energy and produce less heat than traditional light bulbs. Plus, they come in various shapes and sizes to fit any fixture. However, one downside to LED light bulbs is that the buttons can often stop working over time. In this article, we’ll show you how to fix the diy button on led lights. Stay lit!
Nowadays, people are using LED light bulbs in their homes more and more. They last longer and use less energy than traditional light bulbs, plus they come in all sorts of shapes and sizes to fit any fixture. Even though LED light bulbs offer many advantages, it’s not surprising that they can sometimes stop working. If that happens, don’t worry! We’ll show you how to fix it. Keep reading for more information.
Summary: If you’re having trouble fixing your DIY button on your LED lights, follow these steps:
1. Remove the light bulb.
2. Remove the outer casing of the light bulb.
3. Clean the area around the button with a dry cloth.
4. Apply a thin layer of superglue to the back of the button.
5. Place the light bulb back in place and press down firmly.
6. Wait a few minutes for the glue to set.
7. Enjoy your repaired button!
What Could Be the Possible Reasons for the Diy Button on Led Lights Not Working?
There could be a few reasons why your diy button on led lights is not working as expected.
- Batteries Are Running Low: One of the most common reasons for led lights not working. If your batteries are running low, likely, they’re not providing enough power to light up the leds. You’ll need to replace the batteries with fresh ones.
- The Connection Is Loose: If your DIY button is not working, the first thing you should check is the connection. If the connection is loose, it will cause the light to flicker or not work at all. You can fix this by simply reconnecting the wires.
- The Switch Is Broken: If the switch is broken, it will need to be replaced. To test if the switch is broken, remove the batteries from the light. Then, using a multimeter, test for continuity between the two terminals on the switch. If there is no continuity, the switch will need to be replaced.
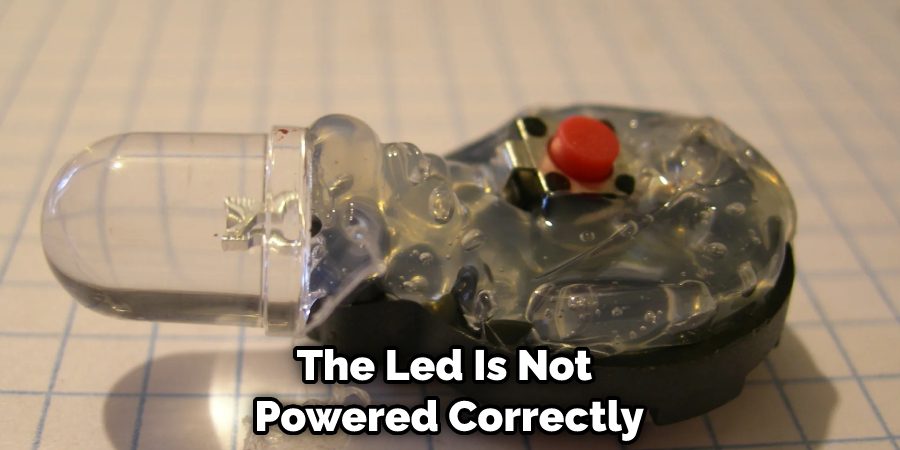
- The Button Is Stuck: If the button is stuck, it will need to be replaced. To test if the button is stuck, remove the batteries from the light. Then, using a multimeter, test for continuity between the two terminals on the switch. If there is no continuity, the button will need to be replaced.
You Can Check It Out to Fix Color Changing Led Lights
A Step by Step Guide on How to Fix the Diy Button on Led Lights
Step 1: Identify the Issue with the DIY Button
First, determine the specific issue with the DIY button on your LED lights. The problem could be a faulty button, a damaged remote control, or an issue with the LED light strip’s control unit. Common symptoms include the DIY button not responding, the LED lights not changing colors, or the button getting stuck.
Step 2: Check the Remote Control
If your LED lights are controlled by a remote, inspect the remote for any visible signs of damage or wear. Ensure that the remote has fresh batteries and is functioning correctly. If the remote is not working, consider replacing it or trying another compatible remote.
Step 3: Inspect the DIY Button
Examine the DIY button for any visible signs of damage, such as cracks or debris. If the button appears to be stuck, try gently cleaning it with a soft cloth or cotton swab dipped in rubbing alcohol. Allow the button to dry completely before testing it again.
Step 4: Test the Wiring and Connections
Check the wiring and connections between the LED light strip and the control unit for any signs of damage or loose connections. If you find any damaged wires, repair or replace them as needed. Ensure that all connections are secure and properly seated.
Step 5: Reset the LED Light Strip
Sometimes, resetting the LED light strip can resolve issues with the DIY button. To reset the light strip, unplug it from the power source and wait for about 30 seconds. Then, plug the light strip back in and test the DIY button to see if the issue has been resolved.
Step 6: Update the LED Light Strip’s Firmware
If your LED light strip has a control unit with updatable firmware, check the manufacturer’s website for any available firmware updates. Updating the firmware can sometimes resolve issues with the DIY button or other functions of the LED light strip.
Step 7: Replace the Control Unit
If the issue with the DIY button persists and you’ve ruled out issues with the remote control, wiring, and connections, consider replacing the control unit for your LED light strip. Check the manufacturer’s website or contact their customer support for information on obtaining a replacement control unit.
Step 8: Test the DIY Button Functionality
With the control unit replaced, test the DIY button again to ensure that it is functioning correctly. If the button is still not working, you may need to consult with the manufacturer or a professional technician for further assistance.
Step 9: Customize the DIY Settings
Once the DIY button is functioning correctly, you can customize the settings for your LED light strip. The DIY button typically allows you to create custom color combinations and lighting patterns, so consult the manufacturer’s instructions for guidance on using the DIY button to achieve your desired lighting effects.
Step 10: Secure and Organize the Wiring
After repairing the DIY button and customizing your LED light strip’s settings, secure and organize any exposed wiring. Use cable clips or zip ties to neatly bundle the wires and secure them in place, ensuring that they are not at risk of damage or becoming tangled.
Step 11: Test the LED Light Strip
With the DIY button repaired and your LED light strip customized, test the entire system to ensure that it is functioning correctly. Turn the LED lights on and off, change the colors and patterns, and adjust the brightness settings to ensure that all functions are working as intended.
Step 12: Maintain the LED Light Strip
To prevent future issues with the DIY button or other components of your LED light strip, regularly inspect and maintain the system. Keep an eye out for signs of wear or damage, such as frayed wires or cracked buttons, and address any issues promptly. Clean the LED light strip and remote control as needed to ensure that they remain in good working condition.
By following these steps, you can successfully troubleshoot and repair the DIY button on your LED light strip, allowing you to customize and control your lighting system effectively. Regular inspection and maintenance, along with the proper use of your LED light strip and its components, will help to ensure that your lighting system remains functional and efficient for years to come.
Step 13: Familiarize Yourself with the Product Warranty
Understanding the warranty for your LED light strip can save you time and money if you encounter issues with the DIY button or other components. Familiarize yourself with the terms of the warranty, including the coverage period and any conditions that may void the warranty. In some cases, the manufacturer may offer free repairs or replacements for faulty components, which can be a cost-effective solution for fixing the DIY button on your LED light strip.
Step 14: Keep Spare Components on Hand
To minimize downtime and inconvenience if the DIY button or other components of your LED light strip fail, consider keeping spare parts on hand. Having a spare remote control, control unit, or wiring connectors readily available can help you quickly address issues with your LED light strip and ensure that your lighting system is always ready to use.
Step 15: Educate Others on Proper Use and Maintenance
If you share your living or working space with others, educate them on the proper use and maintenance of your LED light strip system. Ensuring that everyone who interacts with the lighting system understands how to operate the remote control, use the DIY button, and maintain the LED light strip can help to prevent issues caused by improper use or neglect.
Step 16: Consult Professional Help If Necessary
If you’re unable to resolve the issue with the DIY button on your LED light strip, don’t hesitate to consult a professional technician or electrician for assistance. Attempting to repair a faulty DIY button or control unit without the necessary skills or knowledge can potentially cause further damage to your LED light strip or create a safety hazard. A professional can accurately diagnose and repair the issue, ensuring that your LED light strip is functioning safely and correctly.
By following these comprehensive steps, you can effectively address any issues with the DIY button on your LED light strip, ensuring that your lighting system is customizable and functional. Proper maintenance, care, and troubleshooting will help to extend the lifespan of your LED light strip and keep it in optimal working condition.
You Can Check It Out to Fix Led Strip Lights Different Colors
Frequently Asked Questions
Why Can’t I Make Diy Colors on My Led Lights?
If you’re having trouble making DIY colors on your Led lights, it may be due to incorrect installation.LEDs emit light in a specific color range depending on the type of bulb that is installed. This color range can be customized using traditional bulbs or led Lights, but if the LEDs are not properly installed and aligned with the bulb’s color spectrum, then they will produce unnatural colors.
To ensure proper installation, it is important to consult an experienced electrician who can help you choose the right LED lights for your specific needs and install them accordingly. In addition, make sure that all electrical connections are tight and free from any kinks or grooves – even small bumps can cause problems later on down the line.
Why Are My Led Light Buttons Not Working?
There are a few possible reasons why your led light buttons might not be working. The first is that the batteries may need to be replaced. If you do not have any replacement batteries, then you can try connecting them directly to an outlet using an extension cord or via a USB port on your computer.
If this does not work, then it might be necessary to replace the button controller. This can often be done by removing the back cover of the device and accessing its internal components through removable screws or rivets. Once inside, locate and replace the faulty component with a new one..
Lastly, if none of these solutions work and you’re still experiencing issues with your light buttons, there could possibly be a problem with between circuit boards in your device related to communication between modules (this has happened rarely). In such cases, it’s usually necessary to open up the entire unit and check for shorts, etc.
What Color Should I Put My Led Lights on to Sleep?
Some general tips that may help you choose the correct color for your lights to sleep include these:
- Choose a color that is close to the color of your walls – This will help to minimize any contrast between the light and the wall, which will make it easier for your eyes to adjust and fall asleep.
- Make sure to choose a light color that is also dark enough – This will help to drown out any other noises and distractions in your room and make it easier for you to fall asleep.
- Choose a light color that is easy on the eyes – Bright light can be irritating and cause fatigue, so make sure to pick a light color that won’t be too harsh on your eyes.
- Choose a light color that won’t clash with any other colors in your home – If you have any other colorful accessories in your room, make sure to choose a light color that won’t clash with them.
Conclusion:
If you have followed the steps we’ve outlined in this article on how to fix the diy button on led lights and are still having difficulty fixing your diy button on led lights, please reach out to a professional for assistance. Experts would be more than happy to help get your light fixtures up and running again in no time. Thanks for reading.