If you’re like most people, your computer is one of your most prized possessions. So, it’s only natural that you want to keep it looking as good as new for as long as possible. But, unfortunately, even the most careful people can sometimes accidentally scratch their computer case.
It makes your PC look unsightly, but it can also lead to further damage if not fixed properly. This blog post will show you how to fix scratches on computer case using a few simple steps. Keep reading to learn more!

Summary: There are a few ways to fix scratches on computer cases. One is to use a polishing cloth and polish the scratch until it disappears. Another is to use a clear adhesive to attach a piece of sandpaper to a plastic card and use that to polish the scratch.
10 Easy Methods on How to Fix Scratches on Computer Case
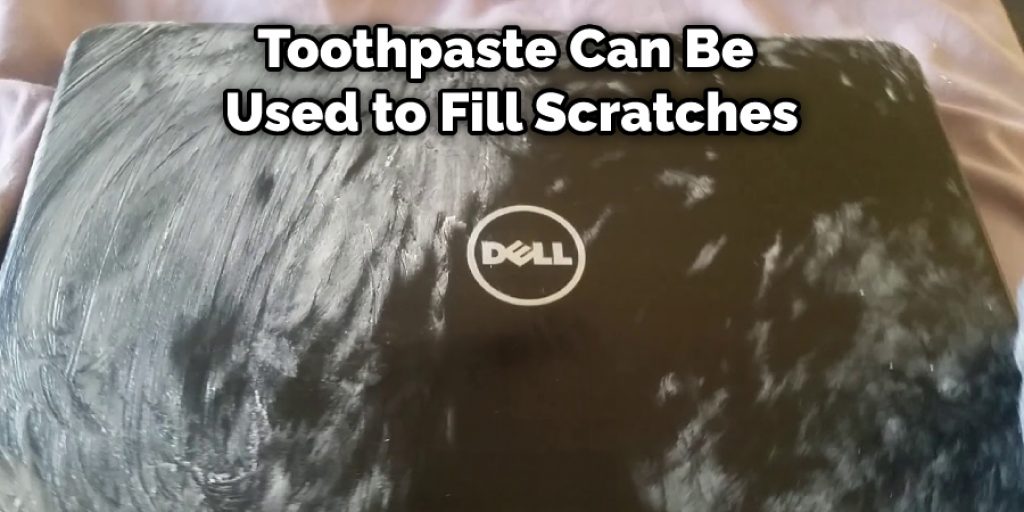
1. Toothpaste Method
Clean the area with cotton and water. Use a soft cloth to spread the toothpaste over the scratch. Next, squeeze some toothpaste on an old CD, and rub it into the scratch. (You can also use a razor blade, but you must be careful not to cut or scar your case.) Be patient, and don’t let the toothpaste dry. Rinse it off with water after three minutes. The scratch should be gone now. If it’s still there, try buffing over the area again.
2. Nail Polish Method
You can fill scratches on your computer case with clear nail polish just like you would your nails. Put a dab of it on a cotton swab and run it over the scratch. Once you’re done, buff it out with a soft cloth.
3. Using Vinegar
Vinegar is a great way to fill scratches and make your computer case look new in no time. Just mix equal parts vinegar and water together in a bowl, and dip a clean cloth into it. Rub the scratch with this mixture for about two minutes, then wipe away any excess liquid left on your case.
4. Using Toothpaste and Oil
Just like vinegar, toothpaste and oil can be used to fill scratches on chromed plastic such as your computer case. Mix a few drops of mineral oil with some toothpaste paste. Spread the paste over the scratch, then wipe it away after about three minutes of letting it soak into the metal. If you want, you can increase the amount of oil in your mixture. I would recommend not adding more than a tablespoon of oil to a half teaspoon Of toothpaste, but it’s up to you.
5. Using Alcohol Pad
To fix a scratched phone case, clean the scratch with an alcohol pad, then buff the case with a napkin or a piece of a soft cloth.
6. Using acetone
Acetone can be used to take off paint from walls and computer cases alike. Just soak a cotton swab in acetone, and rub the scratch with it. Make sure you’re wearing gloves before doing this, as acetone is very strong and can take the paint off your skin as easily as a computer case!
7. Using Baking Soda
To remove a scratch from your phone case, mix a few tablespoons of baking soda with a bit of water. Stir until smooth, then spread the paste over the scratch. Let it sit for a few minutes, then rinse with a damp cloth. Finally, dry it off with a dry towel to prevent water spots.
8. Apply Plastic Polish
Plastic polish can fill in minor scratches on your computer case. Just clean the scratch with acetone, then apply the polish to buff it out. Make sure you don’t use too much, or it could make the scratch more visible since it will reflect light.
9. Using Wax
You can use car wax to fill in and polish out scratches on your computer case. The Wax will work just like toothpaste and oil, but it’s stronger. Just put a little bit of the Wax over the scratch, then buff it down using a piece of cloth or an old sock.
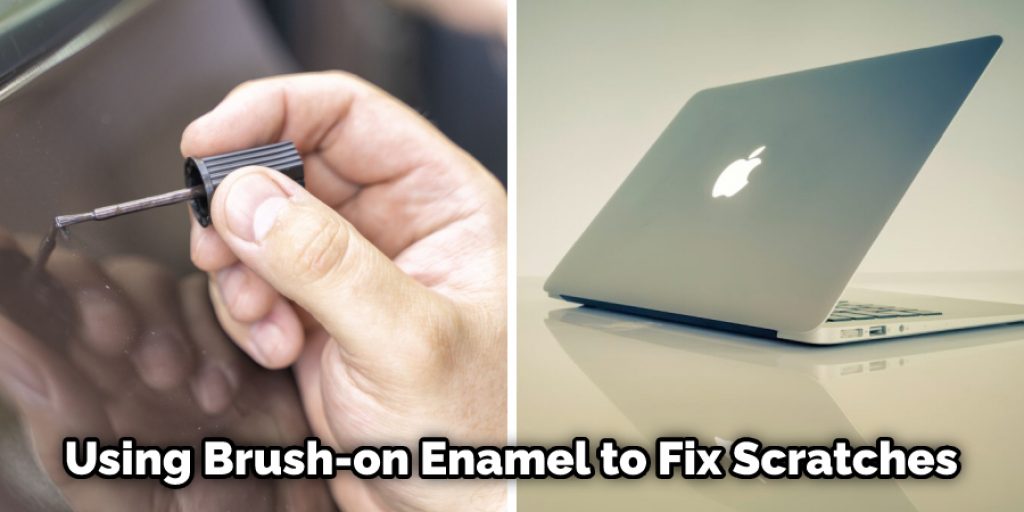
10. Use Brush-On Enamel
Using brush-on enamel to fix scratches on metal surfaces like your computer case. Just put a small amount of the paint in the scratch, then rub it into place using a cotton swab or old toothbrush. This method will probably require several coats of paint, so you’ll want to apply each one after the previous coat has dried.
Step by Step Guide: How to Fix Scratches on Computer Case
Step 1: Gather Necessary Materials and Tools
Before attempting to fix scratches on your computer case, gather the following materials and tools:
- Microfiber cloth
- Mild dish soap
- Water
- Fine-grit sandpaper (between 600 and 2000 grit)
- Polishing compound (optional)
- Paintbrush or cotton swab (optional)
- Touch-up paint (if applicable)
- Clear coat or lacquer (if applicable)
- Painter’s tape (if applicable)
Step 2: Assess the Damage
Inspect the scratches on your computer case to determine the extent of the damage. Scratches can range from superficial marks that only affect the surface to deep gouges that penetrate the material. Note the severity of the scratches and any additional imperfections you may wish to address during the repair process.
Step 3: Clean the Scratched Area
Use a microfiber cloth dampened with a solution of mild dish soap and water to gently clean the scratched area, removing any dirt, dust, or debris. Make sure the area is completely clean before moving on to the next step, as any remaining debris can cause further damage during the repair process.
Step 4: Lightly Sand the Scratched Area
For light scratches that only affect the surface, you may be able to remove or minimize their appearance by gently sanding the area with fine-grit sandpaper. Begin by wrapping the sandpaper around a soft, flexible block or your finger, and gently sand the scratched area using small, circular motions. Be careful not to apply too much pressure, as this can cause additional damage to the case.
Step 5: Wipe Away Sanding Dust
After sanding the scratched area, use a clean microfiber cloth to wipe away any sanding dust or debris. This will ensure a clean, smooth surface for further repair steps, if necessary.
Step 6: Apply Polishing Compound (Optional)
If the scratches are still visible after sanding, you can try applying a polishing compound to further minimize their appearance. Using a clean microfiber cloth or a soft, lint-free cloth, apply a small amount of polishing compound to the scratched area, and gently buff the surface using small, circular motions. Be sure to follow the instructions on the polishing compound packaging for best results.
Step 7: Clean the Polished Area
After polishing the scratched area, use a clean microfiber cloth dampened with water to remove any residual polishing compound. Ensure the area is completely clean and dry before moving on to the next step.
Step 8: Match the Paint (If Applicable)
If the scratches on your computer case have penetrated the paint or finish, you may need to touch up the area with matching paint. Consult your computer case’s user manual or the manufacturer’s website for information on the specific paint color and type used on your case. Purchase a small quantity of the appropriate paint for touch-up purposes.
Step 9: Mask Off the Surrounding Area (If Applicable)
Before applying touch-up paint, mask off the area surrounding the scratch using painter’s tape. This will help to protect the unaffected areas of your computer case from accidental paint application.
Step 10: Apply Touch-Up Paint (If Applicable)
Using a small paintbrush or cotton swab, carefully apply a thin layer of touch-up paint to the scratched area. Be sure to apply the paint evenly and avoid creating any drips or pools. Allow the paint to dry completely, as specified by the product’s instructions. Depending on the severity of the scratches and the type of paint used, you may need to apply multiple coats to achieve the desired coverage and appearance.
Step 11: Remove Painter’s Tape (If Applicable)
After the touch-up paint has dried, carefully remove the painter’s tape from the surrounding area.
Step 12: Apply Clear Coat or Lacquer (If Applicable)
If your computer case has a clear coat or lacquer finish, you may need to apply a protective layer over the touch-up paint to ensure a consistent appearance and provide additional protection. Consult your computer case’s user manual or the manufacturer’s website for information on the specific clear coat or lacquer used on your case, and purchase a small quantity for touch-up purposes.
Step 13: Mask Off the Surrounding Area (If Applicable)
Before applying the clear coat or lacquer, mask off the area surrounding the repaired scratch using painter’s tape. This will help to protect the unaffected areas of your computer case from accidental application.
Step 14: Apply Clear Coat or Lacquer (If Applicable)
Using a small paintbrush or cotton swab, carefully apply a thin layer of clear coat or lacquer to the repaired area. Be sure to apply the product evenly and avoid creating any drips or pools. Allow the clear coat or lacquer to dry completely, as specified by the product’s instructions. Depending on the type of clear coat or lacquer used, you may need to apply multiple coats to achieve the desired appearance and level of protection.
Step 15: Remove Painter’s Tape (If Applicable)
After the clear coat or lacquer has dried, carefully remove the painter’s tape from the surrounding area.
Step 16: Buff the Repaired Area (If Applicable)
If the repaired area appears slightly raised or uneven after the clear coat or lacquer has dried, you can gently buff the surface using fine-grit sandpaper to create a smooth, even finish. Be sure to use a light touch and small, circular motions to avoid causing additional damage to the case.
Step 17: Clean the Repaired Area
Use a clean microfiber cloth to gently clean the repaired area, removing any dust or debris that may have accumulated during the repair process.
Step 18: Inspect the Repair
Examine the repaired area to ensure that the scratches have been effectively addressed and that the repair is consistent with the surrounding area. If necessary, repeat any of the previous steps to further refine the repair and achieve the desired appearance.
By following these steps, you can effectively repair scratches on your computer case, restoring its appearance and protecting it from further damage. Remember that the key to a successful repair is patience and attention to detail, as rushing through the process or using improper techniques can result in additional damage or an unsatisfactory result. With practice and care, you can maintain the appearance of your computer case and keep it looking its best for years to come.
Some Helpful Tips and Suggestions
Here we have given some tips on how to fix scratches on computer case.
- First, separate the case from the rest of your PC. You will need a screwdriver to do so. You will need a Phillips head screwdriver for some cases, and for other types, you might need a different screwdriver, such as a hex wrench.
- Next, give your computer case a thorough look-over to inspect it, find any scratches and scuffs, and remove them.
- Fill the scratches with either a colored paint or an enamel to cover them up.
- Be sure not to paint any necessary areas for your computer’s ventilation system because this will cause damage to the rest of your components.
- You can use sandpaper, but it is suggested that you use something else instead, such as rubber or a fine cloth.
- You are strongly advised to use an electric sander if you have one because this will ensure that your computer case will get evenly painted with nice, smooth edges for a professional look.
- If the color of your paint is different from that of the original color of your computer case, then you can try to spray paint your entire computer case or put a clear coat on it to give it that shiny, new look.
How Long Does It Take to Remove Scratches From Computer Case?
The time it takes to fix a car scratch depends on the depth of the scratch and the level of experience of the person doing the repair. A deep scratch will take longer to fix than a shallow one, and someone with a lot of experience with this type of repair can do it more quickly than someone who is less experienced. In general, though, it should take around half an hour to fix an average number of car scratches.

If you have a very large number of scratches, then the process could take over an hour. However, if your case is badly damaged, then you might need to remove all layers of paint from it before using the scratch removal products will do anything. In this case, it will take a few hours, and you’ll probably need to use more than one product.
Frequently Asked Questions
Can You Fix Computer Scratches?
It can be difficult to repair computer scratches, but there are a few ways that you can try. If the scratch is on the surface of your screen, you may be able to remove it with a cloth or dry-erase marker. You could also use an application called X-ZERO Scratch Remover if the scratch is deeper down on the screen. However, be aware that the removal of scratches may cause damage to your screen surface and should only be undertaken by someone who knows how to do this correctly.
If the scratch is inside one of your windows or applications, unfortunately repairing it will likely require replacing your entire operating system disk or repairing damaged software files.
Can Scratched Plastic Be Repaired?
While it may not be as glamorous as a new phone, scratched plastic can in fact be repaired. If the scratch is small and does not go deep into the surface of the phone, you can try to fix it yourself using a few simple steps. All you will need is some clear Goo Gone adhesive remover, some fine-grit sandpaper or steel wool (which should also have caution labels), and patience!
If the scratch goes deeper than that or if there are multiple scratches on different areas of your screen/phone body, then it’s likely best to take your device to an expert for repair. There are several companies that specialize in fixing broken screens and other damaged parts on smartphones. They will typically require access to the entire device so they can correct the damage properly and ensure that no additional damage occurs during the repair.
Does Pledge Remove Scratches?
Pledge is a household name when it comes to removing scratches from walls and floors. They have a wide range of products that can help with this task, from a simple spray to an advanced solution that uses lasers. So, does Pledge really work as well as they say?
The short answer is yes, Pledge does remove scratches from walls and floors. Their advanced solution actually uses lasers to damage the surface of the scratch and then remove the material that was removed. This is a much more effective way to remove scratches than using a simple spray, and it’s also more accurate – meaning less damage done to the surrounding area.
Overall, Pledge is an effective product that can help you remove scratches from walls and floors. If you have any questions about their products or services, please don’t hesitate to contact us. We would be happy to help!
Does Vaseline Restore Plastic?
Some people believe that Vaseline restores plastic, while others are unsure. The answer is likely that it depends on the type of plastic and how damaged it is. Some experts suggest using Vaseline to moisturize or seal small tears in PE (polyethylene) plastics such as milk jugs and food containers. Others claim that this will not repair the damage done to these types of plastics, but will instead just create a protective barrier against moisture and oxidation.
If you’re uncertain about whether or not Vaseline can restore plastic, then it’s best to avoid using it in situations where your Plastic may be at risk. Instead, try increasing hygiene standards by washing dishes with soap and water rather than relying on products like vaseline to help keep them clean.
Conclusion
In conclusion, there are multiple ways to fix scratches on your computer case. If the scratch is small, you can probably fix it at home with some simple supplies that you may already have. In this post, we have walked you through how to fix scratches on computer case. The first step is to clean the area around the scratch using a microfiber cloth and some rubbing alcohol.
Be sure to remove all dirt and dust from the surface before moving on. Next, apply a small amount of toothpaste to the scratch. You want to use a non-gel toothpaste, something like Colgate or Crest will work just fine. We hope this blog post has been helpful. If you have any questions or want to know more, then feel free to comment below!
You may also read: How to Repair Rusting Powder Coated Metal