We’ve all been there. You turn on the faucet to get a drink of water, and instead, you get a trickle of rusty-colored water. This usually means a pinhole leak in your copper water pipe. Don’t worry – it’s a common problem, and it’s easy to fix. Today in this article, we’ll show you how to fix pinhole leak in copper water pipe. Read on for step-by-step instructions on sealing that leaky pipe and restoring your plumbing to its former glory!
Water pipes made of copper are prone to corrosion over time. This can be caused by several factors, including exposure to oxygen, water hardness, and even acidic water. When these pipes corrode, they can develop small holes or pinholes.
If you’re dealing with a pinhole leak in your copper pipes, don’t despair. While it can be frustrating to have low water pressure or rust-colored water, the good news is that fixing the leak is relatively straightforward.
Summary: If you have a pinhole leak in your copper water pipe, there are a few things that you can do to fix the problem. First, you can try to seal off the leak with a caulking material. If that doesn’t work, you can try to replace the pipe.
What Is a Pinhole Leak in a copper water pipe?
A pinhole leak in a copper water pipe can be a serious problem, leading to major water damage in your home if left unchecked. Several factors can cause a pinhole leak, including corrosion, mineral deposits, or damage to the pipe.
If you suspect a pinhole leak in your water pipe, it is essential to have it repaired as soon as possible by a qualified professional. Ignoring the problem will only worsen and eventually result in costly repairs. The leak can cause the water pressure in the pipe to drop, leading to stagnation and the growth of bacteria. In addition, the leak can allow water to seep into surrounding areas, causing mold and mildew to form.
Causes of Pinhole Leak in Copper Water Pipe
Corrosion:
One of the primary reasons for a pinhole leak in a copper water pipe is corrosion. This can be caused by water that is high in acidity or alkalinity levels. The higher the level of these chemicals, the greater the chance of corrosion.
Temperature:
Another factor that can lead to a pinhole leak is extreme temperature changes. When water freezes, it expands and can cause the pipes to crack or break. This can lead to small holes or cracks, which are susceptible to leaks. As soon as the ice melts, water will begin to leak from the crack. This is a common problem during cold weather months.
Installation:
Incorrect installation is another common cause of pinhole leaks. If pipes are not installed properly, they may not be able to handle the pressure of the water flowing through them. This can lead to cracks and leaks.
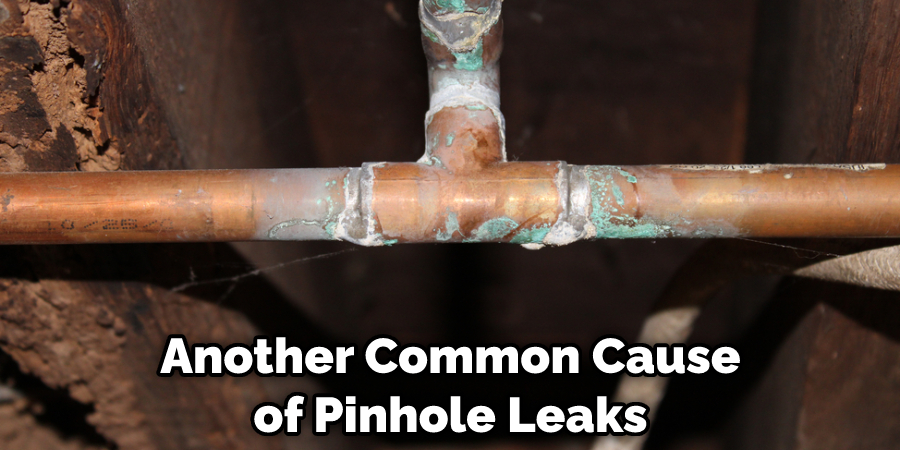
Rusting:
Rust can also cause a pinhole leak in a copper water pipe. When water comes into contact with iron or steel, it can cause the metal to corrode. This can then lead to small holes or cracks in the pipes.
Aging:
Ageing pipes are also susceptible to pinhole leaks. Over time, the material of the pipes can break down and become brittle. This can cause small cracks and holes to form, allowing water to leak through.
Exposure:
Pipes exposed to the elements are also more likely to develop pinhole leaks. If pipes are not adequately protected from the sun, wind, or rain, they can become damaged and develop small cracks or holes.
Acidic Water:
One of the most common causes of pinhole leaks is acidic water. When water is too acidic, it can eat away at the pipes and cause them to develop small holes or cracks.
Electrolysis:
Electrolysis is another common cause of pinhole leaks. This occurs when an electrical current passes through the water, which can then cause the pipes to corrode.
Poor Application Of A Protective Layer Or Localized Damage:
If a protective layer is not applied correctly, it can allow water to seep through and cause the pipes to develop small holes or cracks. Localized damage can also lead to pinhole leaks.
What Are the Signs There Is a Pinhole Leak in My Copper Pipe?
Water Damage:
One of the most common signs of a pinhole leak in your copper pipe is water damage. If you see any water stains on your walls, ceiling, or floor, it could signify a small leak. You may also notice your water bill increasing without changing your usage.
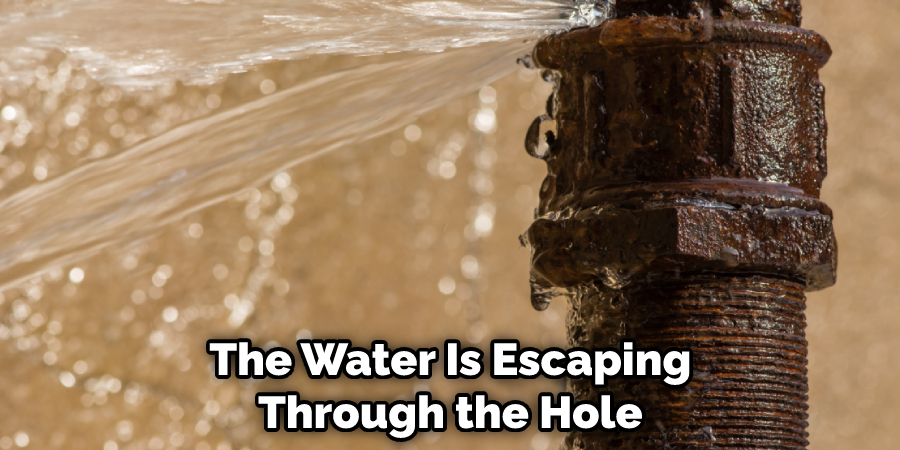
Sound:
Another sign of a pinhole leak in your copper pipe is if you hear water running when all the taps are turned off. This is because the water is escaping through the hole in the pipe and causing the noise. If you hear this, it’s essential to shut off the main water supply to your home and call a plumber right away.
Discoloration:
If you notice your water is discolored, it could signify a pinhole leak. This is because the water is coming into contact with the pipe’s metal and causing it to rust. If you see any rusty water, it’s essential to shut off the main water supply and call a plumber.
Higher Water Bill:
As mentioned, one of the signs of a pinhole leak in your copper pipe is an increase in your water bill. This is because the water is leaking out, and you are charged for it. Therefore, if you see a sudden spike in your water bill, it’s essential to check for leaks.
Low Water Pressure:
If you notice that your water pressure is lower than usual, it could be due to a pinhole leak in your copper pipe. The water is leaking out and causing the pressure to drop. This can be a problem if you’re trying to take a shower or wash dishes.
Mold or Mildew Growth:
If you notice mold or mildew growth around your pipes, it could signify a leak. The water provides the perfect environment for mold and mildew to grow. If you see any mold or mildew, it’s essential to dry the area and call a plumber.
If you suspect a pinhole leak in your copper pipe, it’s essential to shut off the main water supply to your home and call a plumber right away. Trying to fix the problem yourself could worsen and cause more damage. A plumber will be able to locate the leak and repair it properly.
You Can Check It Out to Fix Airlock in Water Pipes
A Detailed Guide on How to Fix Pinhole Leak in Copper Water Pipe
Step 1: Gather Necessary Tools and Materials
Before you begin, collect the following tools and materials to ensure a smooth and efficient repair process:
- Pipe cutter or hacksaw
- Pipe cleaning brush or sandpaper
- Emery cloth or fine-grit sandpaper
- Copper repair coupling
- Copper pipe (matching the diameter of the existing pipe)
- Flux and flux brush
- Propane torch
- Lead-free solder
- Pipe wrench or adjustable wrench
- Bucket or towel (to catch water)
- Safety glasses
- Gloves
Step 2: Turn Off the Water Supply
Shut off the main water supply valve to the house or the specific water line that feeds the affected pipe. Open a faucet or hose bib near the leak to relieve pressure and drain the remaining water in the pipe.
Step 3: Locate and Confirm the Pinhole Leak
Inspect the copper pipe to find the exact location of the pinhole leak. Look for signs of corrosion, moisture, or a steady stream of water coming from the pinhole. Wipe the area dry and mark the location of the leak with a marker or masking tape.
Step 4: Cut Out the Damaged Pipe Section
Using a pipe cutter or hacksaw, carefully cut out a section of the copper pipe that includes the pinhole leak. Be sure to leave enough space on either side of the leak to accommodate the repair coupling. Have a bucket or towel nearby to catch any water that may be released when cutting the pipe.
Step 5: Prepare the Pipe Ends
Using a pipe cleaning brush or sandpaper, clean the ends of the remaining copper pipe where the repair coupling will be installed. Remove any burrs or rough edges with emery cloth or fine-grit sandpaper, ensuring that the pipe ends are smooth and free of debris.
Step 6: Cut a New Pipe Section
Measure the length of the removed pipe section and cut a new piece of copper pipe to match. Clean the ends of the new pipe section with a pipe cleaning brush or sandpaper and smooth the edges with emery cloth or fine-grit sandpaper.
Step 7: Apply Flux to the Pipe Ends and Repair Coupling
Using a flux brush, apply a thin layer of flux to the ends of the existing pipes, the new pipe section, and the inner surfaces of the repair coupling. The flux will help the solder flow and bond properly during the soldering process.
Step 8: Assemble the Repair Coupling and Pipe Section
Slide the repair coupling onto one end of the existing pipe, then insert the new pipe section into the other end of the coupling. Make sure the coupling is centered over the joint between the existing pipe and the new pipe section.
Step 9: Heat the Repair Coupling and Pipe Joints
Put on your safety glasses and gloves, and ignite the propane torch. Carefully heat the repair coupling and the pipe joints where the coupling meets the existing pipe and the new pipe section. Keep the flame moving to avoid overheating any one spot.
Step 10: Solder the Repair Coupling and Pipe Joints
When the flux begins to sizzle and the pipe turns a dull red color, touch the lead-free solder to the joint between the repair coupling and the pipe. The solder should melt and flow into the joint, creating a watertight seal. Repeat this process for the other pipe joint. Allow the solder to cool and solidify before proceeding.
Step 11: Inspect the Repair for Leaks
Turn the water supply back on and carefully check the repaired area for any signs of leaks. If you notice any water seeping from the joints, turn off the water supply and reheat the joint to reflow the solder, ensuring a proper seal.
Step 12: Restore Normal Water Flow
Once you’ve confirmed that the repair is leak-free, restore normal water flow throughout your home. Open any faucets or hose bibs that were used to drain the pipe earlier and allow the water to run for a few minutes to flush out any air or debris trapped in the pipes. Check the repaired area again for any signs of leaks to ensure a successful repair.
Step 13: Clean Up and Dispose of Materials
After the repair is complete and you’ve confirmed that there are no leaks, gather all the tools and materials used during the process. Properly dispose of any waste materials, such as the removed section of copper pipe, used sandpaper, and emery cloth. Store your tools and any leftover materials for future use.
Step 14: Monitor the Repaired Pipe
Periodically check the repaired pipe to ensure that the repair remains secure and leak-free. Keep an eye out for any signs of corrosion or new pinhole leaks in the surrounding area, as these may indicate a more extensive issue with your copper piping.
By following these steps, you can successfully fix a pinhole leak in a copper water pipe. It’s important to work carefully and methodically to ensure a secure, watertight repair. In some cases, pinhole leaks may be indicative of a larger issue with your home’s plumbing system. If you continue to experience pinhole leaks or other plumbing problems, consider consulting a professional plumber for a comprehensive assessment and any necessary repairs or replacements.
You Can Check It Out To Fix Bubbles in Epoxy Resin
Frequently Asked Questions
Will Plumbers Putty Stop a Leak on Copper Pipe?
Plumbers’ putty is not specifically designed to stop leaks on the copper pipes. However, it can be used as a temporary sealant to help prevent water from seeping into the joint and causing damage. It can also be helpful in fixing minor cracks or uneven surfaces that may lead to leaks. Finally, plumbers’ putty is effective at sealing small holes or tears in piping systems.
Can I Solder a Pinhole Leak in Copper Pipe?
At first glance, a pinhole leak may not seem like an important issue. After all, it’s just a small hole in the pipe that water can seep through. However, if the leak is large enough, it can cause serious damage to your home or business. In some cases, the water can even reach hazardous levels.
Here are a few tips to help you fix a pinhole leak in a copper pipe:
- Use a snake – A snake can help you determine the size of the leak and guide you in fixing it properly.
- Use patching materials – Materials such as caulk, sealant, or Gorilla Glue can be used to fix small pinhole leaks. For bigger leaks, use metal screws and metal plates to fix the pipe permanently.
- Turn off the water – If possible, turn off the water at the source of the leak before attempting to fix it. This will prevent damage from being done while you’re working.
- Use caution – Always use caution when working with water and metal equipment. If you do need to fix a pinhole leak in a copper pipe, be sure to wear gloves, goggles, and a mask to protect yourself from potential injuries
Does Flex Seal Work on Copper Water Pipes?
Flex Seal is a water-repellent sealant that can be applied to copper pipes. However, before using Flex Seal on copper pipes, it is important to test the product first in a small area to make sure there are no negative consequences. If there are any adverse effects, then you should not use Flex Seal on your copper pipe and should contact the manufacturer for more information.
Conclusion:
So, there you have it, how to fix pinhole leak in copper water pipe. If you are experiencing a pinhole leak in your copper water pipe, there are several ways to fix it. The most common methods are using epoxy or solder; which of these methods you choose will depend on the leak’s severity and level of expertise. If you are unsure which method to use, please consult a professional. Thanks for reading!