Are you struggling to keep your home comfortable without having to foot a hefty heating bill? An oil heater is an affordable and efficient alternative that can help you regulate the temperature in your home during colder months. Although oil heaters are simple and reliable, like all equipment they sometimes need repair.
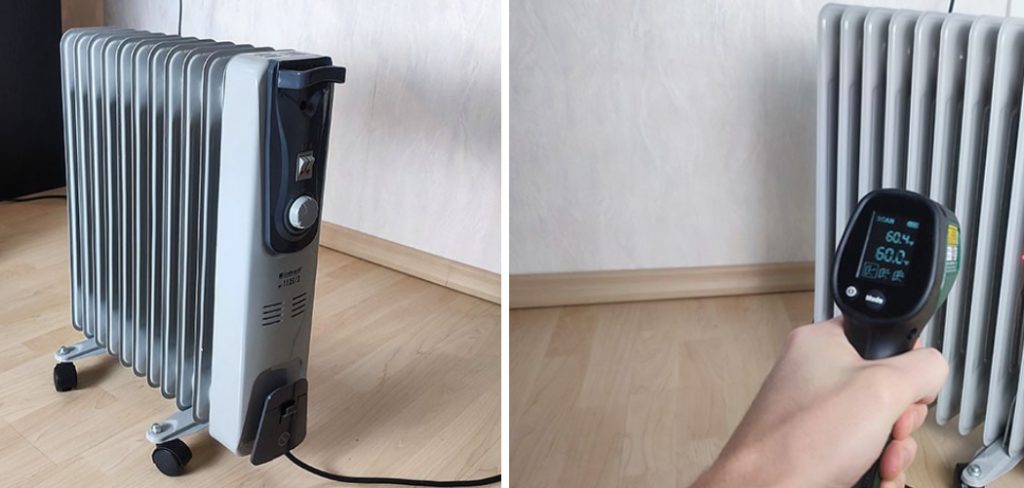
In this post, we’ll show you how to troubleshoot some of the common issues associated with oil heaters so that your home stays cozy throughout winter. Fighting off those cold nights doesn’t have to be a challenge – read on for helpful tricks and tips on how to fix oil heater!
What Causes Problems in Oil Heater?
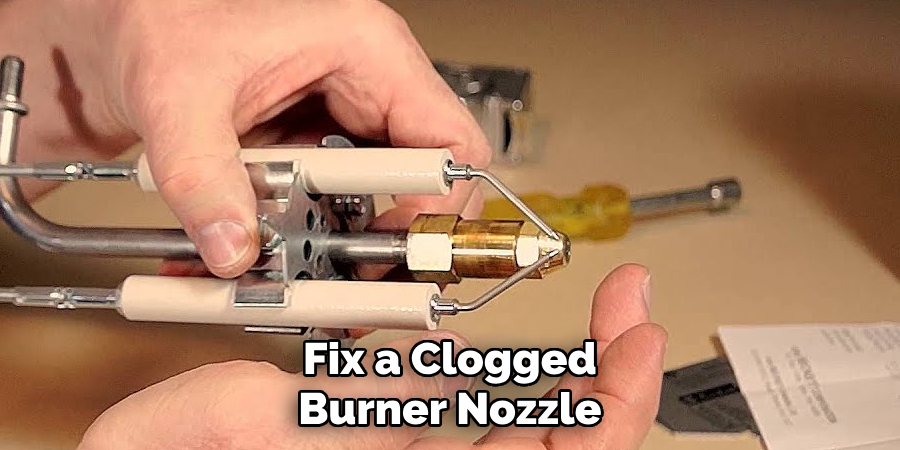
1 . Dirty Burner Nozzle
The burner nozzle is responsible for spraying the oil into the combustion chamber, where it is burned to generate heat. Over time, this nozzle can become clogged with dirt and debris, which can prevent the oil from properly igniting. This can result in a lack of heat or complete failure of the heater.
2 . Faulty Ignition System
Similar to a car engine, an oil heater requires a spark or electrical current to ignite the fuel and create heat. If there is an issue with the ignition system, such as a faulty transformer or broken wire, then the heater may not be able to produce heat.
3 . Clogged Fuel Filter
The fuel filter prevents impurities and debris from entering the combustion chamber and clogging the nozzle. However, if the filter becomes too dirty or clogged itself, it can restrict the flow of oil to the burner, causing a lack of heat or failure to produce heat.
4 . Airlock in Oil Line
An airlock occurs when air gets trapped in the fuel line, preventing oil from reaching the burner. This can happen due to a leak in the fuel line or if air is introduced into the system during an oil delivery. Without proper oil flow, the heater will not be able to produce heat.
10 Tips on How to Fix Oil Heater
1 . Clean the Burner Nozzle
To fix a clogged burner nozzle, first turn off the heater and allow it to cool down. Then, carefully remove the nozzle and clean it with a soft brush or cloth. If necessary, use a small amount of alcohol to dissolve any stubborn buildup.
2 . Check the Ignition System
If you suspect an issue with the ignition system, inspect all components for damage or wear. Replace any faulty parts and ensure that all connections are secure.
3 . Replace the Fuel Filter
Regularly replacing the fuel filter is important in maintaining proper oil flow to your heater. Refer to your manufacturer’s instructions for how often this should be done and follow their recommended procedure.
4 . Bleed Air from the Oil Line
To remove an airlock in the oil line, first turn off the heater and locate the bleeder valve on the fuel pump. Use a wrench to open this valve and allow any trapped air to escape. Once you see a steady flow of oil, close the valve and restart the heater.
5 . Check for Leaks
Inspect all fuel lines for leaks and repair or replace as needed. Even small leaks can cause issues with oil flow and affect the performance of your heater.
6 . Clean or Replace Air Filters
Dirty or clogged air filters can restrict airflow to your heater, causing it to work harder and potentially overheat. Regularly clean or replace air filters according to manufacturer’s instructions. Also, make sure air vents are not obstructed.
7 . Check the Thermostat
If your heater is not producing enough heat, check the thermostat settings to ensure it is set to the desired temperature. Also, inspect the thermostat for any damage or wear and replace if necessary.
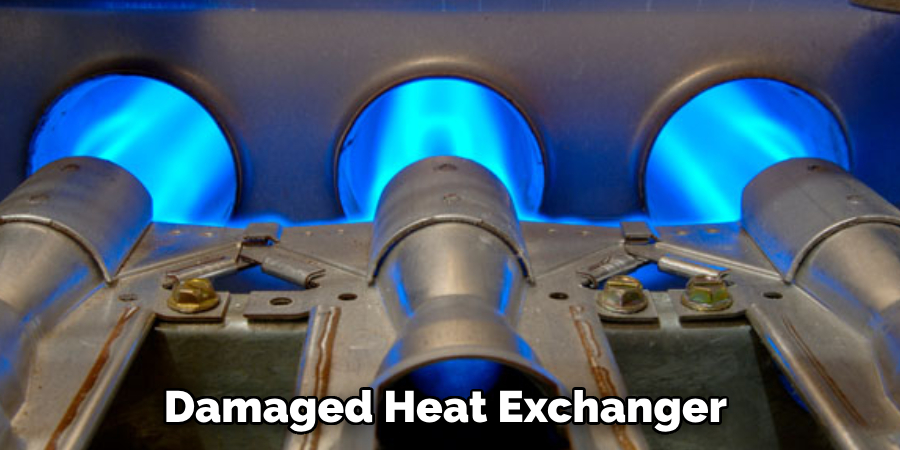
8 . Inspect the Heat Exchanger
A cracked or damaged heat exchanger can cause a lack of heat in your oil heater. If you suspect this may be the issue, contact a professional technician to inspect and repair as needed.
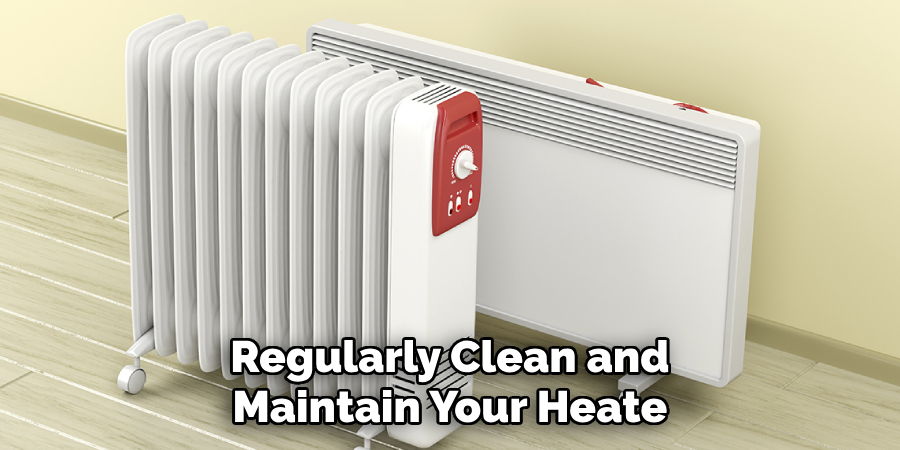
9 . Perform Regular Maintenance
To prevent future issues with your oil heater, perform regular maintenance such as cleaning and replacing filters, checking connections and components for wear, and scheduling professional tune-ups as recommended by the manufacturer.
10 . Consider Professional Repairs
If you are not comfortable or experienced with repairing an oil heater, it is always best to consult a professional technician. They have the knowledge and tools to properly diagnose and fix any issues with your heater. Additionally, attempting to repair the heater yourself could potentially be dangerous.
Overall, proper maintenance and early detection of problems can help keep your oil heater running smoothly and efficiently for years to come. Remember to refer to your manufacturer’s instructions for specific guidelines on how to maintain and troubleshoot your oil heater. So, follow these tips and enjoy a warm and cozy home during those chilly winter months!
Frequently Asked Question
What Precautions Should I Take Before Fixing an Oil Heater?
Before attempting to fix your oil heater, you should follow these precautions:
- Ensure that the power supply to the heater is turned off. You can do this by unplugging it or turning off the circuit breaker.
- Allow the heater to cool down before attempting any repairs. This will prevent you from getting burned.
- If you are not experienced in fixing heaters, it is recommended to seek professional help.

How Can I Tell if My Oil Heater Needs Fixing?
There are a few signs that indicate your oil heater may need fixing:
- The heater is not producing enough heat or no heat at all
- It makes strange noises
- There are visible signs of damage such as cracks or leaks
How Do I Fix an Oil Heater That’s Not Producing Enough Heat?
If your oil heater is not producing enough heat, the first thing you should check is the thermostat. Make sure it is set to the correct temperature and if necessary, replace it. If that doesn’t solve the issue, then you may need to clean or replace the air filter.
What Should I Do If My Oil Heater Is Making Strange Noises?
If your oil heater is making strange noises such as banging or clanging, there could be an issue with the heater’s motor or bearings. It is recommended to seek professional help in this situation as attempting to fix it yourself could potentially cause more damage.
What Can I Do About Visible Damage on My Oil Heater?
If your oil heater has visible signs of damage like cracks or leaks, do not attempt to fix it yourself. Turn off the power supply and call a professional to assess the situation. Continuing to use a damaged heater can be dangerous and may cause further damage or malfunctions. Remember, safety should always be your top priority when dealing with any type of heater repair.
Can I Prevent My Oil Heater from Needing Repairs?
While some issues with oil heaters are unavoidable, there are steps you can take to prevent frequent repairs:
- Regularly clean and maintain your heater according to the manufacturer’s instructions.
- Make sure the area around your heater is clear of any debris or flammable objects.
- Schedule annual maintenance checks with a professional to catch any potential issues before they become bigger problems.
By following these precautions and tips, you can help prolong the lifespan of your oil heater and avoid costly repairs. Remember, if you ever feel unsure or uncomfortable with fixing your heater yourself, it is always best to seek professional help. So, if you want to save time, money, and ensure safety for yourself and those around you – leave it to the experts! Fixing an oil heater may seem daunting, but with the right precautions and knowledge, you can easily tackle any issue that may arise.
How Much Does It Usually Cost to Fix an Oil Heater?
The cost of fixing an oil heater can vary depending on the type and severity of the issue. In general, minor repairs may cost around $100-$200 while major repairs could cost over $500. It is important to keep in mind that regular maintenance and catching issues early on can help prevent costly repairs in the future.
Conclusion
Now that we’ve discussed the best ways of how to fix oil heater, it’s time for you to use this advice and put it into action. Taking measures now can help ensure that your oil heater is running correctly and efficiently.
There may be instances when reaching out to a professional is the only available option, but doing some basic upkeep and checks are always beneficial in solving any minor issues. Remember that no matter how often you use your oil heater, don’t underestimate vigilance and preventative care.
Stay one step ahead by being aware of the telltale signs if your system is not working as it should or a repair could soon be necessary; taking these simple precautions will go a long way in keeping your device safe and working at its utmost efficiency. With the tips provided here, you are now fully equipped to face any challenge related to getting rid of issues with your oil heater. So get ready – your heating system is now in safe hands!