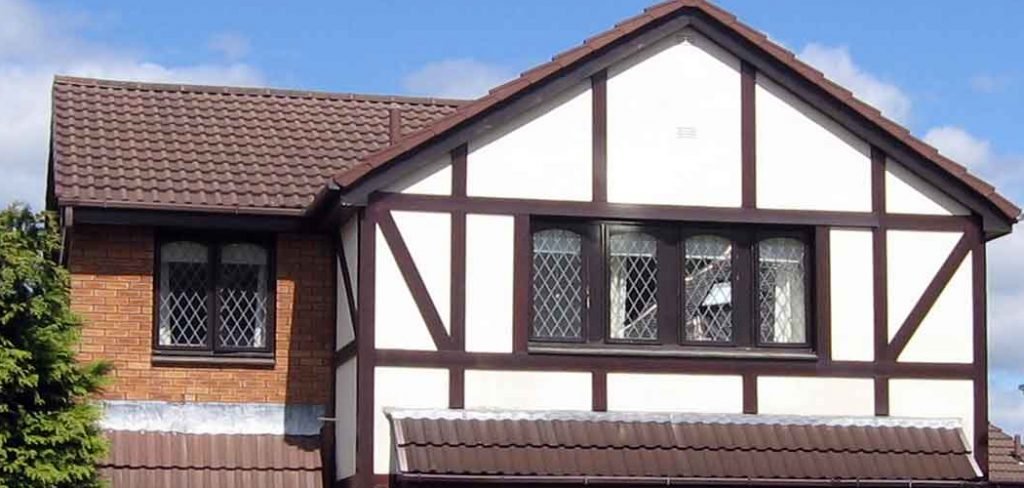
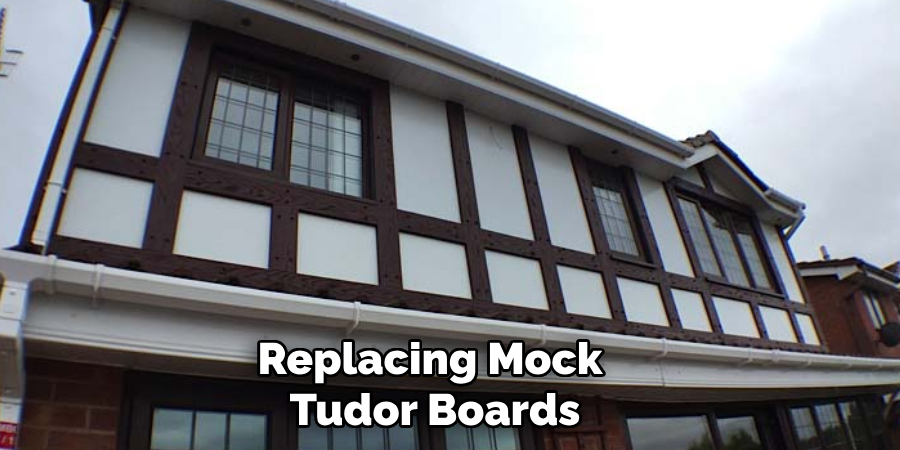
Mock Tudor boards, also known as faux Tudor panels, emulate the distinctive architectural style associated with the Tudor period. Over time, these boards can become weatherworn, cracked, or damaged, compromising both their aesthetic appeal and structural integrity.
Repairing or restoring mock Tudor boards can rejuvenate the exterior of a building, preserving its historical charm while ensuring longevity. In this guide, we will walk you through how to fix mock tudor boards, whether it involves simple repairs or complete replacements.
Understanding Mock Tudor Boards
Mock Tudor boards are a key component in replicating the classic Tudor-style architecture that was popular in England during the late medieval period. These panels are typically made from modern materials like fiberboard or uPVC, designed to mimic the timber framing that characterized historic buildings.
Unlike actual timber, these modern materials offer increased resistance to weathering and lower maintenance requirements, making them a practical option for modern construction.
The aesthetic of mock Tudor panels provides a sense of tradition and elegance, suitable for both residential and commercial properties seeking to adopt a timeless architectural style. Understanding the materials and construction techniques of mock Tudor boards is essential for effective repair and restoration, ensuring that the authentic appearance is maintained while integrating durability and modern efficiency.
Importance of Wearing Protective Gear
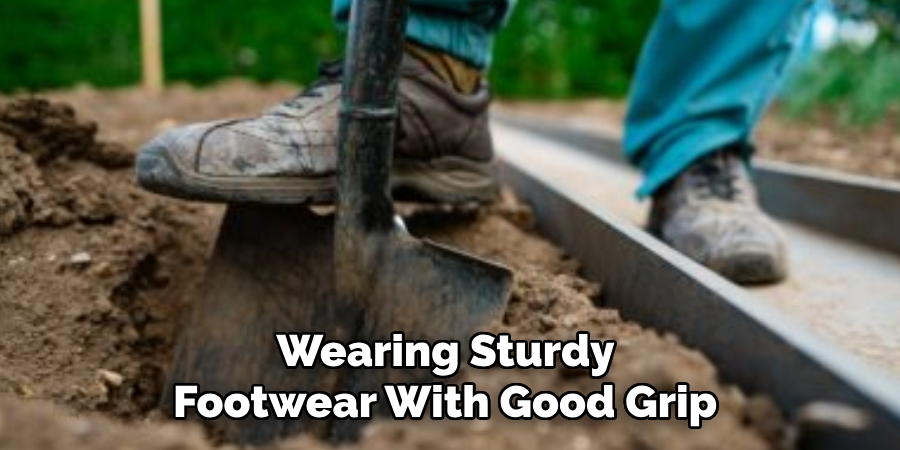
Wearing protective gear is crucial when working on fixing mock Tudor boards to ensure safety and prevent injuries. Handling tools, materials, and being on ladders or scaffolding poses risks such as cuts, eye injuries, or falls. Essential protective gear includes gloves to protect hands from sharp edges and splinters, safety glasses to shield eyes from debris, and hard hats to guard against head injuries.
Additionally, wearing sturdy footwear with good grip can prevent slips, especially when working at heights. By prioritizing safety through the use of protective gear, you ensure a safer work environment and minimize the risk of accidents during the restoration process.
10 Methods How to Fix Mock Tudor Boards
1. Assess the Condition of the Boards
Before embarking on repairs, begin by thoroughly assessing the condition of your mock Tudor boards. Look for signs of damage such as cracks, rot, peeling paint, or loose boards. Take note of the extent of the damage to help determine the best approach for repair.
Use a moisture meter if necessary, as high moisture levels can indicate underlying issues such as rot or water infiltration. Document your findings to guide your repair process and ensure that no issues are overlooked.
2. Gather Necessary Tools and Materials
Once you’ve assessed the damage, gather the tools and materials you will need for the repairs. Common items include a pry bar, hammer, nails or screws, wood filler, sandpaper, paint or stain, and a paintbrush. For larger repairs, you might also need replacement boards or structural reinforcements. Having all your materials ready will streamline the repair process and minimize interruptions, allowing you to work more efficiently.
3. Remove Loose or Damaged Boards
If any boards are loose, cracked, or severely damaged, carefully remove them to prevent further deterioration. Use a pry bar or hammer to gently detach the boards from the wall structure.
Take care not to damage adjacent boards or the underlying structure. Once removed, inspect the area behind the boards for signs of damage, such as mold, rot, or insect infestations. If you find any significant damage, address these underlying issues before replacing the boards.
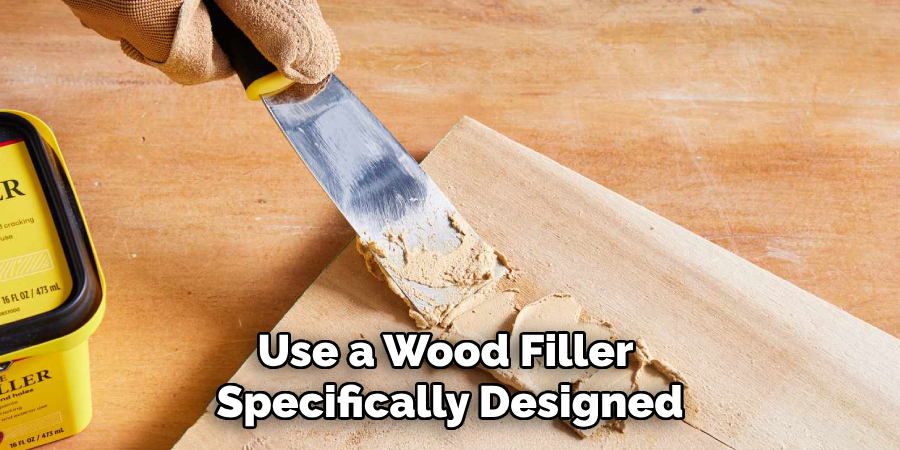
4. Repair Rot or Damage
For boards that have suffered from rot or other types of damage, you’ll need to repair or replace them. For minor rot, you can use a wood filler specifically designed for exterior applications. Clean the affected area and apply the filler according to the manufacturer’s instructions.
Once it dries, sand the area smooth to create a flush surface. If the rot is extensive, consider replacing the entire board with a new one. Choose a weather-resistant material, such as treated wood or a composite material, to ensure durability and longevity.
5. Reinforce Loose Boards
If some boards are simply loose but otherwise in good condition, reinforce them to restore stability. Start by using screws or nails to secure the boards back into place. If the existing fasteners are stripped or damaged, consider using longer screws to provide a stronger hold.
You may also apply a construction adhesive to the back of the board before securing it, creating a more robust bond. This additional reinforcement will help prevent future movement and damage.
6. Sand and Smooth the Surface
After repairing or replacing the boards, it’s essential to sand the surface to create a smooth finish. Use sandpaper or a power sander to remove any rough edges, paint drips, or inconsistencies in the surface.
Pay special attention to the areas around repairs to ensure a seamless transition between old and new materials. A smooth surface not only enhances the aesthetic appeal but also helps the paint or stain adhere more effectively, resulting in a more polished final look.
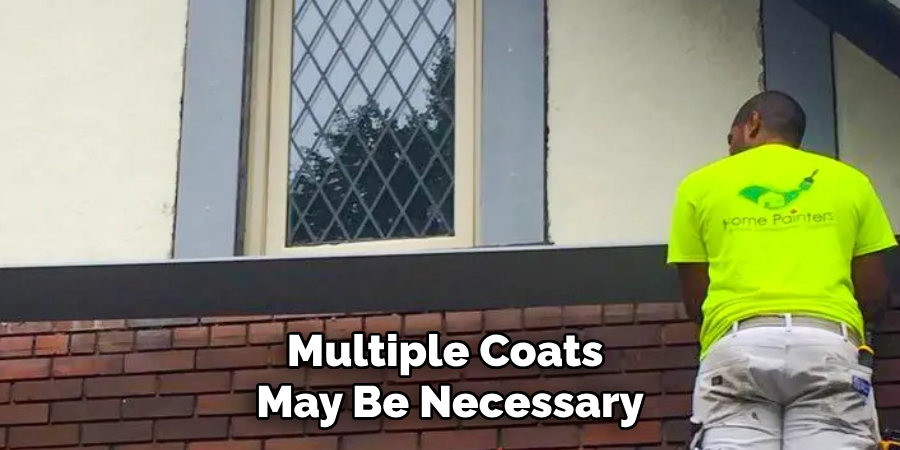
7. Prime and Paint or Stain
Once the surface is smooth, apply a high-quality primer to the boards to protect them from moisture and enhance paint adhesion. Choose a primer suitable for exterior use, especially if the boards are exposed to the elements.
After the primer dries, apply a weather-resistant paint or stain to achieve the desired finish. Opt for a color that complements the overall aesthetic of your home while providing a durable layer of protection. Multiple coats may be necessary for even coverage, so be prepared to apply additional layers as needed.
8. Seal Gaps and Joints
To further protect your mock Tudor boards from moisture and air infiltration, seal any gaps or joints using a high-quality caulk. Apply the caulk along the edges of the boards where they meet each other and at any points where the boards connect to the home’s structure.
This sealing process prevents water from seeping behind the boards and causing damage over time. Choose a caulk specifically designed for exterior applications to ensure that it withstands the elements.
9. Maintain Regular Inspections
To prevent future issues with your mock Tudor boards, establish a routine maintenance schedule that includes regular inspections. Check for signs of wear, damage, or moisture accumulation at least twice a year, ideally in spring and fall. During these inspections, look for any loose boards, peeling paint, or gaps that may require attention. Addressing minor issues early on can help prevent more extensive repairs and prolong the life of your mock Tudor exterior.
10. Consult a Professional for Major Repairs
If you encounter extensive damage or are unsure about how to proceed with repairs, it may be best to consult a professional contractor experienced in exterior renovations. A skilled contractor can assess the situation, recommend appropriate repairs, and ensure that the work is done safely and effectively.
This is particularly important for significant structural repairs or when dealing with underlying issues like rot or insect infestations. Investing in professional help can save you time, effort, and potential headaches in the long run.
Alternative Methods and Tips
When working on mock Tudor board repairs, considering alternative methods and additional tips can enhance the quality of your results and overall efficiency. One alternative approach is to use engineered wood or fiber-cement boards for replacement.
These materials offer increased durability and resistance to environmental factors compared to traditional wood. Additionally, investing in high-quality finishes, like UV-resistant stains or paints, can prolong the lifespan of your boards and reduce maintenance needs. Always work during dry weather conditions to ensure materials cure properly and avoid moisture complications.
To further extend the life of your repairs, consider applying a topcoat that provides extra protection against the elements. Regular cleaning with mild detergents can also prevent dirt buildup and protect the boards, maintaining their visual appeal. By utilizing these alternatives and tips, you can achieve a lasting, weather-resistant mock Tudor exterior.
Things to Consider When Choosing Materials
When selecting materials for repairing or replacing mock Tudor boards, it’s important to consider various factors that affect both aesthetic and functional outcomes. Firstly, weigh the balance between cost and quality. While traditional wood may be more affordable, investing in high-quality, engineered materials like fiber-cement or composite wood can offer better durability and lower maintenance over time.
Assess the local climate and environmental conditions, as they will influence material performance. For example, areas prone to heavy rainfall should prioritize water-resistant options to reduce the risk of rot or moisture damage. Additionally, consider the architectural style and desired appearance of the home when making material choices.
Conclusion
Fixing mock Tudor boards is essential for preserving the charm and integrity of your home. By following these ten effective methods—from assessing the condition of the boards and gathering necessary tools to repairing damage, reinforcing boards, and maintaining regular inspections—you can successfully restore and maintain your mock Tudor exterior.
A well-maintained façade not only enhances your home’s curb appeal but also protects it from the elements, ensuring that it remains a beautiful and enduring feature for years to come. Thanks for reading our blog post on how to fix mock tudor boards! We hope you found it helpful and informative.