Car lights can be one of the most difficult and mysterious car problems to fix. Whether you don’t have any license plate light illumination, or it’s just flickering on and off, fixing this issue can prove challenging. However, if you understand a few simple concepts about how your vehicle’s wiring system works when it comes to your license plate light and how it must be wired correctly in order for everything to work properly, then you should have no problem getting your lights working again!
In this blog post on how to fix license plate light wiring, we will go through step-by-step instructions from diagnosing why the license plate light is malfunctioning to what needs to be done in order to correct the problem so that all of your vehicle’s lighting is functioning perfectly once again. So let’s get started with figuring out what exactly could be causing this pesky problem – read on and keep reading…
13 Step-by-step Guidelines on How to Fix License Plate Light Wiring
Step 1: Check Your Fuse Box
The first thing to do when troubleshooting any lighting issue is to check your fuse box. Make sure that the fuse for your license plate light is not blown. If it is, replace the fuse with a new one of the same amperage rating and test if this resolves the problem. But if the fuse is not blown, proceed to step two.
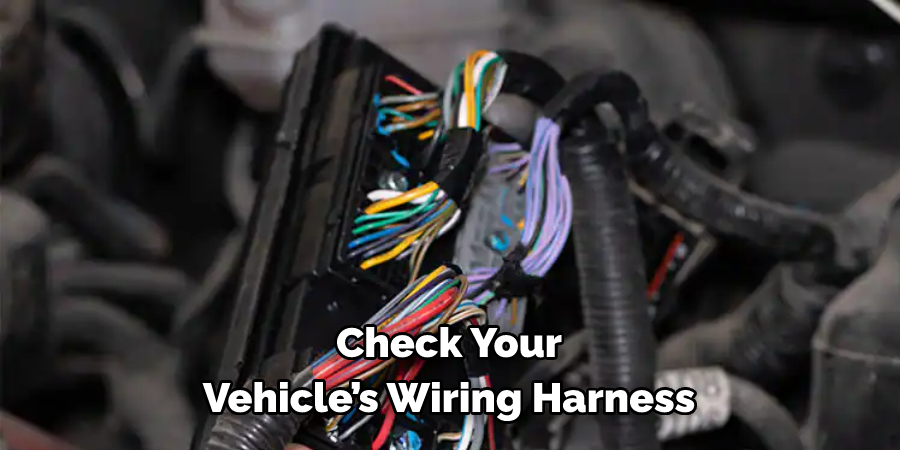
Step 2: Check Your Wiring Harness
Next, check your vehicle’s wiring harness for any signs of corrosion or damage. If you notice any, repair the wiring as soon as possible to prevent further issues with your license plate lights. But if your wiring harness looks okay, move on to step three. You may need a flashlight or extra light source to properly see the wiring harness.
Step 3: Inspect the Wiring for Good Connections
Inspect all of your car’s wiring connections and make sure that all of them are connected properly and securely. If there is a loose connection, secure it again by tightening or re-wiring it as necessary. But if all of the wiring looks good, proceed to step four. If you are unsure about any connection, contact a professional to help.
Step 4: Check the Bulbs
If everything seems to be in order regarding your car’s wiring, then check if both bulbs are working properly. Inspect them visually for signs of burnouts or cracks in their exterior shells and replace them if they appear burnt out or broken so that they will not short out or cause other issues.
Step 5: Check the Ground Connection
Now, check for a good ground connection between the light fixture and the frame of your vehicle. This may require unscrewing the license plate’s screws and checking to make sure that there is a nice, tight continuous connection between them. If there isn’t, then try using a wire brush to clean up any corrosion or dirt on either side before re-tightening them back together. This should help restore the proper flow of electricity to power your lights once again.
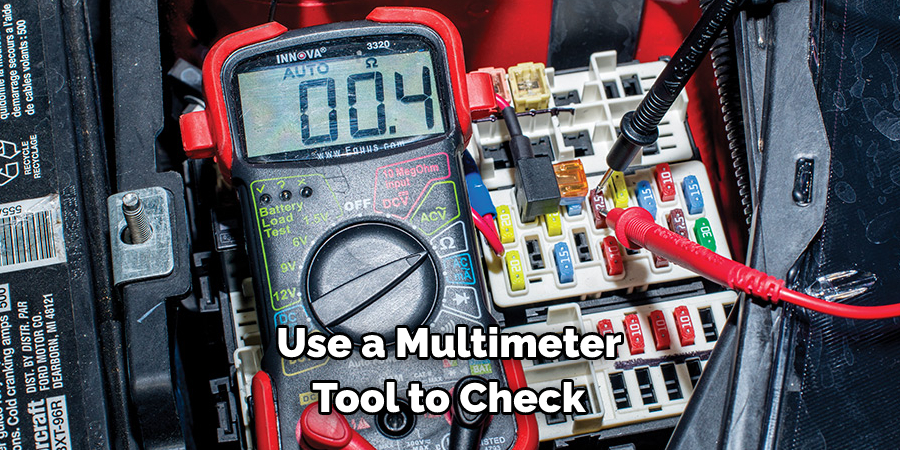
Step 6: Check if There is Power Running Through Your Wiring Harness
If all else fails, use a multimeter tool to check if there is power running through your wiring harness. If there is no power, then the problem may be a broken wire or bad connection somewhere in your vehicle’s electrical system that needs to be located and repaired as soon as possible.
Step 7: Replace Your Wiring Harness
If you find that the wiring harness itself is damaged, it may need to be replaced in order for your license plate light to function again. Make sure to buy one with the correct connectors for your make and model of car so that you can ensure a proper fit when re-installing the lights. If you are not comfortable with doing this yourself, contact a professional for help.
Step 8: Test the New Wiring Harness Out
After replacing the wiring harness, turn on all of your car’s lights and check if they are working properly. If everything appears to be in order, then your license plate light should be working correctly again! But if not, then try the previous steps again to pinpoint the root of the problem. It is always best to take the time to double check all of your connections and wiring before giving up.
Step 9: Troubleshoot Further if Necessary
If the lights still don’t work after following all of these steps, you may need to troubleshoot further. Check for any loose connections or broken wires in your vehicle’s electrical system and make sure that they have been properly fixed before continuing on with other repairs. It is also important to ensure that the bulbs are in working order and replace them if necessary.
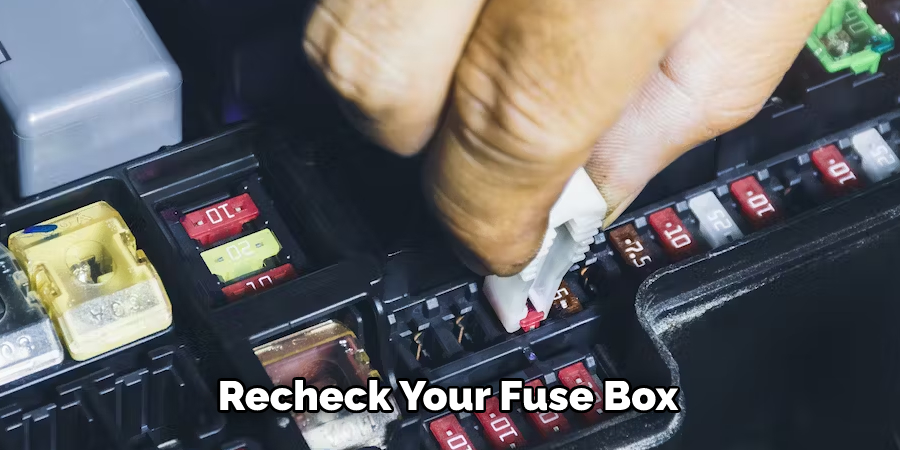
Step 10: Recheck Your Fuse Box
Once you have gone through the entire process and put everything back together, recheck your fuse box just in case something was missed during earlier inspections. This can help ensure that no other issues arise in the future. If all is well, then congratulations! You have successfully fixed the wiring for your license plate light and can now drive safely in the dark.
Step 11: Check for Other Issues
In addition to checking your vehicle’s wiring and fuse box, also make sure to check if there are any other issues that need to be taken care of before attempting to fix your license plate lights. These can range from loose contacts or wires, missing or broken parts, corroded connections, or even faulty bulbs in some cases.
Step 12: Double Check Your Work
Before you get back on the road with functioning lights again, double check all of your work one last time and make sure that everything is connected properly and securely. This will ensure that your license plate light functions properly for many miles down the road! If you are still having any trouble, then don’t hesitate to contact a professional for assistance.
Step 13: Enjoy
Now that you have successfully fixed your license plate light wiring, it’s time to enjoy the fruits of your labor! With everything up and running again, make sure to drive safely and be aware of other drivers around you. Enjoy the improved visibility that comes with a fully functioning license plate light!
By following these steps on how to fix license plate light wiring, you can save yourself time, money, and hassle in the long run. A little bit of preventative maintenance now will keep your vehicle functioning properly for many years down the road. So don’t wait any longer – get out there and start fixing those lights today!
Do You Need to Hire a Professional?
If you find that the wiring is still not functioning properly after trying these steps, it may be best to contact a professional electrician or automotive technician. They will have the necessary tools and experience to correctly diagnose and fix any issues with your license plate light wiring. It’s better to be safe than sorry, so don’t hesitate to call in the experts if needed!
Frequently Asked Questions
Q: How Do I Know if My Wiring Harness is Damaged?
A: You can check for broken or corroded wires, loose connections, or missing parts when inspecting your wiring harness. If any of these issues are present, then the wiring harness needs to be replaced.
Q: Do I Have to Replace the Entire Wiring Harness if It’s Damaged?
A: No – you only need to replace the part of the wiring that is damaged. Make sure to buy one with the right connectors for your make and model of car in order to ensure a proper fit when re-installing your license plate lights.
Q: What Should I Do if My License Plate Lights Still Don’t Work?
A: If the lights still don’t come on after you have followed all of these steps, then it may be best to contact a professional electrician or automotive technician. They can help diagnose and fix any further issues with your license plate light wiring.
Q: Is It Safe to Drive With Faulty License Plate Lights?
A: No – driving without fully functional license plate lights is not only illegal but also a hazard for other drivers on the road. Make sure to always check that your lights are in working condition before getting back on the road!
Conclusion
In conclusion, a license plate light can be an essential part of your vehicle’s security and presentation. Knowing how to fix license plate light wiring is a great way to save time and money. The key is to troubleshoot and identify the problem, secure the right parts, and connect them appropriately. With careful attention to safety steps, you can confidently tackle this job on your own and make sure that you don’t build up too many traffic tickets due to a mischievous burnt-out bulb!
Lastly, always remember to double-check your work at the end before putting continued strain on all the components when driving. Whether you need an entirely new circuit assembly or just a simple bulb replacement, this guide showed you how easy it can be to correctly fix any license plate light wiring issue.