A laminator is a machine used to laminate paper by pressing it between two heated metal plates. The result is a finished product that looks like it has been glued to the backing material. Laminators come in all shapes and sizes, from small portable models to large industrial machines.
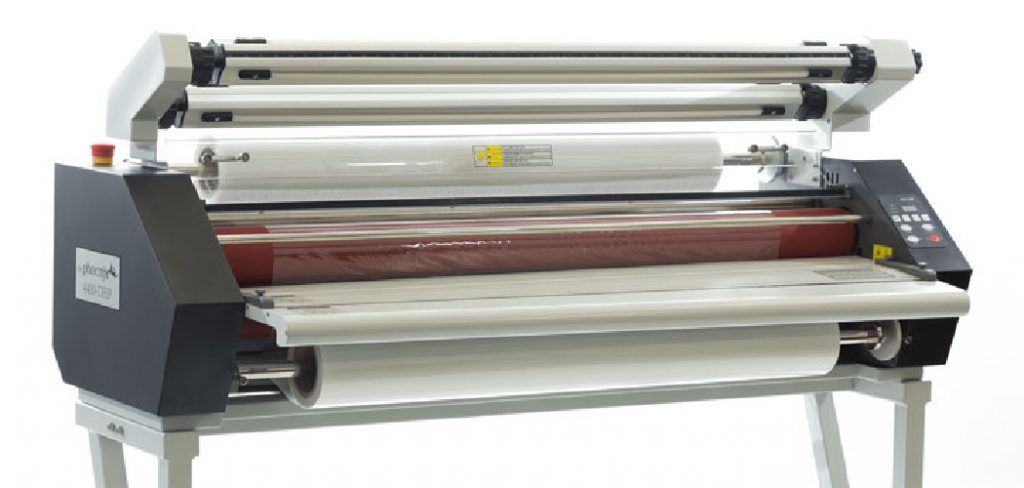
The most common type of laminator uses pressure-sensitive adhesive (PSA) film. This type of lamination is also known as thermal lamination because the adhesive is activated by heat.
Several things can go wrong with a laminator, but the most common problem is with the roller assembly. In this article, we will show you how to fix laminator roller.
Summary: If your laminator roller is not working properly, there are a few things you can do to try and fix the problem. First, make sure the rollers are clean and free of debris. Next, make sure the belt is tight and not slipping. Finally, make sure the laminator is plugged in and properly operating.
Why Is My Laminator Not Rolling?
If your laminator isn’t working, the first thing you should check is whether the power cord is plugged in and turned on. If it is, then the next thing to check is the roller release lever. This lever is located on the laminator’s side and controls whether the rollers are engaged or not.
If the lever is in the up position, then the rollers are disengaged and will not rotate. To engage the rollers, make sure that the lever is in the down position.
If your machine isn’t working, the first thing you should check is whether there’s something blocking the roller. This could be a piece of paper or plastic that’s jammed in the machine. If there is something blocking the roller, you’ll need to remove it before the machine will work properly.
Things You Will Need
- Laminator
- Masking Tape
- Pen or Sharpie
- Scissors
Step by Step Process on How to Fix Laminator Roller
Step 1: Look For the Reason.
The first thing you need to do is find out what caused the laminator roller to break in the first place. There are several reasons why this could happen, but the most common one is that the machine was not properly taken care of. If you can find out what caused it, you can prevent it from happening again. There are several things that you need to do when you have a laminator roller that has been damaged. The first thing is to take it apart and see what caused it to break in the first place. This way, you can be sure that it will not happen again.
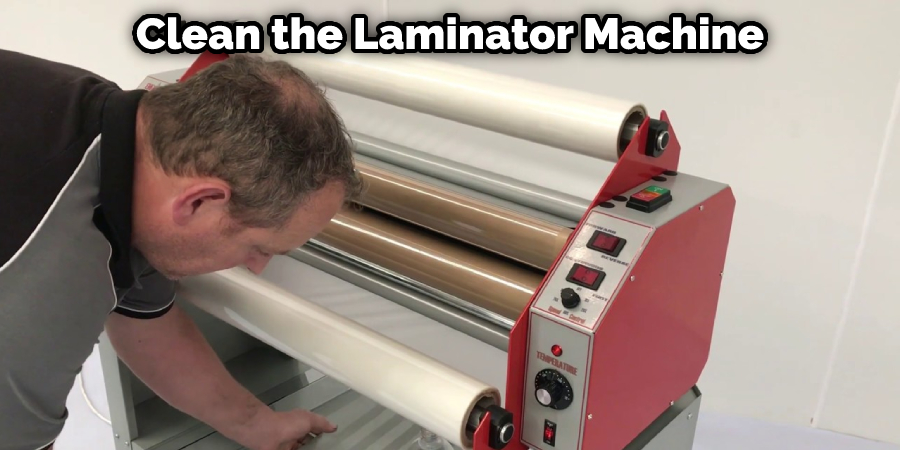
Step 2: Clean the Machine.
The next step is to clean the laminator machine thoroughly. This will remove any dirt or debris that could have caused the roller to break in the first place. Again, be sure to use a soft cloth to don’t damage the machine.
Once you have cleaned the machine, you can begin to fix the roller. There are two options for doing this. The first option is to replace the roller entirely. This may be the best option if the roller is severely damaged.
There is the option to try and fix the roller. It may be more difficult, but it could be worth it if the damage isn’t too bad. You would need to buy a roller repair kit to fix the roller. These kits can be found at most office supply stores.
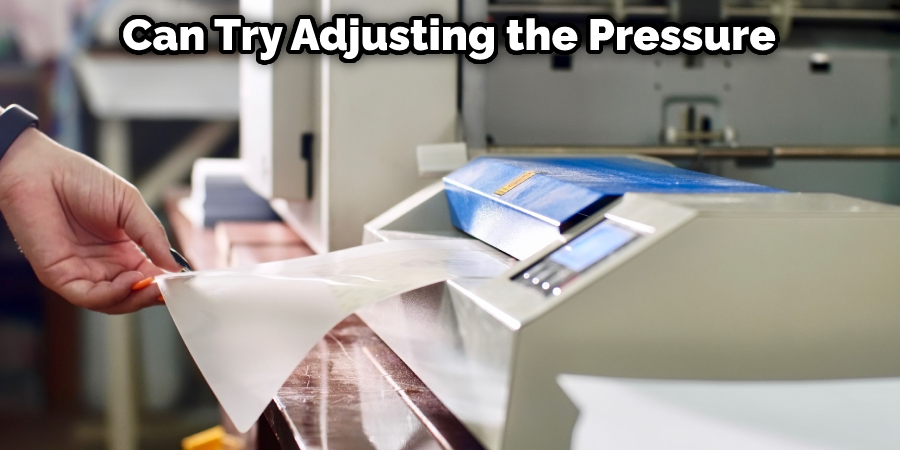
Step 3: Change the Pressure.
If you are having problems with the laminator not working correctly, it might be because the pressure is not set correctly. The first thing you should do is check the user manual to see the correct pressure setting.
If you cannot find the manual, you can try contacting the manufacturer. Once you have found out what the correct pressure should be, you can adjust it by turning the knob on the side of the machine.
Step 4: Check Inside.
If you are still having problems with the machine, you might need to take a look inside. This is a more difficult task, and you will need to be very careful so you don’t damage anything.
The first thing you should do is unplug the machine and remove the casing. Once you have done this, you can begin to check for any loose parts or wires. If you find anything, you can try to tighten it or replace it.
It is also a good idea to check the rollers for any damage. If you see any cracks or chips, you should replace the roller. Once you have checked all of the parts, you can put the casing back on and plug the machine back in.
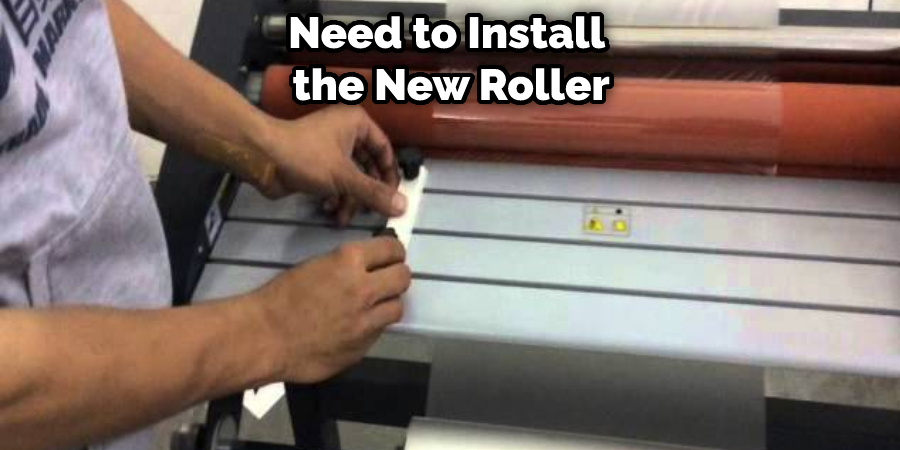
Step 5: Replace the Roller.
Once you have cleaned the machine, the next step is to replace the broken roller. You can usually find replacement rollers at your local office supply store. Be sure to follow the instructions that come with the new roller.
Installing a new roller is a fairly simple process. First, you will need to remove the old roller from the machine. You will need to unscrew the retaining ring that holds the roller in place to do this.
Once the ring is removed, the roller can be pulled out of the machine. Next, you will need to install the new roller. To do this, simply screw the retaining ring back into place. Again, be sure to follow the instructions that come with the new roller.
Step 6: Test the Machine.
Once you have replaced the roller, the next step is to test the machine. Be sure to run a few sheets of paper through the machine to make sure it is working properly. If everything seems to be working properly, then you are finished. If you have followed these steps, then you should now know how to fix a laminator roller.
You Can Check It Out to Fix Wrinkled Laminated Paper
How Do I Know If My Laminator Roller Is Working Properly?
If your laminator isn’t working properly, there are a few things you can check to see what the problem might be. First, check the power cord to make sure it’s plugged in correctly. Next, check the laminator’s roller. If the roller is loose, tighten it with the knob on the side of the machine. Finally, check the laminator’s settings to make sure they’re correct for the type of material you’re trying to laminate.
If your laminator still isn’t working properly after checking these things, it’s probably time to replace the roller. Laminator rollers are made of plastic, and over time they can become worn out or damaged. However, replacing the roller is a relatively simple process, and it’s something you can do yourself with a few tools and supplies.
Tips & Warnings
Here we have given some tips and warnings on how to fix laminator roller.
Tips
- Always consult the user manual before attempting to repair the machine.
- Be sure to unplug the machine before taking it apart.
- Be careful when handling the rollers, as they can be fragile.
- Always test the machine after making any repairs.

Warnings
- Do not attempt to repair the machine if you are not familiar with its inner workings.
- Do not repair the machine if it is still under warranty.
- Be sure to unplug the machine before taking it apart.
- Be careful when handling the rollers, as they can be fragile.
- Always test the machine after making any repairs.
Frequently Asked Questions
Why Does My Laminating Curl?
Lamination curl is caused by heat and pressure imbalances during the laminating process. For example, if the top roller is set too low, the bottom roller exerts more pressure on the document and causes it to curl. If the rollers are not perfectly aligned, this can also cause curling.
To fix the lamination curl, start by checking your laminator’s settings. Next, make sure the top roller is set to the correct height for your document. If it is set too low, raise it until the curl disappears. If the rollers are not aligned, use the adjustment screws to align them.
Why Is There a Cold Switch on a Laminator?
A cold switch is a safety feature that allows you to turn off the laminator without unplugging it. This is useful if you need to stop the laminating process for any reason. The cold switch is located on the front of the laminator, near the power cord. Simply flip the switch to the “off” position to turn off the laminator.
What Is the Difference Between a Hot and Cold Laminator?
A hot laminator uses heat to seal the lamination film to the document. A cold laminator does not use heat but instead uses pressure to seal the film. Cold laminators are typically slower than hot laminators, but they are safer to use and don’t require an electrical outlet.
What temperature should I laminate?
The ideal laminating temperature is between 60-80 degrees Celsius. If your laminator does not have temperature control, you can try adjusting the pressure or speed. If you are still having trouble, it is best to consult the user manual or contact the manufacturer.
Can You Iron Laminating Sheets?
Yes, you can iron laminating sheets. However, it is not recommended as it can damage the sheet and the material you are trying to laminate. If you must iron a laminated sheet, set the iron to a low heat setting, and be sure to use a pressing cloth.
Conclusion
So, if you’re having the same problem with your laminator roller, don’t throw it away quite yet. There are a few things you can try before giving up on your machine. First, make sure that the rollers are actually dirty and not just worn down. If they’re dirty, give them a good cleaning with some hot water and soap.
Second, check to see if the rollers are properly aligned in the machine. If they’re not, re-align them using the instructions in your laminator’s manual. Finally, make sure that there is enough adhesive on the rollers. If there isn’t, apply more adhesive to them using a glue stick or spray adhesive. Hopefully, one of these tips on how to fix laminator roller will help you get your laminator working again.