There are few things more frustrating than trying to make your morning cup of coffee, only to have your Keurig machine refuse to pump any water. If you’re dealing with this issue, don’t worry – we’re here to help. In this article, we’ll outline some simple steps you can take to get your machine up and running again. So read on for tips on how to fix keurig that won’t pump water.
Summary: If your Keurig won’t pump water, there are a few things you can try. First, check to see if the machine is plugged into an outlet. If it’s not, check to see if the power cord is plugged in. Sometimes, when the power goes out, the machine will start pumping water. If that doesn’t work, you can try to reset the machine. You can do this by pressing and holding down the buttons on the front of the machine for about five seconds. If all else fails, you can call a repairman.
What is Keurig?
The Keurig coffee brewing system was invented in 1992 by John Sylvan and Peter Dragone. It uses pre-packaged coffee pods, or “K-Cups,” to brew a single serving of coffee. Green Mountain Coffee Roasters bought the company in 2006, and today Keurig is one of the most popular coffee brewing systems on the market, used by both home and office coffee drinkers.
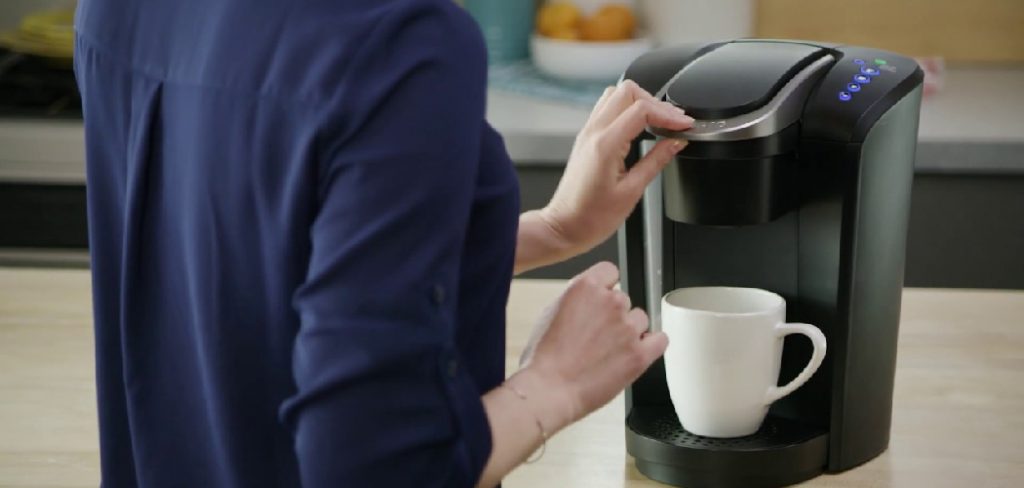
The Keurig system is simple and efficient: insert a K-Cup into the machine, press the brew button, and in less than a minute, you’ll have a fresh cup of coffee. K-Cups come in a variety of flavors, so you can enjoy your favorite traditional or specialty coffee.
Keurig machines brew individual cups of coffee, so there is no waste or cleanup associated with traditional drip coffee makers. This makes Keurig the perfect way for many coffee drinkers to enjoy a fresh cup of coffee without any hassle.
Why Should You Fix Keurig that Won’t Pump Water?
It can be a real pain if your Keurig won’t pump water. Not only will you be unable to make your morning coffee, but you’ll also have to go through the hassle of troubleshooting the machine. However, there are a few reasons why you should take the time to fix your Keurig rather than buy a new one.
First of all, Keurigs are expensive machines, and it’s often more cost-effective to repair them than to replace them. Secondly, even if you need to buy a new Keurig, you’ll likely be able to sell your old one for a reasonable price. Finally, and most importantly, fixing your Keurig yourself will give you a sense of satisfaction that you can’t get from buying a new machine.
So, next time your Keurig won’t pump water, don’t despair; roll up your sleeves and get to work!
How to Fix Keurig that Won’t Pump Water Step by Step Guide
Step 1: Gather Necessary Tools and Materials
To fix a Keurig that won’t pump water, you will need the following tools and materials:
- Soft cloth or sponge
- Paperclip or a small brush
- White vinegar
- Freshwater
- A large mug or container
Step 2: Unplug the Keurig
Before starting any troubleshooting or maintenance on your Keurig, ensure that the machine is unplugged from the wall outlet. This will prevent any potential electrical hazards during the repair process.
Step 3: Empty the Water Reservoir
Remove the water reservoir from the Keurig and empty any remaining water. This will allow you to access the internal components of the machine more easily.
Step 4: Clean the Water Reservoir
Using a soft cloth or sponge, clean the water reservoir to remove any debris or buildup that may be preventing water flow. Rinse the reservoir thoroughly with freshwater to remove any cleaning residue.
Step 5: Check the Water Inlet Valve
The water inlet valve is located at the base of the water reservoir. Inspect the valve for any visible signs of damage, such as cracks or broken pieces. If the valve appears damaged, you may need to replace it to restore proper water flow.
Step 6: Clean the Water Inlet Valve
If the water inlet valve appears undamaged, use a paperclip or a small brush to gently clean the valve, removing any debris that may be blocking the flow of water. Be careful not to damage the valve while cleaning it.
Step 7: Reattach the Water Reservoir
After cleaning the water inlet valve, reattach the water reservoir to the Keurig, ensuring that it is properly seated and secured.
Step 8: Perform a Water Flow Test
Fill the water reservoir with freshwater and plug the Keurig back into the wall outlet. Place a large mug or container on the drip tray and attempt to brew a cup of hot water without using a K-Cup. If water flows through the machine and into the mug, the issue may be resolved. If water still does not flow, proceed to the next step.
Step 9: Descale the Keurig
Mineral deposits from hard water can build up inside the Keurig, potentially affecting water flow. Descale the machine using a mixture of white vinegar and water. Fill the water reservoir halfway with white vinegar and the remainder with freshwater. Run several brewing cycles without using a K-Cup to flush the vinegar solution through the machine. After descaling, refill the reservoir with freshwater and run several more brewing cycles to rinse the machine thoroughly.
Step 10: Clean the Needle
The needle is responsible for puncturing the K-Cup and allowing water to flow through it. A clogged needle may prevent water from pumping through the machine. To clean the needle, first locate it within the Keurig’s brewing chamber. Then, use a paperclip or a small brush to gently remove any debris or coffee grounds that may be obstructing the needle.
Step 11: Check the Pump
If the previous steps have not resolved the issue, the pump may be malfunctioning. The pump is responsible for moving water from the reservoir through the machine. If you can hear the pump running but no water is being pumped, it may be time to replace the pump.
Step 12: Contact Keurig Customer Support
If you have tried all of the above steps and your Keurig still won’t pump water, contact Keurig customer support for further assistance. They may be able to provide additional troubleshooting tips or help you determine if your machine needs to be serviced or replaced.
Step 13: Perform Regular Maintenance
To prevent future issues with your Keurig not pumping water, perform regular maintenance on the machine. This includes cleaning the water reservoir, descaling the machine, and cleaning the needle periodically. Regular maintenance will help ensure that your Keurig continues to function properly and provide you with delicious coffee.
Step 14: Use Filtered Water
Using filtered water in your Keurig can help reduce the buildup of mineral deposits, which can contribute to water flow issues. By using filtered water, you can prolong the life of your machine and help prevent future issues with water flow.
Step 15: Store the Keurig Properly
When not in use, store your Keurig in a cool, dry place to prevent any potential damage from moisture or temperature fluctuations. Proper storage will help prolong the life of your machine and ensure that it continues to function optimally.
Step 16: Avoid Overfilling the Water Reservoir
Overfilling the water reservoir can cause water to spill over into the machine’s internal components, potentially causing damage or water flow issues. Always fill the reservoir to the indicated fill line to prevent overfilling.
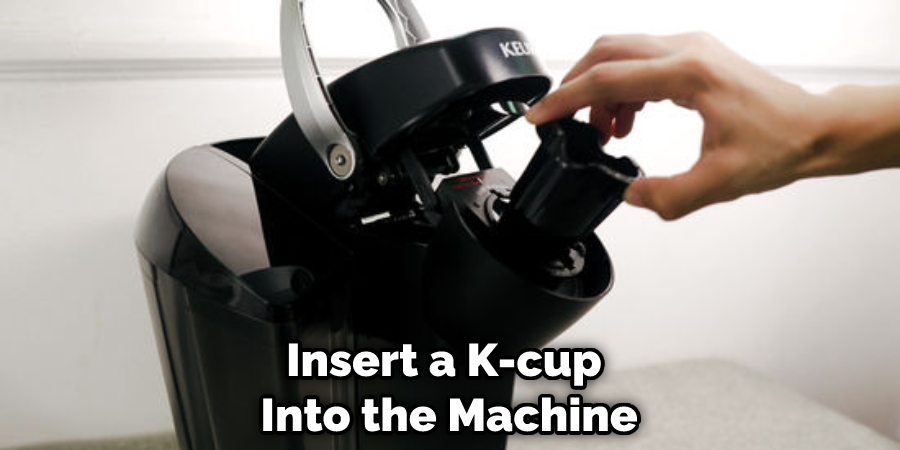
Step 17: Inspect and Replace K-Cups
Damaged or expired K-Cups can contribute to water flow issues in your Keurig. Regularly inspect your K-Cups for any signs of damage, such as punctures or tears, and replace them as needed. Additionally, check the expiration date on your K-Cups and discard any that have passed their expiration date.
Step 18: Avoid Using Non-Keurig Branded K-Cups
Some non-Keurig branded K-Cups may not be compatible with your Keurig machine and could cause water flow issues. To ensure optimal performance, only use Keurig branded K-Cups in your machine.
Step 19: Keep the Drip Tray Clean
Regularly clean the drip tray to prevent any buildup of debris, which could potentially obstruct water flow or cause the machine to malfunction. Simply remove the drip tray, empty it, and clean it with a soft cloth or sponge.
Step 20: Check for Loose Connections
Loose connections within the Keurig can cause the machine to malfunction or not pump water properly. Inspect the machine for any visible loose connections and tighten them as needed. If you are uncomfortable performing this task, consider contacting Keurig customer support or a professional technician for assistance.
By following these steps and maintaining a proactive approach to Keurig care, you can fix a Keurig that won’t pump water and prevent future issues. Regular maintenance and attention to detail will help ensure that your Keurig continues to provide delicious coffee for years to come.
Why Is Keurig Not Dispensing Coffee?
Are you wondering why your Keurig is not dispensing coffee? There are a few possible reasons for this. First, check to make sure that there is water in the reservoir. If there is no water, the machine will not be able to brew coffee. Second, check to see if the coffee grounds are too fine. If they are, they will not be able to pass through the filter and into the cup.
Third, check to see if the filter is clogged. If it is, replace it with a new one. Finally, check to see if the coffee pot is empty. If it is, refill it with fresh coffee. By following these steps, you should be able to solve the problem and get your Keurig working again.
How Do You Unclog a Coffee Maker?
Most coffee makers come with a built-in water filter to remove impurities from the water and help produce a better-tasting cup of coffee. Over time, however, the coffee maker’s filter can become clogged with sediment and make it difficult for water to flow through. As a result, the coffee maker may take longer to brew or produce weaker coffee.
To unclog a coffee maker, start by removing the water filter and soaking it in vinegar for about 30 minutes. Then, scrub the filter with a brush to remove any buildup. If the coffee maker still isn’t working properly, you may need to descale it. This process involves using a strong acid to remove mineral deposits from the inner workings of the machine.

While descaling is typically done by a professional, there are also descaling solutions that can be purchased online or at most home improvement stores.
By taking these simple steps, you can keep your coffee maker working like new for years to come. Keep reading for more information about how to fix keurig that won’t pump water.
How Many Times Should I Run Vinegar Through My Coffee Maker?
If your coffee maker shows signs of mineral buildups, such as reduced water pressure or less consistent brewing temperatures, it’s time to start cleaning it with vinegar. But how often should you run vinegar through your coffee maker?
The answer depends on how hard the water is that you’re using. If you have very soft water, you might only need to clean your coffee maker with vinegar once a month. But if you have very hard water, you might need to clean it with vinegar once a week or more often.
Frequently Asked Question
Can You Replace the Pump in A Keurig?
If your Keurig isn’t pumping water, the pump may need to be replaced. You can buy a replacement pump from Keurig’s website or other online retailers. Before replacing the pump, make sure that nothing is blocking the pump’s intake or outlet and that the water reservoir is properly seated.
How Do I Clean My Keurig with Baking Soda?
If your Keurig isn’t pumping water, you may need to clean it. Mix one teaspoon of baking soda with one cup of water. Pour the mixture into the water reservoir and brew a single cup of coffee. Repeat if necessary.
Can a Keurig Be Repaired?
Yes, in most cases, a Keurig can be repaired. However, it is important to note that some models of Keurigs cannot be repaired and must be replaced. If your Keurig is still under warranty, you may be able to get a replacement for free or at a reduced cost.
Conclusion
If your Keurig isn’t pumping water, there are a few troubleshooting tips you can try before calling customer service. We’ll walk you through them step-by-step in this article. Hopefully, one of these solutions will get your Keurig up and running again! Thanks for reading our post about how to fix keurig that won’t pump water.