If you’ve ever experienced the terrible sound of a Hydro Flask straw lid coming off in your bag, you know how frustrating it can be. Luckily, there is an easy fix for this problem! In this blog post, we will show you how to fix hydro flask straw lid to stay on securely. Keep reading to learn more!
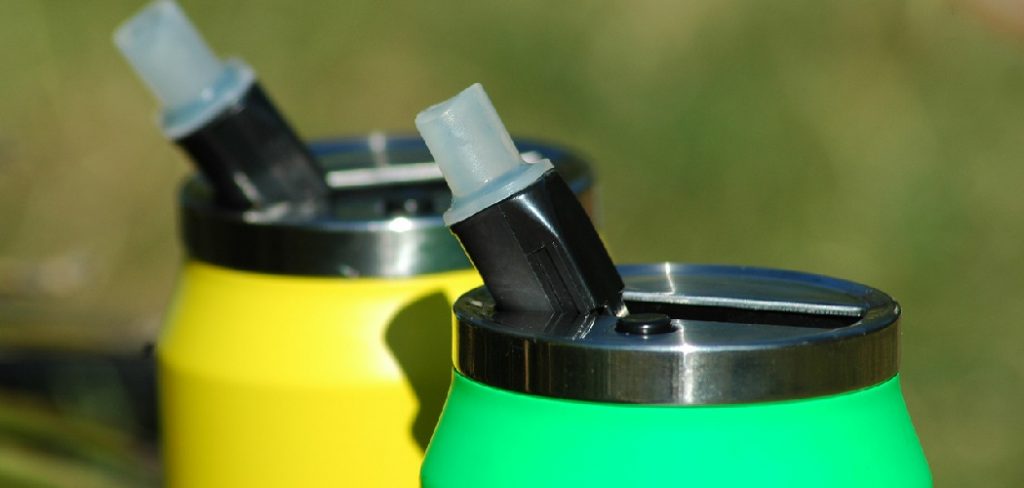
We all know how important it is to stay hydrated, especially when participating in outdoor activities. However, dealing with a loose straw lid can damage your day. It’s not only annoying, but it can also be dangerous if you’re unaware that the lid is no longer attached. Many people have experienced the frustration of a Hydro Flask straw lid coming off in their bag. If you’re one of them, don’t worry – there is an easy fix for this problem!
Summary: To fix a leaking Hydro Flask straw lid, you can start by cleaning the lid and adjusting the seal. You can try replacing the lid O-Ring or silicone ring if that doesn’t work. Lastly, adjust the straw if needed. These steps should help you fix your leaky Hydro Flask straw lid.
Why Does My Hydro Flask Straw Lid Leak
There are a few reasons why your Hydro Flask straw lid might be leaking.
Your Straw Lid Might Be Damaged
If you’ve noticed that your Hydro Flask straw lid isn’t working as well as it used to, there might be something wrong with the seal. Over time, the silicone seal can become damaged or warped, causing leaks. To fix this, you’ll need to replace the seal.
You Might Need to Clean Your Hydro Flask Straw Lid
The Hydro Flask is a water bottle with a straw lid. If the water doesn’t taste great or there is a weird smell coming from the bottle, it might be time to clean the straw lid.
If your Hydro Flask straw lid is not working properly, there are a few things you can try. One is to make sure that the O-ring seal on the bottom of the lid is seated correctly. If this seal is not in place, it can cause leaks and prevent the straw from working correctly.
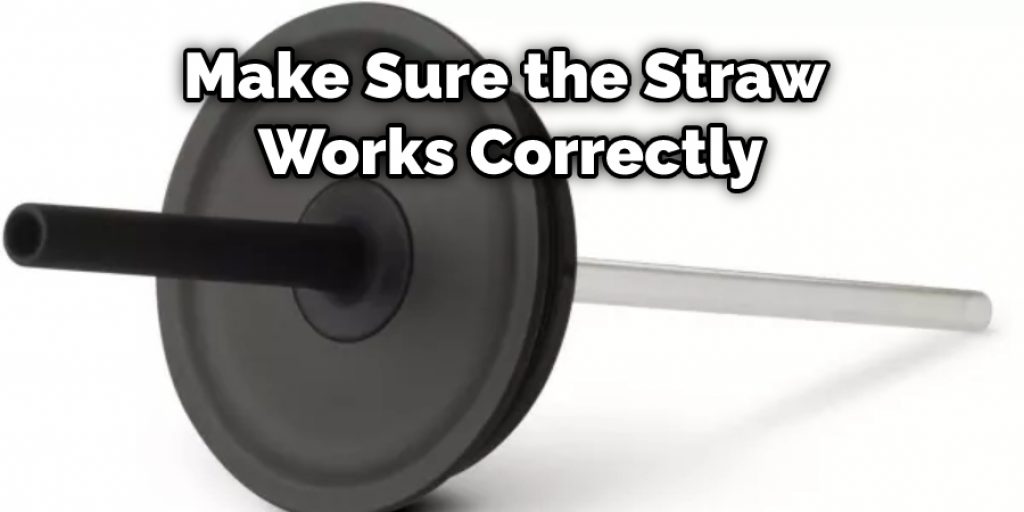
There is also the possibility that the straw itself is damaged or blocked. Inspect the straw for any cracks or breaks and blow through it to clear any blockages. If all else fails, you may need to replace your Hydro Flask straw lid.
Your Bottle Might Be Too Cold
Another potential reason your Hydro Flask straw lid isn’t working is that your bottle’s contents are too cold. When liquids get very cold, they can expand and create pressure inside the bottle. This pressure can make it difficult for the straw to penetrate the opening in the lid.
Hydro Flask Straw Lids Aren’t Leakproof.
It’s important to remember that Hydro Flask straw lids are not 100% leakproof. They are designed to be spill-resistant, but there is always a chance of leakage, especially if the lid is not properly sealed. If you’re concerned about leaks, it’s best to store your Hydro Flask upright.
A Detailed Guide on How to Fix Hydro Flask Straw Lid
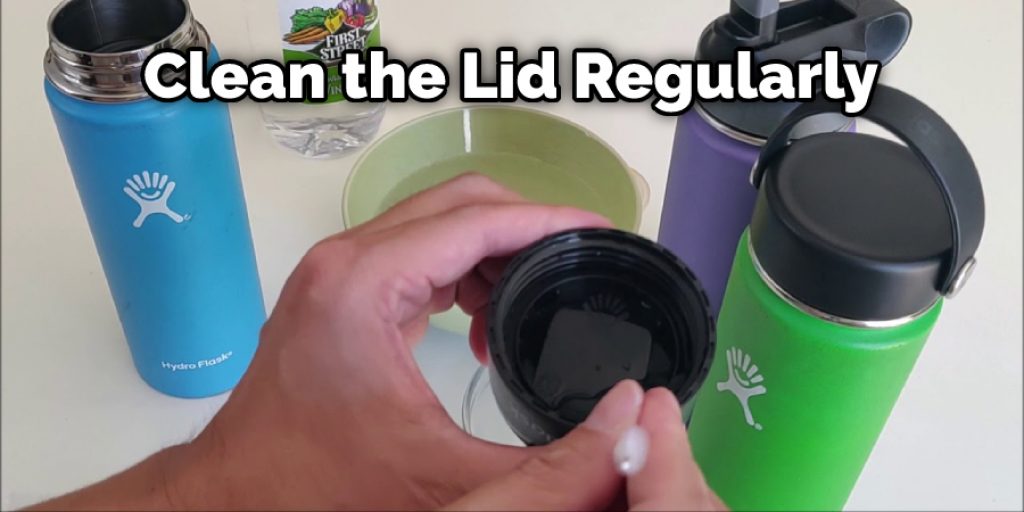
Method 1: Cleaning the Lid
Cleaning the lid is essential because it can help remove any dirt or residue clogging the straw. It would be best to clean the lid regularly to prevent the straw from becoming clogged and difficult to use.
What you will need:
- Hydro Flask
- Straw
- Cleaning brush
- Warm water
- Mild soap
Step 1: Determine if the Lid Needs to Be Cleaned.
The first step is to determine if the lid needs to be cleaned. For example, if the straw is clogged or the water is not coming out of the straw, then it is likely that the lid needs to be cleaned. Use a straw cleaning brush to clear any blockages in the straw. Rinse the lid in warm water and dry it with a clean towel.
Step 2: Remove the Lid From the Hydro Flask.
Next, you will need to remove the lid from the Hydro Flask. This can be done by unscrewing the lid from the top of the flask.
Step 3: Inspect the Lid for Dirt or Residue.
Once the lid is removed, you should inspect it for any dirt or residue. If you see any dirt or residue, you will need to clean it off before continuing.
Step 4: Clean the Lid With a Brush.
If there is dirt or residue on the lid, you should use a brush to clean it off. A toothbrush can be used for this purpose. You should also use warm water and mild soap when cleaning the lid.
Step 5: Allow the Lid to Dry Completely.
After you have finished cleaning the lid, you should allow it to dry completely. Once dry, you can screw it back onto the Hydro Flask.
Method 2: Adjusting the Seal
The seal is the small, black rubber gasket found on the inside of the cap. It’s what ensures that your Hydro Flask is leak-proof. If your straw lid is leaking, it’s likely because the seal isn’t seated correctly.
What You’ll Need:
- A Phillips head screwdriver
- A new seal (if the old one is damaged)
Step 1: Check the Seal
Before you do anything, make sure that the seal is seated correctly. It should be flush with the inside of the cap, with no gaps.
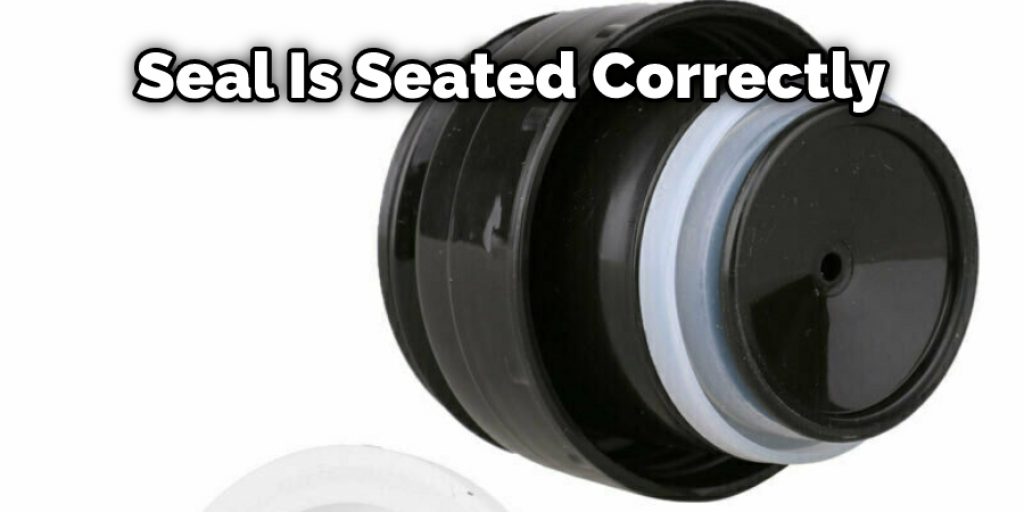
If the seal is damaged or not seated properly, it will need to be replaced.
Step 2: Adjust the Screws
There are two screws on the underside of the straw lid. These screws adjust the tension of the lid, which affects how well the seal works.
If your lid is leaking, try tightening these screws a bit. If they’re already tight, try loosening them slightly.
Step 3: Replace the Seal (if Necessary)
If the seal is damaged, it will need to be replaced. You can buy replacement seals from Hydro Flask’s website or many retailers that sell Hydro Flask products.
To replace the seal, use a Phillips head screwdriver to remove the two screws from the underside of the lid. Then, pull out the old seal and press the new one into place. Finally, replace the screws and test the lid to see if it’s still leaking.
Step 4: Test the Lid
Once you’ve adjusted the screws or replaced the seal, test the lid to see if it’s still leaking. Fill your Hydro Flask with water and turn it upside down. If no water leaks out, then the problem is fixed!
If your lid is still leaking, another issue may be causing the problem.
Method 3: Replacing the Lid O-Ring
What You’ll Need:
- New O-Ring
- Grease
- Knife or Screwdriver (optional)
Step 1: Remove the Old O-Ring
Use a knife or screwdriver to remove the old O-Ring from the lid carefully. If the O-Ring is stuck, you may need to use some force to get it out.
Step 2: Clean the Lid
Once the old O-Ring is removed, clean the surface of the lid where the O-Ring sits. This will ensure that the new O-Ring has a clean surface to adhere to.
Step 3: Apply Grease to the New O-Ring
Before installing the new O-Ring, apply a thin layer of grease to it. This will help it stay in place and prevent it from drying out.
Step 4: Install the New O-Ring
Carefully install the new O-Ring into the lid. Make sure it’s seated correctly and that there are no gaps.
Step 5: Test the Lid
Put the lid on your Hydro Flask and test it out. Make sure the straw works correctly and that there are no leaks.
Method 4: Replacing the Silicone Ring
What You’ll Need:
- A new silicone ring
- A pair of tweezers or a small screwdriver
Step 1: Remove the Old Silicone Ring.
The first step is to remove the old, damaged, or lost silicone ring. Next, use a pair of tweezers or a small screwdriver to open the metal clip that holds the ring in place.
Step 2: Insert the New Silicone Ring Into the Groove.
With the old silicone ring removed, it’s time to insert the new one. First, find the correct size replacement ring. If you’re not sure, consult Hydro Flask’s customer service. Once you have the proper size ring, stretch it out a bit to fit easily into the groove on the underside of the lid.
Step 3: Close the Metal Clip.
Once the new silicone ring is in place, use your tweezers or screwdriver to close the metal clip. Ensure that the clip is fully completed so that the silicone ring stays securely in place.
Your Hydro Flask straw lid is now fixed!
Method 5: Adjusting the Straw
What You’ll Need:
- A straw that is too long or too short for your Hydro Flask
- A pair of scissors
- A ruler or measuring tape
Step 1: Cut the Straw to the Correct Length.
Use a ruler or measuring tape to measure the length of the straw. It should be about 1 inch (2.54 cm) shorter than your Hydro Flask lid height.
Screw on the lid and make sure that the straw is inserted all the way in. The end of the straw should be even with the top of the cover.
Step 2: Adjust the Position of the Straw.
If necessary, you can adjust the position of the straw by unscrewing and then re-screwing the lid. Make sure that the straw is pointing in the direction you want it to before screwing the lid on.
If your Hydro Flask straw lid is still leaking, you may need to replace the lid seal.
Frequently Asked Questions
Does the Hydro Flask Straw Lid Leak?
The Hydro Flask Straw Lid Leak is a common issue that affects many brands of water bottles. When the straw lid is inserted into the bottle, it can’t seal completely due to interference from the spout. This causes liquid to seep out and slowly leak onto your coffee or beverage, making it difficult to drink.
There are several methods you can use to correct this problem: first, try inserting the straw more tightly into the lids; second, try using a different type of lid (such as one with a rubber gasket) if possible; third, insert a reusable cup liner inside of your Hydro Flask before filling it with water; fourth, top off your Hydro Flask halfway with Water Soluble Thermoshield Extended Life Gel for an extra layer of protection against leaks and staining; fifth, adjust how often you replace your straw by adding/removing fluid ounces accordingly.
Which Hydro Flask Lid is Leak Proof?
The Hydro Flask lids can vary in terms of their leak-proofness. However, some Hydro Flasks that are designed as water bottles come with lids that are specifically designed to be leakproof.
If you’re looking for a Hydro Flask that is specifically designed to be leak-proof, I recommend the Hydro Flask Insulated Water Bottle with Leak Proof Lid. This lid is made from a durable and waterproof material that helps to keep your drink cold and your food fresh.
What is the Difference Between Lid and Cap?
A lid is a cover that goes over the top of a container, such as a jar or a bottle. A cap is an accessory that fits on top of a jar or bottle and helps to keep the food inside fresh.
Do Hydro Flask Lids Fit All Sizes?
The good news is that Hydro Flask lids fit a wide range of beverage containers, including regular and large-mouth cans and bottles. That being said, it’s always best to check the size of the container before purchasing a Hydro Flask lid to make sure it will fit properly.
Conclusion
Overall, the Hydro Flask straw lid is an excellent addition to an already fantastic product. It’s easy to use and makes drinking from your Hydro Flask even easier. Although it can be tricky to get the hang of at first, it becomes second nature with a bit of practice. We hope you have gone through the article on how to fix hydro flask straw lid.