Snowboard boots are an essential part of any snowboarding gear. They not only provide the rider with support and comfort but also affect a rider’s ability to control their board. Choosing the right pair of boots is important for both beginner and experienced riders. Snowboard boots provide crucial support and stability while shredding down the slopes.
However, if your heel lift is off, you can bet that your ride will be anything but enjoyable. While enjoying a day on the slopes, many snowboarders may not realize that their heel lift is causing them to lose control and balance. This can be easily fixed by following these simple steps. This post will show you how to fix heel lift in snowboard boots using a few simple techniques. Read on to learn more.

Summary: Snowboard boots that lift can be a nuisance, but don’t worry! You can fix heel lift with a few simple steps. First, make sure you have the right size boot and wear the proper socks.
Then break in your boots and fasten them tightly to minimize heel lift. Additionally, select bindings that fit properly, opt for a stiffer boot and adjust your bindings accordingly. Consider investing in heel plates, custom footbeds or even a new pair of boots if necessary.
What Causes Heel Lift in Snowboard Boots?
Several factors can cause heel lift in snowboard boots. The most common cause is an improper fit. If your boots are too loose, your feet can slide around inside the boot, which can cause your heel to lift. Another common cause of heel lift is wearing boots that are too stiff. While stiff boots are necessary for certain riding styles, they can also cause heel lift if they’re not broken in properly. Improperly broken boots can also cause your feet to slide around inside the boot, leading to heel lift.
Additionally, if you don’t fasten your boots properly, this can also cause heel lift. Another factor is the terrain. If you’re riding on uneven or icy terrain, this can also cause your heel to lift. Lastly, if you’re using an old or worn-out binding, this can also lead to heel lift.
Is Heel Lift Bad?
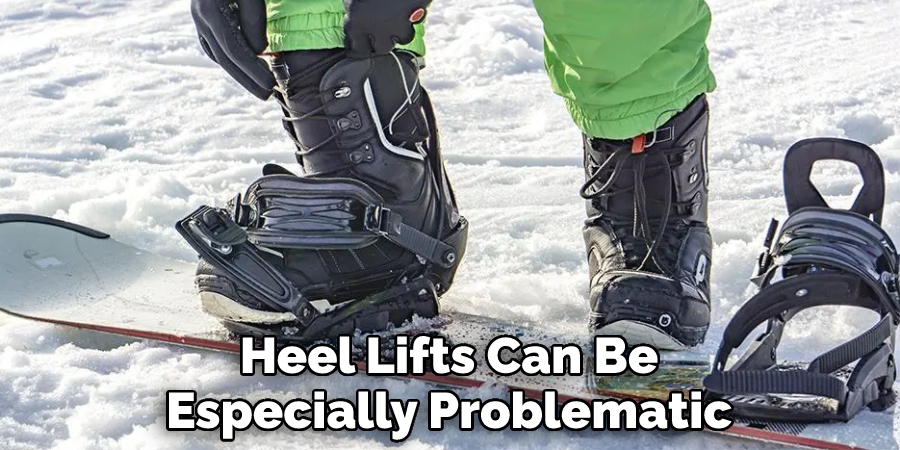
While heel lift may not seem like a big deal, it can be quite dangerous. A heel lift can cause you to lose balance and control, leading to serious injury. Also, heel lift can make it difficult to steer and may cause you to catch an edge. A heel lift is also one of the main reasons why snowboarders fall.
If you’re having difficulty staying on your feet, it’s likely due to a heel lift. Another problem with heel lift is that it can make your snowboard feel unstable. This can lead to a loss of confidence, affecting your ability to ride. If you’re new to snowboarding, heel lifts can be especially problematic. So, it’s important to be aware of the dangers of heel lifts and take steps to prevent them.
10 Ways How to Fix Heel Lift in Snowboard Boots
1. Check the Boots Fit
The first step is to make sure that your boots fit properly. If your boots are too loose, your feet will be able to slide around inside the boot, which can cause your heel to lift. Also, make sure that your boots are the right size. To check the fit of your boots, put them on and stand up. There should be about a finger’s width of space between your heel and the back of the boot. If there is more than this, your boots are too big.
Additionally, you should be able to wiggle your toes. If you can’t, your boots are too small. If you’re unsure of your size, you can always consult a snowboard shop or the boot manufacturer’s size chart.
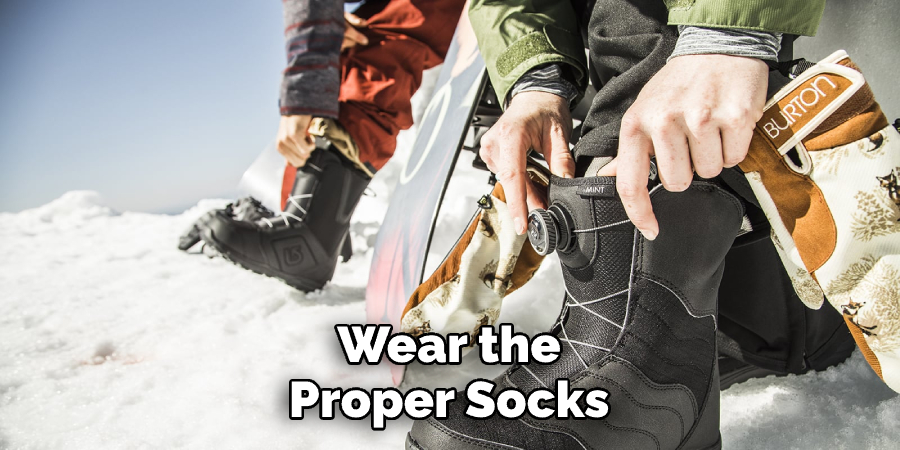
2. Wear the Proper Socks
It’s important to wear the proper socks when snowboarding. If you wear too thin socks, your feet will slide around inside your boots, which can cause heel lift. Additionally, if your socks are too thick, they can make your boots feel too tight and cause your feet to ache. The best socks for snowboarding are made of wool or synthetic materials. These materials will keep your feet warm and dry while also providing the necessary support. Avoid cotton socks, as they will absorb moisture and make your feet cold.
3. Break in Your Boots
If you’re using new boots, it’s important to break them in before hitting the slopes. New boots are often quite stiff and can cause heel lift if they’re not broken in properly. First, put them on and fasten them securely to break into your boots. Then, walk around your house or apartment for a few minutes. Next, you can try doing light exercises like jumping jacks or squats. Finally, you can try riding around on a carpeted surface. After a few days of breaking in your boots, they should be ready for the slopes.
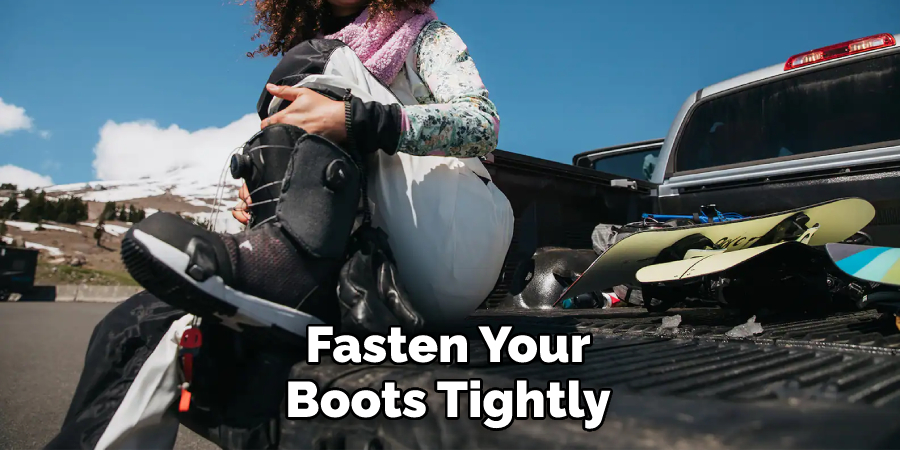
4. Fasten Your Boots Tightly
Another way to prevent heel lift is to make sure that your boots are fastened tightly. If your boots are too loose, your feet can move around inside them, which can cause your heel to come up. To prevent this, make sure to fasten your boots tightly before heading out onto the slopes. First, loosen the laces and then tighten them until their snug. Then, fasten the Velcro straps if your boots have them. Once your boots are fastened, try walking around to make sure that they’re not too tight. You should be able to wiggle your toes, but your feet shouldn’t slide around inside the boot.
5. Choose the Right Binding
When choosing a binding, it’s important to make sure that it’s the right size for your boot. If the binding is too small, it won’t provide enough support, and your heel could lift. Also, make sure that the binding is the right width for your boot. It won’t be easy to control your board if it’s too wide. To find the right binding, first, measure your boot. Then, consult the binding manufacturer’s size chart to find the right binding for your boot. If you’re unsure of the size, you can always ask a snowboard shop for help.
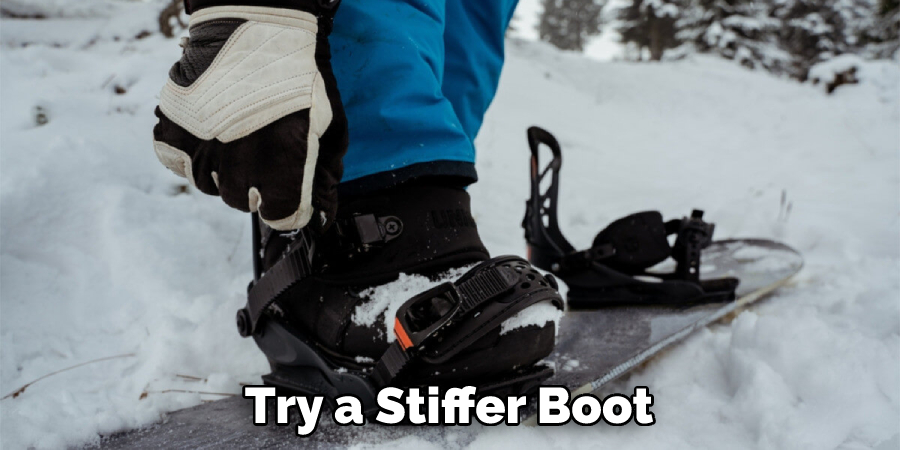
6. Go for a Stiffer Boot
If you’re having trouble with a heel lift, you might want to try a stiffer boot. A stiffer boot will provide more support and prevent your foot from moving around too much. However, a stiffer boot can be more difficult to control, so finding the right balance is important. If you’re not sure which boot to choose, you can always ask a snowboard shop for help.
7. Adjust Your Bindings
You can try adjusting your bindings if you still have trouble with a heel lift. First, loosen the binding straps to give your foot more room. Then, try moving the binding back on your board. This will put your foot in a more natural position and provide more support. Finally, you can try moving the binding forward on your board. This will give you more control over your board but may sacrifice some comfort.
8. Use Heel Plates
Heel plates are a great way to prevent heel lift. Heel plates attach to the bottom of your boot and help keep your heel in place. Additionally, heel plates provide extra support and cushioning, which can help prevent heel lift. Heel plates are relatively inexpensive and can be found at most snowboard shops.
To use heel plates, simply attach them to the bottom of your boot using the provided adhesive. Avoid using too much adhesive, as removing the heel plate later can make it difficult.
9. Get Custom Footbeds
Custom footbeds are another great way to prevent heel lift. Custom footbeds are made to fit your feet and provide extra support. They can also help with alignment and stability. Custom footbeds are more expensive than heel plates, but they’re worth the investment if you’re having trouble with a heel lift.
To get custom footbeds, first, visit a snowboard shop to have your feet measured. Then, the shop will create custom footbeds that fit your feet perfectly.
10. Try a New Boot
If you’ve tried everything and still have trouble with a heel lift, you might need to buy a new boot. A new boot will provide more support and may be more comfortable than your old one. When choosing a new boot, try to find one stiffer than your old one. You should also ensure that the boot is the right size and width for your foot.
Tips and Warnings on How to Fix Heel Lift in Snowboard Boots
Tips
- Check the length of your snowboard boots. A heel lift can be caused by wearing too big or too small boots.
- Inspect the bindings. Ensure the bindings are not loose and the screws are tightened.
- Look for areas where the boot is rubbing against the snowboard. This can cause friction and eventually lead to heel lift.
- Adjust the straps on your bindings. Sometimes, simply tightening or loosening the straps can fix the problem.
Warnings
- Do not ride your snowboard with a heel lift. This can be dangerous and cause you to lose control.
- Do not try to fix the heel lift while you are on the slopes. This is a job for the experts. Instead, take your snowboard to a qualified technician.
- Do not overtighten the screws on your bindings. This can damage the bindings and cause them to break.
You May Also Read: How to Fix Skateboard Wheels Not Spinning
Frequently Asked Questions
What Causes Heel Lift?
Heel lift is a common problem that affects the feet and toes. The cause may be unknown, but it is typically present at some point during your adulthood. Toe Septum Syndrome (TES), also known as Heel Lift or Verrucous Foot Disease, is an uncommon condition in which skin growth on the sole of the foot causes pain and difficulty walking.
Heel lift can also result from psoriasis, seborrheic dermatitis, fungal infections of nails or toenails, orthotics use abnormally prolonged standing or sitting periods with weight bearing on heel socks/footwear covering entire feet continuously for long durations while working, etc., diabetes mellitus type 2[1], pregnancy,[2],[3] there might even be a genetic predisposition.[4],[5]
There are various treatments available that include topical ointments such as ketoconazole cream 0.025% 、fluconazole shampoo 1%), oral antifungals like itraconazole 400mg tablets once daily PO; systemic steroids such as prednisone 10−20 mg orally twice a day; pedicure with hydrocolloid bandages over bunionectomy scar annually followed by heel elevation anesthesia if the discharge from wound indicates no further improvement within 6 months post-op therapy has been unsatisfactory [6].
Does Heat Molding Help Heel Lift?
Heat molding is a popular treatment that helps to lift the heel, but there is limited evidence to support this claim. Some people believe that heat increases circulation and therefore supports tissue regeneration. Others believe that gentle warmth helps to break down scar tissue and stimulate new collagen production. However, research does not seem to back up these claims fully.
What we do know is that heat therapy can be helpful in relieving pain from heel spurs or other heel conditions, as well as helping speed the healing process of tendonitis or other injuries sustained to your heels. If you are considering using heat molding for heel lift, it’s important to speak with a doctor first so they can provide you with specific instructions on how much heat should be applied and for how long.
Should Your Heels Lift In Boots?
it depends on personal preference and what is comfortable for you. Some people feel that lifting the heels in boots makes them more comfortable and helps them move more freely. Others may feel that it makes the boots less sturdy and increases the risk of accidents. Ultimately, it is up to the individual to decide if they want to lift their heels or not.
Can Heel Lifts Cause Problems?
There is some confusion surrounding heel lifts and their potential side effects, which is why it’s important to be aware of the risks before undergoing a procedure like this. Heel lifts can impact your alignment and cause pain in the arches of your feet, as well as other joints throughout your body.
Additionally, they may also result in decreased range of motion or muscle atrophy. If you are experiencing any of these symptoms after having a heel lift surgery, please seek medical attention immediately.
Conclusion
So there you have it! These are some ways how to fix heel lift in snowboard boots. A heel lift is a common problem, but it can be easily fixed. With a little effort, you can have your boots fitting perfectly in no time. Thanks for reading!