Once you’ve finally gotten your shower all cleaned up, the last thing you want to do is deal with a malfunctioning shower door. But if your glass shower door won’t close, don’t worry – it can be fixed! In this article, we’ll walk you through some simple steps on how to fix glass shower door that won’t close. So read on and get started repairing your shower door today!
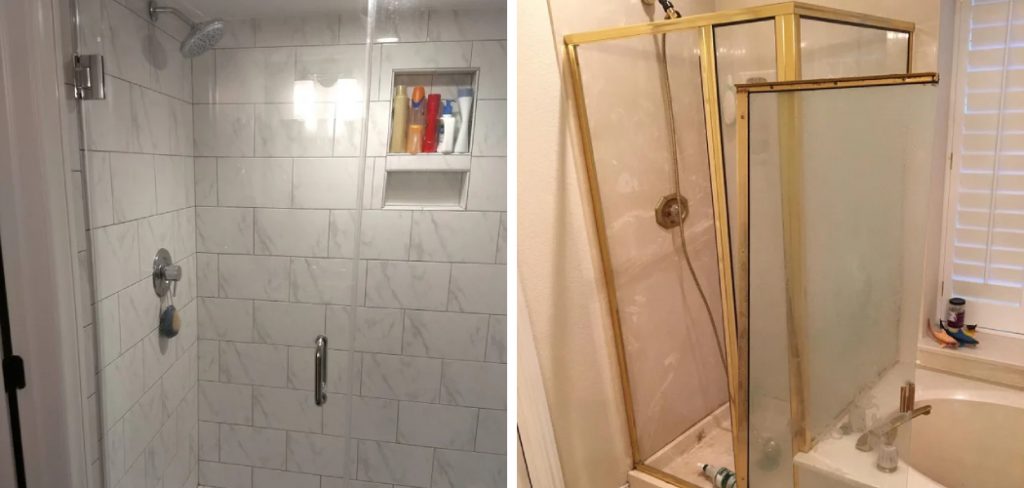
Glass shower doors are a great way to add style and sophistication to your bathroom. But if they’re not working correctly, they can be a real pain. If your glass shower door doesn’t close, you can do a few things to fix it. The problem is often simply that the door needs to be adjusted. But if that doesn’t work, there are a few other things you can try.
Summary: Fixing a broken hydraulic hood lift or a glass shower door can often seem like an intimidating task. However, with a few simple steps, you can make these repairs quickly and easily.
In this blog post, we’ll provide an outline that will help you navigate your way through troubleshooting and repairing the door – from identifying the problem to testing the new door installation. With our guide in tow, your home’s fixtures will be looking good as new in no time!
Why Is My Door Not Closing Properly?
If your shower door isn’t closing properly, it could be because the door is not level, the tracks are dirty or damaged, or the door itself is warped. You’ll need to look at the problem and see what you can do to fix it.
If the problem is with the tracks, you’ll need to clean them out first. Using a vacuum cleaner with a brush attachment to remove any dirt or debris, you can do this. If there are any damaged parts of the track, you’ll need to replace them.
If the problem is with the door itself, you’ll need to check for any warping. Warping can occur over time due to humidity or temperature changes. If the door is warped, you can try to straighten it out by using a heat gun.
Once you’ve identified the problem, you can then take the necessary steps to fix it. With a little effort, you should be able to get your glass shower door working properly again in no time.
A Step by Step Guide on How to Fix Glass Shower Door That Won’t Close
Step 1: Gather Necessary Tools and Materials
Before you begin repairing a wooden box spring, gather the necessary tools and materials. These may include:
- Screwdriver
- Hammer
- Wood glue
- Wood filler
- Sandpaper (medium and fine grit)
- Wood screws or nails
- Replacement wooden slats (if needed)
- Wood stain or paint (optional)
- Paintbrush (optional)
- Tape measure
- Saw (if necessary)
- Drill (if necessary)
- Clamps (optional)
Step 2: Inspect the Box Spring
Carefully inspect the wooden box spring for any signs of damage or wear. Common issues may include broken or cracked slats, loose screws or nails, and worn or damaged fabric covering. Make a note of any areas that require repair or replacement.
Step 3: Remove the Fabric Covering (if applicable)
If your wooden box spring has a fabric covering, carefully remove it to expose the wooden frame. Use a screwdriver or another appropriate tool to gently pry off any staples or tacks holding the fabric in place. Set the fabric aside for reattachment once the repairs are complete.
Step 4: Tighten Screws and Nails
Use a screwdriver or hammer to tighten any loose screws or nails in the wooden frame. If any screws or nails are missing or damaged, replace them with new ones of the appropriate size and type.
Step 5: Repair or Replace Damaged Wooden Slats
If any of the wooden slats are cracked, broken, or otherwise damaged, repair or replace them as necessary. For small cracks or splits, apply wood glue to the damaged area and clamp the slat until the glue dries. For more extensive damage, remove the damaged slat and replace it with a new one. Measure the length and width of the existing slat and cut a new piece of wood to match these dimensions. Attach the new slat to the frame using wood screws or nails.
Step 6: Fill Gaps and Holes
Use wood filler to fill any gaps, holes, or imperfections in the wooden frame. Apply the filler using a putty knife or another appropriate tool and smooth it out to create a seamless surface. Allow the filler to dry according to the manufacturer’s instructions.
Step 7: Sand the Wood
Once the wood filler is dry, sand the entire wooden frame using medium-grit sandpaper to smooth out any rough or uneven areas. Be sure to sand in the direction of the wood grain to avoid creating scratches or cross-grain marks. After the initial sanding, use fine-grit sandpaper to further smooth the surface and prepare it for staining or painting.
Step 8: Stain or Paint the Wood (optional)
If you choose to stain or paint the wooden frame, first clean the surface with a tack cloth to remove any dust or debris. Apply a coat of wood stain or paint using a paintbrush, following the manufacturer’s instructions for application and drying times. You may need to apply multiple coats to achieve the desired color and finish.
Step 9: Reattach the Fabric Covering (if applicable)
Once the wooden frame is fully repaired and any stain or paint is dry, reattach the fabric covering. Start by positioning the fabric over the frame, ensuring that it is properly aligned and evenly stretched. Use a staple gun or tacks to secure the fabric to the frame, working your way around the perimeter and pulling the fabric taut as you go.
Step 10: Reinforce the Box Spring (if needed)
If your wooden box spring requires additional reinforcement, consider adding extra wooden slats or installing a center support beam. To add extra slats, measure the distance between the existing slats and cut new pieces of wood to fit in the gaps. Attach the new slats to the frame using wood screws or nails. For a center support beam, measure the length of the box spring and cut a piece of wood to match this dimension. Attach the support beam to the center of the frame, perpendicular to the existing slats, using wood screws or nails. Make sure the support beam is level and securely fastened to the frame.
Step 11: Inspect Your Work
Once all repairs and reinforcements are complete, carefully inspect your work to ensure that the wooden box spring is now sturdy and free of damage. Check that all screws and nails are tight, slats are secure and level, and the fabric covering (if applicable) is properly attached and free of wrinkles or sagging.
Step 12: Reassemble the Bed
With the wooden box spring repaired, reassemble your bed by placing the box spring back on the bed frame or rails, and then positioning the mattress on top. Ensure that the box spring is properly aligned and sits securely on the frame or rails.
Step 13: Test the Box Spring
After reassembling the bed, test the repaired box spring by sitting or lying down on the mattress. Apply pressure to various areas of the bed to ensure that the box spring provides even support and does not sag or creak under your weight.
Step 14: Perform Regular Maintenance
To prolong the life of your wooden box spring and prevent future damage, perform regular maintenance checks. Inspect the box spring for any signs of wear, loose screws or nails, or damaged slats, and address any issues promptly. Rotate the box spring occasionally to distribute weight evenly and reduce the likelihood of sagging.
Step 15: Protect the Box Spring
Consider using a box spring cover or encasement to protect the wooden frame from dust, dirt, and moisture. This can help preserve the integrity of the wood and extend the lifespan of your box spring.
By following these steps, you can successfully repair a wooden box spring and restore its functionality and appearance. Regular maintenance and proper care will help ensure that your box spring continues to provide stable, comfortable support for your mattress and a good night’s sleep.
You Can Check It Out to Fix Shower Door Not Closing
Tips and Warnings
Tips:
- If your glass shower door has a lot of soap scum or mineral deposits, you may need to use a stronger cleaner. For example, you can try a vinegar and water solution or a commercial glass cleaner.
- If the problem is with the hinges, it’s essential to ensure they’re properly lubricated. This will help the door close more smoothly.
- Make sure that the tracks are clean and free of debris. This can be a common issue that prevents doors from closing properly.
- Adjusting the tension on the door may also be necessary. Again, this should be done by a professional, as it can be tricky to get right.
- It may be necessary to replace the glass shower door in some cases in some cases. If the damage is extensive, or if the door is old and worn out, it’s probably time for a new one.
Warnings:
- Be careful when working with glass. It can be fragile and dangerous.
- Always follow the manufacturer’s instructions for cleaning and maintenance.
- If you’re not sure how to fix the problem, it’s best to call a professional. For example, trying to force the door closed can cause more damage and worsen the problem.
You Can Check It Out To Fix Tacky Resin
How Do You Adjust a Glass Door Closer?
If you have a glass shower door that won’t close, you may need to adjust the glass door closer. To do this, first, identify which type of glass door closer you have. There are two types of glass door closers: surface-mounted and concealed.
To adjust a surface-mounted glass door closer, start by loosening the screws that hold the plunger in place. Then, use a screwdriver to turn the adjustment screws located on the arms of the door closer. Finally, turn the screws clockwise to increase the tension and counterclockwise to decrease the tension.
To adjust a concealed glass door closer, start by removing the cover plate. Underneath the cover plate, there will be an adjustment knob. Turn the knob clockwise to increase the tension and counterclockwise to decrease the tension.
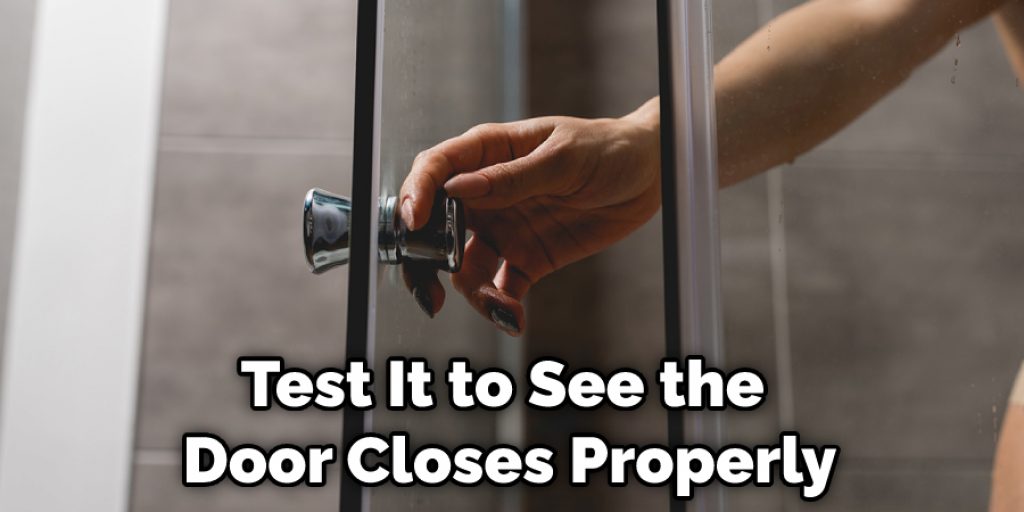
Once you’ve adjusted the glass door closer, test it out to see if the door closes properly. If it still doesn’t close, you may need to replace the glass door closer.
Frequently Asked Questions
Why Does My Shower Door Keep Sliding Open?
There are several possible reasons for this common problem, with the most frequent cause being incorrect installation. If your shower door was installed without proper caulking or sealing around the perimeter, water can seep in and create an environment conducive to mildew and mold growth. Another cause could be poorly mounted brackets that hold the shower door open. This can occur if they were not tightened sufficiently during installation, or if they shifted when wet.
In some cases, it may also be necessary to adjust the hinges on your shower doors so that they’re vertical instead of horizontal. Finally, make sure there’s nothing blocking water from flowing properly through your rainwater head (which controls how much water enters your bathroom).
Can Shower Door Hinges Be Adjusted?
Most likely, yes. While it is not always a straightforward process to adjust shower door hinges, there are ways that you can do it yourself. One option is to use a tension wrench which allows you to apply the correct tension on the hinge so that it doesn’t loosen over time. This will prevent damage and possible water infiltration into your home in the future. Additionally, installing weatherstripping around your bathroom door can also help keep moisture and humidity out while letting air circulate freely within the room.
Do You Adjust the Rollers on a Shower Door?
A shower door typically has either rubber or plastic rollers, and it is important to adjust them regularly in order to ensure that the door operates smoothly. Depending on the type of door, adjusting the rollers may involve turning them either clockwise or counterclockwise.
Which Side Should Shower Door Slide?
When it comes to shower doors, many people believe that the left side should slide more than the right. This is because research has shown that people who drift their feet to the left use less energy when exiting and entering a shower. In addition, this position helps balance out your weight so you don’t put too much stress on your knees and hips.
However, there are also those who believe that both sides should move equally. The choice ultimately depends on personal preference and how you typically use showers. If you’re okay with using whichever side feels more comfortable for now, then go for it! But if you want to take advantage of scientific evidence in order to make an informed decision, then feel free to do so!
What is the Difference Between Sliding and Bypass Shower Doors?
Sliding and bypass shower doors are two types of shower doors that can be used in different situations. Sliding shower doors open by moving along a track and can be used in standard or corner showers. Bypass shower doors open with a push of a button and are typically used in tub or large walk-in showers.
Conclusion
Shower doors are notorious for not closing correctly, but that doesn’t mean you have to put up with it. You can do a few things to fix the problem and get your shower door back in working order. We outlined some of the most common solutions so you can get your shower looking and functioning like new again. We hope you find this article on how to fix glass shower door that won’t close helpful.
You May Also Read: How to Fix Gap in Shower Door