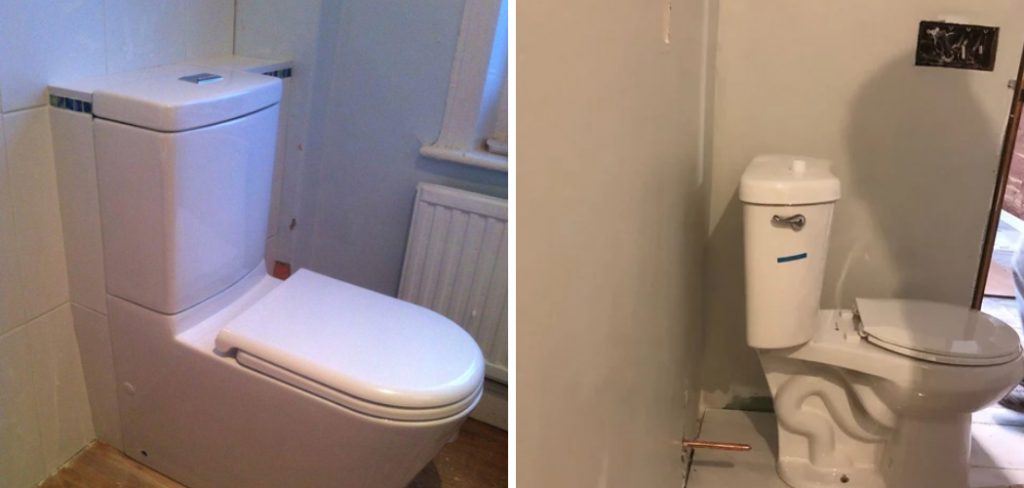
There’s nothing more annoying than a gap between your toilet and the wall. It can be difficult to fix, but with a little know-how, you can have it looking good as new in no time! Follow these simple steps on how to fix gap between toilet and wall to get the job done.
Summary: When you notice a gap between your toilet and the wall, there are several ways to fix it. First, identify the source of the problem. Measure the size of the gap and decide which repair method is best for your situation.
You may choose to use caulk, expanding foam, or a toilet flange repair kit. If you find that your toilet is loose, there are steps you can take to fix it. Once finished, test out the area to ensure everything is secure and functioning properly.
Why It’s Important to Fix Gap Between Toilet and Wall?
It’s important to fix the gap between your toilet and the wall for several reasons. First, if it’s not properly sealed, it can be a breeding ground for bacteria and mold. Second, if you have small children, they could potentially stick their fingers or other objects in the gap and hurt themselves.
Finally, an unsealed gap can simply be unsightly and make your bathroom look dirty. By taking the time to seal the gap, you can avoid all of these potential problems.
How to Fix Gap Between Toilet and Wall Step by Step Guide
Step 1: Gather Necessary Tools and Materials
Before starting the repair process, gather the required tools and materials to ensure a smooth workflow. Some essential items include a tape measure, a level, a wrench, a toilet base plate or toilet flange extender, a new wax ring, silicone sealant, a putty knife, and a cloth or towel.
Step 2: Turn Off the Water Supply
Before beginning any repair work, turn off the water supply to the toilet. Locate the shutoff valve, which is typically located near the base of the toilet, and turn it clockwise until the water is fully shut off.
Step 3: Drain the Toilet Tank
Flush the toilet to drain the water from the tank. To remove any remaining water, use a cloth or towel to soak up and wring out the excess.
Step 4: Disconnect the Water Supply Line
Using a wrench, disconnect the water supply line from the base of the toilet tank. Place a towel or cloth beneath the connection to catch any residual water.
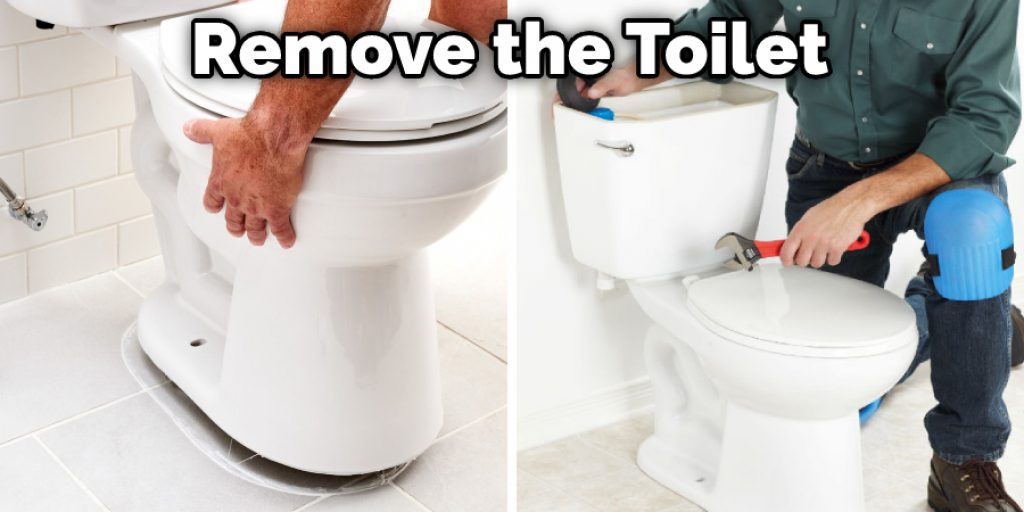
Step 5: Remove the Toilet
Remove the nuts and washers from the bolts securing the toilet to the floor. Carefully lift the toilet off the bolts and set it aside on a towel or cloth to prevent any damage to the floor.
Step 6: Inspect the Toilet Flange
Inspect the toilet flange, which is the circular ring that connects the toilet to the sewer pipe. Check for any cracks, damage, or signs of wear that may contribute to the gap between the toilet and the wall. If necessary, replace the flange or use a flange extender to raise its height.
Step 7: Measure the Gap
Using a tape measure, determine the size of the gap between the toilet and the wall. This measurement will help you select the appropriate toilet base plate or flange extender to fill the gap.
Step 8: Select and Install the Toilet Base Plate or Flange Extender
Choose a toilet base plate or flange extender that corresponds to the size of the gap you measured. Follow the manufacturer’s instructions for installing the plate or extender, ensuring it is level and securely attached to the toilet flange.
Step 9: Replace the Wax Ring
Remove the old wax ring from the toilet flange using a putty knife. Clean the flange thoroughly to remove any wax residue. Install a new wax ring by pressing it firmly onto the flange. This will create a watertight seal between the toilet and the sewer pipe.
Step 10: Reinstall the Toilet
Carefully lower the toilet onto the flange, aligning the mounting bolts with the holes in the base of the toilet. Apply even pressure to the toilet bowl to compress the wax ring and create a secure seal.
Step 11: Secure the Toilet
Replace the washers and nuts on the mounting bolts and tighten them using a wrench. Be cautious not to overtighten the nuts, as this may cause damage to the toilet or the flange.
Step 12: Check the Level
Using a level, check that the toilet is level both side-to-side and front-to-back. If necessary, make adjustments by slightly loosening or tightening the mounting bolts or by using shims to create a level surface.
Step 13: Reconnect the Water Supply Line
Reattach the water supply line to the base of the toilet tank using a wrench. Turn on the water supply and allow the toilet tank to refill.
Step 14: Apply Silicone Sealant
To create a watertight seal between the toilet and the wall, apply a bead of silicone sealant along the base of the toilet where it meets the floor. Smooth the sealant with your finger or a putty knife for a clean, professional appearance.
Step 15: Perform a Final Inspection and Test
Inspect the toilet for any signs of leaks or issues, paying close attention to the area around the base where the gap was previously present. Flush the toilet several times to ensure it is functioning properly and that no water is leaking from the base or the connection between the toilet and the wall.
Step 16: Maintain Proper Toilet Care
To prevent future issues with your toilet, practice proper toilet care by avoiding the use of harsh chemicals or abrasive cleaning tools that may damage the toilet or its components. Regularly clean the toilet using gentle, non-abrasive cleaners and inspect it for any signs of wear or damage.
Step 17: Schedule Regular Plumbing Inspections
To ensure the continued health and functionality of your toilet and plumbing system, schedule regular professional plumbing inspections. A licensed plumber can identify potential issues, provide recommendations for maintenance, and perform necessary repairs to keep your plumbing system running smoothly.
Step 18: Consider Toilet Upgrades
If your toilet is older or experiences frequent issues, consider upgrading to a newer model with improved efficiency and performance. Modern toilets often have features such as dual flush systems, which can save water and reduce the strain on your plumbing system.
Step 19: Be Mindful of Flooring Changes
If you make changes to the flooring in your bathroom, such as adding tile or a thicker underlayment, be aware that this may affect the alignment of your toilet and the connection to the sewer pipe. Ensure that any changes to the flooring still allow for a secure, watertight connection between the toilet and the wall.
You Can Check It Out to Fix Large Gap Between Tub and Floor
Another Way to Fix Gap Between Toilet and Wall
1. Remove Toilet
To remove your toilet, start by disconnecting the water supply line. Next, flush the toilet to empty the tank. Then, use a putty knife to break the seal around the toilet’s base. Finally, lift the toilet off its mounting bolts and set it aside.
2. Cut Backer Board to Size and Attach It to Wall with Screws
Cut a piece of backer board to size using a utility knife and a straight edge. Then, attach the backer board to the wall with screws. Be sure to countersink the screws so that they are flush with the board’s surface.
3. Re-Install Toilet and Check for Level
Re-install your toilet and make sure that it is level. To do this, you may need to adjust the mounting bolts. Once the toilet is level, reconnect the water supply line and flush the toilet to check for leaks.
4. Caulk Around the Top of The Toilet Where It Meets the Wall
If there’s a gap between the top of your toilet and the wall, caulk is an easy fix. Just run a bead of caulking around the entire circumference of where the two surfaces meet. Use a putty knife or your finger to smooth out the caulk to create a tight seal. Wipe away any excess caulking with a damp cloth.
5. Re-Attach Toilet Seat and Tank Lid
Re-attach your toilet seat and tank lid. Make sure that the tank lid is sitting level on the tank. Then, tighten all bolts to ensure that the seat is secure.
6. Flush Toilet to Check for Leaks
Once you’ve finished caulking, flush the toilet to check for leaks. If everything is sealed properly, there should be no leaks. If you see a leak, caulking may not be the only issue. You may need to adjust the toilet itself or the mounting bolts.
How Do You Fix a Big Gap Under a Toilet?
There are a few ways to fix a big gap under a toilet. The first is to use caulk. Caulk is a flexible sealant that can fill in gaps and cracks. If the gap is small, you may be able to use a tube of caulk. For bigger gaps, you’ll need to use a caulking gun.
Another option is to use expanding foam. Expanding foam is quick-drying and forms a tight seal. It’s ideal for filling large gaps and voids. Finally, you could also use putty. Putty is a pliable material that can be used to fill in cracks and holes. Once it dries, it becomes hard and durable.
Whichever method you choose, make sure the area is clean and dry before beginning. First, fill the gap, then allow it to dry completely before using the toilet. Keep reading for more information about how to fix gap between toilet and wall.
Should I Put a Cabinet Above My Toilet?
If you’re considering putting a cabinet above your toilet, the gap between the toilet and the wall may be too tight. In that case, you may need to get creative with how you install the cabinet. For example, you could try to install it flush with the wall or install it slightly away from the wall and use trim to cover the gap.
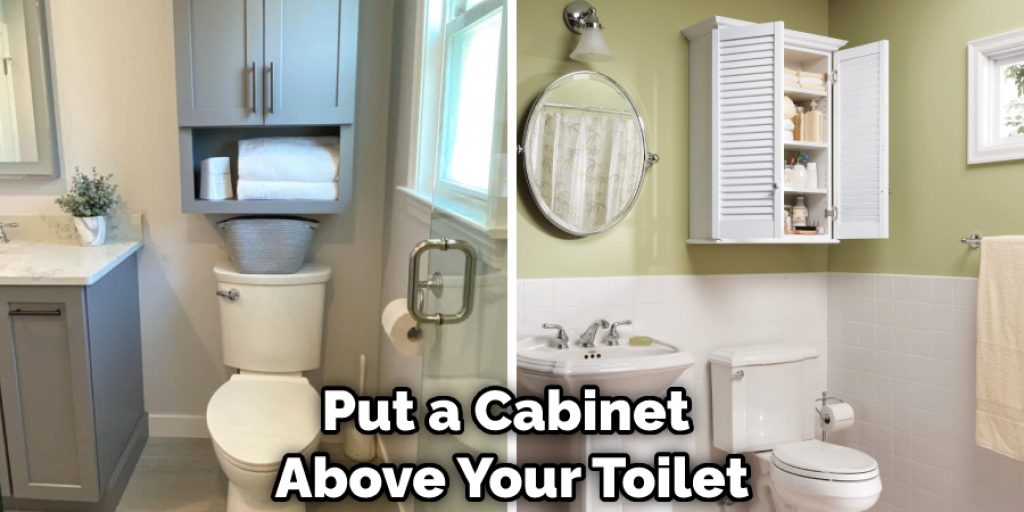
Another option is to use a shelf instead of a cabinet. This can be a great way to save space and get the storage you need. Just make sure that the shelf is sturdy and won’t sag over time.
In general, it’s best to avoid putting anything too close to your toilet. That way, you won’t have to worry about leaks or anything else that could potentially damage your bathroom.
If you decide to put a cabinet above your toilet, make sure to measure the space carefully and choose a model that fits well. Otherwise, you may end up with an eyesore or a dangerous situation.
Frequently Asked Question
Should the Toilet Tank Touch the Wall?
There should be a gap between the toilet tank and the wall to allow airflow and prevent moisture build-up. If the toilet tank is touching the wall, you can use shims to create the necessary space.
Should There Be a Gap Between Toilet Bowl and Tank?
There should not be a gap between the toilet bowl and the tank, as this can lead to water leakage. However, if you find a gap, use shims to fill the space and create a tight seal.
What Can I Put Behind the Toilet?
There are many things that can be put behind the toilet to fix the gap between it and the wall. Some popular options include using a stack of bricks, using a piece of wood, or using a piece of metal.
Conclusion
A gap can be a frustrating experience, but it doesn’t have to be. With the right tools and some practice, you can fix your gap in no time. We hope these tips have helped and are well on your way to closing the gap for good. Thanks for reading our post about how to fix gap between toilet and wall.