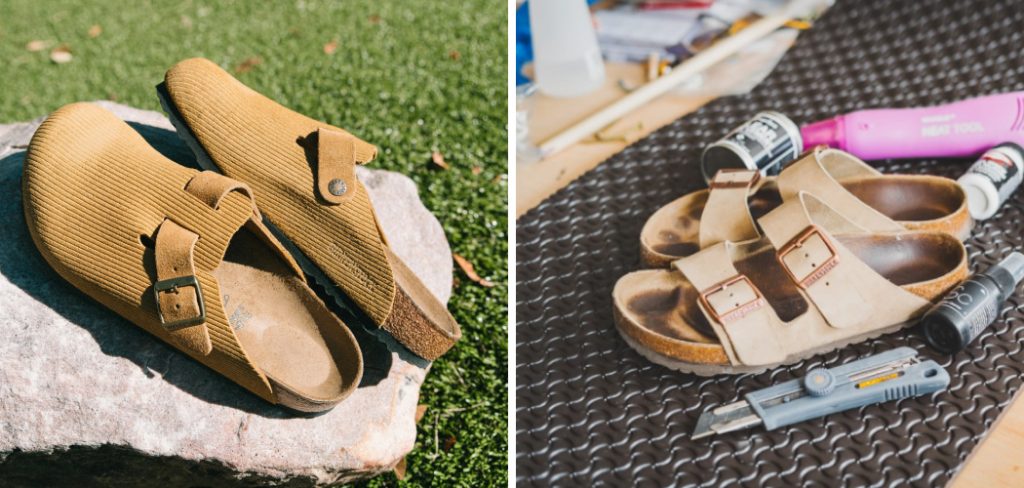
Are you a Birkenstock lover? Do you swear by the comfort and style of these iconic sandals? If so, you may have encountered an issue with your cork footbed.
How to fix Birkenstocks cork is an essential skill to prolong the life of these beloved sandals. Over time, the cork may degrade due to moisture, dirt, and general wear and tear exposure. Regular maintenance, using suitable materials, and applying careful techniques can help restore the cork’s integrity and prevent further damage.
In this guide, we’ll take you through the basic steps to repair your Birkenstocks’ cork, ensuring that your sandals stay functional and comfortable for as long as possible. Whether you’re dealing with minor cracks or more significant damage, these tips will equip you with the know-how to confidently tackle the task.
What Will You Need?
To fix Birkenstock cork, you will need a few essential materials. These include:
1. Cork Sealer or Glue
This specialized adhesive is designed to repair cork, providing a strong bond and protection against moisture.
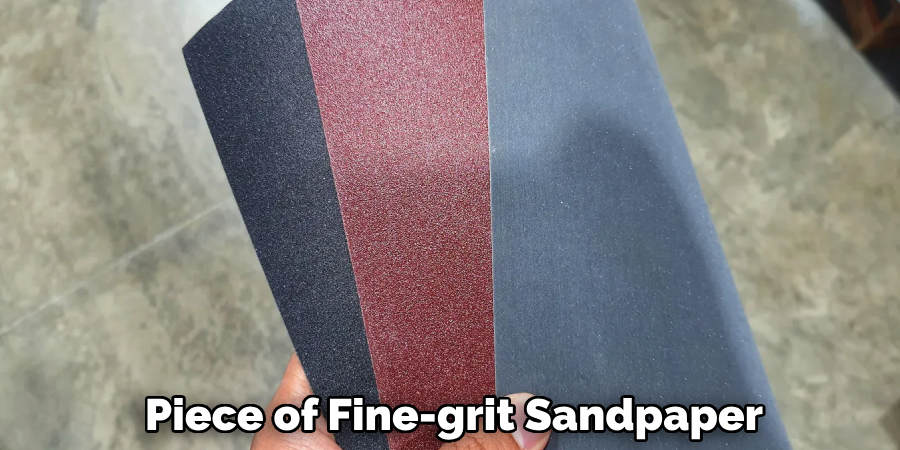
2. Fine-grit Sandpaper
You’ll use this to smooth out any rough edges or bumps on the cork surface.
3. A Clean Cloth
This will come in handy for wiping away excess glue or sealer.
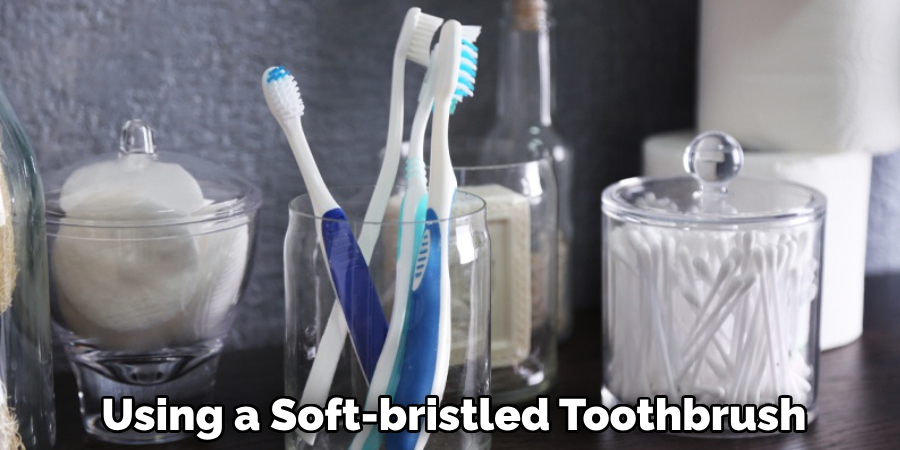
4. A Toothbrush
Useful for gently cleaning dirt and debris from the cork’s grooves.
5. Q-tips or Small Brush
To apply the sealer evenly and precisely to smaller areas of damage.
6. Optional Items
If your sandals have significant cracks, you may also need a cork filler or patch and a utility knife to cut and shape it to fit the footbed.
Once you have all the necessary materials, you can start fixing your Birkenstocks’ cork.
10 Easy Steps on How to Fix Birkenstocks Cork
Step 1. Clean the Cork Surface:
Begin by thoroughly cleaning the cork surface to remove all dirt, moisture, and residue before you start the repair process. Use a clean, dry cloth to gently wipe the cork, removing any loose dirt and debris. For more embedded dirt, consider using a soft-bristled toothbrush to scrub the cork lightly, being careful not to damage it. Make sure to clean along the edges and any grooves where dirt accumulates.
Once the visible dirt is removed, dampen the cloth slightly and wipe down the cork to pick up any remaining particles. Allow the cork to air dry completely; this is crucial as moisture can interfere with the adhesion of the cork sealer or glue that will be applied in later steps. A clean and dry surface will ensure a stronger bond, effectively prepping your Birkenstocks for the restoration process.
Step 2. Sand the Cork Surface:
Once the cork is clean and dry, use fine-grit sandpaper to gently sand any rough edges or uneven areas on the cork surface. This step is essential to ensure a smooth surface, allowing the sealer or glue to adhere more effectively. Be careful to sand lightly and evenly, avoiding excessive pressure that could wear down too much cork material. Focus on areas that have visible ridges or rough spots. After sanding, wipe away any resulting dust with a clean, dry cloth, ensuring the surface remains pristine for the upcoming sealing process.
Step 3. Apply Cork Sealer or Glue:
With the cork surface cleaned and smoothed, it’s time to apply the cork sealer or glue. Using a Q-tip or small brush, apply a thin, even layer of the sealer or glue to the damaged areas. Be precise and avoid using too much product, as excessive amounts can lead to overflow and mess. Ensure that the sealer covers all the cracks and any areas where the cork is starting to deteriorate.
Work the sealer into the cork gently, allowing it to penetrate and bond effectively. Once applied, let the sealer or glue dry entirely as per the manufacturer’s instructions. This may take several hours, so patience is vital. Proper drying ensures a solid fix, enhancing the durability and lifespan of your Birkenstocks’ cork footbed.
Step 4. Inspect and Repeat if Necessary:
Once the sealer or glue has completely dried, carefully inspect the cork surface for any remaining visible cracks or areas needing additional attention. If you notice any spots that didn’t fully bond or still appear damaged, you may need to apply a second layer of cork sealer or glue. Follow the same application process, allowing adequate drying time between layers. It’s important to ensure that each layer is thin and evenly distributed to avoid excess buildup. This step may be repeated until the cork footbed is securely restored.
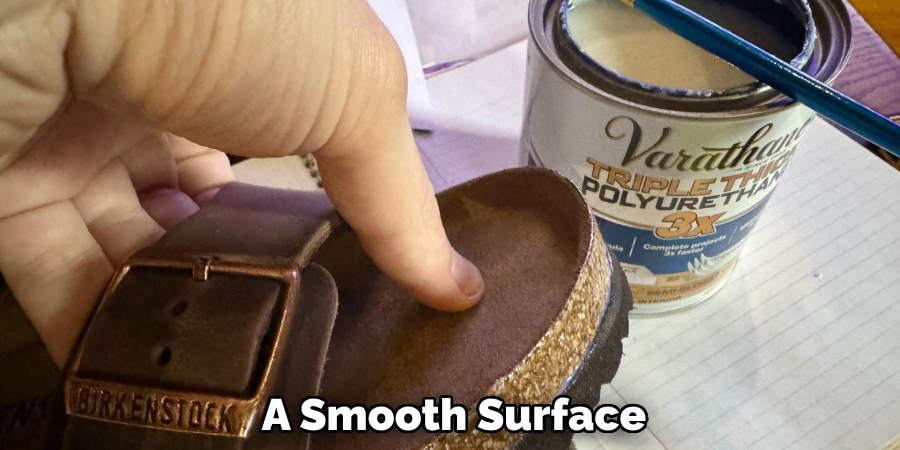
Step 5. Smooth the Surface:
Once the cork has been thoroughly sealed and there are no remaining cracks or damages, it’s time to refine the surface. Using a fresh piece of fine-grit sandpaper, gently sand the entire cork footbed to achieve a smooth and uniform finish. This step enhances the appearance of your Birkenstocks and ensures comfort when worn. Lightly sand in circular motions, maintaining consistent pressure to avoid creating new grooves or inconsistencies. After sanding, thoroughly wipe away any dust or debris with a clean, dry cloth, and inspect the surface to ensure it is as smooth as desired.
Step 6. Condition the Cork:
After ensuring the cork is smooth and fully sealed, applying a cork conditioner is beneficial to enhance flexibility and longevity. Cork conditioners penetrate the material, providing added moisture and protection against drying out and cracking. To condition the cork, apply a small amount of the conditioner onto a clean cloth and gently rub it over the entire cork surface.
Allow the conditioner to absorb fully into the cork, enhancing its texture and appearance. This step is beneficial for maintaining the suppleness of older sandals or those frequently exposed to harsh conditions. Once conditioned, give the cork enough time to dry before wearing your Birkenstocks.
Step 7. Allow Curing Time:
After applying the conditioner and ensuring a smooth surface, letting the cork rest and cure fully is essential. This curing period allows all products, including the sealer and conditioner, to integrate thoroughly into the cork material. Place your Birkenstocks in a cool, dry place away from direct sunlight or extreme temperatures, as these conditions can affect the curing process.
Patience is vital during this step; ample curing time will ensure the restoration’s effectiveness and longevity. Typically, a curing period of at least 24 hours is recommended, but specific product instructions are always used to ensure optimal results. Once the curing period is complete, your Birkenstocks should be ready for wear and restored to their comfortable, supportive condition.
Step 8. Reattach Cork Soles:
If, during the restoration process, you find that the cork soles have separated from the upper sections of your Birkenstocks, you will need to reattach them to ensure stability and comfort. To begin, align the cork sole with the footbed to ensure a proper fit. Apply a robust and flexible adhesive suitable for footwear to the separated areas. Use a brush or a small spatula to spread the adhesive evenly on both the cork and the upper material. Press the pieces together firmly, ensuring they are securely aligned.
Hold them in place for the time specified in the adhesive’s instructions or use clamps to maintain the bond during drying. Once the parts are securely attached, allow them to cure according to the adhesive manufacturer’s guidelines, ensuring maximum adhesion and longevity. This final step will reinstate the comfort and structural integrity of your sandals.
Step 9. Final Cleaning and Polishing:
With all the restoration steps completed, the final touch is to clean and polish your Birkenstocks to give them a refreshed, like-new appearance. Begin by gently wiping the entire sandal with a soft, damp cloth to remove any remaining dust or adhesive residue. This will ensure a clean surface before polishing. Next, use a leather cleaner or polish that is appropriate for the upper material of your Birkenstocks.
Apply the cleaner or polish with a soft cloth, using circular motions to work it into the material. This enhances the appearance and protects against future wear and tear. Once finished, allow your sandals to air dry completely.
Step 10. Enjoy Your Restored Birkenstocks:
With your Birkenstocks fully restored and polished, it’s time to enjoy the fruits of your labor. Slip them on and experience the renewed comfort and support from a well-maintained sandal. Regular maintenance, including occasional cleaning and conditioning, will help prolong their lifespan and keep them looking their best. Whether you’re strolling through the park or enjoying a day out, your restored Birkenstocks are ready to provide both style and comfort, making every step a pleasure.
By following these simple restoration steps, you can revive your worn-out Birkenstocks and extend their life span.
Conclusion
How to fix Birkenstocks cork is a rewarding process that not only revives your sandals’ appearance but also prolongs their usability and comfort.
By carefully following each step — from inspecting and sealing cracks, sanding for a smooth finish, conditioning the cork, allowing proper curing time, to reattaching soles and polishing the final look — you ensure that your sandals are well-maintained and ready for continued wear. Regular care and restoration are vital to maintaining the integrity of your Birkenstocks, keeping them stylish and functional for years to come.
With simple yet effective techniques, anyone can breathe new life into their beloved footwear, emphasizing sustainability and practicality.