If you are having problems with your air conditioner thermostat, don’t worry, you are not alone. There are a few things that you can do to try to fix the problem. In this blog post, we will discuss some of the most common causes of thermostat problems and what you can do to solve them. We will also provide tips on how to keep your thermostat functioning properly in the future.
Summertime means hot weather, and for many people, that means relying on air conditioning to keep them comfortable. But what happens when your air conditioner isn’t working properly? One common issue is a thermostat that is not correctly set. In this blog post, we will show you how to fix air conditioner thermostat so that you can get your cooling unit back up and running.
Summary: The air conditioner is not cooling your home as it should. The thermostat may be the problem. Follow these steps to fix the thermostat: 1) Turn off the power to the air conditioner by pressing the switch on the front of the unit. 2) Open the cover on the thermostat housing and remove the wires connecting it to the unit. 3) Unscrew the thermostat housing and remove it. 4) Clean the contacts on the new thermostat with a cotton swab and rubbing alcohol. 5) Reattach the wires to the thermostat housing, screwing it back onto the unit. 6) Replace the cover on the thermostat housing and press the switch back on to test the unit.

Why Is My Air Conditioner Thermostat Not Working?
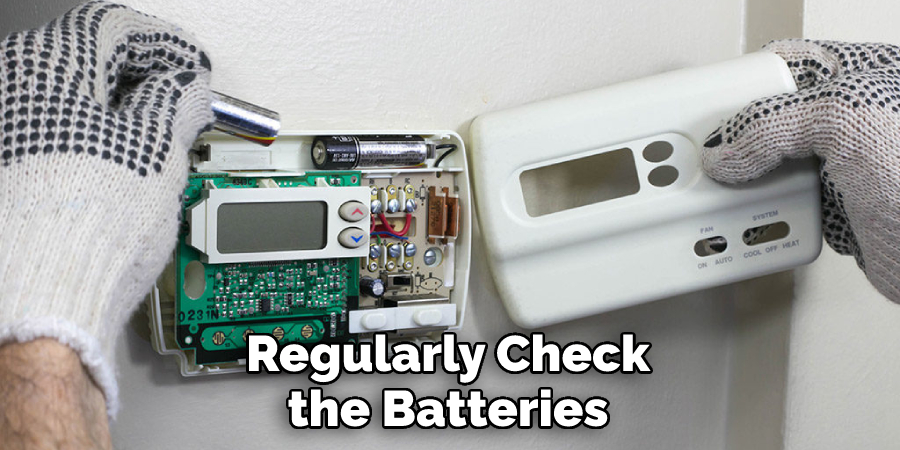
There are a few different reasons why your air conditioner thermostat might not be working correctly. One possibility is that the batteries in your thermostat are running low and need to be replaced. Another possibility is that the settings on your thermostat are not correct for the current weather conditions. Finally, it is also possible that there is something wrong with the actual thermostat itself.
If you think that the problem might be with the batteries, the first thing you should do is open up the front panel of your thermostat and take a look. If you see that the batteries are indeed low, go ahead and replace them. Once you have done this, close the front panel and check to see if your air conditioner is working properly.
If you don’t see any low batteries, the next step is to check the settings on your thermostat. First, take a look at the temperature setting. It is possible that the reason your air conditioner isn’t working properly is that the temperature setting is too high or too low. If it is too high, turn it down a bit and see if that solves the problem. If it is too low, turn it up a bit.
If you have checked the batteries and the settings and neither of those seem to be the problem, the next step is to take a look at the actual thermostat itself. It is possible that there is something wrong with the wiring or the components inside the thermostat. If you are not comfortable troubleshooting this problem yourself, you can always call a professional to come and take a look.
How Can I Prevent My Air Conditioner Thermostat from Breaking?
There are a few things that you can do to prevent your air conditioner thermostat from breaking in the future. First, make sure that you regularly check the batteries and replace them when they start to get low. Second, be careful not to bump or drop your thermostat as this can damage the internal components.
Finally, if you are going to be away from home for an extended period of time, consider turning off your air conditioner altogether to prevent any damage from happening while you are gone.
Following these tips should help you keep your air conditioner thermostat working properly for many years to come. However, if you do find that your thermostat is not working correctly, don’t hesitate to call a professional for help.
10 Steps on How to Fix Air Conditioner Thermostat
1. Check the Air Filter
The air filter is one of the most important parts of the air conditioner, and it needs to be checked regularly to ensure that it is clean. A dirty air filter will restrict airflow and cause the air conditioner to work harder, which can lead to a number of problems, including a frozen evaporator coil. If the air filter is dirty, replace it with a new one.
2. Check the Evaporator Coil
The evaporator coil is responsible for absorbing heat from the indoor air, and it needs to be checked regularly to ensure that it is clean. A dirty evaporator coil will cause the air conditioner to work harder and may eventually lead to a frozen coil. If the coil is frozen, the air conditioner will not be able to cool the home effectively. However, the coil can be cleaned with a brush or vacuum.
3. Check the Condenser Coil
The condenser coil is responsible for dissipating heat from the refrigerant, and it needs to be checked regularly to ensure that it is clean. A dirty condenser coil will cause the air conditioner to work harder and may eventually lead to a compressor failure. If the condenser coil is dirty, it is important to clean it with a brush and soap. Make sure that the coil is completely dry before turning on the air conditioner.
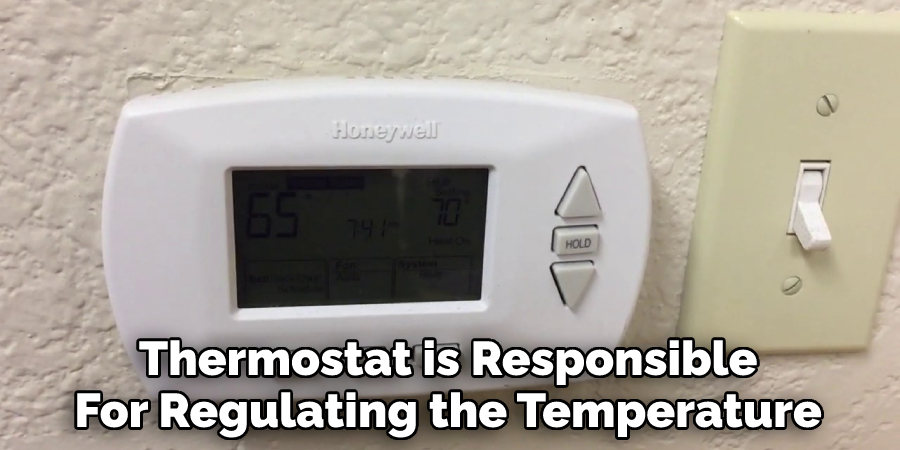
4. Check the Thermostat
The thermostat is responsible for regulating the temperature of the room, and it needs to be checked regularly to ensure that it is working properly. If the thermostat is not working properly, it can cause the air conditioner to cycle on and off too frequently or not turn on at all. If the thermostat is not working properly, it will need to be replaced. Make sure to follow the manufacturer’s instructions when replacing the thermostat.
5. Clean the Outdoor Unit
The outdoor unit of the air conditioner needs to be cleaned regularly to remove dirt, dust, and debris. A dirty outdoor unit will cause the air conditioner to work harder and may eventually lead to a frozen coil. If the outdoor unit is dirty, it is important to clean it with a brush and soap. Make sure to disconnect the power to the air conditioner before cleaning the unit.
6. Inspect the Ductwork
The ductwork is responsible for delivering conditioned air throughout the home, and it needs to be inspected regularly for leaks or other damage. Leaks in the ductwork can cause the air conditioner to work harder and may eventually lead to a frozen coil. If the ductwork is damaged, it will need to be repaired or replaced. If you are not comfortable inspecting the ductwork, you can hire a professional to do it for you.
7. Replace the Batteries in the Remote Control
If the batteries in the remote control are dead, they will need to be replaced in order to use the remote control again. Replacement batteries can be found at most hardware stores or online retailers. If you are not sure how to replace the batteries, you can consult the owner’s manual for your specific model of the air conditioner. Make sure to use the correct type of batteries in the remote control.
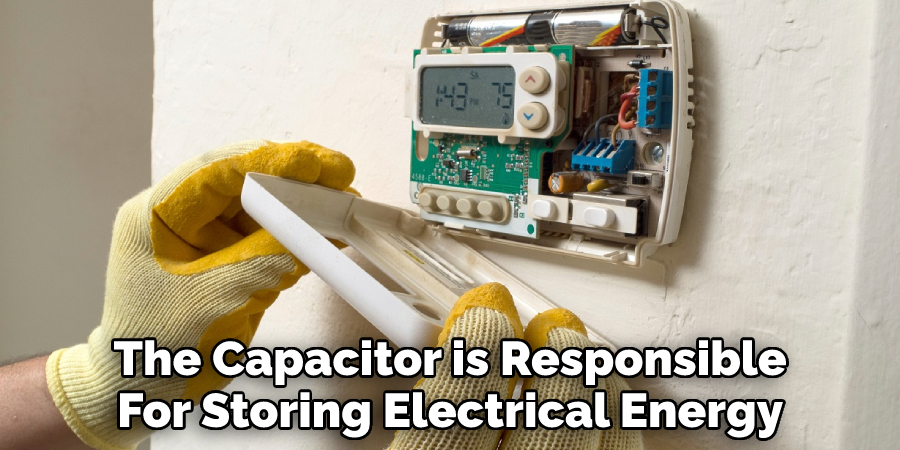
8. Test the Capacitor
The capacitor is responsible for storing electrical energy, and it needs to be tested regularly with a multimeter to ensure that it is working properly. If the capacitor is not working properly, it can cause the air conditioner not to turn on at all or cycle on and off too frequently. If the capacitor is not working properly, it will need to be replaced. Make sure to follow the manufacturer’s instructions when replacing the capacitor.
9. Check for Refrigerant Leaks
Refrigerant leaks can cause the air conditioner not to cool the home effectively, and they need to be repaired as soon as possible. Refrigerant leaks can also cause the air conditioner to cycle on and off too frequently or not turn on at all. If you suspect that there is a refrigerant leak, you can hire a professional to inspect the system and repair any leaks. If you are not sure how to repair a refrigerant leak, you can consult the owner’s manual for your specific model of air conditioner.
10. Call a Professional
If you are not comfortable performing any of the maintenance tasks on your air conditioner, you can always hire a professional to do it for you. Air conditioner repair and maintenance is best left to the professionals, as they have the training and experience to properly troubleshoot and repair the system.
If you hire a professional, make sure to get references and read reviews before hiring anyone. If you are not sure how to find a reputable air conditioner repair and maintenance professional, you can always ask friends and family for recommendations.
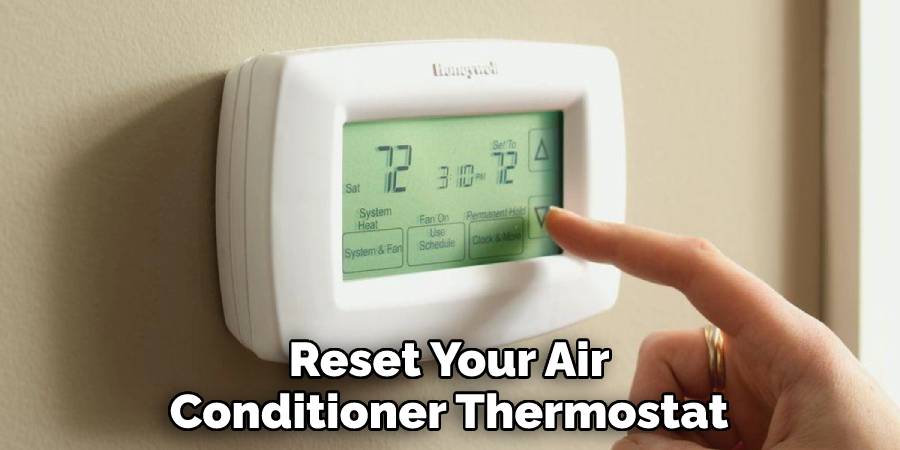
How to Reset Air Conditioner Thermostat?
If your air conditioner thermostat is not working properly, you may need to reset it. To reset your air conditioner thermostat, you will need to turn off the power to the air conditioner at the breaker box. Once the power is off, you will need to remove the thermostat from the wall and disconnect the wires. After the wires are disconnected, you will need to use a screwdriver to remove the cover of the thermostat.
Once the cover is removed, you will need to locate the reset button on the thermostat and press it. After the reset button is pressed, you will need to replace the cover and reattach the wires. Once the wires are reconnected, you can turn the power back on at the breaker box. If your air conditioner thermostat still does not work properly, you may need to replace it.
Conclusion
If your home or office air conditioner isn’t working as well as it should, there may be a problem with the thermostat. Before you call an expensive repairman, try these tips on how to fix air conditioner thermostat to see if you can fix the issue yourself.
Thermostats are complex machines, but with a little troubleshooting, you may be able to get yours working properly again. Have you ever had to fix your air conditioner thermostat? What other appliance repairs have you been able to do on your own?