Have you ever seen a barn door with the wood twisted and made useless? Are you renovating an old outbuilding or working on a project that involves crafting a beautiful barn door for wall art, furniture décor, or even interior entryway purposes?
Warping is incredibly common in wooden doors of all sizes due to temperature changes, humidity levels, and other environmental conditions. It can be disheartening when your perfect piece seems unusable, but don’t give up just yet! There are ways of fixing, or at least minimizing, the warping and twisting in those rustic boards and panels so you can use them in your design.
In this post we’ll be covering how to fix a warped barn door. Whether your goal is functionality or aesthetic appeal, there are solutions that can help restore the look (or utility) you desire, no matter which material it’s constructed from.
What are the Causes of Warped Barn Doors?
Before we delve into the solutions for fixing a warped barn door, it’s worth discussing what could be causing the warping in the first place. As previously stated, temperature changes or humidity levels can lead to wood warping and twisting due to its unique characteristic of expanding/contracting with environmental forces.
Another common reason would be improper storage or installation. For example, when a door is stored in an area with too much sunlight and heat, the wood can become weak over time and eventually warp. Consequently, if it’s installed without proper support (such as frames around each side), then the door’s weight could lead to warping due to uneven pressure.
Now that we understand what’s causing the warping let’s look at how to fix a warped barn door. You can use several methods depending on the severity of the twist and the materials/techniques available.
What Will You Need?
Before you begin, make sure you have the necessary materials at your disposal. Depending on which method you choose to use, you could need a few basic tools alongside some woodworking supplies:
- Clamps
- Sandpaper/sander
- Wood glue
- Saw (table saw and straight edge)
- Wood putty/filler
- Wood screws
- Hammer or nail gun
- Chisel
Once you have the necessary tools, you’re ready to begin fixing that warped barn door.
10 Easy Steps on How to Fix a Warped Barn Door
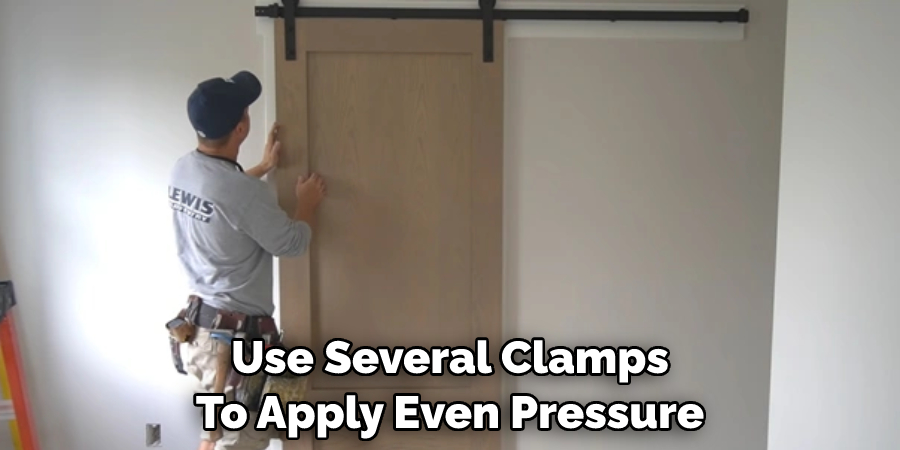
Step 1. Use Clamps
This method is ideal for those with limited tools and materials on hand, and it’s surprisingly simple. You’ll need to secure the door against a flat surface and then use several clamps to apply even pressure throughout the door. This will help reduce the warping and twist over time so it’s less visible.
Step 2. Sand Down the Warped Area
If you have a sander available, use this to sand down any warped areas of the door. Make sure you do this carefully and evenly, as too much pressure or uneven sanding can damage your piece. Additionally, you may find that you’ll need to use wood putty or filler in some areas, especially for deeper grooves.
Step 3. Use Wood Glue
For more serious warping and twisting, you may need to utilize wood glue in order to hold everything together firmly while it dries. Apply an even amount of glue on both sides of the door and clamp down until completely dry (or overnight). If possible, place some weight on the door while it dries to ensure even pressure.
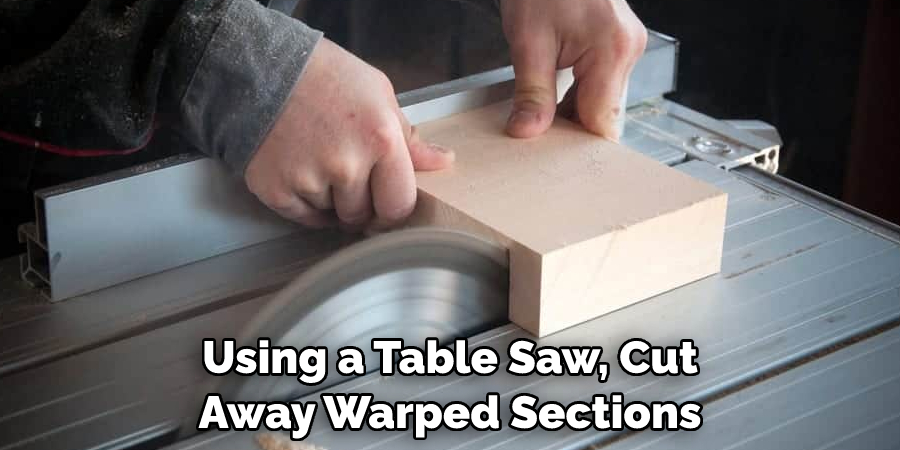
Step 4. Use a Saw
If the warping is too severe to be fixed with clamps and glue, you may have to cut the warped area out completely. Using a table saw, cut away any warped sections, then use wood putty or filler to fill in the gaps as needed. Don’t forget to sand the edges down before you start.
Step 5. Secure With Screws
Once you’ve finished cutting and filling, use some wood screws (or nails) to secure the door back together again. Make sure these are evenly distributed across all sides of the door for maximum support. Try to use screws that are the same length and size as those originally used.
Step 6. Re-Sand The Door
After securing your door, you can sand it down one more time in order to get a smooth surface before moving on to the next step. Always use finer-grit sandpaper for the final touch. It will help remove any remaining imperfections.
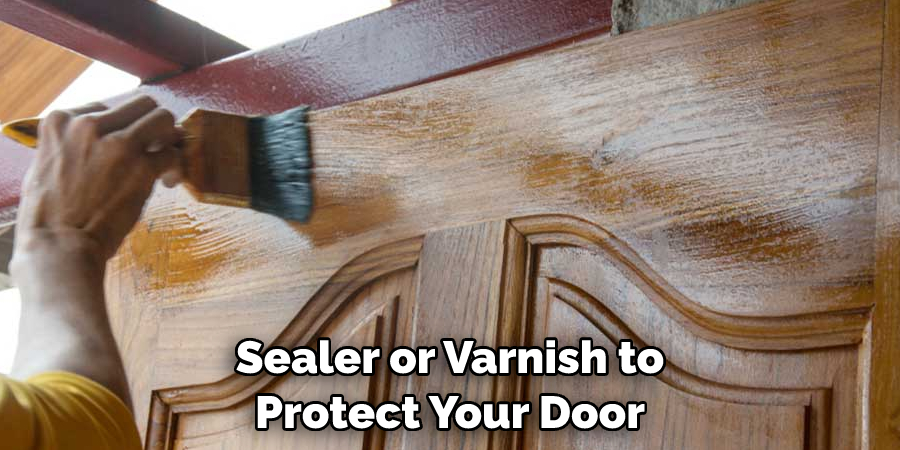
Step 7. Apply a Finish
Use a clear sealer or varnish to protect your door from future warping and give it an improved aesthetic. Many different types of finishes are available, so choose one that best suits your needs. Best of all, this will add an extra layer of protection to your door.
Step 8. Hang Your Barn Door
Now that the door has been fixed, you can hang it back up in its rightful place. If you have frames around each side, ensure these are properly secured to support the entire structure. Be careful when hanging it; too much weight could cause warping again.
Step 9. Monitor For Further Warping
Even after all your hard work, it’s still worth monitoring the door for any further warping over time due to changing temperatures and humidity levels throughout the year. Keeping an eye on this is especially important if you live in an area with extreme weather. Ensure that there’s enough space between the door and the frame in order to allow for some movement without any damage being caused.
Step 10. Enjoy Your Warping-Free Barn Door!
All that’s left now is to sit back and enjoy your beautiful, warping-free barn door! With the steps provided in this guide, you should have no problem keeping your door looking good for years to come. Remember, proper maintenance and periodic inspection is key to preserving your door’s condition.
By following these steps, you can easily repair a warped barn door and maintain it for years to come. With the right tools and materials, this job doesn’t have to be too difficult. Just make sure you take your time and keep an eye on the door during extreme weather conditions.
5 Additional Tips and Tricks
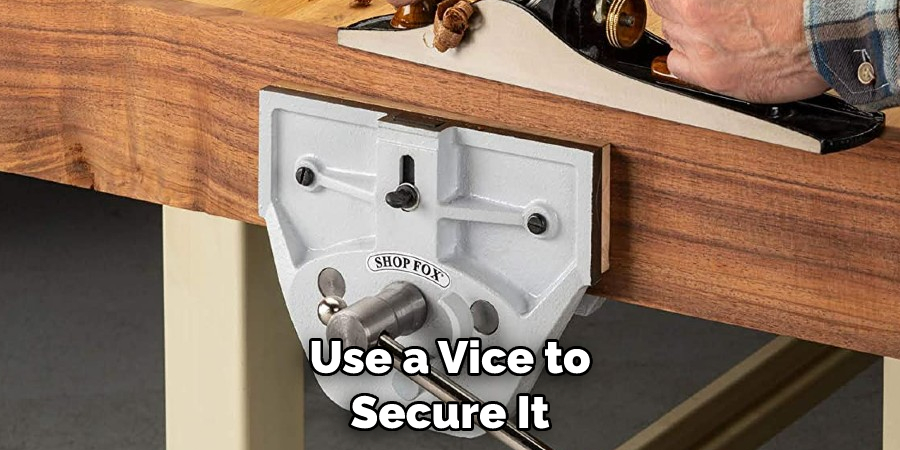
1. If the door is bowed in the middle, use a vice to secure it, then gently apply pressure at both ends of the door with wooden wedges.
2. If one side of the door has warped, use a sander to remove any paint and smooth out the surface. Then attach two pieces of wood to either side of it before clamping them together.
3. Fasten two pieces of angle iron on either side of the door’s edge with screws or nails that can be secured firmly in place.
4. Use a square and level to ensure that all four corners line up correctly before adding screws or nails into each corner for added stability.
5. You can also use planks as supports along either side of the door to help keep it from bowing or warping further. Secure them with screws in each corner for added stability.
By following these steps, you can easily fix a warped barn door and enjoy years of use from it!
5 Things You Should Avoid
1. Avoid using a power tool to fix the door, as this could cause more damage.
2. Don’t use too much pressure when clamping or wedging the door, as this may cause it to break or warp in an undesirable way.
3. Refrain from using excessive force when you apply screws and nails to each corner of the door, as this can weaken it over time.
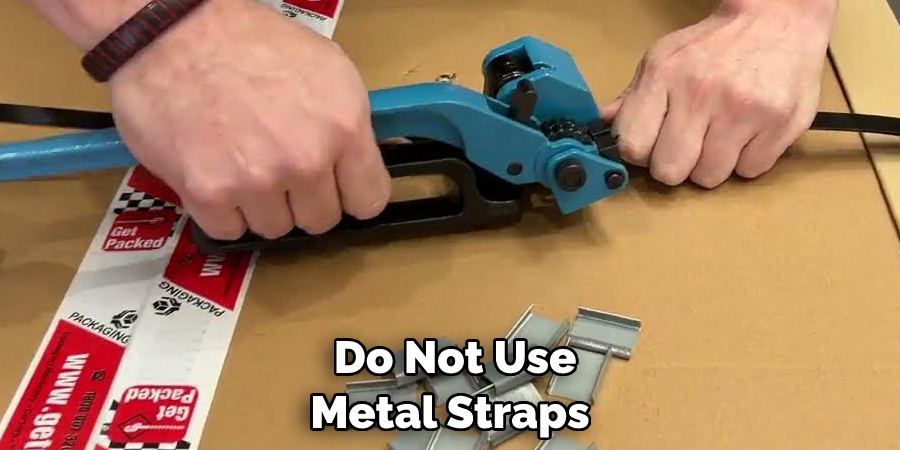
4. Do not use metal straps or other materials that can corrode over time since they won’t be able to withstand weather conditions for long periods of time
5. Steer clear of putting too much weight on top of the door, as this will only cause additional bowing and warping over time. Taking steps to support the door’s weight from the sides rather than from on top is essential for preserving its shape.
By avoiding these common mistakes and following the steps mentioned above, you should be able to fix a warped barn door in no time.
Conclusion
By now, you should better understand how to fix a warped barn door. From custom cuts to warping prevention techniques, these solutions will help maximize the longevity of your wooden barn door and improve its overall appearance. If all else fails and your door is beyond repair, replacing it altogether is always an option.
Either way, consider speaking to a local carpenter or experienced contractor to give you more insight and ensure that the job is done correctly. Implementing these strategies will save you time and effort and guarantee peace of mind in properly addressing a malfunctioning door. That’s not all; with these ideas in mind, recovering from warped doors can also be an enriching project!
Hopefully, this guide has been helpful in giving you the knowledge and resources necessary to fix a warped barn door. With these tips and tricks, your wooden doors will look good as new in no time! Start today and enjoy the satisfaction that comes with taking matters into your own hands!