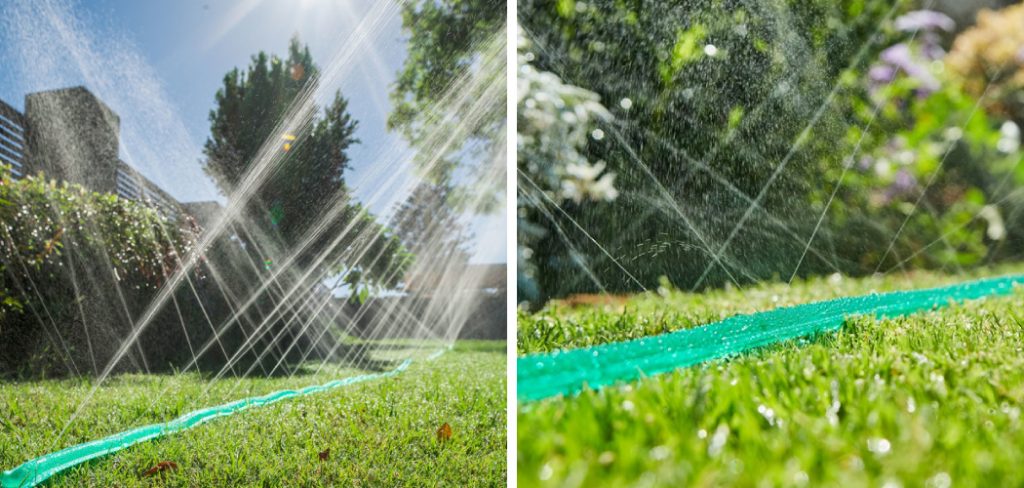
When your soaker hose starts to leak, it can be frustrating. You may not know how to fix it, and you may not have the time to take it in for repairs. A soaker hose is a great way to water plants, but it can sometimes become clogged. In this blog post, we will give you some tips on how to fix a soaker hose.
First, try loosening the kinks in the hose by bending it back and forth. Next, try spraying water through the hose to clear any debris if that doesn’t work. If those methods don’t work, you may need to cut the hose and reattach the ends. Finally, ensure that you are using the correct nozzle for your soaker hose. Read on to know more!
Summary: This blog post outlines how to fix a soaker hose. Learn how to disconnect your hose, inspect it and locate and cut the hole. Additionally, discover how to fix the leak, reconnect your hose and test it for an effective remedy.
10 Reasons That Causes a Damaged Soaker Hose
- All hoses are made of materials that will degrade over time due to exposure to sunlight, water, and other elements.
- Hoses can kink or crack, especially if they are constantly bent or moved.
- If a soaker hose is left on for too long, the water pressure can build up and cause the hose to burst.
- Sharp objects or animals can puncture soaker hoses.
- They can be pulled out of the ground if not anchored properly.
- The soil can erode around the hose and gradually bury it underground.
- If a soaker hose is not properly connected to a water source, the water can siphon out, and the hose will eventually dry up.
- Frost can damage soaker hoses if left outside in cold weather.
- Extreme heat can cause the plastic covering on the hose to melt.
- The tubing inside the hose can rust over time and leak water.
If you notice any of these problems with your soaker hose, it’s time to take action to repair the damage. Depending on the severity of the problem, you may be able to fix it yourself, or you may need to replace the hose entirely.
Step by Step Guide: How to Fix a Soaker Hose?
1.Inspect the Soaker Hose:
Before beginning any repairs, thoroughly inspect the soaker hose to identify the location and extent of the damage. Look for leaks, clogs, cracks, or any other signs of wear or damage that may be affecting the hose’s performance.
2.Gather Necessary Tools and Materials:
To fix a soaker hose, you will need the following tools and materials:
- Hose repair couplings or connectors (compatible with your soaker hose)
- Utility knife or scissors
- Flathead screwdriver or pliers (if using hose clamps)
- Clean cloth or paper towel
- Bucket or container (for flushing the hose)
- Protective gloves
3.Prepare the Work Area:
Select a well-lit, flat work area with ample space to lay out the soaker hose. Clear the area of any debris or obstacles to ensure a safe and efficient workspace.
4.Disconnect the Soaker Hose:
Before attempting any repairs, disconnect the soaker hose from the water source and any attached accessories. This will make it easier to work on the hose and prevent any accidental water damage.
5.Flush the Soaker Hose (If Clogged):
If the soaker hose is clogged, fill a bucket or container with water and submerge the end of the hose that was connected to the water source. Turn on the water and allow it to flow through the hose, flushing out any debris or sediment that may be causing the clog. If the clog persists, consider using a specialized hose cleaning tool to dislodge the obstruction.
6.Cut Out the Damaged Section:
If the soaker hose has a leak or crack, use a utility knife or scissors to cut out the damaged section. Ensure the cuts are clean and straight to facilitate a secure connection with the hose repair couplings or connectors.
7.Attach Hose Repair Couplings or Connectors:
Following the manufacturer’s instructions, attach the hose repair couplings or connectors to the cut ends of the soaker hose. Ensure the couplings or connectors are securely fastened and properly aligned to prevent leaks and maintain proper water flow.
8.Secure the Connection (If Using Hose Clamps):
If your hose repair couplings or connectors require hose clamps, use a flathead screwdriver or pliers to tighten the clamps around the hose and couplings or connectors. Be careful not to overtighten the clamps, as this may damage the hose and result in additional leaks.
9.Test the Repair:
Reconnect the soaker hose to the water source and turn on the water. Inspect the repaired area for any leaks or issues with water flow. If necessary, adjust the couplings or connectors and retighten the hose clamps to ensure a secure connection.
Inspect and Repair Additional Damage:
While the soaker hose is connected and running, inspect the entire length of the hose for any additional leaks or damage. If needed, repeat steps 6 through 9 to repair any other issues found.
10.Clean the Soaker Hose:
After completing any necessary repairs, use a clean cloth or paper towel to wipe down the soaker hose, removing any dirt, debris, or residue that may have accumulated during the repair process.
11.Properly Store the Soaker Hose:
When not in use, store the soaker hose in a cool, dry place, away from direct sunlight and extreme temperatures. Proper storage will help prolong the life of the hose and prevent future damage.
12.Perform Regular Maintenance and Inspections:
To ensure the longevity and proper function of your soaker hose, perform regular maintenance and inspections. Check for leaks, clogs, or signs of wear, and address any issues promptly to maintain the hose’s performance and prevent more significant damage in the future.
13.Replace Worn or Damaged Parts as Needed:
If your soaker hose is equipped with additional components, such as fittings, pressure regulators, or filters, inspect these parts regularly and replace them as needed. Regularly replacing worn or damaged parts can help extend the life of your soaker hose and maintain its performance.
14.Winterize Your Soaker Hose:
Before winter arrives, it’s essential to properly winterize your soaker hose to protect it from freezing temperatures and potential damage. Disconnect the hose from the water source, drain any remaining water, and store it in a cool, dry place away from extreme temperatures. This will help prevent the hose from freezing, cracking, or becoming brittle during the colder months.
15.Know When to Replace Your Soaker Hose:
While repairing a soaker hose can prolong its life and maintain its performance, there may come a time when it’s more practical to replace the hose entirely. If your soaker hose has multiple leaks, extensive damage, or has become brittle and prone to cracking, consider investing in a new hose to ensure the best results for your watering needs.
By following these steps, you can successfully repair a damaged soaker hose and restore its performance and functionality. The repair process requires patience, attention to detail, and the appropriate tools and materials, but a well-executed repair will provide a durable and efficient solution. Regular inspections, maintenance, and proper storage will help prevent future damage and ensure your soaker hose remains in optimal condition for years to come.
Some Helpful Tips and Suggestions
Here we have given some tips on how to fix a soaker hose
- Check the end of the soaker hose for any holes, cracks, or leaks. If there are any, then you will need to replace that section of the hose.
- If the soaker hose is kinked, try to straighten it out as much as possible.
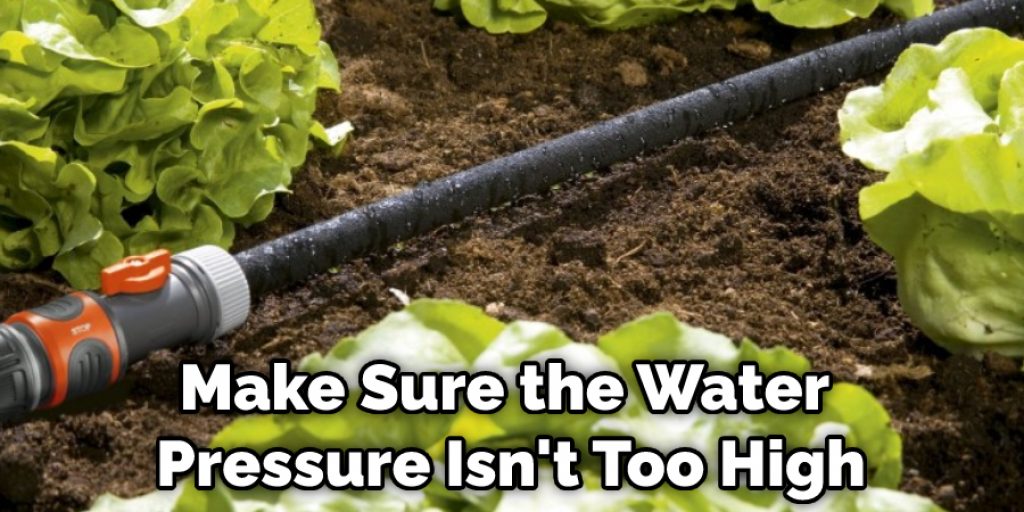
- Make sure that the water pressure is not too high, as this can cause the hose to burst.
- If the hose is clogged, try using a garden hose to clear it out.
- If the water is not flowing through the hose properly, you may need to adjust the nozzle on your sprinkler or garden hose.
- If you have trouble with your soaker hose, you can always contact the manufacturer for help.
- Make sure to store the hose in a cool, dry place when not in use.
Seven Common Mistakes to Avoid When Using a Soaker Hose
1. Not Using Enough Water Pressure:
If you don’t use enough water pressure, the water will soak the ground slowly and inefficiently. This means that it will take a long time for the water to reach the roots of the plants. Try increasing the water pressure at the faucet or using a hose with a higher water pressure rating.
2. Not Using Enough Hose:
If you don’t use enough hose, the water will only soak the ground in a small area around the hose. Try using a longer hose or moving the hose around to cover more ground.
3. Connecting the Hose Incorrectly:
If you connect the hose incorrectly, the water will shoot out in all directions and not go where you want it to. So make sure to check the connections before turning on the water.
4. Using a Poor Quality Hose:
If you use a hose made of poor quality materials, it will leak and wastewater. Instead, try to find a hose made of durable material and has a good warranty.
5. Not Flushing the Hose Before Use:
If you don’t flush the hose before use, the water will come out dirty and full of sediment. This will clog up the pores in the hose and reduce its effectiveness. To avoid this, attach the hose to a faucet and let the water run through it for a few minutes before using it.
6. Kinking the Hose:
If you kink the hose, it will reduce the water flow and eventually cause the hose to burst. To avoid this, always coil the hose loosely and never force it to bend.
7. Using the Hose in Hot Weather:
The hose can become brittle and crack if the temperature gets too hot. To avoid this, try using a hose with a higher temperature rating. With a little bit of effort, you can easily fix a soaker hose that has been cut or damaged. By following these simple steps, you can ensure that your garden stays well-watered all season long!
You Can Check It Out To Fix a Leaking Saddle Valve
Can You Tape a Soaker Hose?
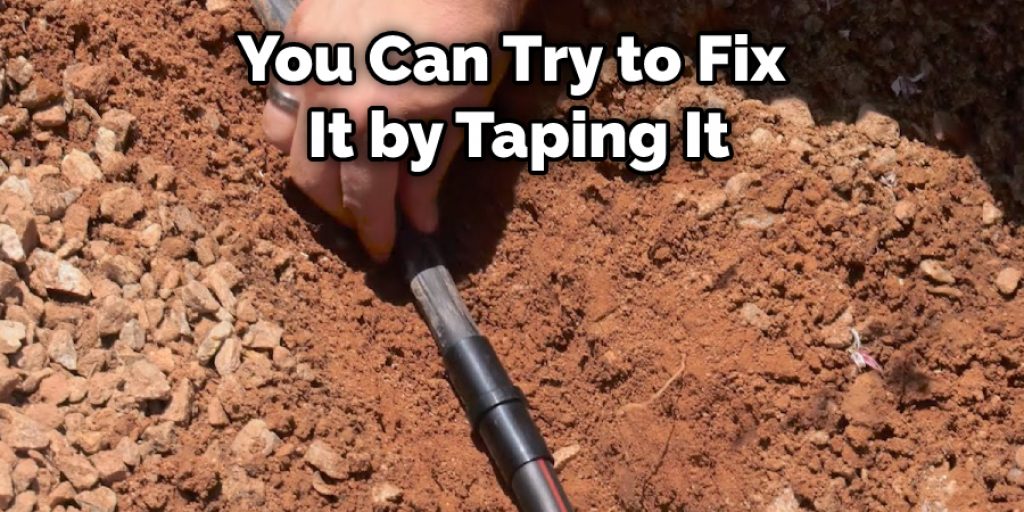
If the soaker hose is leaking, you can try to fix it by taping it. First, cut a piece of tape that is long enough to cover the entire leak. Then, peel off the adhesive backing and stick the tape over the leak. Finally, press down on the tape to make sure it sticks to the hose. If the leak is in a hard-to-reach place, you can use a piece of wire to hold the tape in place.
If the soaker hose is kinked, you can try to fix it by straightening it out. First, cut off the damaged part of the hose. Then, use a pair of pliers to straighten out the kink. If the kink is at a joint, you can try to loosen the joint and then straighten out the hose. If the soaker hose is clogged, you can try to clear it with a garden hose.
Frequently Asked Questions
Can You Fix a Soaker Hose With Duct Tape?
Yes, you can fix a soaker hose with duct tape. In fact, this is a common repair technique that many homeowners use to fix leaks and other small problems. All you need is some duct tape and some watertight solutions (such as Plumbers Putty or Joint Formula). Once you have these materials handy, follow these steps:
- Cut off the end of the soaker hose that’s leaking. Make sure to cut it close to the braid so that water won’t get into the spigot further downstream.
- Apply a layer of duct tape around the open end of the hose where it joins with its coupler or connector piece. This will help prevent any more water from getting through while also keeping your area clean and dry.
- Hold down the ends of both pieces of tubing while applying uniform pressure with your hand until they are tightly sealed together by the adhesive strip on duct tape. Don’t overdo it; just apply enough pressure to keep things in place but not too much that damage may occur.
Why Does My Soaker Hose Keep Bursting?
There are a few reasons why your soaker hose may keep bursting. First, it is important to make sure that the water pressure is high enough for the hoses to flow freely. If the water pressure is too low, then the hoses might not be able to withstand the force of the stream and will burst.
Second, check for kinks or twists in the hosepipe where it joins together into one piece. If these areas are twisted or kinked densely, they can cause excessive wear and tear on the internal pipe walls which can eventually lead to ruptures. And finally, inspect your connections regularly for signs of corrosion or deterioration This could result in leaks and subsequent flooding problems
If you notice any of these issues affecting your soaker hose, take action right away by fixing them as soon as possible! By doing so you’ll protect yourself from damage and ensure an uninterrupted supply of water while playing outside!
Will Flex Tape Work on a Soaker Hose?
the specific application of flex tape will vary depending on the type of hose and the type of water pressure being used. However, in general, flex tape should be applied as a sealant to prevent water from leaking down the hose and into the system
Can You Repair Flat Soaker Hose?
There are many ways to repair flat soaker hoses, but the best way is to consult a professional. A mechanic may be able to reattach the rubber seals or fix the clamp that holds them in place. He or she may also be able to replace worn parts with new ones that are better quality and will last longer.
You Can Check It Out To Repair Rv Sewer Hose
Conclusion
A soaker hose can be fixed by checking for leaks, cleaning it, and reattaching the end caps. If the holes are too large to patch, the hose can be replaced. If you are having trouble fixing a soaker hose, we have already given some solutions on how to fix a soaker hose. Soaker hoses provide an efficient way to water your garden or plants without wasting water.
They work by allowing water to slowly drip out of small holes in the hose, which helps the water reach the roots of plants instead of running off into the ground. Hoses come in different lengths and diameters, so it is important to choose one that will fit your needs.
You can also buy attachments that will allow you to customize how much water is released from the hose. We hope this blog post on how to fix a soaker hose has been helpful. If you have any questions or want to know more then feel free to comment below!
You May Also Read: How to Fix a Bent Knife Tip