A pinhole leak in Pex pipe can cause a lot of damage and be very difficult to fix. If you have a pinhole leak in your pex pipe, don’t worry it’s a relatively easy fix. Here’s a quick guide on how to fix a pinhole leak in pex pipe.
First, shut off the water to the affected area and drain the system by flushing all the taps. Then, cut out the damaged section of the pipe and remove any burrs or sharp edges. Next, use super glue or epoxy to seal up the hole. Finally, reattach the pipe and turn on the water. You should be good to go! Read on to know more!
Summary: Pinhole leaks are a common problem with PEX pipes. The best way to fix them is to cut out the section of pipe that contains the leak and replace it with a new piece. If this cannot be done, then there are patch kits available which can be used to repair the pipe. It’s important to do a thorough inspection and repair the problem promptly, as pinhole leaks can cause damage and increase your water bills over time.
Five Reasons That Causes Pinhole Leaks in Pex Pipe
1. Improper Installation of the Piping
Improper installation of the piping is one of the most common causes of pinhole leaks in Pex pipe. This happens when the piping is not installed correctly and causes small cracks that can lead to a pinhole leak.
2. Corrosion
Pex pipes are prone to corrosion over time because of their metal content. This can cause small holes to form, which will eventually leak. If you suspect that your Pex pipe has begun to corrode, you can test it by pouring a vinegar and water solution over the pipe. If the pipe fizzes, it is corroded and needs to be fixed. To fix a corroded Pex pipe, you will need to cut out the corroded section and replace it with a new pipe.
3. Kinking
If your Pex pipe has a kink in it, this can cause a small hole to form and eventually lead to a leak. To test if your pipe has a kink, fill it with water and look for any leaks. If there are leaks, the pipe has kinked and needs to be fixed. To fix a kinked Pex pipe, you will need to remove the kink and replace the section of the pipe.
4. Freezing:
If the Pex pipe freezes, it can crack and eventually leak. To prevent this, take precautions such as installing insulation around the piping if you live in a climate where the temperature often drops below freezing. If your Pex pipe has already frozen and cracked, you will need to replace the section of the pipe.
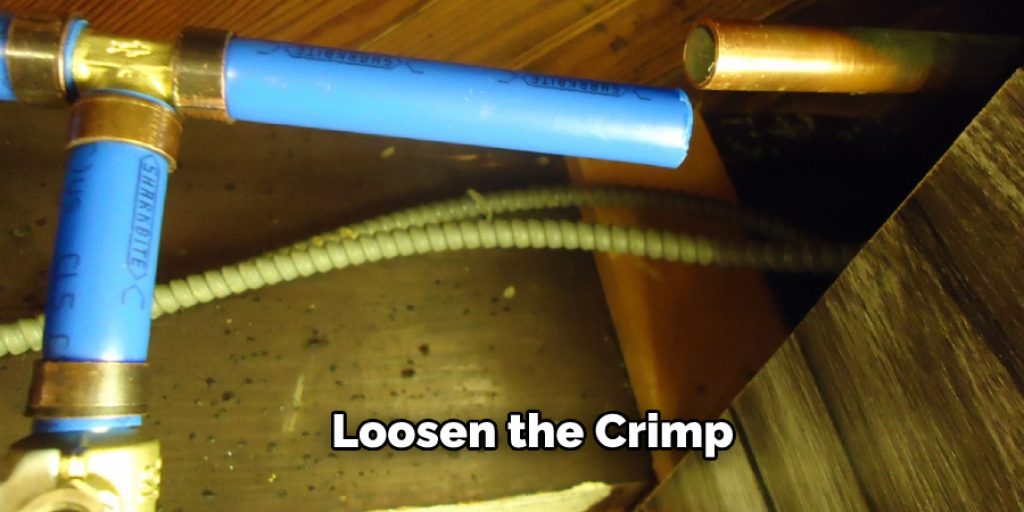
5. Pipe Is Crimped Too Tightly
The Pex pipe can get a small hole in it if it’s crimped too tightly. This hole will cause the pipe to leak. To fix the pipe, you need to loosen the crimp and replace the section of the pipe that has the hole.
16 Steps on How to Fix a Pinhole Leak in Pex Pipe
Step 1: Gather Necessary Tools and Supplies
To fix a pinhole leak in a PEX pipe, gather the necessary tools and supplies, including:
- Adjustable wrench
- Pipe cutter or PEX tubing cutter
- PEX repair coupling (also known as a push-fit coupling)
- PEX crimp rings (if using crimp-style fittings)
- PEX crimping tool (if using crimp-style fittings)
- PEX de-crimping tool (if removing existing crimp rings)
- Plumber’s tape
- Bucket or towel (to catch water)
- Safety goggles
- Gloves
Step 2: Shut Off Water Supply
Before starting any plumbing repairs, shut off the water supply to the area where the pinhole leak is located. This may involve turning off the main water supply to the house or shutting off a local isolation valve if one is available. Open the faucet closest to the leak to relieve any remaining water pressure in the pipe.
Step 3: Drain the PEX Pipe
Place a bucket or towel under the leak to catch any residual water. Open a faucet downstream of the leak to allow any remaining water to drain out of the pipe.
Step 4: Locate and Expose the Pinhole Leak
Put on your safety goggles and gloves before proceeding. Carefully remove any insulation or coverings surrounding the PEX pipe to expose the area where the pinhole leak is located. Inspect the pipe and identify the exact location of the pinhole leak.
Step 5: Cut Out the Damaged Section
Use a pipe cutter or PEX tubing cutter to make two cuts in the pipe, one on each side of the pinhole leak. Ensure that the cuts are straight and perpendicular to the pipe. Remove the damaged section of pipe, being careful not to cause further damage to the surrounding PEX pipe.
Step 6: Prepare the PEX Repair Coupling
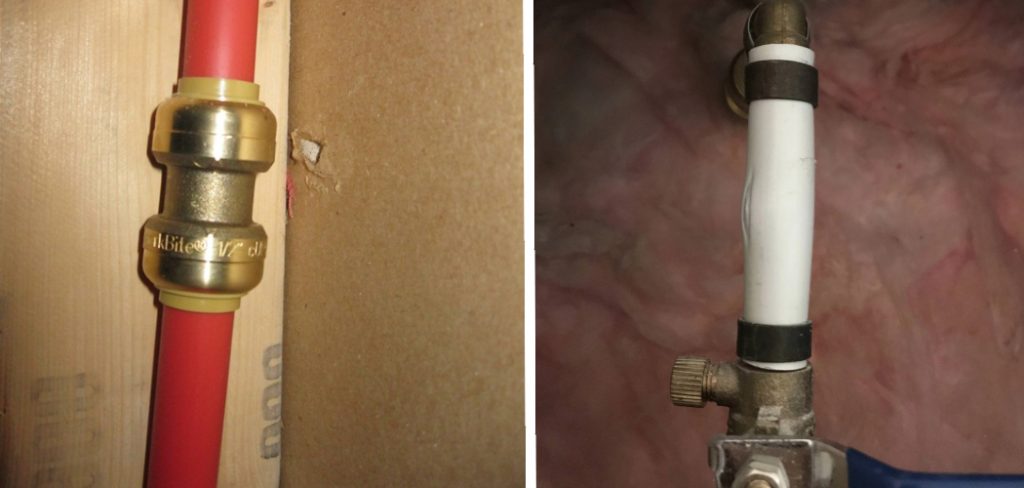
Select the appropriate PEX repair coupling (also known as a push-fit coupling) for the size of your PEX pipe. Ensure that the repair coupling is compatible with your PEX pipe and has the necessary approvals and certifications for use in potable water systems.
Step 7: Install the PEX Repair Coupling
Follow the manufacturer’s instructions for installing the PEX repair coupling. For push-fit couplings, simply insert the cut ends of the PEX pipe into the coupling until they are fully seated. The coupling should grip the pipe securely, creating a watertight seal.
If using crimp-style fittings, first slide a PEX crimp ring onto each end of the cut pipe. Insert the repair coupling into the pipe ends, ensuring that the coupling is seated fully within the pipe. Position the crimp rings about 1/8 to 1/4 inch from the end of the pipe, and use the PEX crimping tool to compress the crimp rings, securing the coupling in place.
Step 8: Test the Repair
Turn the water supply back on, and carefully inspect the repaired area for any signs of leaks. If the repair is successful, there should be no visible water escaping from the connection.
Step 9: Insulate and Secure the Repaired Area
Once the repair has been tested and confirmed to be successful, replace any insulation or coverings that were removed to access the pinhole leak. Ensure that the repaired area is properly insulated and secured to prevent potential damage or movement in the future.
Step 10: Monitor the Repaired PEX Pipe
Periodically inspect the repaired area for any signs of new leaks or issues. By staying proactive with maintenance and monitoring, you can help ensure that your PEX plumbing system remains in good working condition for years to come.
Step 11: Seek Professional Assistance if Needed
If you are not confident in your ability to fix a pinhole leak in a PEX pipe or if the problem persists despite your efforts, consider seeking professional assistance. A licensed plumber will have the necessary tools, knowledge, and experience to diagnose and repair the issue, ensuring a long-lasting and reliable solution.
Step 12: Understand the Causes of Pinhole Leaks
Pinhole leaks in PEX pipes can be caused by a variety of factors, including manufacturing defects, improper installation, excessive water pressure, or even chemical reactions between the pipe material and the water. Understanding the underlying causes of pinhole leaks can help you take preventative measures to avoid future issues with your PEX plumbing system.
Step 13: Maintain Proper Water Pressure
Excessive water pressure can cause pinhole leaks and other issues in your plumbing system. Use a water pressure gauge to check the water pressure in your home, and if necessary, install a pressure reducing valve to maintain a safe and consistent water pressure level.
Step 14: Inspect PEX Pipes Regularly
Regular inspections of your PEX plumbing system can help you identify and address potential issues, such as pinhole leaks, before they become major problems. Look for signs of damage, wear, or corrosion, and take prompt action to repair any issues you discover.
Step 15: Protect PEX Pipes from UV Exposure
PEX pipes can degrade and become brittle when exposed to direct sunlight over time. If your PEX plumbing system includes pipes that are exposed to sunlight, consider covering them with insulation or other UV-resistant materials to protect them from damage.
Step 16: Use Compatible Materials and Fittings
When repairing or modifying your PEX plumbing system, always use materials and fittings that are compatible with PEX pipes. Mixing incompatible materials can lead to leaks, corrosion, and other issues.
By following these steps and taking the necessary precautions, you can effectively fix a pinhole leak in a PEX pipe and maintain the integrity and performance of your plumbing system. Regular maintenance, proper installation, and the use of high-quality materials and fittings can help prevent future issues and ensure that your PEX plumbing system remains reliable and efficient for years to come. Remember that professional assistance is always recommended when dealing with complex repairs or issues beyond your skill level.
You Can Check It Out to Fix Lead Pipe Leak
Some Helpful Tips and Suggestions
Here we have given some tips on how to fix a pinhole leak in pex pipe
- Locate the leak by spraying water on the pipe and watching for where it seeps out.
- Soak the area around the leak with a hose to help identify it.
- Cut the pipe above and below the leak with a hacksaw.
- Use a sharp knife to slice open the pipe and determine the size of the hole.
- Cut a piece of PEX pipe 1 inch longer than the hole.
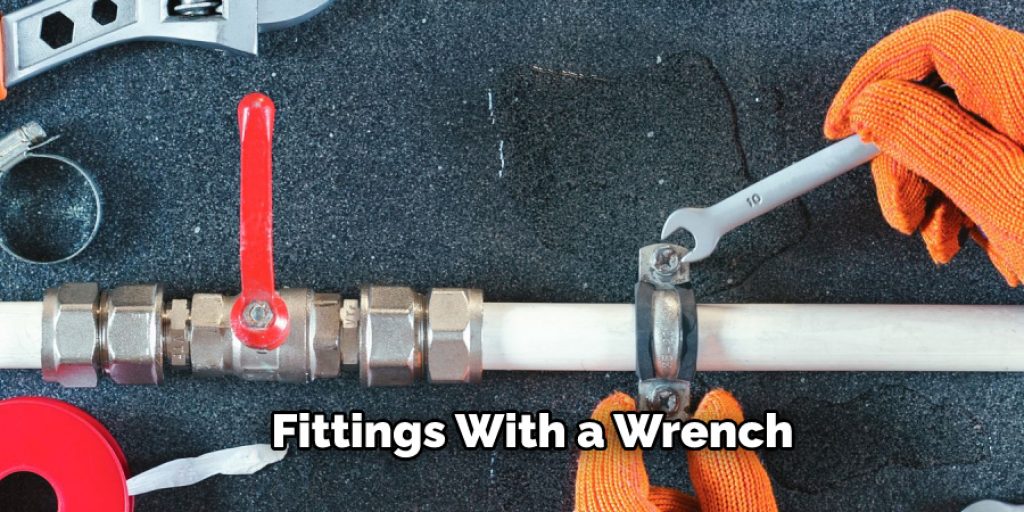
- Apply a generous amount of pipe thread sealant to the threads on both ends of the PEX pipe.
- Insert the PEX pipe into the hole and tighten the fittings with a wrench.
- Allow the sealant to dry for 24 hours before using the water line again.
How to Prevent Leaks in Pex Pipe?
You can do a few things to prevent leaks in the Pex pipe. First, always use approved fittings and connectors. Make sure the connections are tight and properly installed. If there is any doubt, have a qualified plumber do the installation.
Also, check for damage to the pipe and repair any leaks as soon as they are discovered. Finally, use a suitable leak detection solution to help you locate any leaks in the system. Leaks in the Pex pipe can cause significant damage and should be fixed as soon as possible.
Can You Patch Pex Pipe?
Yes, you can patch Pex pipe using special epoxy putty. First, cut out the damaged section of the pipe and clean the pipe end with a wire brush. Next, knead the epoxy putty until soft and apply it to the pipe end. Finally, press the patch onto the pipe and hold it for about 30 seconds. Allow the epoxy to cure for 24 hours before using the pipe.
If you can’t patch the pipe, you will have to replace it. First, cut out the damaged section of the pipe and remove any burrs or sharp edges with a wire brush. Then, use a pipe cutter to cut the pipe to the desired length. Finally, use a compression fitting to attach the new pipe to the old pipe.
You Can Check It Out To Repair Damaged Plastic Pipe Threads
Frequently Asked Questions
What Causes Pinhole Leaks in Pex Pipe?
There are a variety of causes for pinhole leaks in Pex pipes, and the most common ones include faulty installation, excessive water usage, damage caused by pests or rodents, and incorrect sealant use.
When installing Pex tubing, be sure to adhere to the proper set of guidelines provided by your manufacturer. Make sure that the joints are properly sealed using quality contact adhesive (usually silicone spray) and then fix any leakages before they become major problems. If you experience water leakage from cracks or pinholes in your tube system later on down the line, it is important to investigate and rectify the issue as quickly as possible. This can often be done using repair kits that come with proprietary sealants designed specifically for this purpose.
What Glue Works on Pex?
There are a few different types of glue that work on Pex – some are designed specifically for use with Pex, while others can be used on other types of plastic. Here are some of the most popular types of glue that work on Pex:
- Glue-All – This is a general-purpose, adhesive glue that is designed to work with a variety of materials, including Pex.
- Superglue – This is a popular type of glue that is known for its stronghold and rapid setting properties. It works well on Pex and other plastic materials.
- UHU – This fast-setting glue is designed specifically for use with Pex and other plastic materials. It has a quick dry time and offers an effective sealant for connecting parts together.
- Goof-Off – This is a versatile adhesive that can be used to seal cracks and joints in plastic materials, as well as attach stickers and decals to surfaces.
Can You Caulk Around Pex?
Caulking around a Pex pipe is typically not recommended because it can lead to leaks and water damage. A professional installer should be contacted if this needs to be done.
Can I Use Pvc Glue on Pex?
PVC glue is a great way to seal and connect two pieces of PVC pipe. However, because PVC glue is a water-based product, it may not be suitable for use on Pex pipe. In fact, PVC glue may cause damage to the Pex pipe if it’s used incorrectly. If you’re still concerned about using PVC glue on Pex, you can contact the manufacturer of your Pex pipe to ask about their specific instructions for using PVC glue.
Conclusion
If you are experiencing a pinhole leak in your Pex pipe, there are a few ways to fix it. The first option is to use a sealant or epoxy purchased at most hardware stores. This is the easiest and quickest way to repair the pipe.
However, if the leak is more serious, you may need to replace the section of the pipe where the leak is occurring. In either case, we recommend consulting with a professional before attempting to fix the pipe yourself. We hope this article on how to fix a pinhole leak in pex pipe has been helpful. Have you had any experience fixing a pinhole leak in Pex pipe? Let us know in the comments below.
You Can Check It Out To Fix Foghorn Pipes