A leaking tile roof can cause much water damage to your home. If you notice any signs of a leak, it’s important to fix it as soon as possible. Otherwise, you may end up with serious structural damage or mold growth. Here are some tips on how you can fix a leaking tile roof.

If you’ve noticed water leaking through your roof, you may have a damaged tile roof. Luckily, repairing a leaking tile roof is a relatively simple process and can be done by most homeowners. Don’t worry – you don’t need to replace the entire roof! In most cases, only a few tiles need to be replaced. This article will show you how to fix a leaking tile roof. We will also provide some tips on preventing future leaks. Let’s get started!
Summary: Got a leaky tile roof? Don’t worry – with just 10 simple steps, you can enjoy a leak-free roof in no time! Start by inspecting the roof and identifying the damaged tiles, then remove them. Clean the surface and cut new tiles. Apply mortar, sealant and grout and allow to dry, and voila – your tile roof is fixed! Let the leaks be gone and enjoy your leak-free roof!
What are the reasons behind Leaking Tile Roof?
There are many reasons why your tile roof may be leaking. The most common reason is due to damaged or broken tiles. When a tile is damaged, it no longer provides a water-tight seal. This can allow water to seep through and cause leaks.
Another common reason for leaks is improper installation. If your roof is not installed correctly, it may not provide a proper seal. This can also allow water to seep through and cause leaks.
Is It Possible to Fix a Leaking Tile Roof Without Hiring a Professional?
In most cases, yes! If you have a small leak or a few damaged tiles, you can probably repair it yourself. However, we recommend hiring a professional if you have a large leak or extensive damage. Because tile roofs are more complex than other types of roofs, it’s best to leave repairs to the professionals as they have the experience and know-how to repair your roof properly.
Materials and Tools You Might Need
- Ladder
- Roofing sealant
- Replacement tiles (if necessary)
- Hammer
- Chisel
- Trowel
- Caulking gun
- Safety goggles
You can fix a leaking tile roof using the proper materials and tools. I hope this article will informative. We’re always here to help!
10 Steps on How to Fix a Leaking Tile Roof
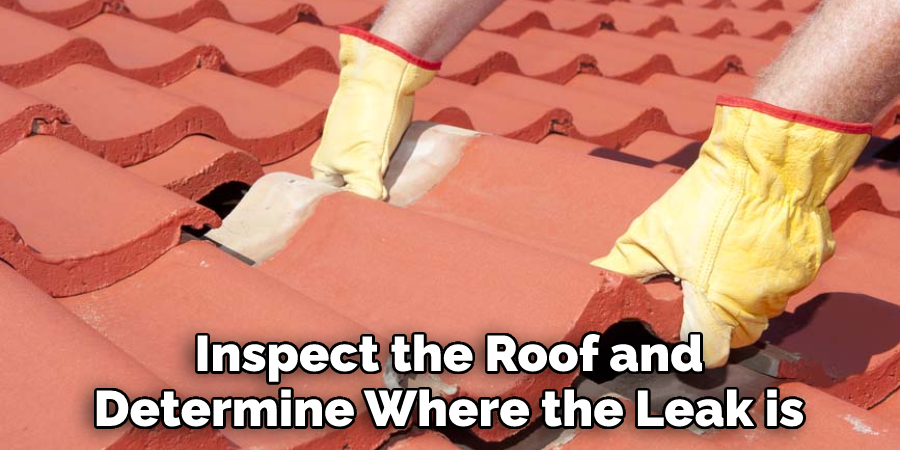
Step 1: Inspect the Roof
The first step is to inspect the roof and determine where the leak is coming from. If you can’t find the source of the leak, it may be coming from multiple places. Once you’ve found the leak’s source (or sources), you can proceed to the next step. Be careful when inspecting the roof, as you don’t want to cause further damage.
Step 2: Identify the Damaged Tiles
Once you’ve located the source of the leak, you need to identify the damaged tiles. In most cases, only a few tiles are damaged and must be replaced. However, if the damage is extensive, you may need to replace the entire roof.
Step 3: Remove the Damaged Tiles
Once you’ve identified the damaged tiles, you need to remove them. Use a hammer and chisel to remove the tiles carefully. Be careful not to damage the surrounding tiles. Otherwise, you’ll just end up with more work to do.
Step 4: Clean the Surface
Once the damaged tiles are removed, you need to clean the surface. Use a putty knife to scrape off any old mortar or sealant. You also need to remove any debris from the surface. This step is important because it will allow the new tiles to adhere properly.
Step 5: Cut New Tiles
Now, you need to cut new tiles to replace the ones you removed. Measure the space where the old tile was and use a wet saw to cut the new tile. Ensure the cuts are straight so the new tile will fit properly. If the cuts are not straight, the tile will not fit properly and will not provide a water-tight seal.
Step 6: Apply Mortar
Now, it’s time to apply mortar to the surface. Use a trowel to spread a layer of mortar over the surface. Then, set the new tile in place and press it down firmly. Be careful when down, so you don’t dislodge the other tiles.
Step 7: Apply Sealant
Once the tile is in place, you must apply a sealant to the edges. Use a caulking gun to apply a bead of sealant around the edges of the tile. This will help create a water-tight seal and prevent future leaks. Be careful when using a caulking gun. Because it can be difficult to control, you don’t want to make a mess.

Step 8: Allow the Mortar to Dry
Now, you need to allow the mortar to dry. This usually takes 24-48 hours. Once the mortar is dry, you can proceed to the next step. Make sure you follow the manufacturer’s instructions for drying time. Otherwise, the sealant may not adhere properly.
Step 9: Apply Grout
After the mortar is dry, you must apply the grout to the joints. Use a grout float to apply the grout evenly across the joints. Start at one end of the roof and work your way down. After applying the grout, use a damp sponge to clean up any excess grout on the tiles. Allow the grout to dry for at least 24 hours before walking on the roof. This step is important because the grout needs time to set properly.
Step 10: Enjoy Your Leak-Free Roof!
After the grout is dry, your roof should be leak-free! Take a step back and enjoy your handiwork. Be sure to inspect the roof regularly for any future damage. And, if you have any questions, feel free to contact a professional. They’ll be happy to help you maintain your roof and keep it looking great for years to come. Thanks for reading!
Following these steps should help you fix a leaking tile roof. If you have any questions, feel free to contact a professional for assistance. They’ll be happy to help you maintain your roof and keep it looking great for years to come. Thanks for reading!

Additional Tips and Tricks
1. You can also use a hammer and chisel to remove the old tile. Be careful not to damage the underlying roofing material.
2. If you are unable to find a matching tile, you can use a repair kit that includes a patch that can be used to cover the damaged area.
3. Once the new tile is in place, you will need to seal it with a roofing sealant.
4. Make sure to have your leaking tile roof repaired as soon as possible to avoid further damage to your home.
5. If you have any questions about fixing a leaking tile roof, contact a professional roofing contractor for assistance.
I hope these tips and tricks help you fix your leaking tile roof. Thanks for reading!
How Can You Find Any Leak on Your Roof Tile?
If you think your roof may have a leak, it’s important to act fast and get it fixed as soon as possible. But how can you be sure there is a leak, and where exactly is it coming from? This guide will show you how to find any leak on your roof tile so you can get it repaired quickly.
Inspect Your Roof Tiles Regularly
If you want to catch a roof leak before it does too much damage, it’s important to inspect your roof tiles regularly. Look for cracked, chipped, or missing tiles, as these could be the leak source. Also, take note of any curling or buckling tiles, as these could also indicate a leak.
Check for Leaks After Severe Weather
After a storm or high winds, check your roof for any leaks. If you find any, it’s important to get them fixed as soon as possible to avoid further damage.
Have Someone Else Check Your Roof
It can be difficult to spot a roof leak from the ground. If possible, have someone else check your roof for you or use a pair of binoculars to get a better view.
Check Your Attic for Leaks
If you have an attic, check it regularly for any signs of leaks. Look for water stains on the ceiling or walls or any mold or mildew. These could be signs that there is a leak in your roof.
Check Your Gutters for Leaks
If you have a tile roof, regularly check your gutters for any signs of leaks. Water can pool in your gutters and cause the tiles to crack or break, leading to leaks. If you notice any leaks, be sure to repair them as soon as possible to prevent further damage.
This information should help you find any leak on your roof tile. If you have any questions or concerns, be sure to contact a professional roofing contractor for assistance. They will be able to help you repair your roof and prevent any further damage.

Conclusion
So, there you have it. If your roof tiles are cracked, don’t despair – with a few simple tools and some elbow grease, you can fix them and save yourself a bit of money. We hope this article was helpful and that you’ll be able to put our tips into practice!
Although it may seem daunting, fixing a leaking tile roof is manageable. A leaking tile roof needs to be fixed as soon as possible. The longer the water leaks, the more damage it will do to the structure of your home. With the right tools and some instruction, you can repair your roof in no time.
Hopefully, this article has given you the information on how to fix a leaking tile roof and the confidence you need to repair your own roof. Thanks for reading!