Fixing a leaking shower pan is not as difficult as one might think. The leak is usually caused by a crack or hole in the pan itself. If you notice water leaking from your shower pan, taking care of the problem as soon as possible is important. A leaking shower pan can lead to serious damage to your bathroom and home if left unprepared. The first step is to identify the source of the leak. Once the leak has been located, the next step is to clean the area around the leak. In most cases, the repairs can be completed in a single afternoon.
However, more serious leaks may require professional assistance. Fixing a leaking shower pan is an important task that every homeowner should know how to do. It can save money and prevent further damage to your home. In this blog post, we’ll show you how to fix a leaking shower pan quickly and easily. We’ll also provide some tips on how to prevent future leaks.
Summary: Fixing a leaking shower pan is not difficult, but it can be a messy and time-consuming process. Follow these simple steps to get the job done right: 1. Remove the old shower pan and any fixtures that are attached. 2. Clean the area where the new shower pan will be installed with a hose or rag. 3. Apply a sealant or caulking to the seams of the new shower pan. 4. Install the new shower pan using screws or bolts. 5. Clean the area where the new shower pan was installed.
What Are the Causes of a Leaking Shower Pan?
There are a few different reasons why your shower pan may be leaking. The most common cause is that the pan was not installed properly, and there is a gap between the pan and the shower wall.
Another common reason for leaking is that the sealant around the perimeter of the pan has failed. In some cases, the drain itself may be faulty and leaking.
Whatever the cause, it is important to fix a leaking shower pan as soon as possible to avoid water damage to your home.
10 Easy Steps for How to Fix a Leaking Shower Pan
Step 1: Determine the Source of the Leak
The first step in fixing a leaking shower pan is determining the source of the leak. There are many potential sources of leaks in a shower pan, so it’s important to identify the specific cause of the problem. Some common sources of leaks include cracked or broken tiles, faulty caulking, and improperly sealed seams.
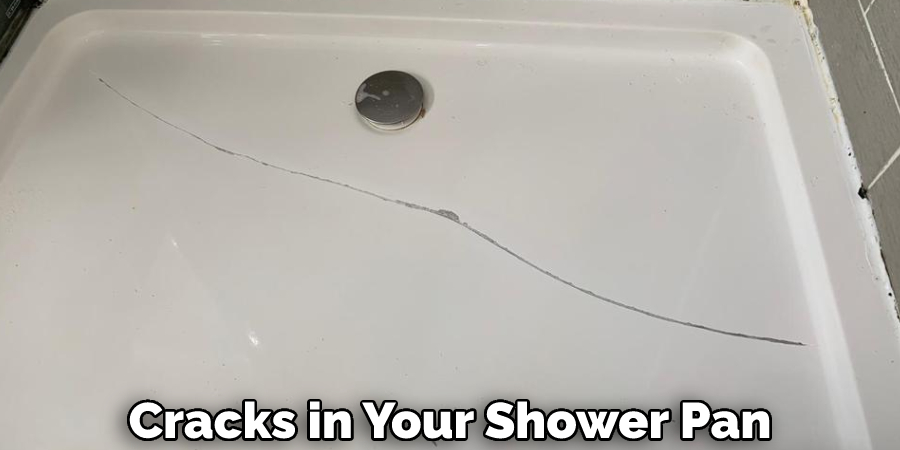
Step 2: Inspect the Shower Pan for Cracks or Holes
If you see any cracks or holes in the shower pan, these will need to be repaired before proceeding. Depending on the size and severity of the damage, you may be able to use a sealant or epoxy to patch up the problem areas. However, if the damage is extensive, you may need to replace the shower pan entirely.
Step 3: Repair Any Cracks or Holes in the Shower Pan
If you have small cracks or holes in your shower pan, you can try to repair them with a sealant or epoxy. Simply follow the instructions on the product packaging and apply the material to the damaged area. Once dry, this should help to prevent water from leaking through.
Step 4: Apply a Layer of Sealant to the Shower Pan
Start by cleaning the surface of the shower pan with a mild cleaner or detergent. Make sure to rinse away any residue afterward. Next, apply a sealant layer around the shower pan’s perimeter. Be sure to smooth it out so that there are no gaps or bubbles. Allow the sealant to dry completely before proceeding to the next step.
Step 5: Install a New Shower Pan Liner
Cut the new liner to size with a utility knife. Ensure it is large enough to extend several inches beyond the shower pan. Install the liner using rubber cement or another adhesive.
Start at the drain hole and work your way up, smoothing out any wrinkles as you go. Once the liner is in place, install the drain assembly according to the manufacturer’s instructions. Install the new shower pan. Make sure it is level and seated properly on the subfloor.
Step 6: Apply Silicone Caulk Around the Drain
Apply a generous bead of silicone caulk around the drain. Use your finger to smooth it out and ensure no gaps. Allow the caulk to dry for 24 hours before using the shower. Install the new shower door according to the manufacturer’s instructions. Make sure the door is sealed properly to prevent water leaks.
Step 7: Secure the Drain With Screws
If your shower pan has a drain hole that is not centered, you will need to use screws to secure the drain in place. Apply a generous bead of silicone caulk around the drain. Place the screws into the holes and tighten them down. Be careful not to over-tighten the screws, as this can damage the shower pan.
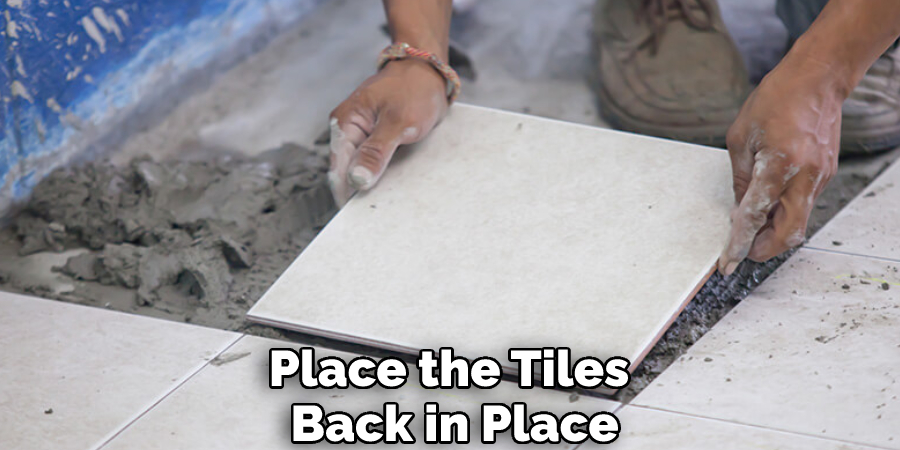
Step 8: Re-attach Any Loose Tiles
Use a utility knife to remove any old silicone caulk or adhesive from the tiles. Apply a new bead of silicone caulk around the perimeter of the shower pan. Place the tiles back in place and press them firmly into the caulk. Wipe away any excess caulk with a damp rag. Allow the caulk to dry for 24 hours before using the shower.
Step 9: Test the Shower Pan for Leaks
Fill the shower pan with water and let it sit for several hours. Check for any leaks around the drain or shower pan. If you find any leaks, apply more silicone caulk and allow it to dry for 24 hours before testing again.
Step 10: Enjoy Your New Leak-free Shower Pan
You may need to replace the shower pan for larger cracks or holes. This is a more involved process, but it will be necessary if the damage is too severe to be repaired. Now that your shower pan is installed and leak-free, you can enjoy your new shower worry-free!
Safety Tips for Fixing a Leaking Shower Pan
- Always wear gloves and eye protection when working with a leaking shower pan.
- Ensure the area around the shower pan is well-ventilated to avoid inhaling fumes from chemicals used to fix the leak.
- Use a putty knife or other sharp object to scrape away any caulk or sealant that is covering the leak.
- Use a vacuum cleaner with a hose attachment to remove any loose dirt or debris from the area around the shower pan.
- If the leak is small, you may be able to repair it with epoxy putty or another type of sealant.
- You will need to seal the new shower pan correctly and replace the damaged portion for larger leaks.
- Ensure you seal the new shower pan correctly to avoid future leaks.
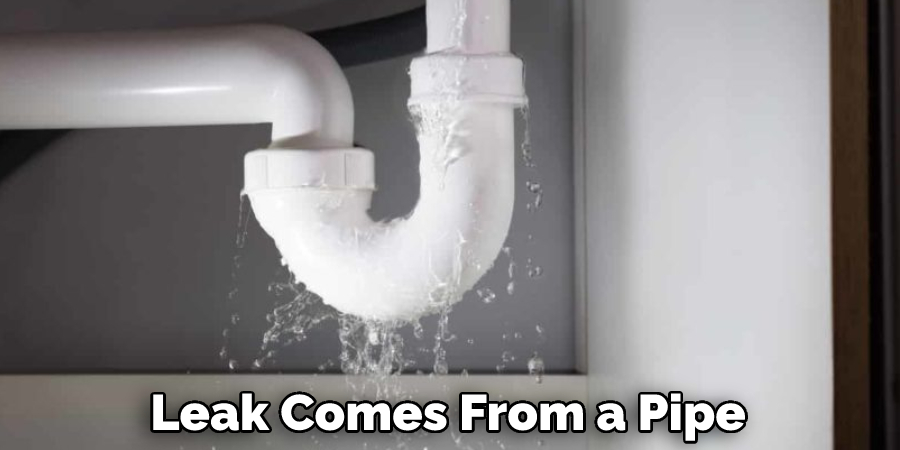
- If the leak comes from a pipe or fitting, you will need to repair or replace the damaged part.
- Once you have fixed the leak, check the area around the shower pan for any signs of water damage.
- If you find any water damage, you must repair it before using the shower again.
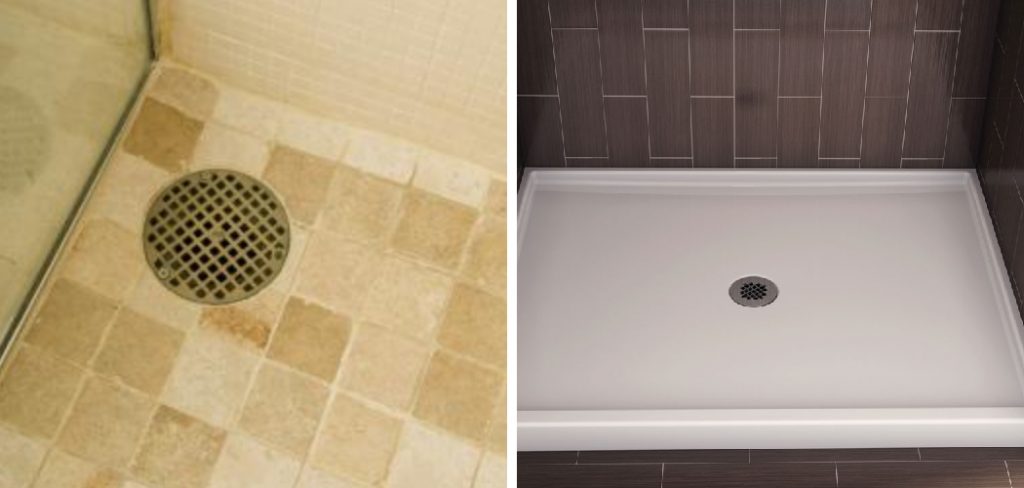
How Do You Know if Your Shower Pan is Leaking?
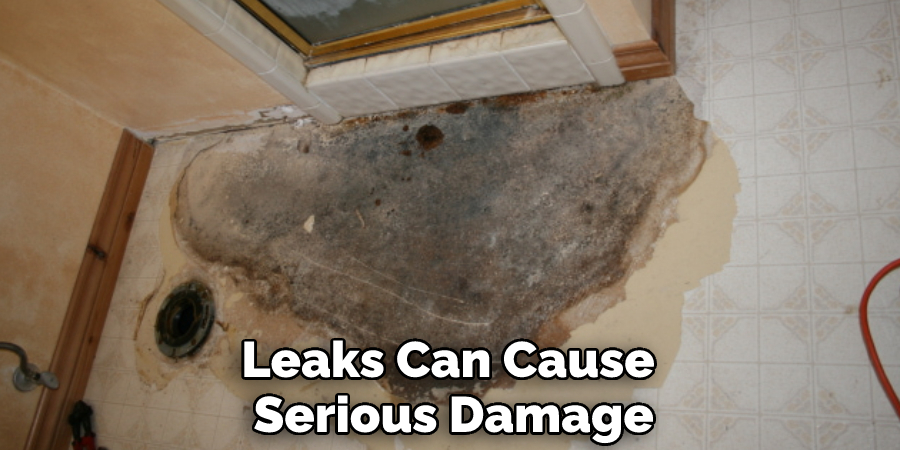
If you have water stains on your ceiling or walls, mildew or mold growing in your bathroom, or puddles of water around your shower base after showering, then you may have a leak in your shower pan. A leaking shower pan can cause serious damage to your bathroom and home if left unaddressed, so it is important to fix the problem as soon as possible.
There are several ways to fix a leaking shower pan, depending on the severity of the leak. For minor leaks, you may be able to simply reseal the joints and cracks in the shower pan with silicone caulk or epoxy putty. If the leak is more serious, you may need to replace the entire shower pan.
How Do You Choose the Right Shower Pan to Prevent Leaks?
If you’re looking to prevent leaks in your shower, you need to choose the right shower pan. There are many different types of shower pans on the market, so it’s important to know what to look for. Here are a few things to keep in mind when choosing a shower pan:
- Ensure the pan is made of a material impervious to water. This will help to prevent leaks.
- The pan should be sloped slightly so that water drains properly.
- A lip should be on the pan to prevent water from spilling onto the floor.
- The pan should be sized correctly for your shower space.
Conclusion
A shower pan that leaks can cause serious damage to your home. If you have a leaking shower pan, it’s important to fix it as soon as possible. There are a few different ways to fix a leaking shower pan, and the best method will depend on the severity of the leak. Repairing a shower pan is a simple process that anyone can do with the right supplies and instructions. The first step is identifying the leak’s source, typically a crack or hole in the pan.
Once the leak has been located, it can be repaired with a sealant or patch kit. In some cases, the entire shower pan may need to be replaced. In most cases, however, you’ll be able to fix the leak yourself with some basic tools and supplies. We hope this article has been beneficial in learning how to fix a leaking shower pan. Make sure the precautionary measures are followed.