If you have a dead ATV battery, don’t worry – it’s easy to fix. This guide will cover how to fix a dead ATV battery and get you back on the trails in no time. Here are a few simple steps to get your battery up and running again. First, make sure that the battery is the problem. Sometimes it’s something else, like a corroded cable or terminal.
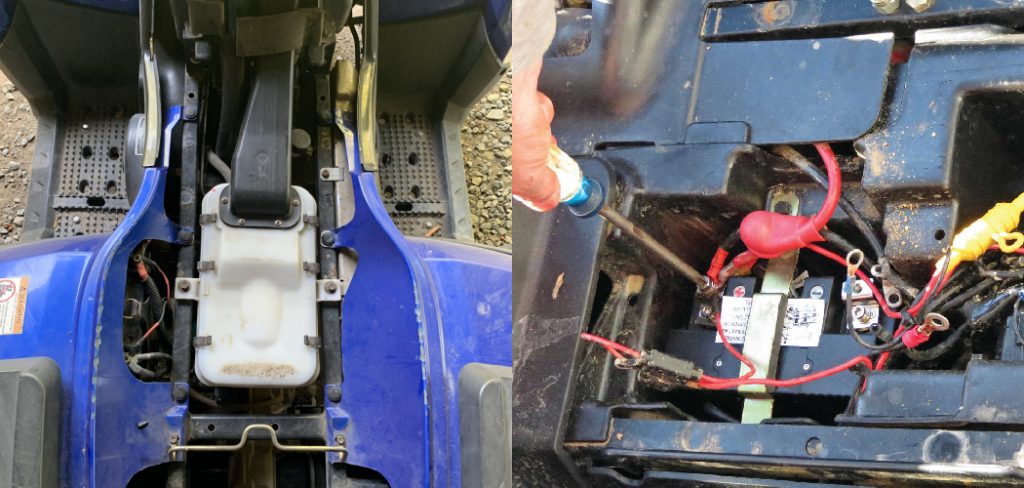
If you’re sure that the battery is at fault, remove it from the vehicle and inspect it for damage. If the battery is cracked or swollen, it needs to be replaced. If not, try cleaning the terminals with a wire brush and reconnecting them securely. Finally, reattach the negative cable before turning on the ignition switch before testing the battery. If it still doesn’t work, you may need a new one. Read on for more information.
Summary: Fixing a dead ATV battery is a relatively easy task. Start by finding the battery and removing it from the vehicle. Once removed, use a multimeter to check for any voltage in the battery.
If there is no voltage, then check the battery terminals for corrosion or damage, and clean or replace if necessary. Next, charge the battery with an appropriate charger and monitor the charge level until it reaches full capacity. Finally, reinstall the battery into the ATV and test to ensure proper operation.
10 Reasons That Causes a Dead Atv Battery
1. Battery Is Too Old:
One of the main reasons that batteries die is simply because they are too old. Over time, the chemicals inside the battery break down, causing it to lose its ability to hold a charge. If your battery is over three years old, it’s probably time for a new one. The old battery is probably not holding a charge as well as it used to.
2. Lack of Use:
Another common cause of dead batteries is lack of use. If you don’t ride your ATV very often, the battery will slowly lose its charge over time. This is because the chemical reaction inside the battery only occurs when it’s being used.
3. Leaving the Lights On:
One of the quickest ways to kill a battery is by leaving the lights on when the engine is off. This drains the power from the battery, causing it to die. If you do this often, you’ll probably need to replace your battery more frequently.
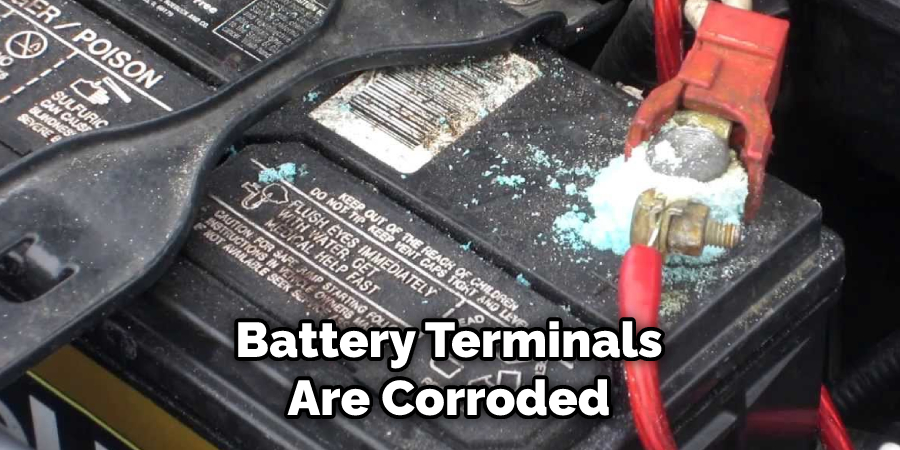
4. Corroded Battery Terminals:
If the battery terminals are corroded, it can prevent the electrical current from flowing properly. This can cause the battery to die prematurely. To clean the terminals, use a wire brush to remove any corrosion. You can also try using a battery terminal protector to help keep the terminals clean. Unfortunately, the corroded terminal can also kill a battery.
5. Overcharging:
If you overcharge your battery, it can cause the chemicals inside to break down, causing the battery to die. It may also happen that the overcharging will cause the battery to leak, and this will damage your ATV. If the battery starts to leak, it’s time for a new one. Be sure to check the charging system regularly to avoid overcharging.
6. Damage from Heat or Cold:
Extreme temperatures can also damage your battery. If it gets too hot or too cold, it can cause the chemicals inside to break down, causing the battery to die. It’s essential to store your ATV in a cool, dry place to avoid this. If you live in an area with extreme temperatures, you may need to invest in a battery designed to withstand those conditions.
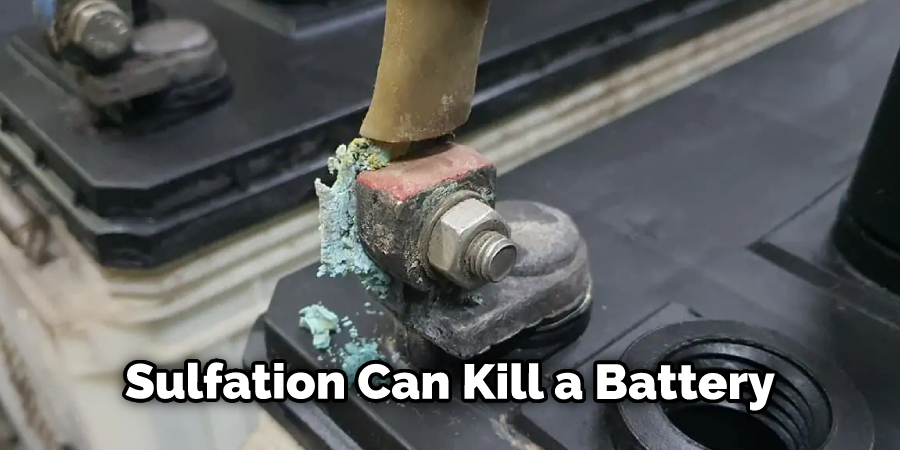
7. Sulfation in the battery:
Sulfation is a common problem that can kill a battery. It occurs when the lead sulfate crystals inside the battery grow too large. This inhibits the flow of electricity, causing the battery to die. To prevent sulfation, be sure to keep your battery properly charged. If you let it discharge too far, sulfation will occur.
8. Loose or Dirty Battery Connections:
If the connections to your battery are loose, it can cause an electrical short, which will kill the battery. Be sure to check the connections regularly to make sure they are tight. Also, if the connections are dirty, it can prevent the electrical current from flowing properly, causing the battery to die. Clean the connections with a wire brush to remove any dirt or corrosion.
9. Short Circuiting:
If you accidentally short circuit your battery, it can damage the internal structure, causing it to die. Short circuits usually occur when the positive and negative terminals are accidentally touched together. To prevent this, be sure to keep the terminal covers on tight. If the terminals do become exposed, make sure not to let them touch.
10. Wiring Problems:
If there is a problem with the wiring in your ATV, it can cause the battery to die. Check the wiring regularly for any frayed or exposed wires causing the problem. If you find any, replace them immediately. Also, make sure that all of the connections are secure and there is no corrosion on the battery terminals.
Step by Step Guide: How to Fix a Dead ATV Battery
Step 1: Disconnect the Battery.
The first thing you need to do is disconnect the battery from the ATV. This will prevent any further damage from being done to the battery or the ATV itself. If the battery is not disconnected, it is at risk of exploding and causing serious injury.
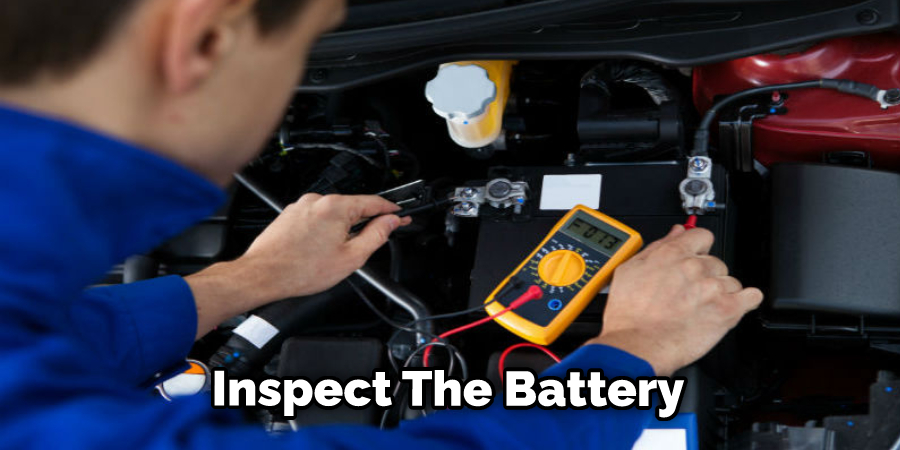
Step 2: Inspect the Battery.
Once the battery is disconnected, you will need to look closely at it to determine the problem. If the battery is cracked or damaged in any way, then it will need to be replaced. However, if the battery looks dirty or corroded, it may be possible to clean it and get it working again.
Step 3: Clean the Battery.
If the battery looks dirty or corroded, you will need to clean it before proceeding further. The best way to clean a battery is to use a mixture of baking soda and water. Then, simply make a paste out of the two ingredients and use a cloth to apply it to the battery. Let it sit for a few minutes before wiping it away.
Step 4: Connect the Dead Battery With New One.
If the old battery is damaged beyond repair, you need to connect a new one. To do this, you will need to locate the positive and negative terminals on the ATV. Once you have found them, connect the new battery similarly. Again, make sure that the connections are tight and secure before proceeding.
Step 5: Leave Them For an Hour.
After the new battery is connected, you will need to leave it for an hour so that it can charge. Once the hour is up, try starting the ATV and see if it works. If the ATV does not start, you may need to replace the battery. If your ATV does not have a kickstand, you will need to prop it up so the battery is not touching the ground. This will help prevent the battery from discharging.
Step 6: Check the Wiring.
Once the new battery is connected, you will need to check the wiring to ensure everything is in good working order. If you notice any frayed or damaged wires, then you will need to replace them. This is especially important if the ATV was involved in an accident.

Step 7: Disconnect the Jumper Cable.
After the ATV has been started, you will need to disconnect the jumper cable. Once the cable is disconnected, you can put the ATV into storage or take it for a ride. Be sure to monitor the battery level and charge it when necessary. If your ATV won’t start and the battery is fully charged, you may need to take it to a mechanic for further diagnosis.
Step 8: Connect the Battery With Charger.
The next step is to connect the battery to the charger. Make sure the polarity is correct before connecting the charger to the battery. If you have a charging system for your ATV, connect the positive and negative leads of the charger to the corresponding terminals on the battery. You can use a standard automotive battery charger if you don’t have a charging system.
Step 9: Charge the Battery.
Once the battery is connected to the charger, turn on the charger and let it charge until the battery is full. This could take a few hours, so be patient. Once the battery is fully charged, turn off the charger and disconnect the battery. If you think the battery may be damaged, take it to a professional for further testing.
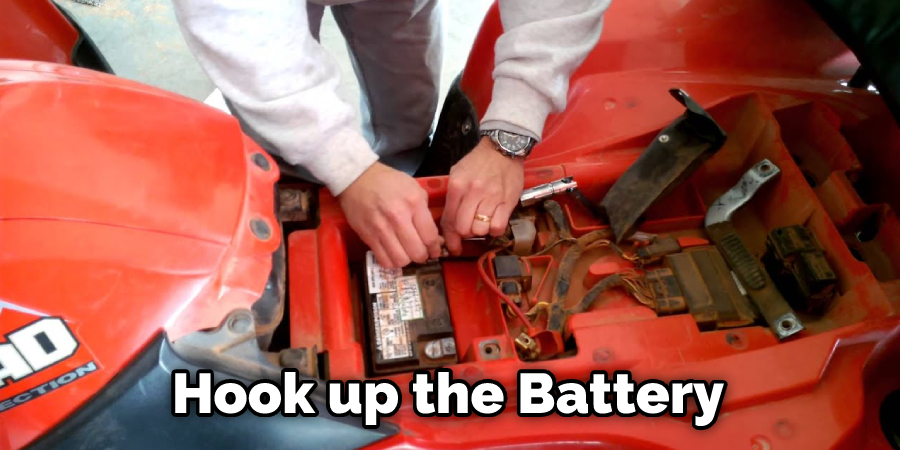
Step 10: Test the Battery.
After charging the battery, it’s time to test it out. Hook up the battery to the ATV and try starting it. If the ATV starts, then the battery was successfully revived! If the ATV doesn’t start, the battery may be beyond reviving, and you’ll need to get a new one.
Additional Tips to Maintain a Dead Atv Battery
Here we have given tips on how to fix a dead atv battery and maintain it regularly.
- Try to keep the battery in a cool, dry place.
- Avoid letting the battery discharge completely.
- Check the battery regularly for corrosion or other damage.
- When storing the ATV for long periods, disconnect the battery and store it in a cool, dry place.
- Make sure the battery terminals are clean and free of corrosion.
- If you notice the battery is not holding a charge, have it checked by a professional.
- Never store the battery in a discharged state.
Troubleshooting a Dead Atv Battery
If your ATV battery is completely dead, there are a few things you can do to try and resurrect it. First, check the connections and ensure they are all clean and tight. If they are corroded, you can try cleaning them with a wire brush or using some sandpaper. Sometimes, just cleaning the connections can get your battery working again.
If that doesn’t work, you can try charging the battery. It may take a few hours to charge if it’s completely dead, so be patient. You can also try jumpstarting the battery using another ATV or a car. Just make sure the other vehicle has a good battery; otherwise, you could damage both batteries.
Can You Charge a Dead Battery Using a Manual Charger?
You can charge a dead battery using a manual charger, but it will take time and patience. First, you’ll need to find the right size battery charger for your ATV. Second, you’ll need to connect the positive and negative terminals of the charger to the corresponding terminals on the battery. Finally, you’ll need to charge the battery over some time slowly.
If you don’t feel comfortable charging your ATV battery yourself, you can always take it to a local repair shop or dealership. They should be able to help you out and get your ATV up and running in no time. When charging the battery, be sure to follow the instructions that come with your charger. Overcharging the battery can damage it and shorten its lifespan.
How Does an ATV Battery Die?
An ATV battery can die for several reasons. The most common reason is sulfation. Sulfation occurs when the lead in the battery’s plates combine with sulfuric acid in the electrolyte, forming lead sulfate crystals. These crystals prevent the flow of electricity, causing the battery to die. Other causes of battery death may include overcharging, freezing, or simply old age.
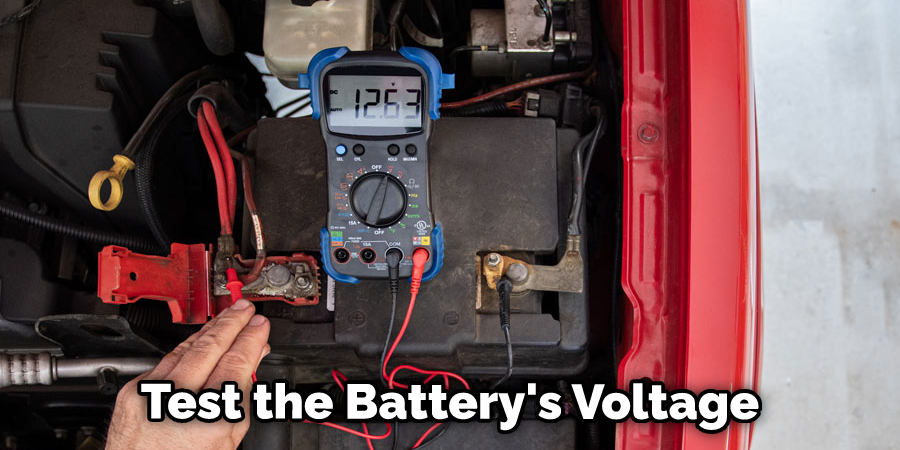
If you think your ATV battery might be dead, there are a few things you can do to check. First, make sure the battery is properly charged. Next, you can use a voltmeter to test the battery’s voltage. If it reads 12.6 volts or less, the battery is probably dead. Another way to check is by starting the ATV. The battery is likely dead if it doesn’t start or starts slowly.
Frequently Asked Questions
Can a Dead Battery Be Restored?
A dead battery cannot be restored, no matter how much effort you put into it. Batteries are designed to fail in a certain amount of time so that they can be replaced. When the battery fails completely, there is not enough juice left to start your car or another device. In most cases, charging the battery will not help because it’s already too late.
Can You Jumpstart an ATV Battery?
Jumpstarting an ATV battery can be a difficult task, but it is possible if you are careful. When your ATV battery is not functioning properly, the first thing to do is check all of the cables and connections. Make sure there are no broken or frayed wires, and that everything is securely connected.
If you have jumper cables available, connect one end of each cable to the positive (+) terminal on either side of the battery, and then connect the other end of each cable to another vehicle with working batteries. Your ATV should start right up this way! If jumpstart isn’t an option or your ATV doesn’t have jumpers available, then you may need to take it to a service center for repairs or replacements.
What Do You Do When Your Atv Won’t Start?
When your ATV won’t start, there are a few things you can do to troubleshoot the issue. The first step is to determine if the battery is fully charged. If it isn’t, you’ll need to replace the battery. If the battery is fully charged, but the ATV still won’t start, it’s likely that there is a problem with the starter. To test the starter, you can try starting the engine without cranking it and see if it starts. If it doesn’t, you’ll need to replace the starter.
Do Atv Batteries Charge When Running?
When you are running your ATV, the battery will draw power from the engine to run the motor. This can actually wear down the battery over time and result in it no longer being able to hold a charge. If this happens, it is important to replace your batteries as soon as possible so that you can continue using your machine safely and without interruption.
Final Words
If you have a dead ATV battery, you can do a few things to try and revive it. First, check the connections between the battery and the vehicle. Make sure they’re clean and tight. If they look good, then try jumpstarting the battery with another vehicle. If that doesn’t work, you may need to bring your battery in for some professional help.
We hope this guide on how to fix a dead ATV battery was helpful. So whether your battery has just stopped working or it’s completely drained, follow these instructions, and you should be able to get your ATV up and running again in no time. Thanks for reading!
You May Also Read: How to Fix a Dead Battery Cell