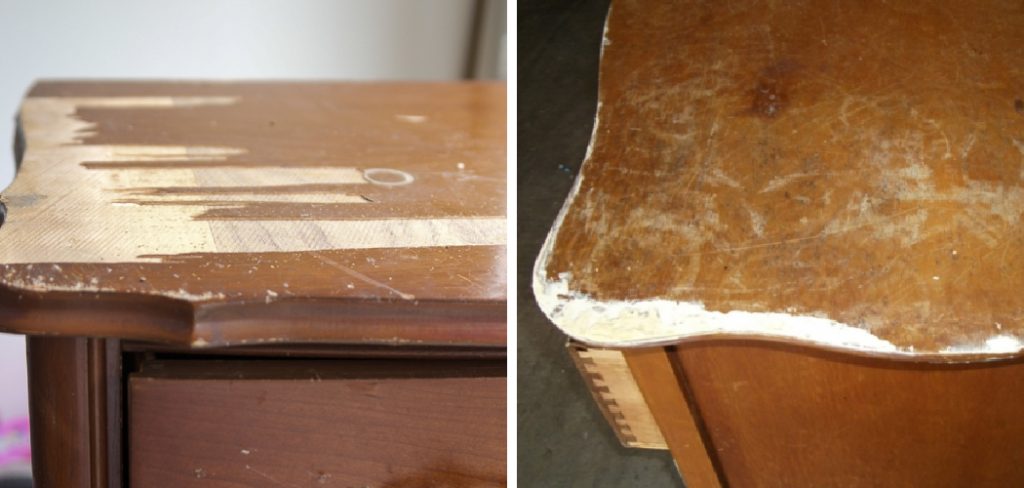
If you have a dresser with a damaged top, there is no need to worry. You can fix it easily and for not very much money. In this post, we will show you how to fix a damaged dresser top. So, whether your dresser has a small chip or a gaping hole, follow these steps to make it look new again.
Summary: Damaged dresser tops can be easily fixed using a few simple tools and supplies. To fix the damage, begin by removing all hardware from the dresser top. Next, sand down the area of damage with sandpaper. Once sanded, apply wood glue to the damaged area and clamp it if necessary. Place a piece of wax paper over the repair before finishing it with paint or stain. Finally, replace all hardware to complete the repair job.
Why Should You Fix a Damaged Dresser Top?
A dresser top is one of your home’s most important furniture pieces. Not only does it provide a place to store your clothes, but it also serves as a decorative piece that can tie a room together. However, dresser tops are also susceptible to damage from spills, scratches, and everyday wear and tear. When this happens, it’s important to take action to repair the damage and protect the dresser top from further harm.
Fortunately, there are a few simple steps that you can take to fix a damaged dresser top. First, try using furniture polish or cleaner to remove any surface stains. If the damage is more extensive, you may need to sand down the dresser top and refinish it with a new coat of paint or varnish. By taking the time to repair a damaged dresser top, you can keep your furniture looking its best for years to come.
8 Tips to Follow on How to Fix a Damaged Dresser Top
When you think of how to fix a dresser top, the first thing that probably comes to mind is putting some kind of adhesive on it and calling it good. But there’s a little more to it than that. Here are eight tips on how to fix a damaged dresser top:
1. Evaluate the Damage
Before fixing the dresser top, you must look closely at the damage and decide how bad it really is. Is it just a small crack or chip? Or is the damage more extensive? You can probably get away with using some glue and a splint if it’s just a small crack or chip. But if the damage is more extensive, you’ll need to use a more substantial repair method.
2. Choose the Right Tools
Once you’ve evaluated the damage, you can choose the right tools for the job. If you’re just dealing with a small crack or chip, you won’t need much more than some wood glue and a few toothpicks. But if the damage is more extensive, you’ll need something like a putty knife, some sandpaper, and some wood filler.
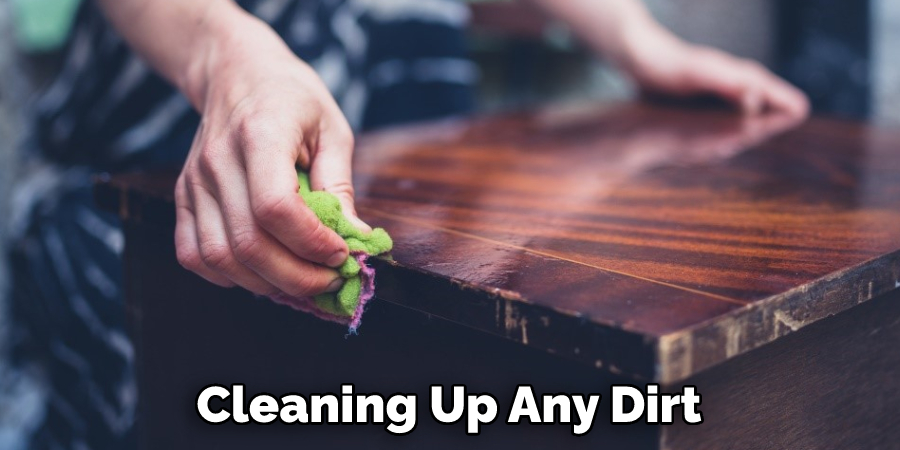
3. Prep the Area
Before you start repairing the dresser top, you need to prep the area. This means cleaning up any dirt or debris that might be on the surface. You also want to ensure that the surface is smooth so that the repair will be as seamless as possible.
4. Apply the Glue
You can use wood glue to repair it if you’re just dealing with a small crack or chip. Just apply a small amount of glue to the area and then use a toothpick to spread it out evenly. Then, wait for the glue to dry before moving on to the next step.
5. Place the Splint
Once the glue is dry, you can place a splint over the area to reinforce it. A splint is just a small piece of wood that you can use to cover the crack or chip. You can find them at most hardware stores.
6. Secure the Splint
Once the splint is in place, you need to secure it so that it doesn’t move around. You can do this using some tape or driving a few nails into the dresser top around the splint.
7. Let It Dry
Once everything is in place, you must let the glue and filler dry completely before moving on to the next step. This usually takes about 24 hours.
8. Check Your Work
Once the glue and filler are completely dry, you can check your work to ensure everything looks good. If everything looks good, then you’re done! If not, you may need to do additional sanding or filling before you finish.
That’s it! You’ve now learned how to fix a damaged dresser top. Just follow these steps, and your dresser will look good as new in no time.
How to Fix a Damaged Dresser Top Without Any Tools
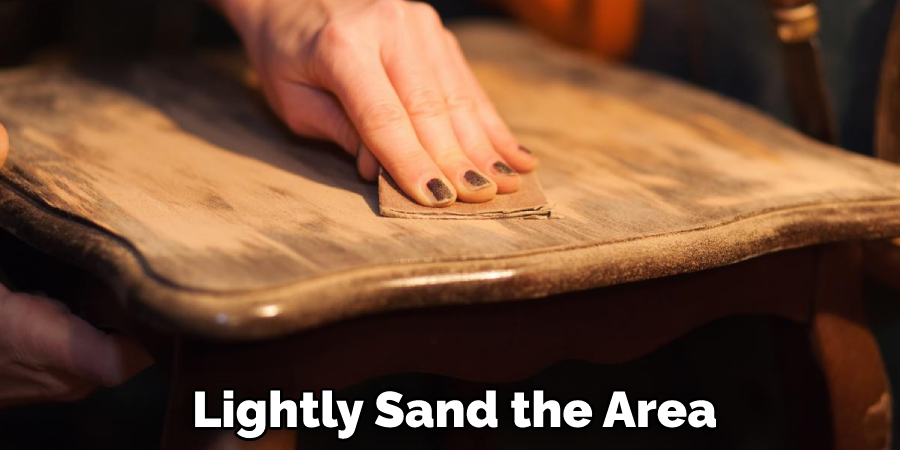
If you’ve ever accidentally left a hot pan on your dresser top, you know how difficult it can be to remove the resulting burn marks. Fortunately, there’s an easy way to fix this problem without any tools. First, lightly sand the area with fine-grit sandpaper until the surface is smooth. Then, apply a thin layer of wood glue to the damaged area.
Finally, press a piece of fine-grit sandpaper onto the glue and let it dry overnight. The next morning, simply peel off the sandpaper, and you’ll find that the damage has disappeared. With this simple fix, you’ll be able to keep your dresser top looking like new for years to come.
How to Fix a Scratched Dresser Top with Furniture Polish
Have you ever looked at your dresser top and noticed a big scratch? Maybe it’s from when you moved homes, or maybe your cat likes to sharpen its claws on the furniture. Whatever the case may be, a scratched dresser top can be an eyesore. But don’t worry – there’s an easy fix! All you need is some furniture polish and a little elbow grease.
First, clean the area around the scratch with a dust cloth. Then, apply a small amount of furniture polish to the scratch and rub it in with a soft cloth. Keep rubbing until the scratch starts to disappear. Once it’s gone, buff the area with a clean cloth to remove any excess polish. And that’s it! You can say goodbye to that unsightly scratch with just a few simple steps.
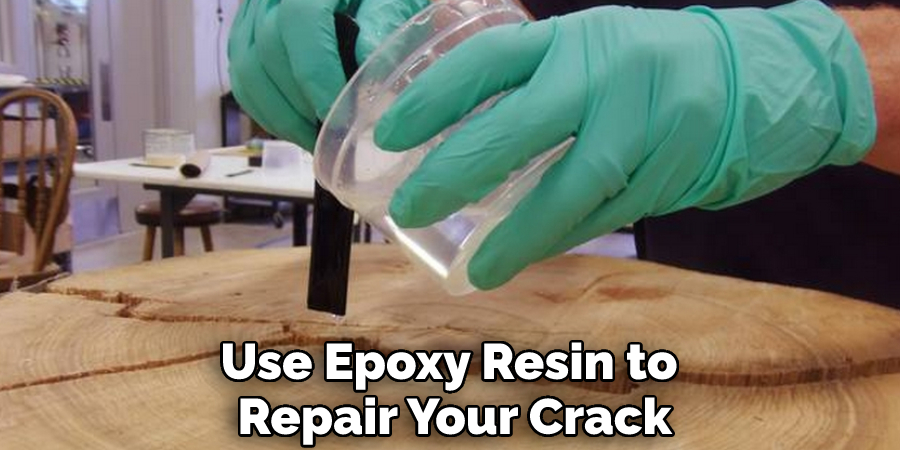
How to Repair a Cracked Dresser Top with Epoxy Resin
Epoxy resin is a strong and durable material that can be used to repair a variety of surfaces, including wood. For example, if you have a cracked dresser top, you can use epoxy resin to fill in the cracks and give the surface a smooth, finished look. The first step is to clean the area around the cracks with a damp cloth.
Next, mix the epoxy resin according to the instructions on the package. Once it is fully mixed, use a putty knife to apply the resin to the cracks. Then, use a piece of sandpaper to sand down any uneven edges lightly. Finally, apply a layer of varnish over the entire surface for protection. With just a little bit of effort, you can use epoxy resin to repair your cracked dresser top and extend its life.
How to Fix a Waterlogged Dresser Top with Polyurethane
A waterlogged dresser top can be a serious problem, as the water can cause the wood to warp and swell. However, there is no need to panic – there are a few simple steps you can take to fix the problem. First, remove any items from the dresser top and set them aside. Next, use a clean cloth to absorb excess water from the surface of the wood.
Once the surface is dry, apply a coat of polyurethane to seal and protect the wood. Finally, allow the polyurethane to dry completely before replacing any items on the dresser top. With these easy steps, you can quickly restore your dresser top to its original condition.
How to Fix a Damaged Dresser Top Using Common Household Items
A dresser is a piece of furniture that most people have in their homes. Dressers come in many different shapes and sizes and are usually made of wood. Unfortunately, over time, the top of a dresser can become damaged. This is usually caused by water spilling on the top of the dresser or by something heavy being placed on top of it. If you have a damaged dresser top, there are several household items that you can use to fix it.
One way to fix a damaged dresser top is to use a piece of cardboard. First, cut the cardboard so that it is slightly larger than the damage. Then, glue the cardboard to the top of the dresser using wood glue or superglue. Another way to fix a damaged dresser top is to use sandpaper. First, sand down the area around the damage to make it smooth. Then, apply a coat of varnish or paint to the area. This will help to protect the area from further damage.
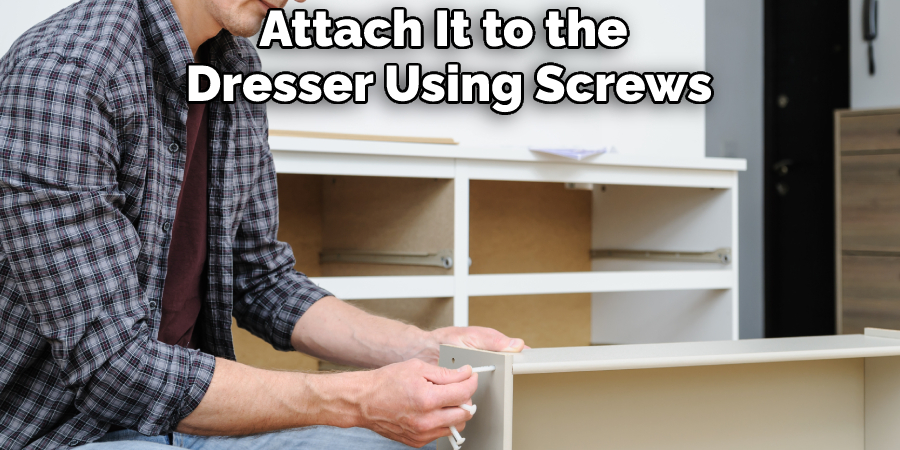
Finally, if the damage is severe, you may need to replace the entire top of the dresser. This can be done by taking measurements of the dresser and then purchasing a new piece of wood that is the same size. Once you have the new piece of wood, attach it to the dresser using screws or nails. Following these steps will help you fix a damaged dresser top quickly and easily.
Frequently Asked Questions
Can You Replace Veneer on Furniture?
Unfortunately, no. Veneers are a type of laminate that can only be replaced with an exact replica. If the original veneer is damaged or missing, you will need to replace it completely in order to achieve the same level of appearance and protection.
Can You Restore Laminate Furniture?
it depends on the type of laminate furniture that you have and the extent of the damage. However, if you think there is a chance of Restoration being possible, some things to try would be filling in any small cracks or gaps with wood filler, applying a water-resistant sealant (such as lacquer), or spraying polyurethane over the surface. If none of these solutions work or if your furniture is too badly damaged for restoration, then you may need to replace it wholeheartedly.
What Can You Use Instead of Wood Veneer?
There are a number of materials that can be used in place of wood veneer. Here are a few of the most popular ones:
- MDF – MDF is a type of particle board made from medium-density fiberboard pulp. It’s a popular choice for use in furniture and other small items because it’s relatively affordable, easy to work with, and has a smooth finish.
- OSB – OSB is made from wood chips that have been heated and compressed together into sheets. It’s a popular choice for use in roofing and wall construction because it’s lightweight, easy to install, and has a relatively low cost compared to other building materials.
- PVC – PVC is made from plastic that has been treated with an adhesive and then heated. This treatment makes it resistant to moisture and weathering, making it a popular choice for things like window frames and door panels.
Can You Use Wood Filler to Repair Veneer?
Yes, you can use wood filler to repair the veneer. This inexpensive and easy-to-use material is a great way to bridge the gaps in your wallboard or vinyl siding and restore its original appearance. Wood filler is made from Portland cement, sand, water, and some additives (priming agent, hardener). It’s typically poured into thin sheets that are then wetted down before being applied to the damaged area. Once it’s dry (usually 24 hours), the wood filler can be easily removed with a brush or power drill.
There are a few things to keep in mind when using wood filler: always wear gloves and avoid breathing in the dust particles; use caution when working around electrical wires and make sure your area is completely covered so that excess moisture doesn’t get inside the house.
Conclusion
Applying a wood sealant will help protect your dresser top from further water damage. A light sanding before sealing may be necessary to create a smooth surface for the sealant to adhere to. Once the sealant has dried, your dresser top should be protected from future water damage. Have you tried this fix? Let us know in the comments below!