Candles are a great way to relax and unwind after a long day. Not only do they emit a soothing, natural light, but they also provide a wonderful fragrance. However, if your candle’s wick is too short, enjoying its benefits cannot be easy. In this article, we will teach you how to fix a candle wick that is too short. So read on!

Many candles come with wicks that are already the correct length. However, if yours is too short, don’t worry! There are a few easy ways to fix it.
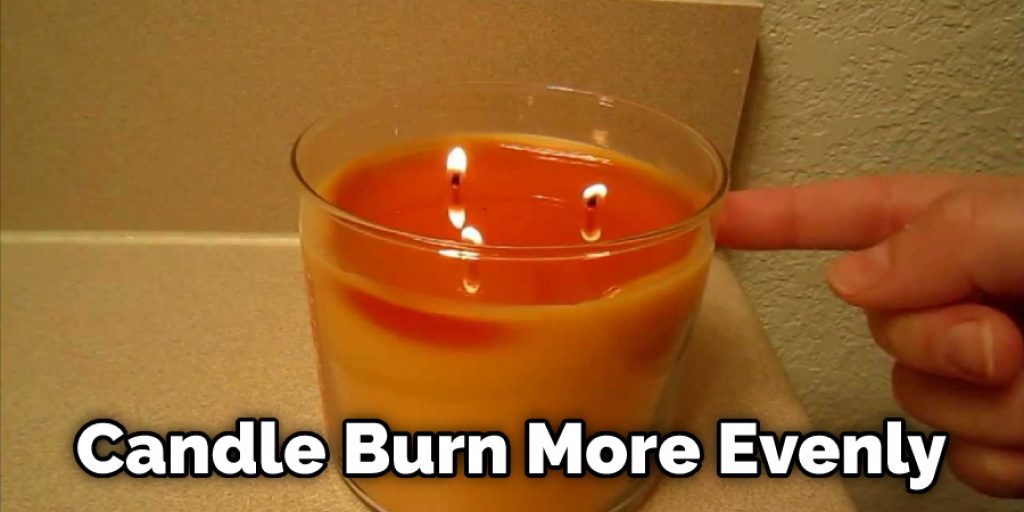
Summary: The first option is to use a candle extinguisher to snuff out the flame in order to prevent it from flickering.
Another option is to use a candle snuffer to put out the flame and lengthen the wick. If neither of those options is available, you can try using your finger as a makeshift wick extender by pressing it down into the liquid wax and pulling it up and outwards.
Why Your Candle Wick Got Too Short?
There are a few reasons your candle wick might be too short.
The most common reason is that the flame is too high. If the flame is too high, it will consume the wick faster than it can be replenished. This will cause the wick to get shorter and shorter each time you light your candle.
If your candle wick is too short, it may be because it wasn’t trimmed properly before you lit it. Candle wicks should always be trimmed to about 1/4 inch before lighting. If they’re not, the flame will be larger and will consume the wick more quickly.
Finally, some candles just come with short wicks. If this is the case, you’ll need to replace the candle with one that has a long wick.
A Detailed Guide on How to Fix a Candle Wick That Is Too Short
Step 1: Gather Necessary Tools and Materials
To fix a candle wick that is too short, you will need the following tools and materials:
- A heat source (such as a lighter or matches)
- A spoon or butter knife
- A pair of tweezers or needle-nose pliers
- A new wick (preferably pre-waxed)
- A wick holder or wick centering tool
- Scissors
- A small container (such as a shot glass or small jar)
- A hairdryer or heat gun (optional)
Step 2: Assess the Candle
Examine the candle and determine if the wick is salvageable. If the wick is buried in wax and cannot be accessed, you will need to create a new wick hole and insert a new wick. If the wick is visible but too short to burn properly, you may be able to fix it by removing some of the surrounding wax.
Step 3: Heat the Spoon or Butter Knife
Using a heat source, such as a lighter or matches, heat the spoon or butter knife for a few seconds. This will make it easier to remove the wax surrounding the short wick.
Step 4: Remove Surrounding Wax
Carefully use the heated spoon or butter knife to remove some of the wax surrounding the short wick. Create a small well around the wick, ensuring that the wick is now exposed and long enough to burn properly. Be cautious not to damage the wick or remove too much wax, as this may cause the candle to burn unevenly.
Step 5: Heat the Exposed Wick (optional)
If the exposed wick is still too short or does not burn well, you can use a hairdryer or heat gun to heat the wick and slightly melt the surrounding wax. This will help to soften the wick and make it more pliable, allowing it to burn more efficiently.
Step 6: Test the Wick
Light the newly exposed wick to ensure that it burns properly. If the wick still does not burn well, you may need to create a new wick hole and insert a new wick.
Step 7: Prepare the New Wick
If you need to insert a new wick, cut a piece of pre-waxed wick to the appropriate length for your candle. The wick should be slightly longer than the height of the candle. Thread the wick through a wick holder or wick centering tool to help keep it in place during the repair process.
Step 8: Create a New Wick Hole
Using a heated spoon or butter knife, carefully create a new hole in the candle for the new wick. The hole should be slightly smaller than the diameter of the new wick to ensure a snug fit. Be cautious not to create the hole too close to the edge of the candle, as this may cause the candle to burn unevenly or drip wax.
Step 9: Insert the New Wick
Using a pair of tweezers or needle-nose pliers, carefully insert the new wick into the hole you created in the candle. Gently push the wick down until it reaches the bottom of the candle. Use the wick holder or wick centering tool to keep the wick in place and ensure it is centered in the candle.
Step 10: Secure the New Wick
Allow the candle to cool and the wax to harden around the new wick. Once the wax has hardened, remove the wick holder or wick centering tool and trim the wick to the appropriate length (approximately 1/4 inch) using scissors.
Step 11: Melt the Removed Wax
Place the wax you removed from the candle in a small container , such as a shot glass or small jar. Carefully heat the container using a heat source, such as a lighter or matches, until the wax has melted. Be cautious not to overheat the wax or allow the container to become too hot, as this can cause burns or other accidents.
Step 12: Fill the Wax Well
Once the removed wax has melted, carefully pour it into the well you created around the new wick. This will help to secure the wick in place and ensure an even burn. Be cautious not to overfill the well or pour wax onto the exposed wick, as this may cause the candle to burn unevenly or the wick to become buried again.
Step 13: Allow the Wax to Harden
Allow the wax to cool and harden around the new wick. This may take several hours, depending on the size of the candle and the type of wax used. Do not attempt to light the candle until the wax has fully hardened, as this may cause the wick to shift or the candle to burn unevenly.
Step 14: Trim the Wick
Once the wax has hardened, trim the wick to the appropriate length (approximately 1/4 inch) using scissors. This will ensure a proper burn and help to prevent soot and smoke from the candle.
Step 15: Test the Candle
Light the candle to ensure that the new wick burns properly and the candle burns evenly. If the wick does not burn well or the candle burns unevenly, you may need to adjust the wick or repeat the process to ensure a proper burn.
Step 16: Maintain the Wick
To ensure that your candle wick remains at the proper length and burns efficiently, trim the wick before each use. This will help to prevent soot, smoke, and uneven burns, as well as extend the life of your candle.
By following these steps, you can successfully fix a candle wick that is too short and restore the functionality of your candle. Proper wick maintenance and care will help to ensure that your candles burn efficiently and last as long as possible, providing you with hours of enjoyment and relaxation.
How to Trim Candle Wicks to the Right Length
The length of your candle wick is essential for a few reasons. First, a wick that is too long will cause your candle to burn unevenly and produce a lot of soot. Second, a wick that is too short will make it difficult for your candle to stay lit. Third, the wrong wick length can also affect the fragrance throw of your candle.
There are a few things to keep in mind when trimming candle wicks. The first is the height of the candle. If the candle is too tall, the flame will be too high and could cause a fire. The second thing to consider is the width of the base of the candle. A wider base will require a longer wick to reach the wax and provide enough heat to melt it. Finally, it would be best if you thought about what you’re trying to accomplish by trimming the wick. Are you trying to create a more even burn, or are you trying to get rid of excess soot?
If you’re trying to create a more even burn, you’ll want to trim the wick down to about 1/4 inch. This will help the candle burn more evenly and prevent the flame from getting too high. If you’re trying to get rid of excess soot, you’ll want to trim the wick down to about 1/8 inch. This will help the candle burn cleaner and produce less soot.
When trimming your candle wicks, always use clean, sharp scissors. This will help ensure that you get a clean cut and don’t damage the wick. Also, be sure to extinguish the candle before trimming the wick. This will prevent any potential accidents.
There are a few different ways to trim candle wicks, but the most important thing is to make sure that you leave enough of the wick exposed so that it can continue to draw up the wax and keep the flame burning. A good rule of thumb is to trim the wick to about 1/4 inch before light your candle. Then, trim the wick down further if you find that your candle is smoking or the flame is getting too high.
Once you’ve trimmed your wicks, it’s essential to watch them as they burn. The wick will slowly sink into the wax pool as the wax melts. To keep it at the right length, you’ll want to monitor the flame and trim the wick as needed.
By following these simple tips, you can ensure that your candles burn evenly and produce less soot and smoke. Happy burning!
Prevent a Short Candle Wick
A short candle wick can be a big problem when trying to enjoy a relaxing evening with candles. If the wick is too short, it will cause the candle to burn faster and create a large flame. This can not only be dangerous, but it can also quickly ruin your candles. Here are a few tips to help you prevent this from happening:
- Always trim the wick before each use. This will ensure that the wick is the correct length for optimal burning.
- Use a wick trimmer or sharp scissors to trim the wick to about 1/4 inch carefully.
- Be sure to remove any debris from around the wick before lighting the candle.
- Never leave a burning candle unattended. This is especially important if you have a short wick.

By following these simple tips, you can help prevent your candle wicks from becoming too short. So enjoy your candles safely and responsibly!
Frequently Asked Questions
Can I Microwave a Candle?
Unfortunately, you cannot microwave a candle. This is because the heat from microwaves can cause the wax to melt and create an unsafe environment. Furthermore, candles may also emit harmful chemicals if they are heated in this way.
Why is My Candle Burning So Low?
There are a few things you can check to determine the cause of your candle burning low. Firstly, make sure that your wick is properly trimmed and lit. Check the flame height and color constantly while your candle is burning, as these may change over time. If the flame size or color changes significantly, it’s likely that there is something wrong with either the wick or flammable material around it. Additionally, if candles seem to be relighting themselves unexpectedly or going out even when they’re supposed to be Litâ?¦this could also be indicative of a problem with the wick or flammable material around them. Depending on what’s causing this issue, you may need to replace either part of your candle setup.
Do You Have to Burn a Candle to the Edge Every Time?
No, of course not! In fact, you don’t even need to light a candle to the edge every time. Instead, you can use a votive candle – which will last for up to 50 hours – or a scented candle. Both of these types of candles will emit a faint smell that will help to create a romantic atmosphere in your home.
Can You Fix Candle Tunneling?
Candle tunneling is a common problem that can occur when a candle is placed too close to the edge of a container. The heat from the flame can cause the wax to rise up and form an indentation in the wax near the top of the candle. Over time, this indentation can grow larger and cause the candle to fall out of the container.
There are several steps you can take to prevent or fix candle tunneling. The easiest way to prevent candle tunneling is to keep your candles at a distance from the edge of the container. You can also use a flame guard or candle snuffer to reduce the amount of heat coming from your candles. If candle tunneling does occur, you can use a melted wax or silicone solution to fill in the indentation and restore the Candle Tunneling Prevention Functionality of your product.
Conclusion
Now that you know how to fix a candle wick that is too short, it’s time to light up your life (and your home) with beautiful candles! If you have ever had this problem before, let us know how you solved it.
You May Also Read: How to Fix Air Bubbles in Candles