Shock absorbers are crucial components of a vehicle’s suspension system, designed to dampen road bumps and provide a smooth ride. They ensure that the tires remain in contact with the road, improving both handling and braking efficiency. However, when a shock absorber begins to leak, it can compromise the vehicle’s performance.
A leaking shock absorber can lead to poor handling, increased tire wear, and even compromise safety by affecting the stability and control of the vehicle. Therefore, timely repairs are essential to maintain vehicle performance and safety standards.
This article aims to provide valuable insights into identifying a shock absorber leak and assessing the extent of damage and includes a comprehensive step-by-step guide on how to fix shock absorber leak or replace the affected component. By following this guide, vehicle owners can better diagnose issues and ensure their vehicle’s suspension system functions optimally.
Understanding Shock Absorber Leaks
A. Common Causes of Leaks
Shock absorber leaks are often the result of several common factors. Wear and Tear are inevitable over time—shock absorbers gradually degrade through normal use, which can lead to fluid leaks as seals weaken. Rust and Corrosion caused by exposure to moisture, road salt, and other environmental factors can also compromise the shock absorber’s structural integrity, resulting in leaks.
Physical Damage is another cause; impacts from potholes, curbs, or accidents can break seals and create leaks. Identifying these causes early can help in mitigating further damage and ensure the longevity of your vehicle’s suspension system.
B. Signs of a Leaking Shock Absorber
Detecting a leaking shock absorber involves recognizing several key indicators. Fluid Spots under the vehicle, particularly around the shock absorber, are a common sign of leaks. Such spots appear as oil stains on the ground. Uneven Tire Wear manifests when a leaking shock absorber causes excessive vehicle bounce, leading to irregular tire wear patterns.
Lastly, Poor Handling—such as experiencing a feeling of instability while driving or excessive body roll during turns—often indicates a failing shock absorber. Recognizing these symptoms can prompt early intervention, preventing further deterioration and maintaining vehicle safety.
C. Assessing Damage
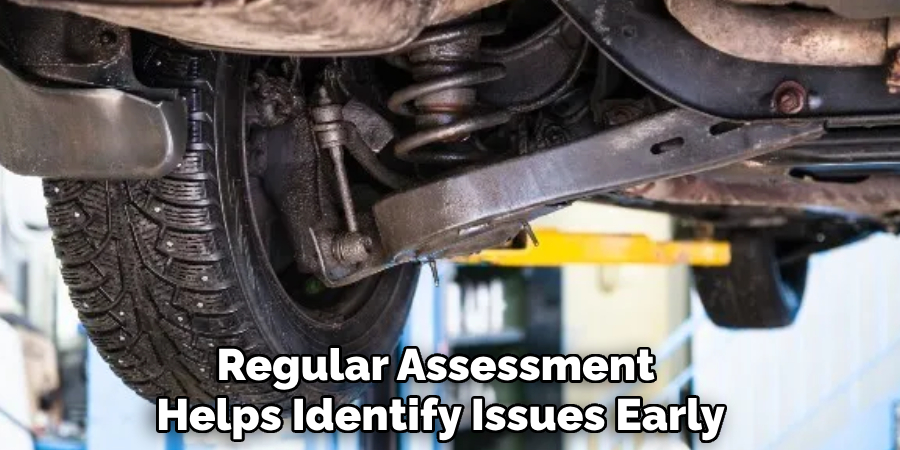
To accurately assess shock absorber damage, begin with a Visual Inspection. Check for any noticeable oil leaks or wetness on the shock absorber itself, and carefully examine seals and mounting points for visible damage. Following the visual inspection, conduct a Functional Testing known as the bounce test: apply force by pushing down on the vehicle and then release.
If the vehicle continues to bounce more than once, this suggests the shocks are compromised and likely require repair or replacement. Regular assessment helps identify issues early and promptly address them to maintain optimal vehicle performance.
Tools and Materials Needed
A. Essential Tools
- Wrench Set: A set of sockets and wrenches is crucial for removing bolts and nuts during the shock absorber replacement process.
- Jack and Jack Stands: These are necessary to safely lift the vehicle and keep it securely supported while you work underneath it.
- Pliers and Screwdrivers: Various adjustments and securing components will require the use of pliers and screwdrivers.
B. Materials for Repair
- Replacement Shock Absorber: In cases of extensive leakage, a new shock absorber will need to be installed to restore optimal vehicle performance.
- Sealant (if applicable): To address minor leaks, an appropriate sealant can serve as a temporary measure until a full repair can be performed.
C. Safety Equipment
- Gloves and Safety Goggles: Wearing gloves and safety goggles is essential to protect your hands and eyes from potential harm while performing the repair work.
How to Fix Shock Absorber Leak: Step-by-Step Guide
Step 1: Preparation
- Gather Tools and Materials: Before beginning the repair, ensure that you have assembled all necessary tools, such as a wrench set, jack, jack stands, pliers, and screwdrivers.
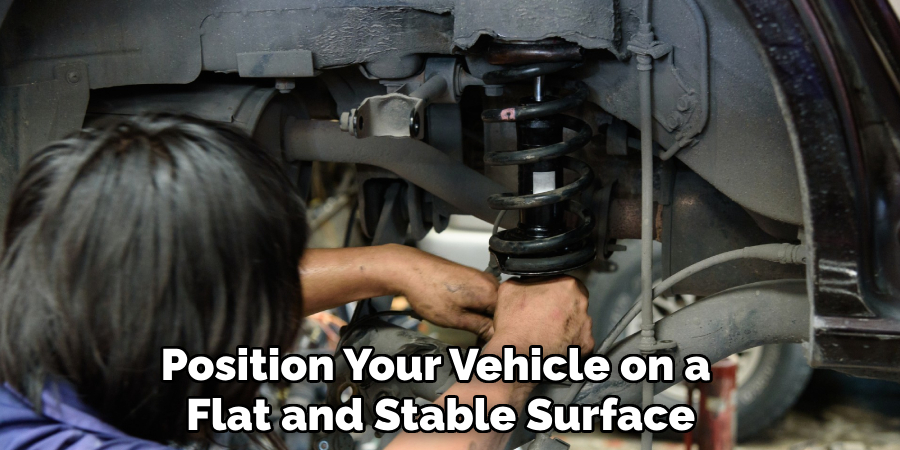
- Park Safely: Position your vehicle on a flat and stable surface. Engage the parking brake to secure the vehicle and ensure safety. Confirm the vehicle’s stability before lifting; this will prevent it from moving unexpectedly during the repair process.
Step 2: Lift the Vehicle
- Use a Jack: Carefully lift the vehicle by placing a jack beneath the designated lifting points. These points are usually marked in your vehicle’s manual and are crucial for maintaining balance during elevation.
- Support with Jack Stands: Once the vehicle is lifted, position the jack stands under the vehicle to provide additional support and ensure safety while you work underneath. Double-check that the vehicle is stable on the stands before removing the shock absorber.
Step 3: Remove the Old Shock Absorber
- Locate the Shock Absorber: Identify the leaking shock absorber that needs replacement. It is generally located near the wheel assembly area.
- Unbolt the Shock: With the wrench set, remove the bolts securing the shock absorber to the vehicle. Typically, the shock has bolts at both the top and bottom to secure its position. Make sure to keep track of the bolts and their arrangement.
- Remove the Shock: Gently remove the old shock absorber from its location. Be prepared for any residual fluid that might spill during removal. This step requires extra care to avoid damaging any surrounding parts during extraction.
Step 4: Install the New Shock Absorber
- Position the New Shock: Align the new shock absorber into position, matching it precisely with the fittings of the removed old one.
- Secure with Bolts: Attach the new shock absorber using the bolts you removed earlier, ensuring they are tightened to the manufacturer’s specifications. A wrench will help secure the bolts firmly, resulting in a stable installation that maintains the vehicle’s structural integrity.
Step 5: Test the Repair
- Lower the Vehicle: Once the new shock absorber is securely in place, gently lower the vehicle back onto the ground with the jack.
- Perform a Bounce Test: Conduct a bounce test by pressing down on each vehicle corner to ensure the newly installed shock absorber is performing correctly. Check for any signs of leakage; if none are detected, this indicates a successful repair, restoring the vehicle’s suspension functionality.
Temporary Fixes for Minor Leaks
A. Using Sealant
Identify Minor Leaks: A sealant specifically designed for shock absorbers may serve as a temporary solution for small leaks. Identifying minor leaks involves inspecting the shock absorber for slight dampness or minimal oil streaks.
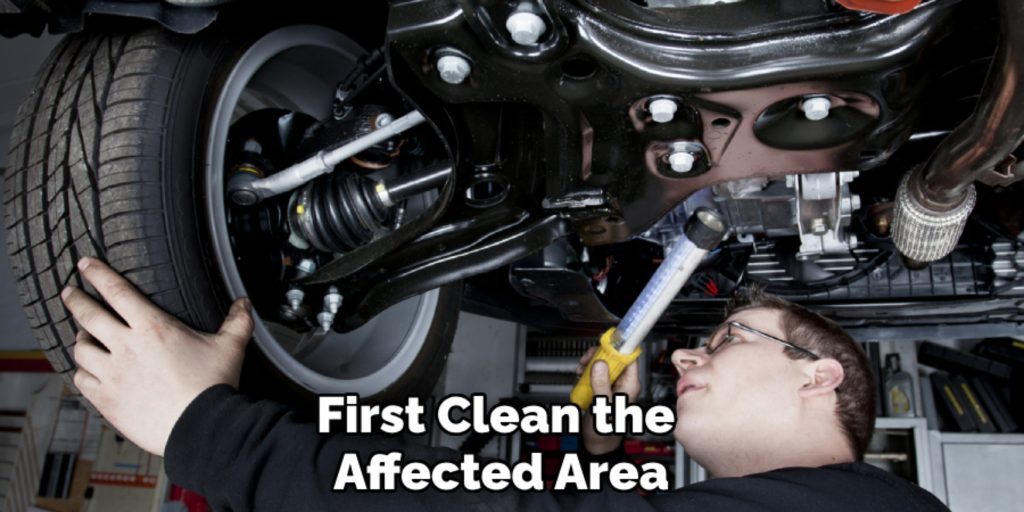
Application: To apply the sealant, first clean the affected area thoroughly to remove any dirt or residue. Then, follow the manufacturer’s instructions to apply the sealant over the leak, ensuring an even distribution. Allow the sealant to cure completely as directed before using the vehicle again. This temporary measure can help maintain functionality until a more permanent solution is arranged.
B. Fluid Replacement
Check Fluid Levels: It is vital to regularly check the fluid levels of adjustable shock absorbers. If levels are low, replenish them with the appropriate type of fluid recommended by the vehicle or shock absorber manufacturer.
Reassess After Temporary Fix: After implementing a temporary fix, closely monitor the shock absorber’s performance over time. While a temporary fix like sealant or fluid replenishment can provide short-term relief, it’s essential to plan for a complete replacement or repair if the leak reoccurs or persists to ensure the vehicle’s ongoing safety and performance.
Preventing Future Shock Absorber Leaks
A. Regular Maintenance
- Inspect Shock Absorbers Periodically: It is vital to check your shock absorbers for any signs of leaks or wear during each routine vehicle maintenance session, aiming for an interval of at least every six months. Early detection can prevent more significant issues later on.
- Address Road Hazards Promptly: Take extra care when driving, especially around potholes and other road hazards that could potentially damage your shock absorbers. Being vigilant can reduce impact damage and prolong the life of your vehicle’s suspension system.
B. Keep Underbody Clean
- Wash Underneath the Vehicle: Regularly cleaning the underside of your vehicle is essential to remove dirt, salt, and other debris contributing to corrosion and eventual leaks. This practice can significantly extend the lifespan of your shock absorbers and other underbody components.
C. Choose Quality Parts
- Invest in Quality Shock Absorbers: When it’s time for a replacement, opting for high-quality shock absorbers tailored to your vehicle’s make and model is crucial. Superior parts ensure better performance, durability, and longevity, ultimately protecting your vehicle’s suspension system from future leaks.
When to Call a Professional
Sometimes, tackling a shock absorber leak requires more than just a DIY approach, especially when the damage is extensive. If you notice additional symptoms, such as strange noises, like clunking or squeaking, or if the vehicle’s handling becomes noticeably impaired, it’s crucial to seek professional assistance.
These indicators often suggest deeper, more complex suspension issues that entail more than just the shock absorber; they may involve other suspension components requiring an expert diagnosis and repair. Furthermore, if you’re not experienced with vehicle repairs or if you do not possess the appropriate tools and equipment, it’s safer to have a trained mechanic address the issue.
Professional mechanics can ensure that the repair is carried out safely and efficiently, improving the performance and safety of your vehicle. Prioritizing expertise will protect you from potential mishaps and guarantee that the job is done correctly.
Conclusion
Repairing a leaking shock absorber requires a systematic approach: first, accurately identifying the issue, then carefully removing the old shock absorber, and subsequently installing a new unit while ensuring it is properly aligned and secured.
Regular inspections are integral to maintaining the optimal performance of your vehicle and preventing future leaks. Timely repairs are crucial, as addressing shock absorber leaks promptly leads to safer driving conditions, improved vehicle handling and extends the life of your suspension system.
Understanding “how to fix shock absorber leak” can empower vehicle owners to undertake manageable DIY repairs, provided they have the right tools and adequate knowledge. However, for complex situations or if you’re inexperienced in auto repairs, seeking the expertise of a professional mechanic is advisable.
Doing so ensures that your vehicle remains in top condition, benefiting from expert handling and proper repair procedures.