When your OnStar system displays a red light, it can indicate a variety of issues ranging from minor glitches to more significant system errors. OnStar is designed to provide a seamless connection for navigation, emergency services, and more, so ensuring its proper functionality is crucial for both safety and convenience.
Understanding the potential causes of the red light and how to address them can help you maintain the efficiency of your vehicle’s OnStar system.
This guide on how to fix onstar red light will provide you with step-by-step instructions to diagnose and fix the problem, ensuring that your OnStar service continues to operate smoothly.
Why is the OnStar Red Light on?
The first step to fixing the red light on your OnStar system is understanding why it’s turned on in the first place. The red light can be triggered by several reasons, such as:
Subscription Expiration:
One of the most common causes of the OnStar red light is an expired subscription. OnStar service requires a paid subscription to function properly, and if yours has expired, then it may trigger the red light. You can check your subscription status by logging into your OnStar account or contacting their customer service.
Poor Signal Strength:
Another reason for the red light could be poor signal strength. The OnStar system relies on cellular signals for communication, so if you’re in an area with weak reception, it can cause disruptions in service and trigger a red light.
Technical Issues:
Sometimes, technical issues within the OnStar system itself can cause the red light to turn on. These issues could include software glitches or hardware malfunctions, which may require a more in-depth troubleshooting process.
Needed Materials
Before you begin troubleshooting your OnStar system, gather the following materials to help streamline the process:
OnStar User Manual:
Having the manual on hand can provide specific instructions tailored to your vehicle model and OnStar system.
Vehicle Owner’s Manual:
In addition to the OnStar manual, it’s also helpful to have your vehicle owner’s manual available for reference. It may contain troubleshooting tips or information about specific error codes associated with the red light.
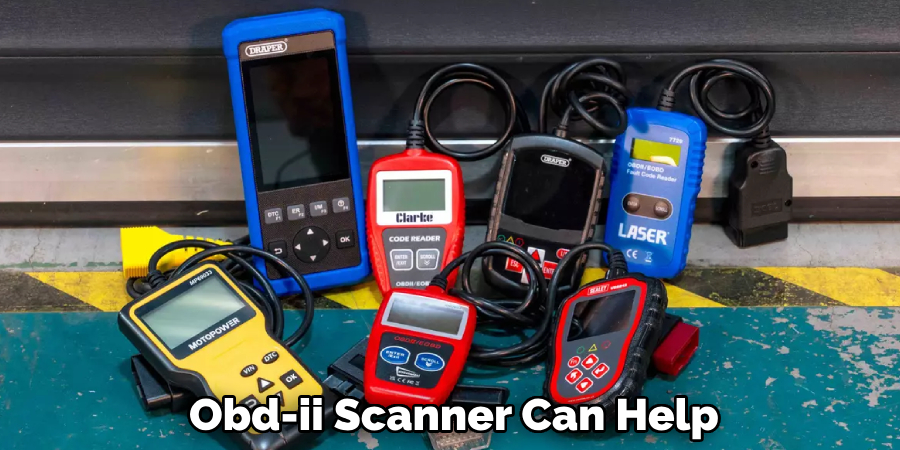
OBD-II Scanner:
An OBD-II scanner can help you identify any underlying issues within the OnStar system by connecting to the onboard diagnostics port in your vehicle.
8 Step-by-step Guidelines on How to Fix Onstar Red Light
Step 1: Check Your Subscription Status
The first step in troubleshooting the OnStar red light is to verify your subscription status. An active subscription is necessary for the system to function correctly. Start by logging into your OnStar account via their official website or mobile app. Look for the account or subscription section to confirm that your plan is marked as active.
If you discover that your subscription has expired, renew it as soon as possible to ensure continued service. You can also contact OnStar customer support for assistance in checking your subscription status or resolving any issues related to an expired plan. Once you have confirmed an active subscription, proceed to the next troubleshooting steps if the red light persists.
Step 2: Check Signal Strength
After confirming that your subscription is active, the next step is to assess the signal strength of your OnStar system. Since OnStar relies on cellular networks for its services, weak or disrupted signals can cause the red light to appear. Begin by checking your location—are you in an underground parking area, rural zone, or surrounded by tall buildings? These environments might impede signal reception.
To test signal strength, take your vehicle to an open area away from potential signal obstructions. Once in a clear area, observe if the red light remains. If the signal improves and the light turns off, the issue is likely related to poor reception in the initial location. If not, further troubleshooting may be necessary.
Step 3: Check for Error Codes
If the red light persists, there may be an error code associated with it. To check for any error codes, use an OBD-II scanner to connect to your vehicle’s onboard diagnostics port.
Once connected, the scanner will provide you with a list of potential errors related to the OnStar system. Note down any codes that appear and cross-reference them with the OnStar user manual or contact their customer support for further assistance in deciphering the codes.
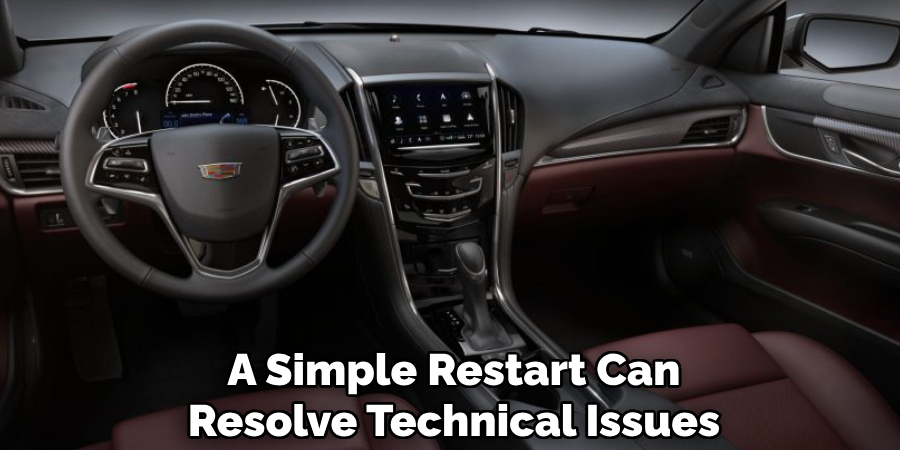
Step 4: Restart Your Vehicle
Sometimes, a simple restart can resolve technical issues within the OnStar system. Turn off your vehicle completely and wait for at least one minute before restarting it. Once the vehicle has been restarted, check if the red light is still on. If it’s not, then the issue may have been a temporary glitch that was resolved with the restart.
If the red light persists, proceed to the next step. The following steps will require additional assistance from OnStar customer support, so be sure to have your subscription details and error codes (if any) ready.
Step 5: Contact OnStar Customer Support
If the red light remains on, it’s time to reach out to OnStar customer support. They have a dedicated team of technicians who are trained to assist with troubleshooting and resolving technical issues related to the OnStar system. Explain the problem you’re experiencing, provide any relevant error codes, and be prepared for their recommended troubleshooting steps.
It’s important to note that OnStar customer support is available 24/7 and can be contacted via their toll-free number or through the OnStar app.
Step 6: Perform a Manual Reset
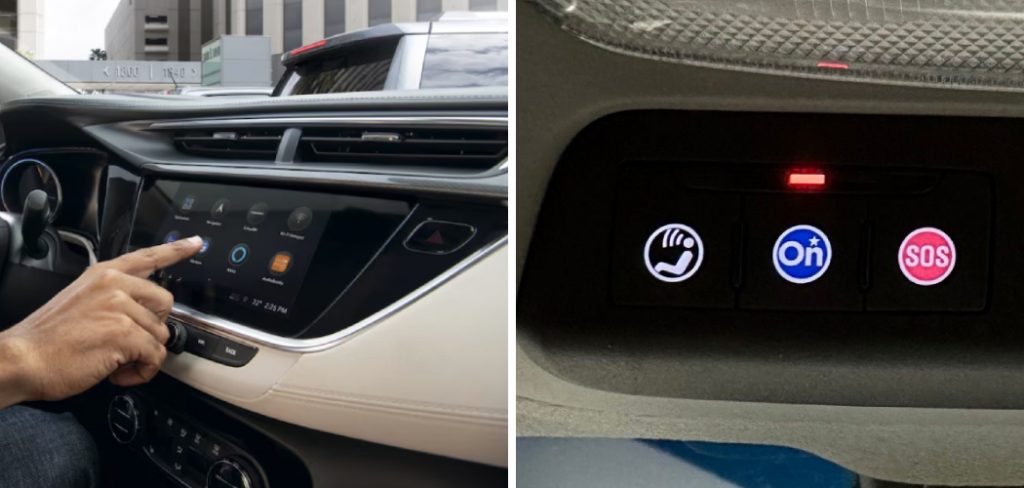
If the red light continues to indicate an issue, performing a manual reset on your OnStar system may resolve the problem. To begin the reset process, turn off your vehicle and remove the key from the ignition. Wait for approximately five minutes to ensure all systems in the vehicle are fully inactive. Next, reinstate power by reinserting the key and turning the ignition to the accessory position without starting the engine.
While in this position, press and hold the blue OnStar button on your vehicle’s console for about 15 seconds. This action will initiate a manual reset of the system. After releasing the button, wait a few moments before starting your vehicle to check if the red light has turned off. If the light remains, further troubleshooting steps may need to be considered in collaboration with OnStar customer support.
Step 7: Check for Hardware Malfunctions
If the manual reset doesn’t resolve the issue, you may have a hardware malfunction within the OnStar system. This could be caused by a loose connection or damaged component, which can only be diagnosed and repaired by an authorized technician.
Contact OnStar customer support to schedule an appointment with their service center or an approved dealership where trained technicians can assess and repair any hardware malfunctions.
Step 8: Consider Upgrading Your Plan
If all troubleshooting attempts fail to turn off the red light, it may be time to consider upgrading your OnStar plan. Sometimes, certain features or services are only available with higher-tiered subscriptions that offer additional benefits, such as advanced diagnostic capabilities or enhanced roadside assistance. Contact OnStar customer support to explore your options and find the best plan for your needs.
Following these step-by-step guidelines on how to fix onstar red light should help you troubleshoot and resolve any issues related to the OnStar red light. Remember to always keep your subscription active and follow proper maintenance procedures to ensure a smooth experience with the OnStar system.

Frequently Asked Questions
Q: How Do I Know if My Onstar Subscription Has Expired?
A: You can check your OnStar account or contact customer support to confirm your subscription status. The red light may also indicate an expired subscription.
Q: Can I Renew My OnStar Subscription?
A: Yes, you can renew your OnStar subscription through their website, app, or by contacting customer support.
Q: What Should I Do if I Don’t See Any Error Codes on My OBD-II Scanner?
A: If no error codes appear on your OBD-II scanner, try restarting your vehicle and manually resetting the OnStar system. If the issue persists, contact customer support for further assistance.
Q: Can I Troubleshoot Onstar Red Light Issues Myself?
A: You can follow these step-by-step guidelines to troubleshoot most OnStar red light issues. However, if the issue is related to hardware malfunctions, it’s best to seek professional assistance from an authorized technician.
Q: How Do I Know if My Vehicle is Compatible with OnStar?
A: You can check if your vehicle is compatible with OnStar by visiting their website or contacting customer support. Additionally, newer vehicles often come equipped with the necessary technology for OnStar services.

Conclusion
Dealing with a persistent OnStar red light can be a frustrating experience; however, following a systematic approach can often help resolve the issue. By checking for error codes, restarting your vehicle, and performing a manual reset, many common technical glitches can be addressed. If these steps do not resolve the problem, engaging with OnStar customer support is crucial to receive the expert assistance needed.
Additionally, considering potential hardware malfunctions and verifying your subscription status are essential steps in maintaining an optimal OnStar experience. Through diligent troubleshooting and collaboration with trained technicians, you can ensure that your OnStar system functions smoothly, providing the peace of mind it is designed to offer. Thanks for reading this article on how to fix onstar red light.