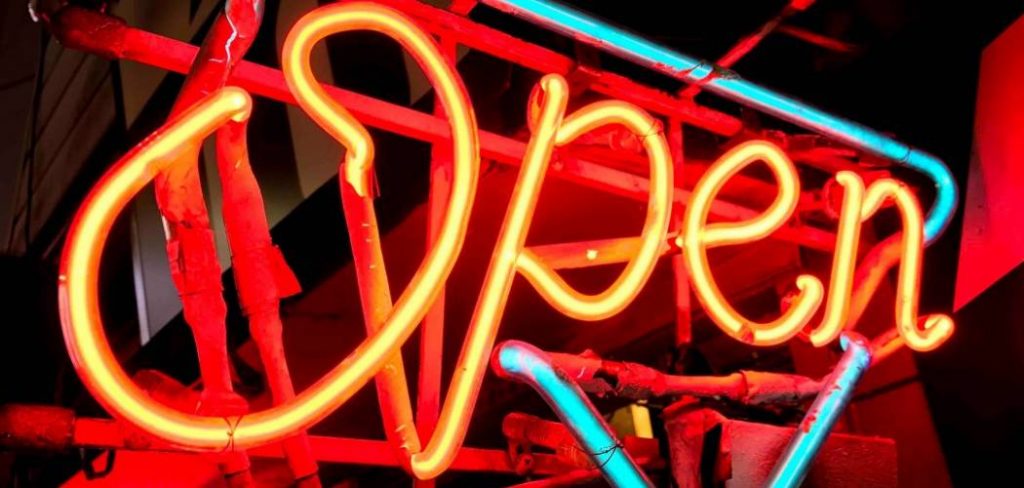
Neon signs are a vibrant and eye-catching way to draw attention, but like any electrical device, they can occasionally malfunction. Properly diagnosing and fixing a neon sign not only saves money but also helps maintain its visual appeal and longevity. Whether it’s a flickering light, a dim glow, or a complete failure to turn on, understanding the basics of troubleshooting and repair can restore your neon sign to its former brilliance. This guide will walk you through the common issues and how to fix neon sign safely and effectively.
Understanding Neon Signs
Neon signs consist of glass tubes filled with inert gases, such as neon or argon, which emit light when an electrical current passes through them. The gas inside the tube is excited by electricity, causing it to produce a bright, colorful glow. The tubes are bent into various shapes and letters, making them a versatile option for signs and artistic displays. A neon sign typically includes components like a transformer, electrodes, and the glass tubing. The transformer regulates the voltage needed to ionize the gas, making it essential for the proper functioning of the sign. Understanding these basic elements is crucial for diagnosing and fixing any issues that may arise.
Tools and Materials Needed
Before attempting to fix a neon sign, gather the necessary tools and materials to ensure a smooth and safe repair process. Here’s a list of commonly required items:
- Multimeter: For testing electrical continuity and voltage to diagnose issues.
- Replacement Transformer (if needed): To fix power supply problems if the current transformer is faulty.
- Insulated Screwdrivers: Essential for safely handling electrical components.
- Glass Repair Kit (if applicable): To repair minor cracks or damage to the neon tubing.
- Wire Strippers and Electrical Tape: For addressing damaged wires or connections.
- Protective Gloves and Safety Goggles: To protect yourself during handling and repair.
- Cleaning Supplies (like a microfiber cloth): For removing dust and debris from the sign.
Having these tools and materials ready will help ensure you’re prepared for any repair work while maintaining safety and efficiency throughout the process.
10 Methods How to Fix Neon Sign
1. Diagnosing the Problem
Before diving into repairs, diagnose the issue accurately. Common problems include dim lighting, flickering, or a complete lack of illumination. Begin by inspecting the neon tubes for visible cracks, discoloration, or gas leakage. Check the power supply for signs of wear, loose connections, or electrical arcing. Use a multimeter to test for continuity in the circuitry. Diagnosing the problem thoroughly ensures you focus your efforts on the root cause rather than guessing blindly.
2. Checking the Power Supply
The transformer or power supply unit is the heart of a neon sign. A faulty transformer can prevent the sign from lighting up. Ensure the transformer is properly plugged in and delivering the required voltage. Use a voltage tester to confirm its output. If the transformer is faulty, replace it with one that matches the specifications of your neon sign. Always disconnect the power before handling electrical components to prevent shocks or further damage.
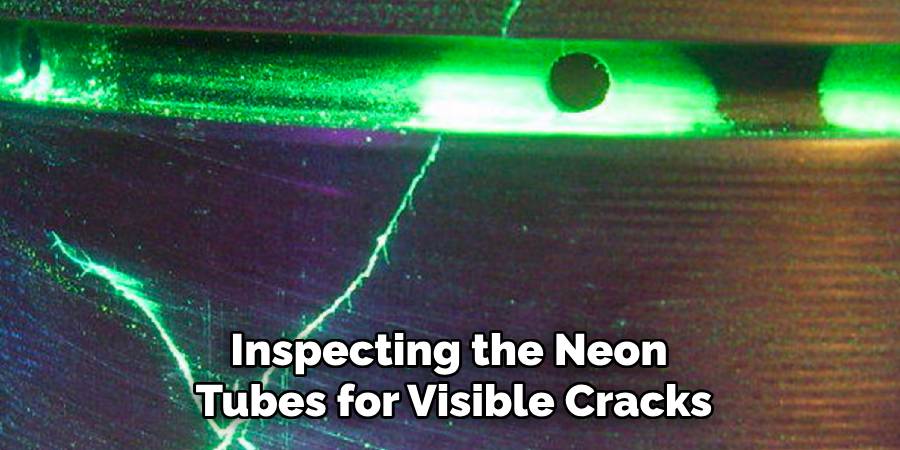
3. Inspecting the Neon Tubes
Neon tubes are the most visible part of the sign, and any damage here is often immediately apparent. Look for cracks, chips, or breaks in the glass. Discoloration or darkened ends of the tube indicate that the gas inside may have deteriorated or leaked out. Unfortunately, repairing a damaged tube is usually not feasible, so replacement is necessary. Take the damaged tube to a professional to ensure the new one matches in size, shape, and gas composition.
4. Cleaning the Components
Dust and grime accumulation can interfere with the performance of a neon sign. Use a soft, lint-free cloth and a gentle glass cleaner to wipe down the neon tubes. Avoid using harsh chemicals that might damage the delicate coating of the glass. For electrical components, use compressed air to blow out dust from crevices. Keeping the sign clean not only improves its appearance but also prevents overheating and electrical faults caused by dirt.

5. Repairing Loose Connections
Over time, vibrations and environmental factors can loosen the connections between wires and components. Inspect all connections, especially where the wires meet the transformer and the electrodes of the neon tubes. Tighten any loose screws or clamps and re-solder broken joints if necessary. Use heat shrink tubing to insulate exposed wires and prevent short circuits. This simple step can often restore functionality to a neon sign without needing major repairs.
6. Replacing Damaged Electrodes
Electrodes act as the bridge between the electrical circuit and the neon tubes. If an electrode is damaged or corroded, it can disrupt the flow of electricity, causing the sign to malfunction. Remove the damaged electrode carefully, taking care not to break the surrounding glass. Replace it with a new electrode compatible with your sign. Ensure a tight fit and proper insulation to avoid arcing or further issues.
7. Refilling the Neon Gas
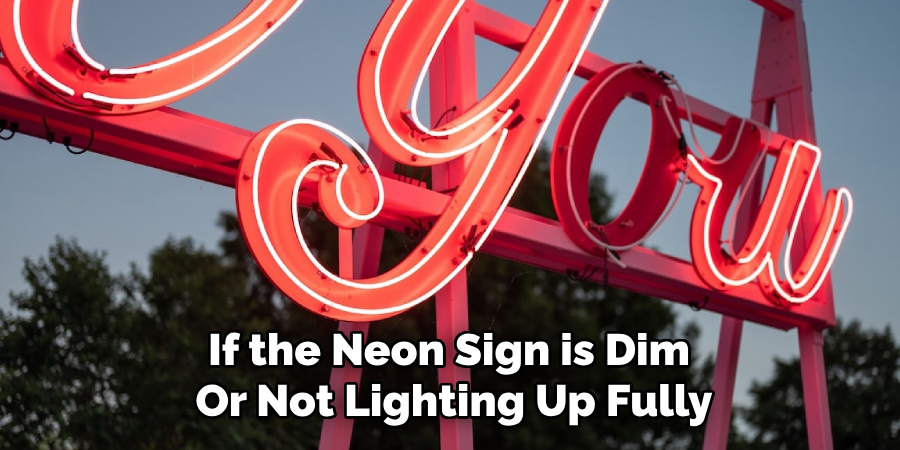
If the neon sign is dim or not lighting up fully, the gas inside the tubes may need replenishing. This is a task that requires specialized equipment and expertise. Take the neon tubes to a professional who can evacuate the old gas, clean the tube, and refill it with the appropriate mixture of neon or argon gas. Refilling ensures the sign glows brightly and evenly, restoring its original brilliance.
8. Testing for Electrical Shorts
Electrical shorts can cause flickering, dimming, or complete failure of the neon sign. Use a multimeter to test for continuity and identify short circuits within the wiring. Inspect the insulation on all wires and look for signs of melting, burning, or cuts. Replace damaged wires and re-insulate connections as needed. Ensuring the electrical system is free of shorts enhances safety and reliability.
9. Using a High-Voltage Tester
A high-voltage tester is a specialized tool used to diagnose issues in neon signs. It helps identify problems in the transformer, electrodes, and gas-filled tubes. Carefully apply the tester to each section of the sign while following safety protocols. The tester will indicate whether the electrical current is flowing correctly or if there are blockages. This method is particularly useful for pinpointing hard-to-diagnose problems.
10. Seeking Professional Help
Some issues with neon signs are too complex or dangerous to handle without professional expertise. If your sign requires extensive repairs, such as replacing intricate glasswork or dealing with high-voltage components, it is best to consult a neon repair specialist. Professionals have the tools and experience to fix your sign safely and efficiently, ensuring it is restored to its full glory.

Things to Consider When Repairing Neon Signs
When repairing neon signs, there are several important factors to keep in mind to ensure safety, efficiency, and a successful outcome:
- Safety First
Neon signs operate at high voltages and can pose serious risks if handled improperly. Always disconnect the power supply before beginning any repair work and use appropriate safety gear, such as gloves and goggles, to protect yourself from electrical hazards, broken glass, or chemical exposure.
- Proper Tools and Equipment
Having the right tools for the job is crucial. From multimeters to high-voltage testers, ensure you have all necessary equipment readily available. Using improper tools can cause damage to the sign or lead to inaccurate diagnostics.
- Compatibility of Replacement Parts
When replacing components like tubes, electrodes, or transformers, ensure the new parts are compatible with your neon sign. Mismatched components can compromise performance, lead to failure, or even pose safety risks.
- Understanding Electrical Systems
Basic knowledge of electrical wiring and circuitry is essential for neon sign repairs. If you’re unfamiliar with these systems, consult an expert to prevent inadvertent damage or safety issues.
- Frequency of Maintenance
Regular maintenance can extend the lifespan of your neon sign and reduce the likelihood of extensive repairs. Clean the components periodically, check for loose connections, and address minor issues promptly before they escalate.
- Professional Assistance
While many repairs can be tackled with some technical knowledge, certain tasks like gas refilling or intricate glasswork should be left to professionals. Recognizing when to seek expert help can save time, prevent accidents, and ensure a high-quality repair.
By keeping these considerations in mind, you can repair your neon sign effectively, preserve its functionality, and keep it glowing beautifully for years to come.
Conclusion
Repairing and maintaining neon signs requires a careful balance of technical skill, safety precautions, and proper tools. By understanding the components of a neon sign and addressing issues such as loose connections, damaged electrodes, or depleted gas in a timely manner, you can restore its vibrant glow and extend its lifespan. Regular maintenance and routine checks can prevent costly repairs while ensuring smooth operation.
However, for complex or high-risk tasks, seeking professional assistance is vital to ensure safety and quality. With the right approach, your neon sign can continue to captivate and illuminate for years to come. Hopefully, this article gave you some helpful tips about how to fix neon sign successfully, so now that you have the proper knowledge on how to get the job done, why not give it a try today?